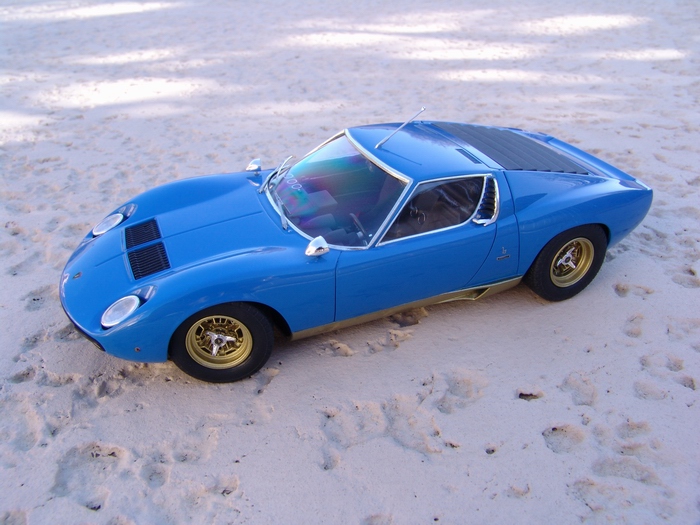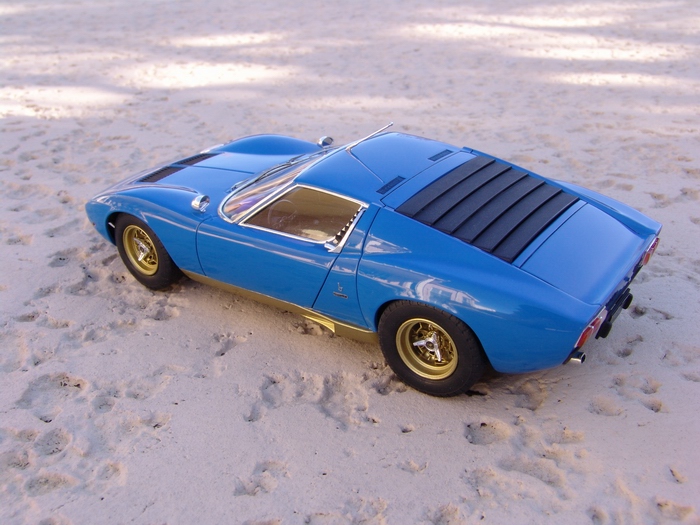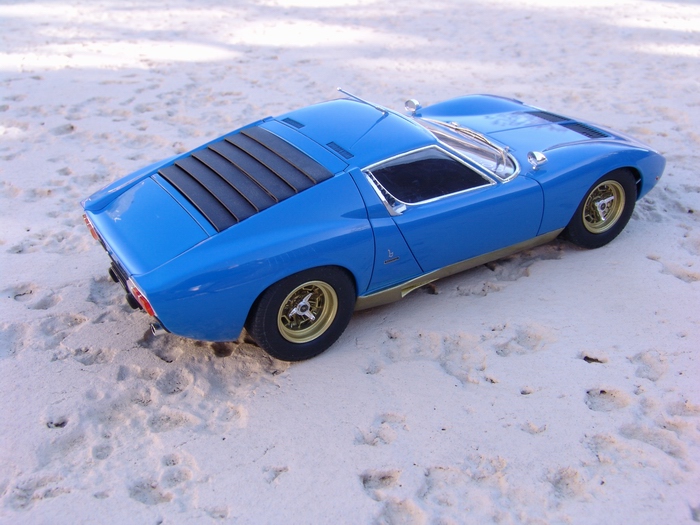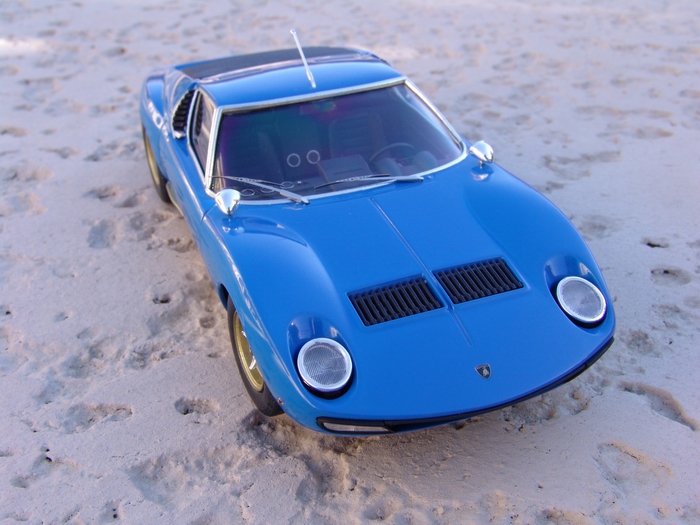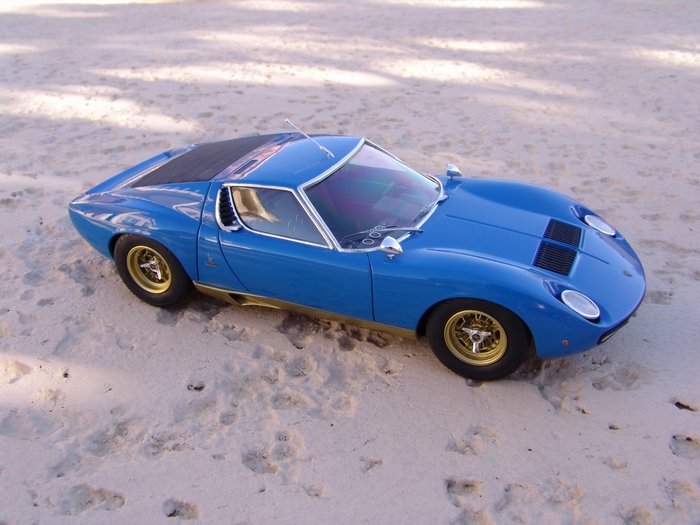
Lamborghini Miura P400 SV
|
|
|
|
Kit: Hasegawa Lamborghini Miura P400 SV #HC-13 Pros: Very well engineered kit. Excellent parts fit, correct body proportions, great wheels and soft rubber-like tires, excellent interior detail, self-adhesive metal transfers for all mirrors and badges, full decal sheet, nicely detailed brakes and suspension. Thin and clear glass parts. Easy to follow instruction sheet with correct color guide. Excellent overall quality kit. Cons: Somewhat brittle plastic and thick chrome plating with attachment points placed in very conspicuous places. Poorly engineered door vent pieces. Some sink marks and mold lines present, and especially annoying on small parts. Only partial engine details. No sidewall markings on the tires. Verdict: Great kit, yields very realistic-looking model with little effort, straight from the box. I wanted to add few additional details to my model however, so I used Acu-STion detail set, and I'm very disappointed in it. First of all, it looks like you get a lot of parts for your $25, but in fact, some of the parts in the set were made to fit Hasegawa's Jota kit, (even though its marked as a set for Miura) and pretty much useless. Second, the parts that I bought this set for, like brake disk faces and radiator mesh are way too big, and required careful trimming before they can be used. A lot of parts in the set are simply duplicates of kit's metal transfers, and essentially useless too. Set provides also hardware for a racing harness, and few other useful additions, such as steering wheel spokes, but it adds so little to the kit! So, save your money and get something else instead of Acu-STion overpriced detail set. |
|
|
|
|
|
|
|
|
|
Buildup
This buildup is also published in Contest Cars, Scale Auto Special Issue, 2005, Lamborghini's Supercar
|
|
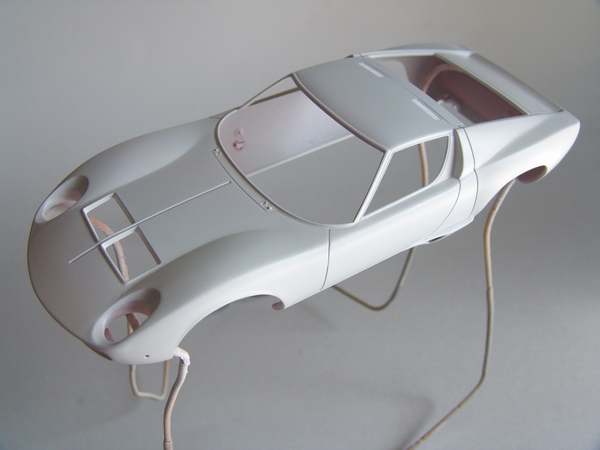
As usual, I started with the body. It had few small sink marks and other little imperfections that I filled with Squadron putty and sanded smooth. I also removed all the mold lines and lightly wet-sanded entire body with fine sandpaper. |
|
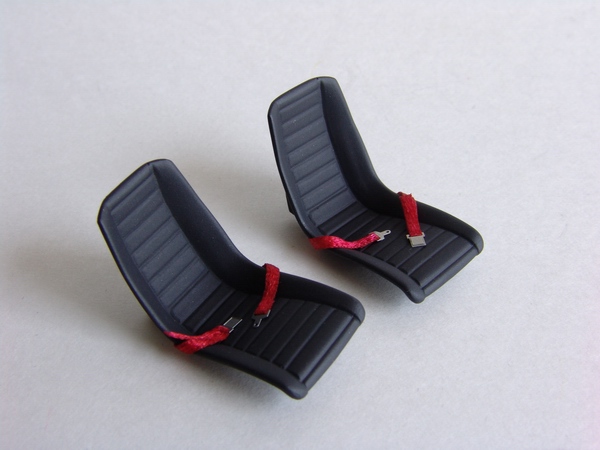
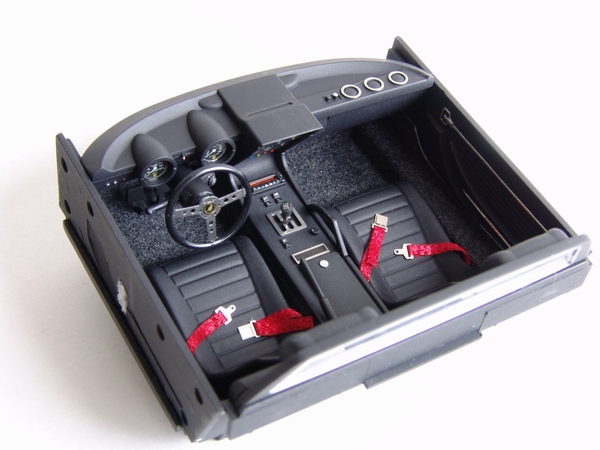
Seats were cleaned, primed, painted flat black, and fitted with lap belts. I used photoetched hardware from the detail set, and fine red cloth ribbon to make the belts. |
|
|
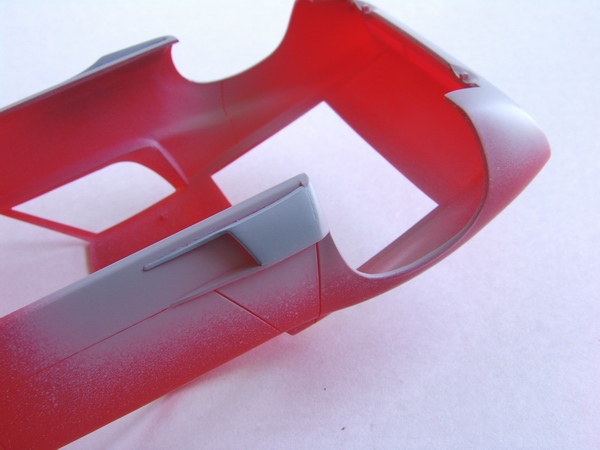
Rear brakes air ducts were glued to the body and gaps were filled with putty. After initial smoothing of the filler with some sanding sticks, I sprayed a light coat of gray primer to check for flaws. More filler was added until the gaps were gone. |
|
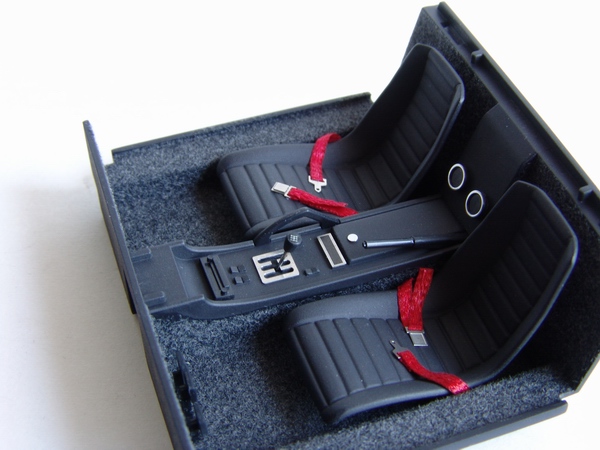
Seats were glued to the main interior tub, and few other small details were added - P/E shifter gate with shifter made from a piece of wire and styrene rod (kit shifter was way too thick), an ashtray, stereo, handbrake, rear speakers, pedals, etc. |
|
|
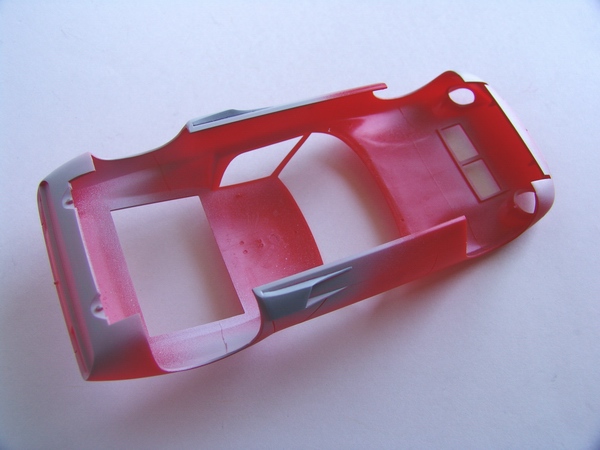
All corrected areas were sprayed with a coat of gray primer, dried, and then the whole body was sprayed with a coat of gray primer. When primer was dry, I lightly wet sanded it to smooth the surface. |
|
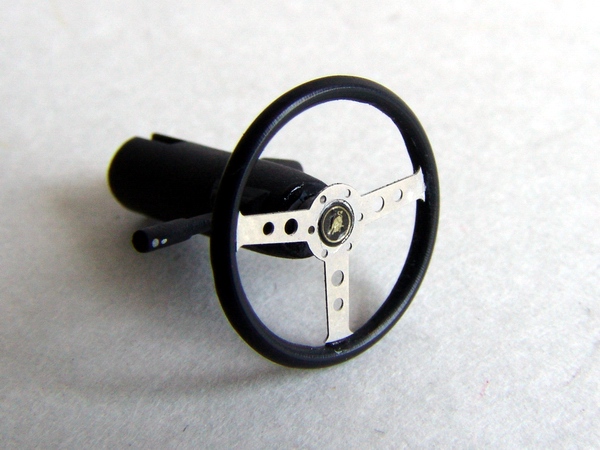
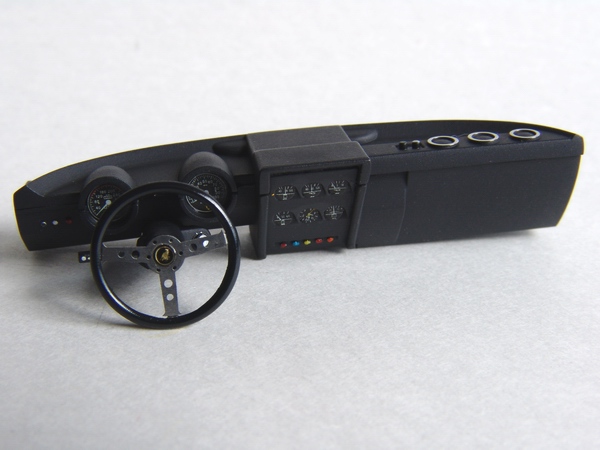
Steering wheel spokes were cut out and replaced with photoetched spokes from the detail set. I also used P/E horn button and topped it off with the kit decal. Steering column was detailed with silver paint and fitted with ignition lock P/E piece from the Acu-STion set. |
|
|
Since I planned painting the car in light color, a coat of white primer was sprayed over the gray primer. |
|
Dashboard was assembled, painted flat black, and detailed with various paints and metal transfers from the kit. I also used kit decals for the instruments, covered with few coats of clear to simulate glass over the clocks. Finally, I attached the steering column and the dash was ready. |
|
|
Entire body was sprayed with 3 mist coats of Tamiya Brilliant Blue through the airbrush. |
|
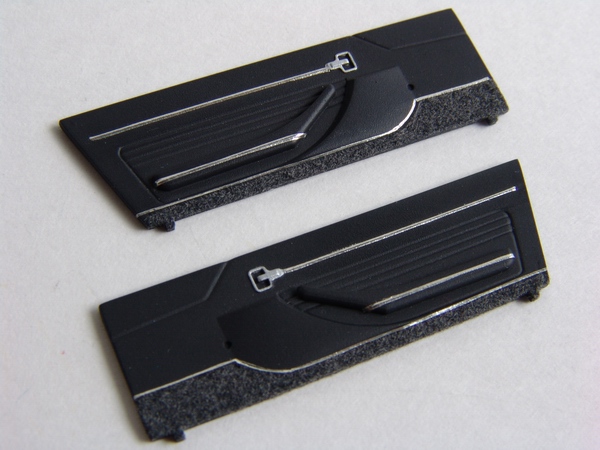
Door panels were painted flat black, and lower part of the panels was flocked with gray flocking. Chrome trim was made from thin stripes of BMF, and door handles details were painted with Testors chrome paint. |
|
|
After few hours of gassing out, the paint was almost completely dry, so I sprayed 2 wet coats 30 minutes apart and left the body to dry for 3 days. After the paint has completely cured, it was polished with Tamiya polishing compound and The Treatment model wax. |
|
All buttons and switches on the central tunnel and stereo were detail painted, and stereo display was detailed with silver and clear orange paint. |
|
|
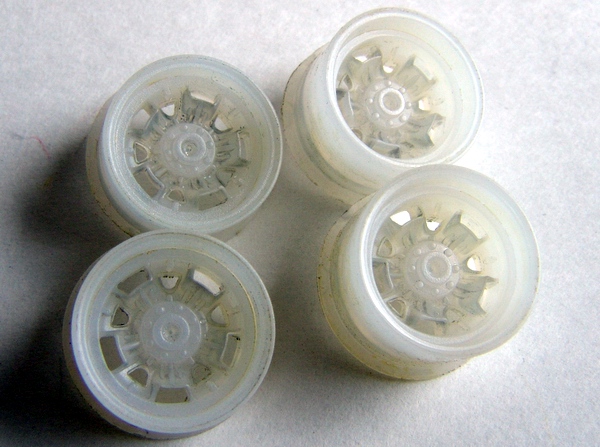
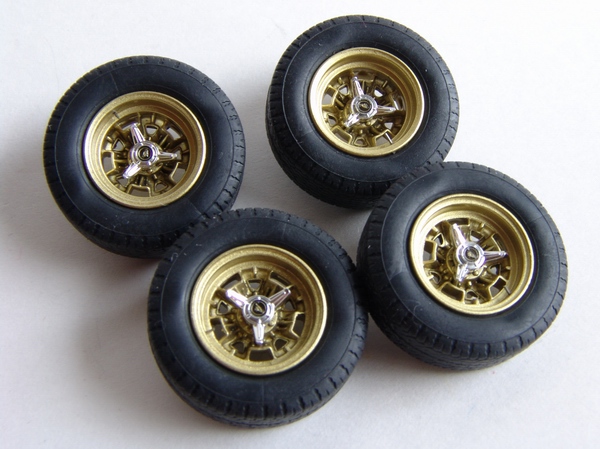
Rims were stripped of chrome plating in Castrol Super Clean, and carefully washed. The I primed them with a coat of gray primer and painted with Model Master Bronze metalizer, followed by a coat of Tamiya TS-13 clear. |
|
Finally I glued the dash and door panels to the interior, and attached headrests and rear window assembly. Interior was now complete. |
|
|
When the paint on the rims was completely dry, I applied black wash to bring out fine detail, and added tire valves made from thin wire. I also added knock-offs with P/E center emblems from Acu-STion set, and covered them with kit decals. |
|
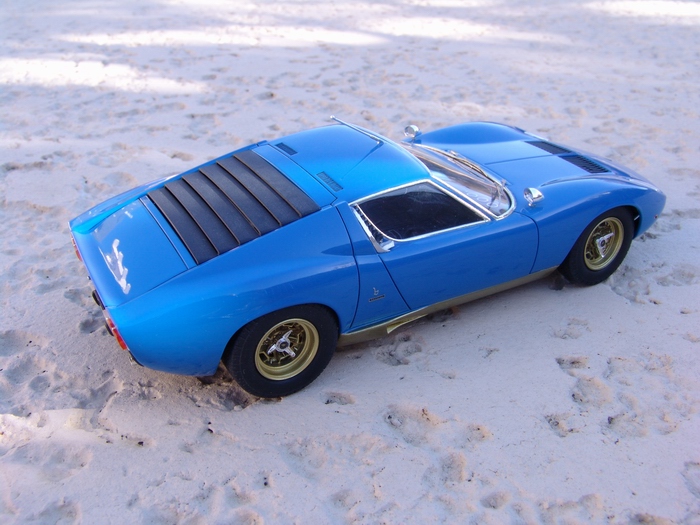
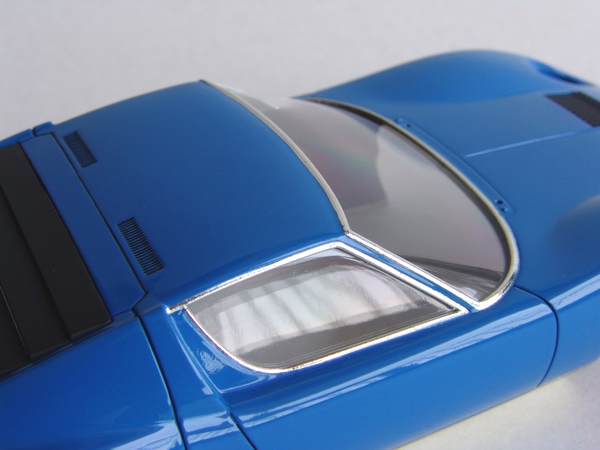
Window trim was detailed with BMF, panel lines with black wash. Then I installed engine cover/vents, glass, hood vents with the gas cap, and thoroughly waxed the body to remove wash excesses and fingerprints. |
|
|
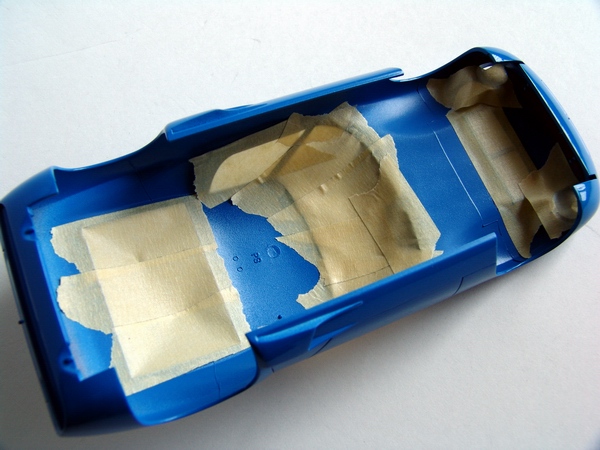
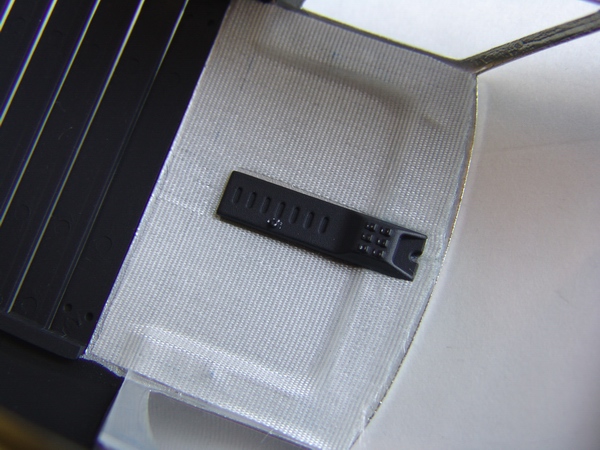
In order to spray the lower body, I masked off the insides with masking tape... |
|
Headliner was made from self-adhesive cloth tape, and then fitted with the roof panel, which was previously painted flat black and detailed with silver paint. |
|
|
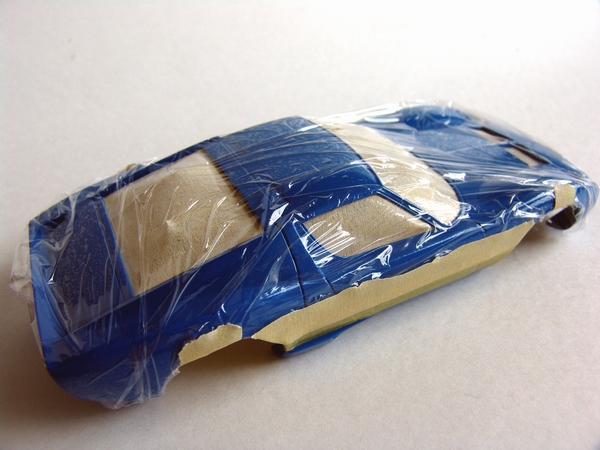
...and outside with Saran wrap and masking tape. Lower body was painted with same Model Master Bronze metalizer, and sealed with Tamiya TS-13 Clear. |
|
Body shell was painted flat black from the inside. I also installed headlight support plates and rearview mirror (not pictured). |
|
|
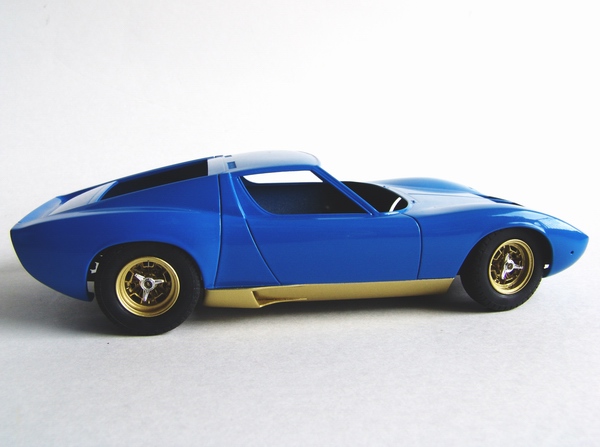
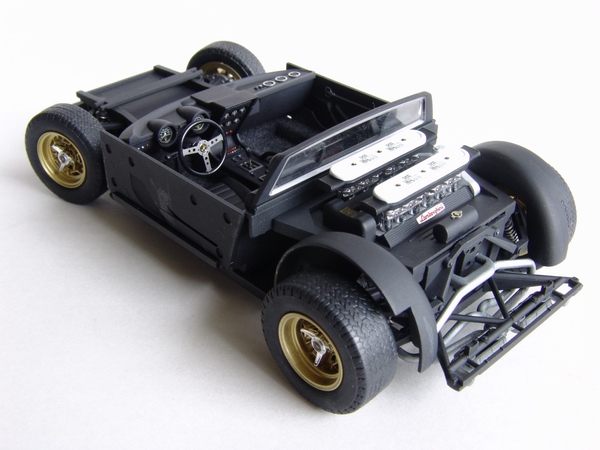
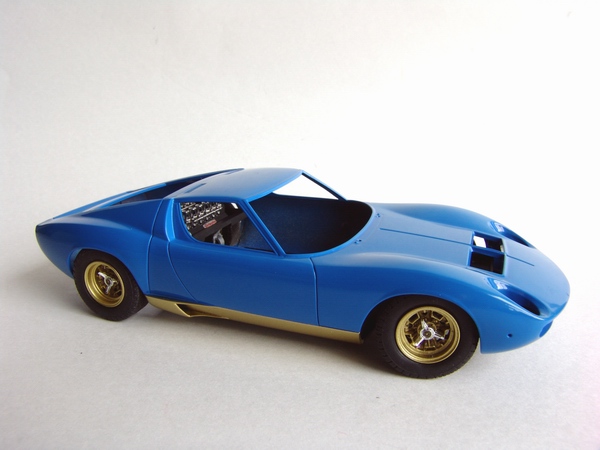
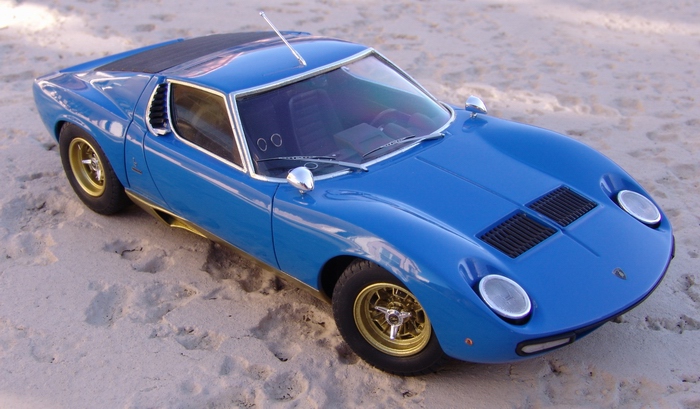
After all the masks were removed, I did a mock up of the car, and I liked what I saw! The stance was perfect, and the colors complimented each other well. |
|
Exhaust system was painted with Burnt Metal metalizer, detailed with black wash, and glued to the chassis. |
|
|
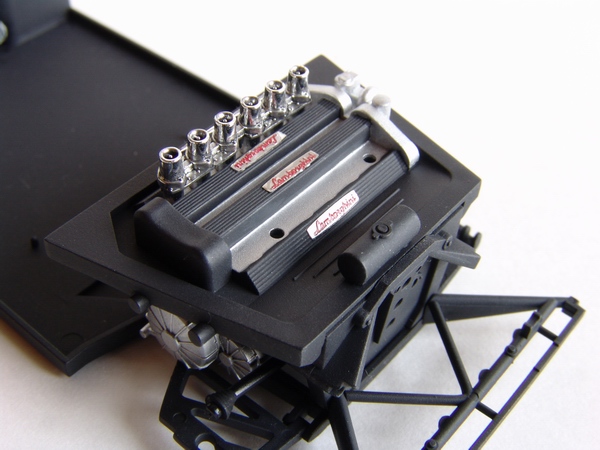
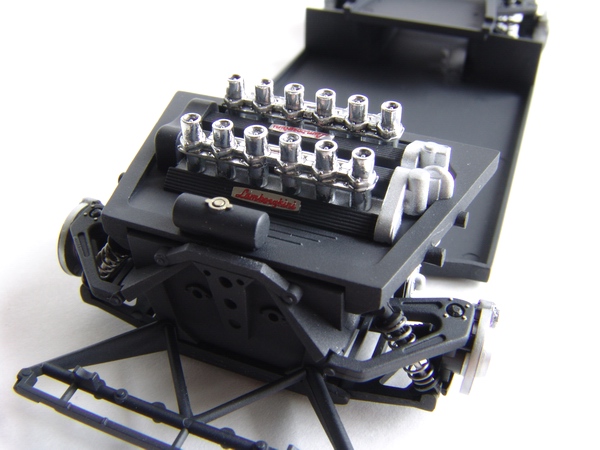
Chassis plate, back engine cover, and engine top plate were painted flat black, and engine parts (sides) were painted aluminum. I also glued P/E Lamborghini scripts on the cam covers, and topped them with red Lamborghini decals from the kit. |
|
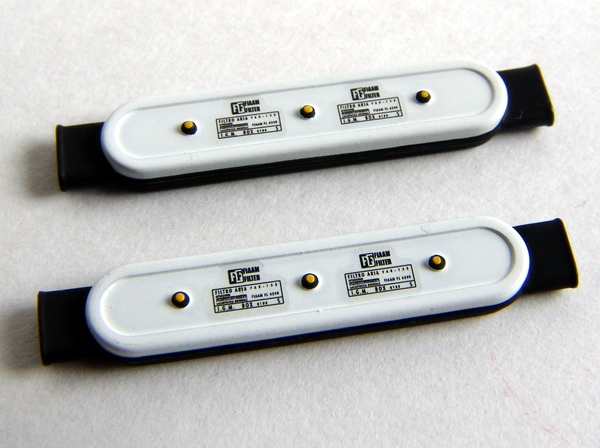
Air filters were cleaned, primed, painted flat white, then masked and painted flat black. After the paint was completely dry, I added spec decals, and detail painted the nuts on top. |
|
|
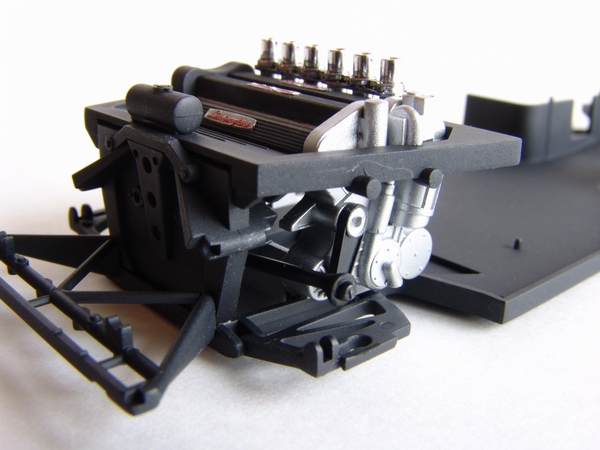
Parts of the engine were painted aluminum, then I installed carburetors assembly with fuel lines, and other small details, such as belt and pulley assembly, drive shafts, coolant overfill tank, etc. |
|
Then I glued rear wheel arches, air cleaners, and connected exhaust system to the engine. Rear window is also clearly visible on this picture. |
|
|
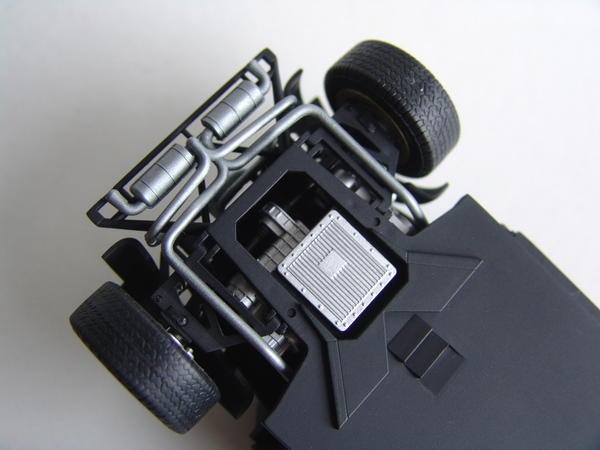
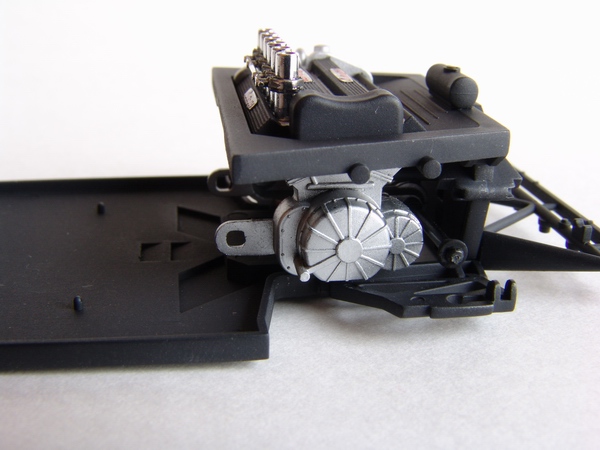
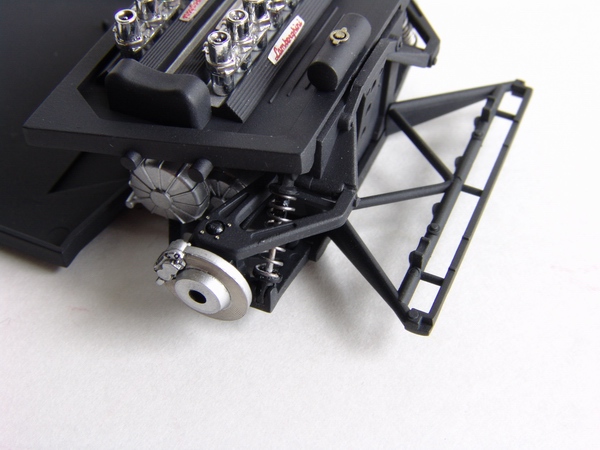
Since the engine will be completely hidden after the model is assembled, Hasegawa included only basic engine parts - you can see it is not complete and has huge gaps between parts. |
|
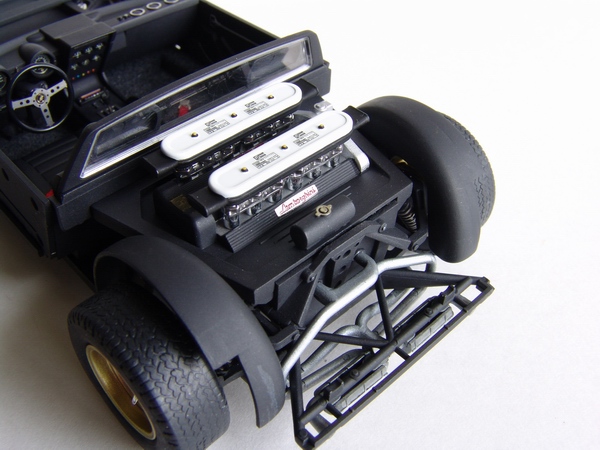
Completed chassis with installed interior and fully assembled engine. |
|
|
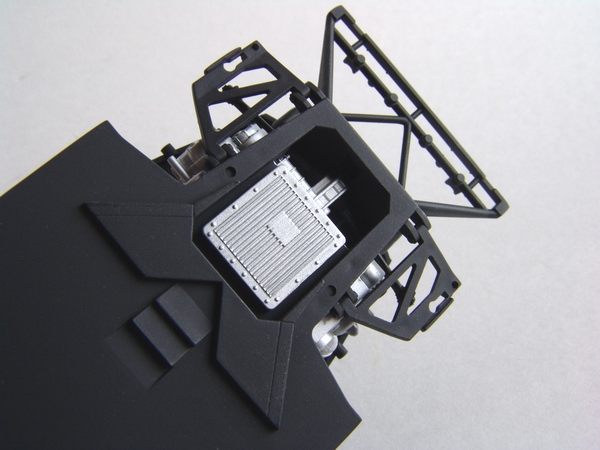
Engine oil pan was painted aluminum. From the underside, engine looks very much complete, and I'm sure this is what Hasegawa engineers were after. |
|
After the cassis was finished, I carefully inserted it into the body shell, and continued with exterior detailing. Radiator mesh provided in the Acu-STion set was way too big and couldn't be used as is. This made this detail set completely useless. |
|
|
Brakes were painted with steel metalizer and detailed with black wash and photoetched rotor faces from Acu-STion set. Rotor faces didn't fit correctly, and required lots of trimming and test fitting to sit right. This was really disappointing, since I bought this set primarily for brakes and few other small parts. |
|
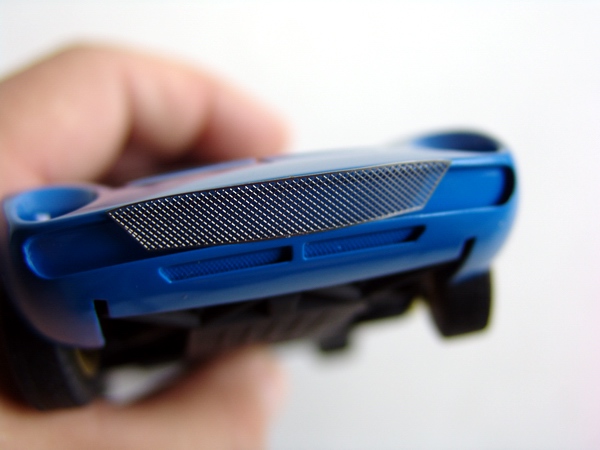
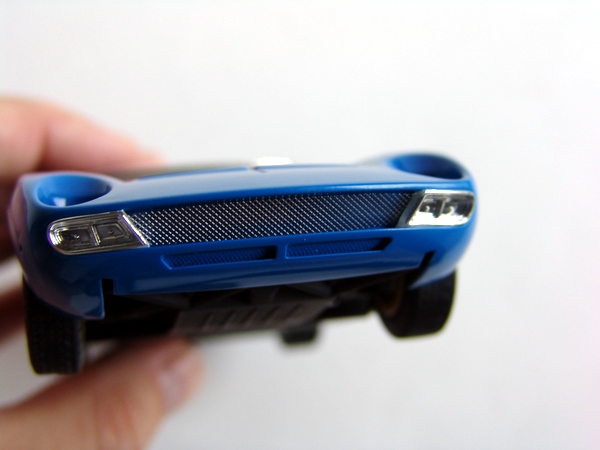
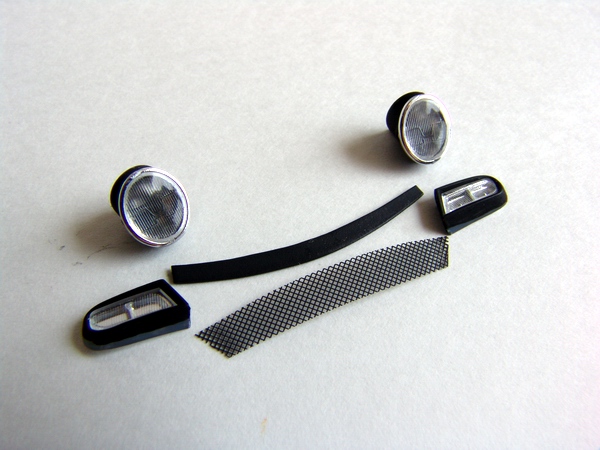
I had to trim the mesh to fit the opening. I also cut the plastic mess off the kit part, and left only driving light's buckets. |
|
|
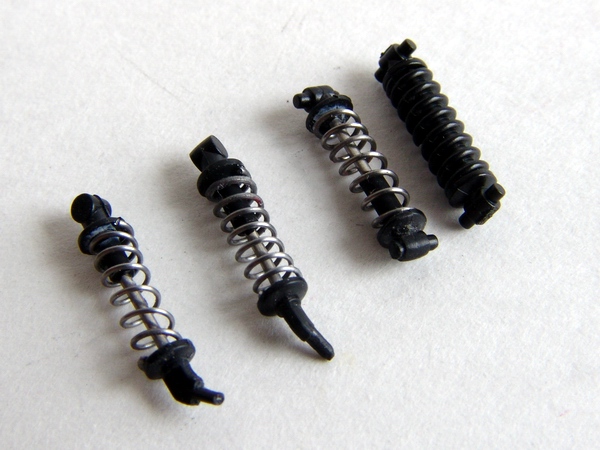
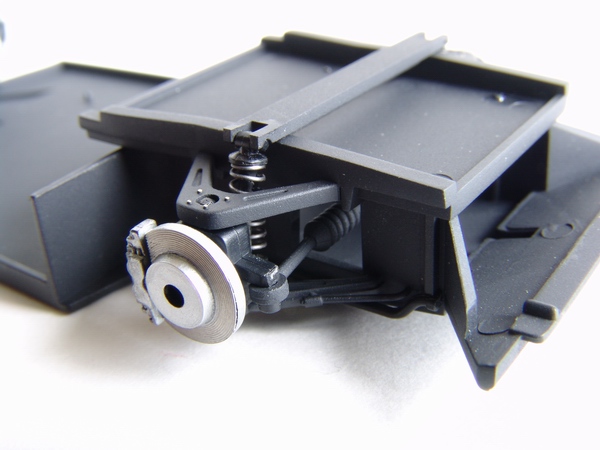
Kit shocks were re-built using aluminum tubing and steel wire as described in my shock absorber tutorial. In my opinion, they look much better, even though they will be almost invisible after model assembly. |
|
In order to replicate upper part of the grille trim (I accidentally cut it off together with the plastic grille mesh) I used a piece of sheet styrene. |
|
|
Shock absorbers and brakes, together with upper A-arms and other suspension pieces were installed. |
|
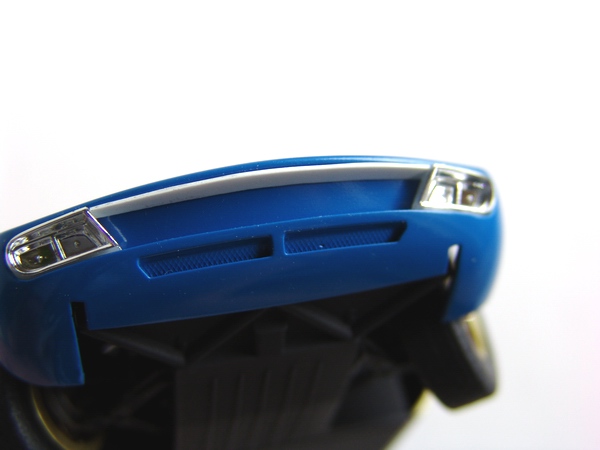
Styrene strip and P/E mesh were painted semi-gloss black. Driving light's cases were painted semi-gloss black and headlight cases flat black. Lenses were glued into the headlight buckets with Elmer's white glue. |
|
|
I also finished with the carburetors, then applied black wash to the entire engine and detail painted bolt heads, nuts, and other small details with different shades of metalizers. |
|
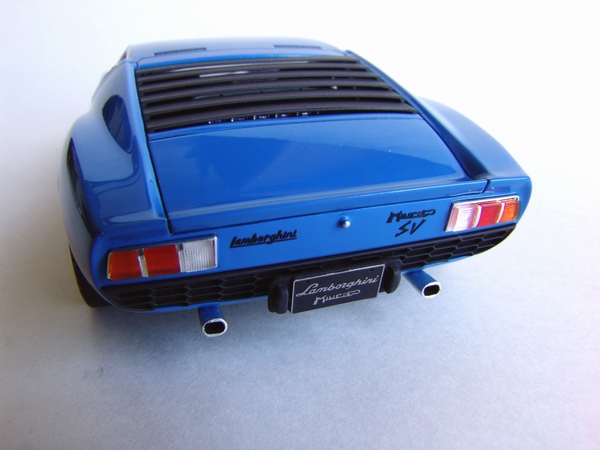
Taillight lenses were painted with Tamiya transparent paints, and detailed with BMF. Chrome on exhaust tips was also repaired with BMF. Door vents and rear license plate holder were painted flat black. |
|
|
Front suspension was assembled in a similar fashion, using new shock absorbers and P/E detailed brakes. Boots on the steering rack were painted flat black to simulate rubber. |
|
The most useful part of the Acu-STion set turned out to be the wipers. I painted the edge with flat black to simulate rubber blades - they look very convincing. |
|
|
After the basic rolling chassis was completed, I test fitted it to the body to check the ride height and track width. All four wheels were touching the ground, and the stance seemed perfect - a testament to Hasegawa's good engineering. |
|
Rear grille was attached to the body, and then I installed the taillights and a P/E license plate from detail set. Photoetched "Lamborghini" and "Miura SV" scripts were painted black and glued to the body. |
|
|
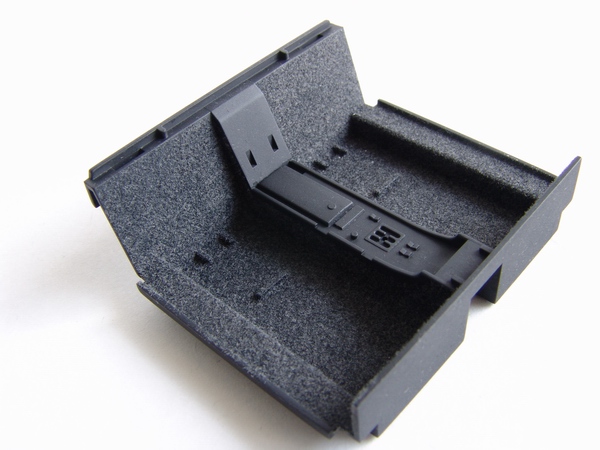
Then I continued with the interior. Main interior tub was pained flat black and flocked with Detail master gray flocking using white glue method. |
|
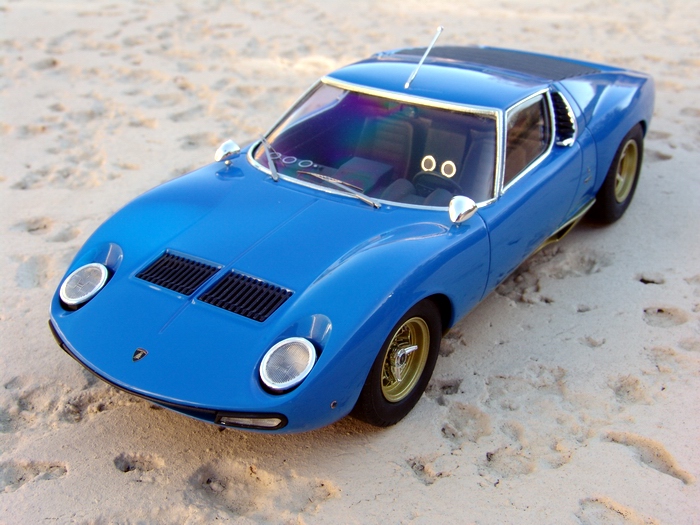
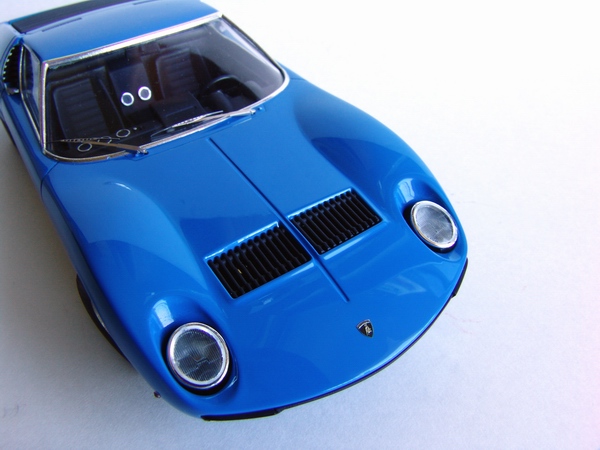
Finally, I assembled front grille/driving lights group, installed the wipers, headlights, attached Bertone scripts, and P/E Lamborghini emblem covered with kit decal. The fastest Lamborghini or the 70's was now complete. |
Copyright 2005, Updated 2006 Alex Kustov. No copying or reproduction in any shape or form without written permission of the author.