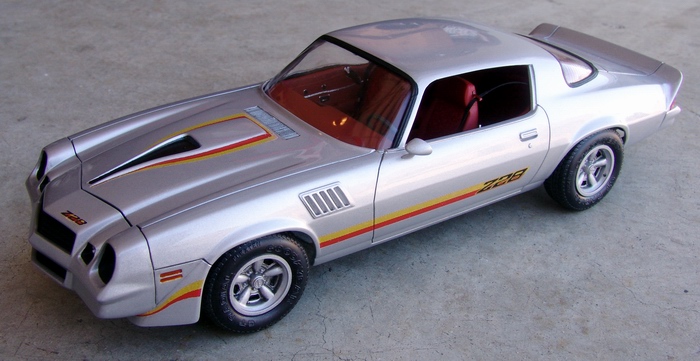
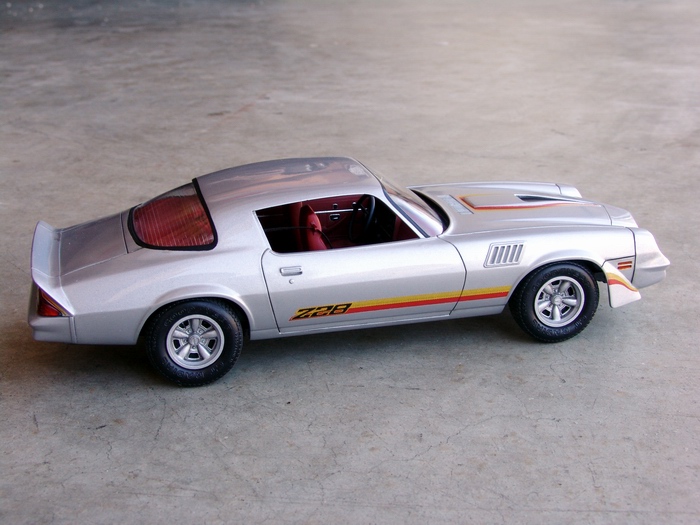
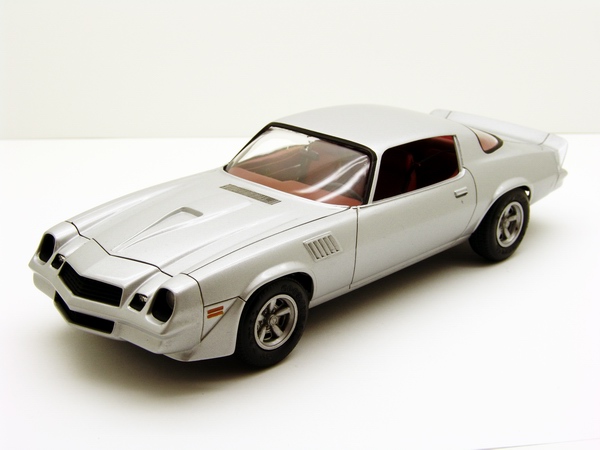
Chevrolet Camaro Z28 1979
 |
 |
 |
Kit: Revell-Monogram Chevrolet Camaro Z28, Kit # 85 2165 Pros: Not many pros, aside from simplicity of the construction and presence of the engine, even though detail of the engine is marginal at best. Nicely detailed wheels. Relatively good parts fit. Parts for street-racing version provided in the kit. Cons: The kit is severely under detailed - low parts count and very average detail on all parts. Some cleanup required, and instructions are not clear. Wrong painting directions for some parts. Awful (pretty much useless) decals, hard vinyl tires, very simple interior "tub" with minimal detailing. Chrome plating is quite bad and thick, most glass pieces are thick and distorted. Verdict: Kit is very simple and parts fit is decent so it would make a good kit for a beginner. But if you want an accurate replica - it will require lots of patience and additional detailing to look correct. Don't buy Keith Marks decals! |
 |
 |
 |
Buildup
 |
I started off with gluing t-tops to the body, and filling the seams with Tamiya liquid styrene glue, to make sure plastic melts and fuses together. Its hard to accomplish with clear and regular plastics since they don't seem to glue together very good. |
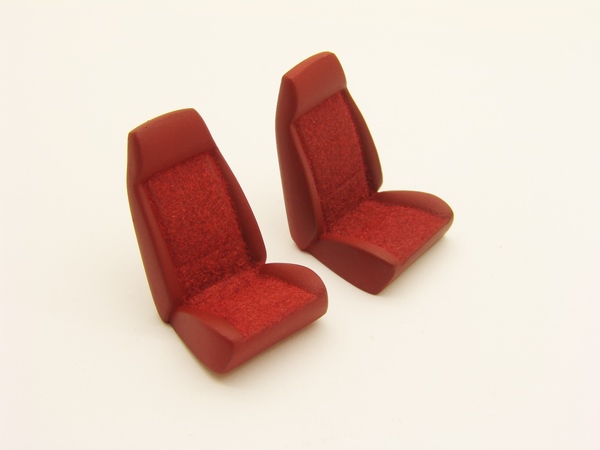 |
Front seats were put together, seams filled, primed gray, then painted red, and central parts flocked with red flocking, same as rear seats. |
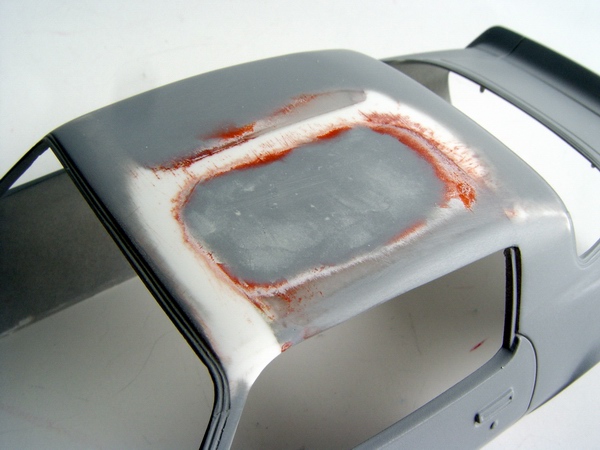 |
After the glue has cured overnight, the body was carefully putties with Squadron filler, and sanded smooth. After a light primer coat, it was evident that roof requires a lot more filling and sanding! |
 |
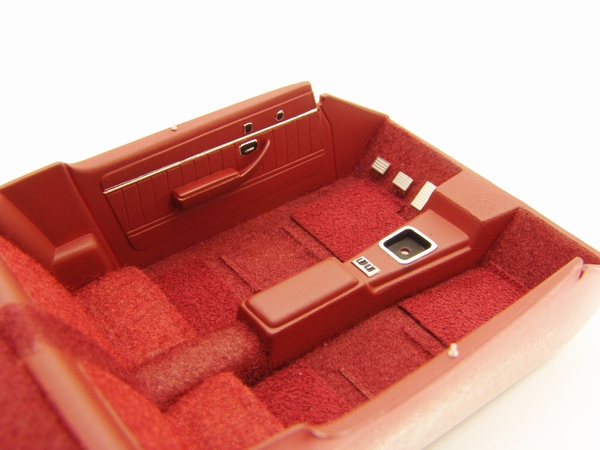
Here is a picture of the interior with nothing but the flocking on the floor and seats. Looks cozy already! |
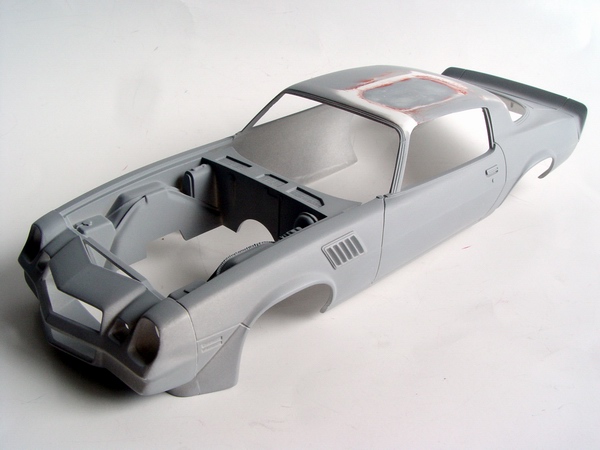 |
After spending few hours filling and sanding the roof and other imperfections, scribing panel lines, and cleaning the mold lines on the body, I had it ready for final primer coat. |
 |
Door panels were detailed with BMF, and fitted with door handles and lock knobs (combination of photo etched base and wire knob). Central tunnel was also detailed with BMF and photoetched pedal faces glued to the plastic pedals. Floor mats were made with Model Factory Hiro adhesive cloth |
 |
Ghost lines on the roof showed up three times! Only after third sealer coat they disappeared and body was ready for paint. Since I was planning on painting the body silver, I didn't prime it white - silver covers up almost any color. |
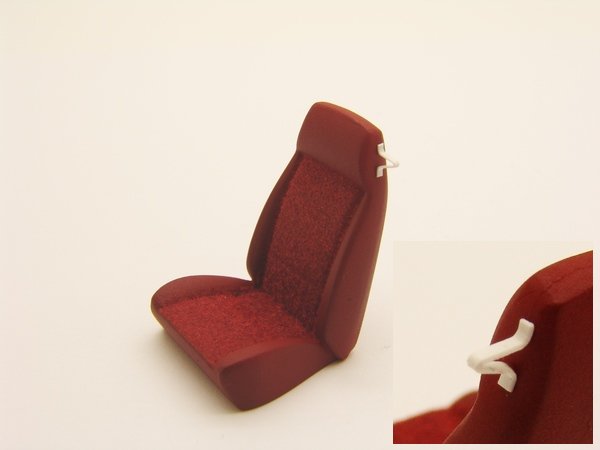 |
After painting the seats I realized that they are missing seatbelt brackets, and since I was planning on adding seatbelts, I made brackets from thin styrene strip and glued them to the seats. |
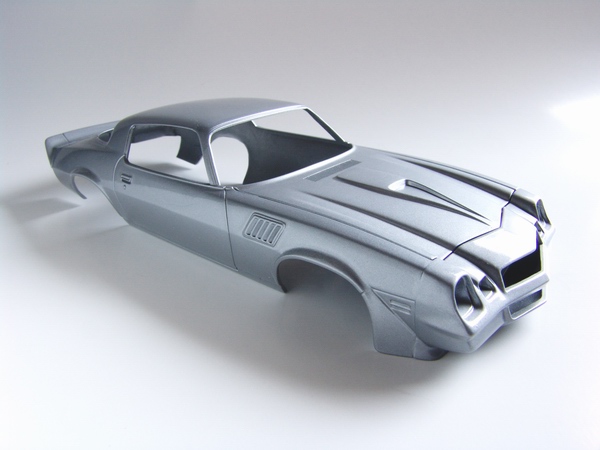 |
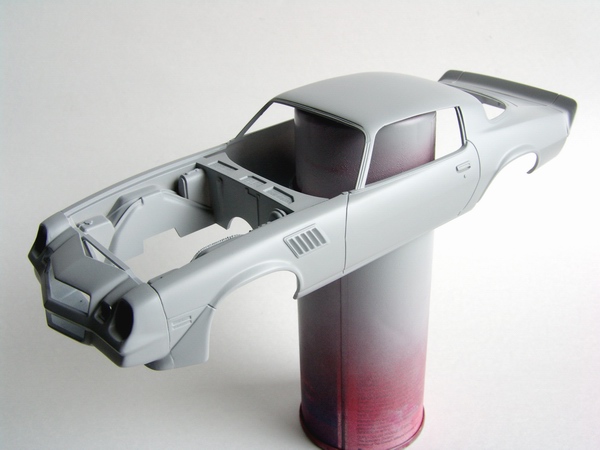
After 2 light and one wet coat of Tamiya Silver Leaf sprayed through the airbrush I had a nice and uniform layer of silver paint on the body. I then proceeded with Tamiya TS13 clear coat, spraying few light coats, followed by 3 heavy wet coats 20 minutes apart. |
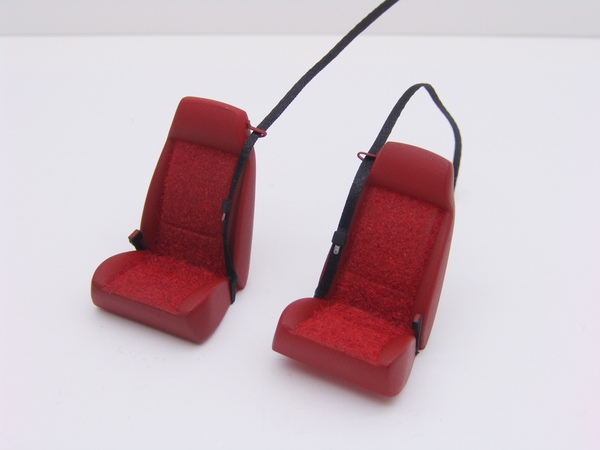 |
Brackets were painted and seats fitted with seatbelts. I also made seatbelt catches from sheet styrene, and fitted belts with photoetched buckles from Detail Master. |
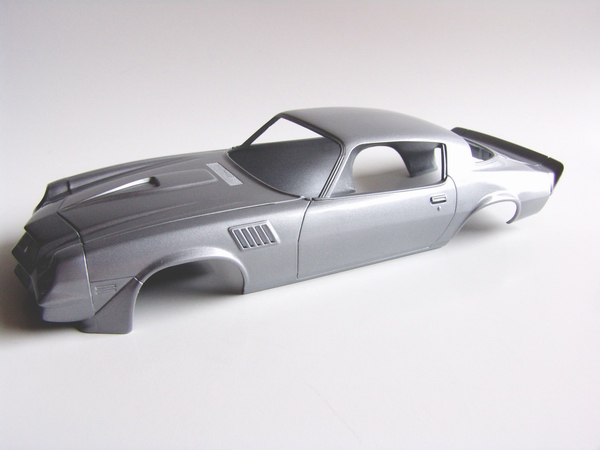 |
After about a week of drying, I polished the body with Tamiya polishing compounds (medium and finish) and waxed with Treatment model wax. It was shining up nicely. |
 |
Dashboard was painted Tamiya flat black, and drybrushed with Model Master aluminum metalizer to highlight instruments and other raised details. |
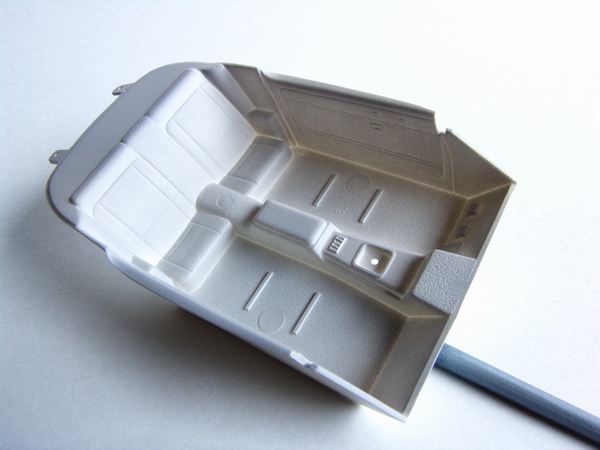 |
Interior tub was really lacking details. I will spice it up later, but for now it was cleaned and sprayed with a light coat of Tamiya gray primer. Since I was planning on paining interior in dark red (almost burgundy color) I decided to have gray primer as an undercoat to darken the red. |
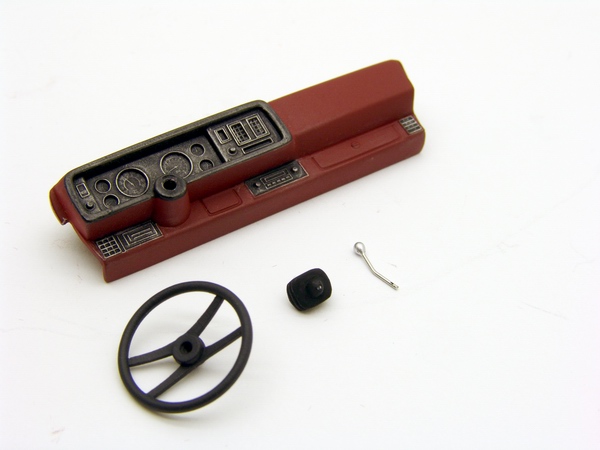 |
I also painted steering wheel and shifter boot flat black, and replaced kit shifter with a pin that had a little ball at one end - looks a lot more convincing than thick piece of plastic with seam line in the middle! |
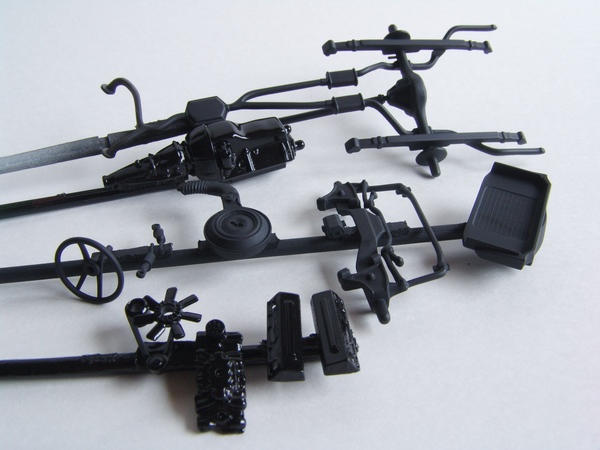 |
Various engine, suspension and interior parts were carefully cleaned, primed, and sprayed with different shades of black. I was paining all parts according to the instruction sheet, but was later pointed out that Camaro engines were never black - great job Revell! |
 |
Interior was temporarily put together to check parts fit and alignment. I also test fitted interior inside the body and to the chassis to make sure there are no interference. |
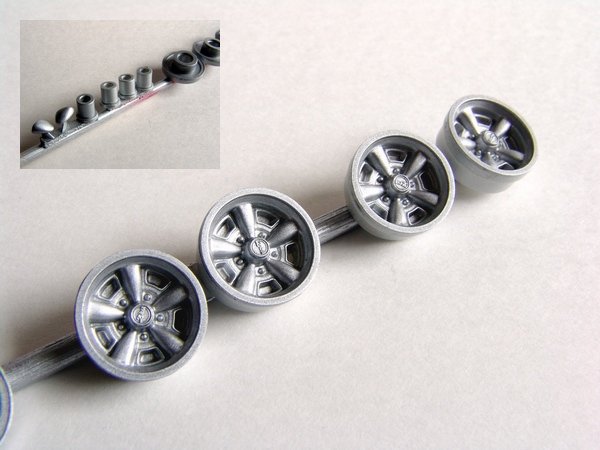 |
Wheels are really weak in the kit - their construction and the way they had to be mounted on the car could have been a lot better., But they looked accurate for the car I was trying to replicate so I went ahead and painted them body color. |
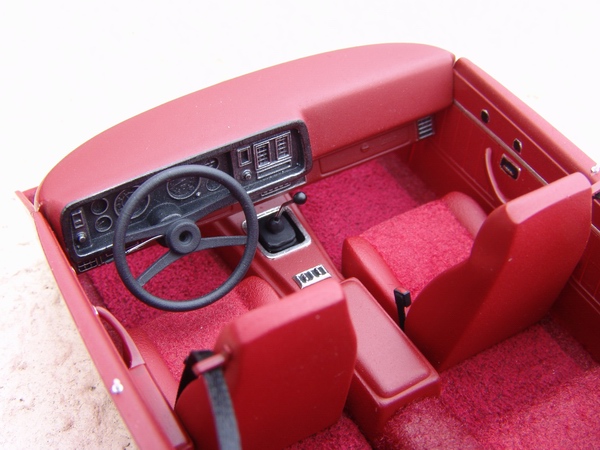 |
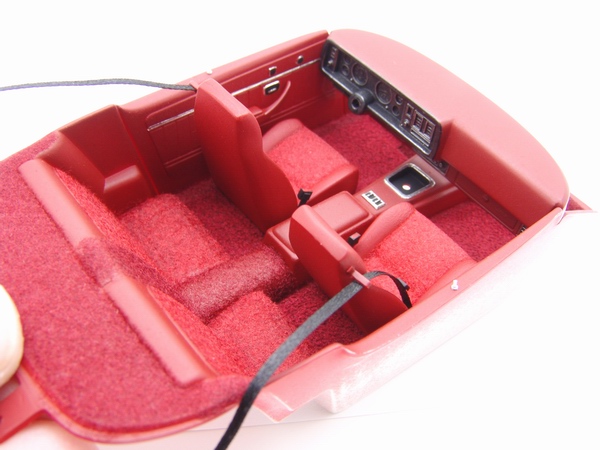
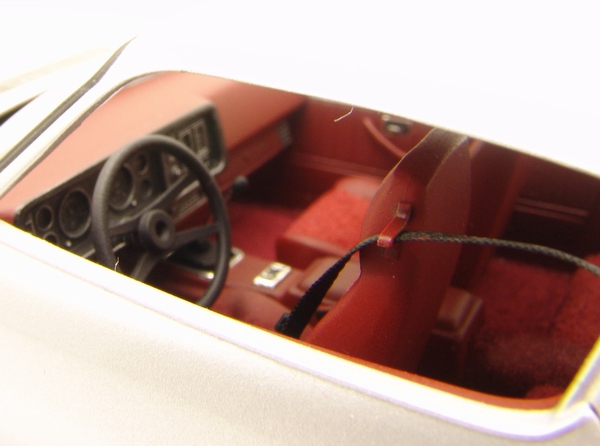
Here is the completed interior just before the final assembly. The last thing I added was blinker stalk made from thin wire. With all the additions and detail painting it still does look a bit plain, but much better than it would look out of the box. |
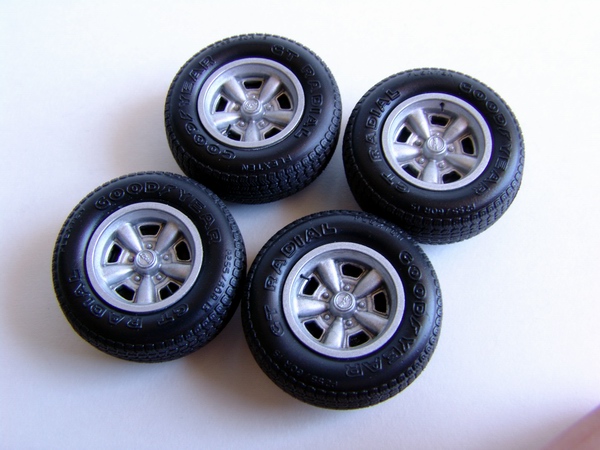 |
Wheels were assembled, fitted with tires and tire valves, and carefully detailed with black paint and black wash. Tires are really hard vinyl pieces that are known to react adversely with plastic (melt it), so I made sure I painted outside of every wheel to slow down that process. |
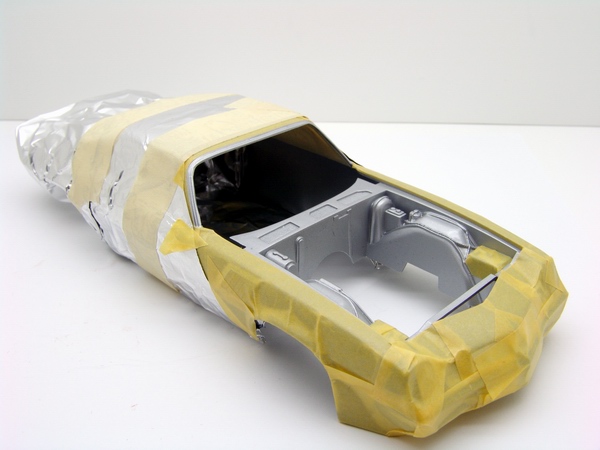 |
Back to the body. After paint was polished to a nice shine, I needed to paint several areas flat black, and also paint window trim. So I masked the front end... |
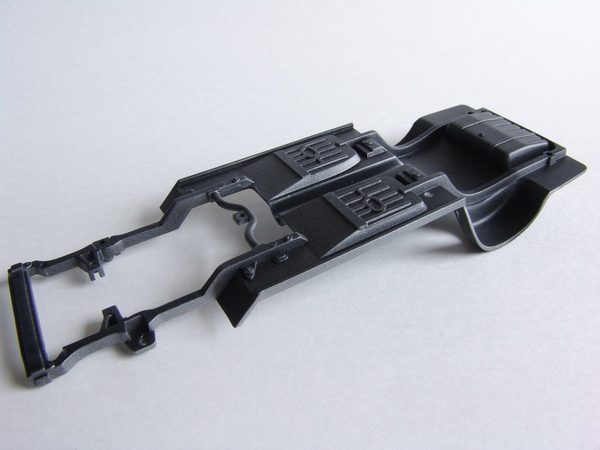 |
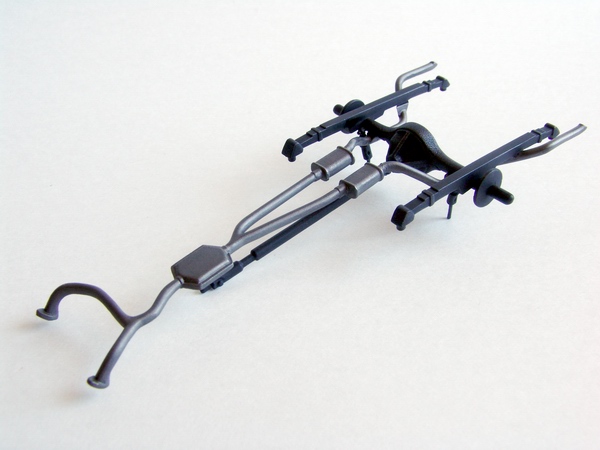
Next was the chassis - it was painted black, and over sprayed with silver from a distance at an angle to replicate factory spraying pattern. This process nicely highlighted the chassis! |
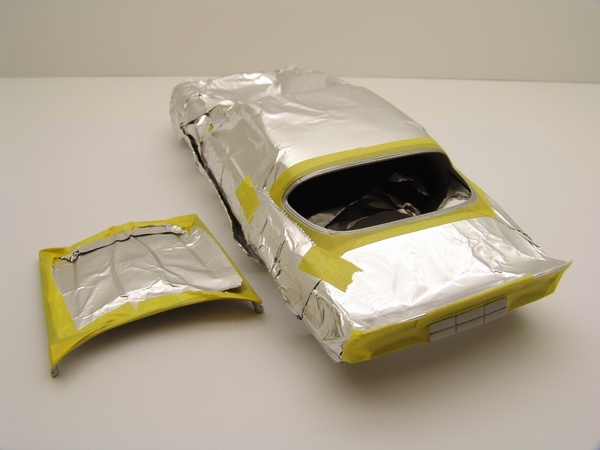 |
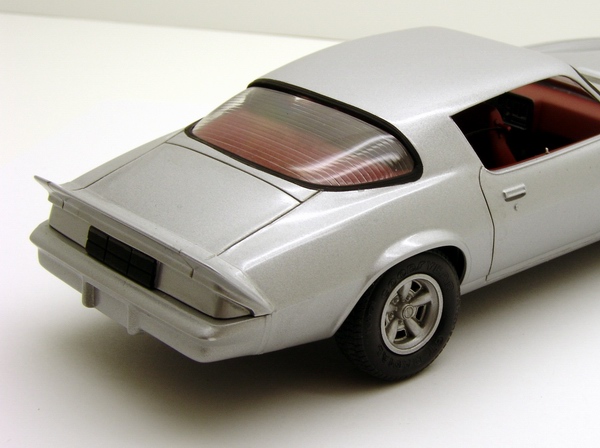
... and rear end and the hood. I have painted front end first, and then masked and painted rear end to avoid complicated masking. |
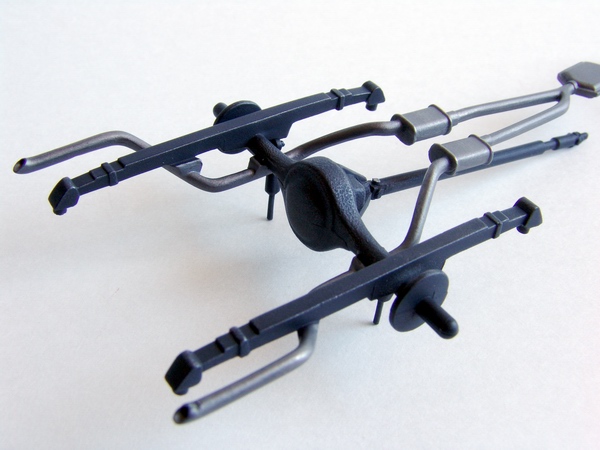 |
Rear axle-suspension-exhaust-drive shaft piece was carefully masked and detail painted. I also drilled out exhaust tips and painted them flat black inside. |
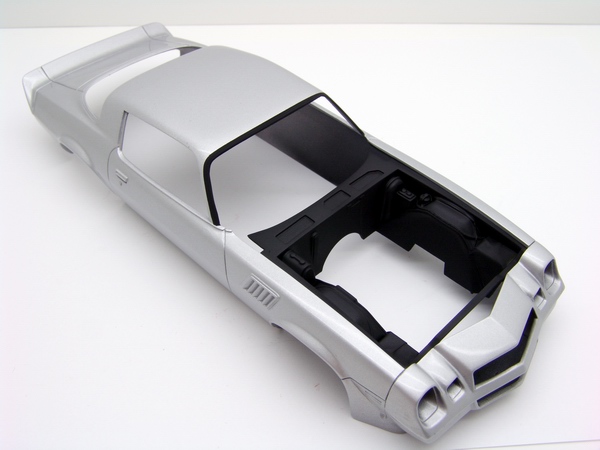 |
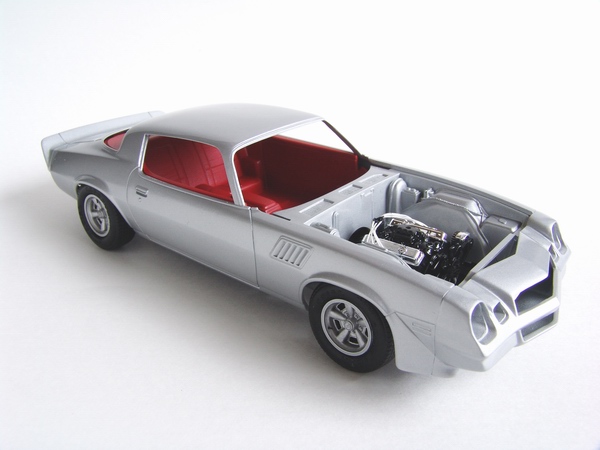
Here is a picture of the engine bay and windshield trim after I removed the masks. Careful masking makes all the difference in the building process. |
 |
Entire piece was drybrushed with Model Master metalizers to bring out the textures and highlight raised areas. |
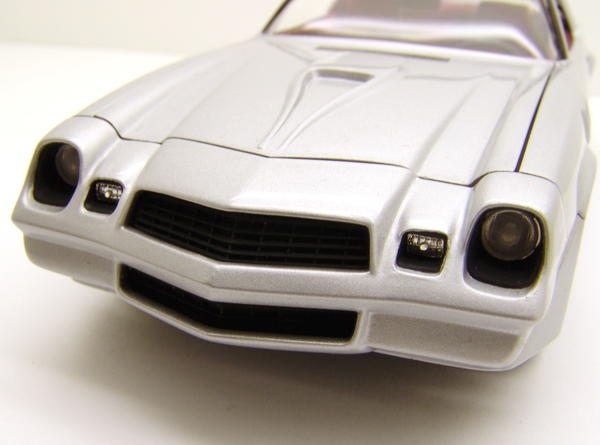 |
Headlight buckets were hand-painted flat black, and lights assembled and installed. I also painted and installed front grilles. |
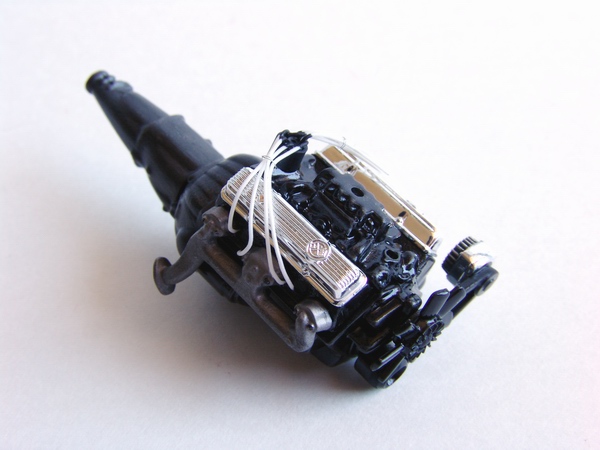 |
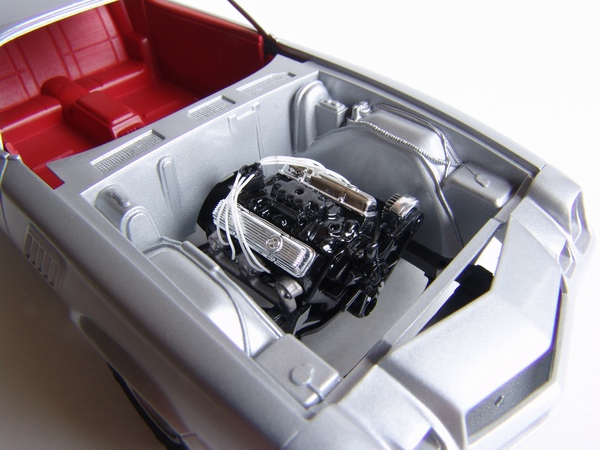
Engine block, cam covers, intake, exhaust manifolds, belts and pulleys, fan, and alternator were put together and lightly washed with black wash. I also run spark plug wires from the distributor to the spark plugs. Wires were tied with MFH photoetched ties. |
 |
Rear end and window trim were painted black and glass installed. Body, interior, and chassis were assembled together and left to dry. |
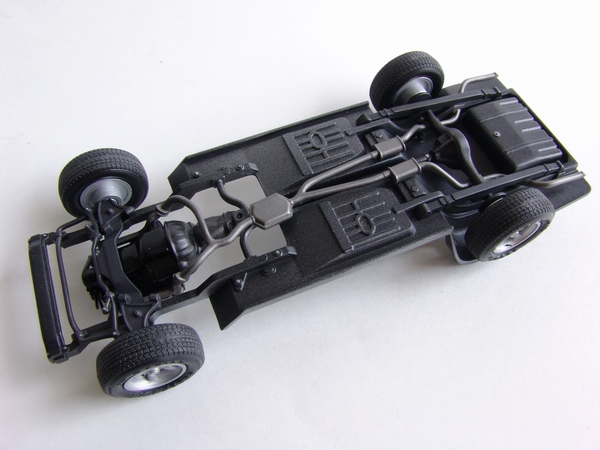 |
Chassis, engine, suspension, exhaust system and wheels were put together. I picked out bolts and nuts on the chassis and suspension with various metallic paints. |
 |
The stance was right, and all four wheels were sitting on the ground. Hood fit was not very good though - there was a gap between it and front fascia that took some alignment, but still wasn't perfect. |
 |
I decided that it was a good time to check the fitment of the chassis and interior parts with the body to reveal any potential assembly problems. Even though the fit was not great, it could be made to fit with some superglue! |
 |
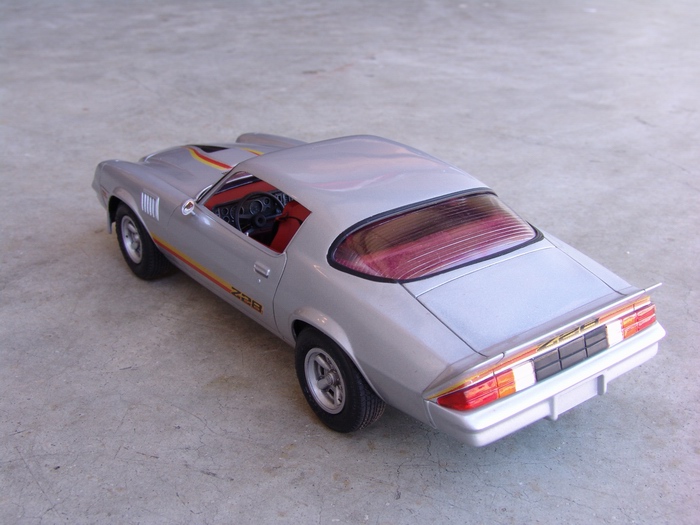
Since kit does not include any side windows I decided to leave them open - that way you can take a glance inside and see all the hard work I've done on the interior. |
 |
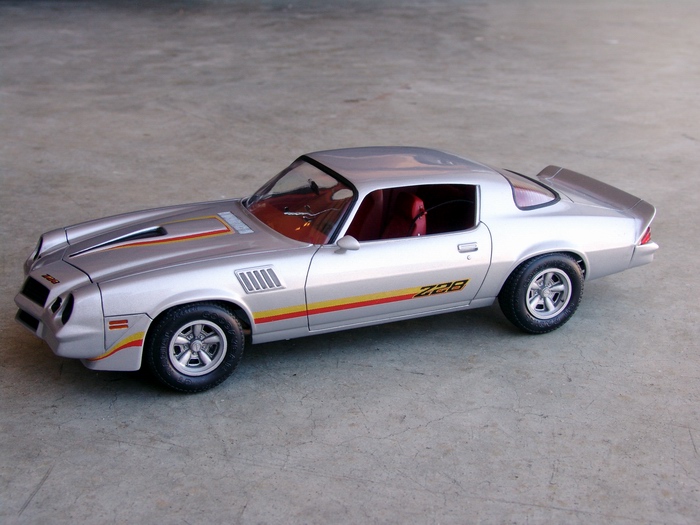
Stance was right and both front and rear track width were fine, so I continued with assembly. |
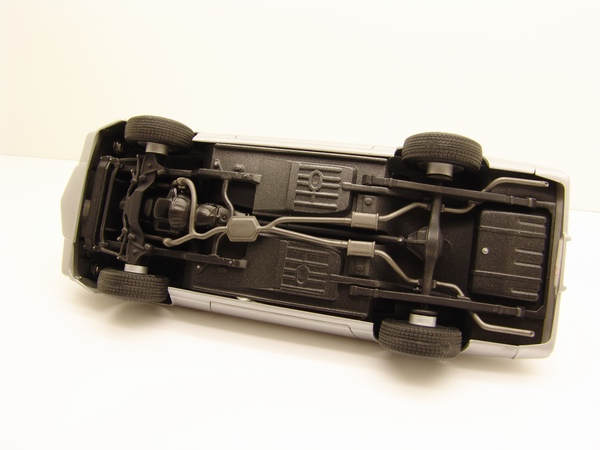 |
Completed chassis looks great - despite minimal detailing, Overpaying and drybrushing with metalizers brought small detail to life. |
 |
I was building a particular car that had cloth/vinyl interior. I used two different shades of red flocking (Detail Master and Hiroboy) and flocked floors, package shelf, and rear seats. |
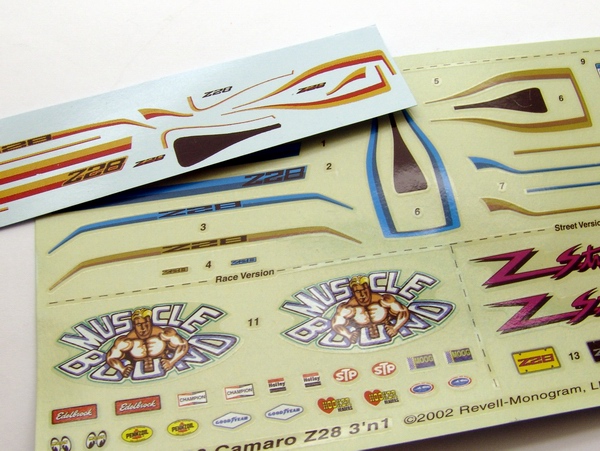 |
Kit decals were poor, colors were absolutely wrong for the red/orange stripes. I decided on aftermarket decals from Keith Marks, but even though the color was right - the quality was even worse than kit decals - badly registered and chipping right on the sheet. Took some effort to salvage them. Never again. |
Copyright 2007 Alex Kustov. No copying or reproduction in any shape or form without written permission of the author.