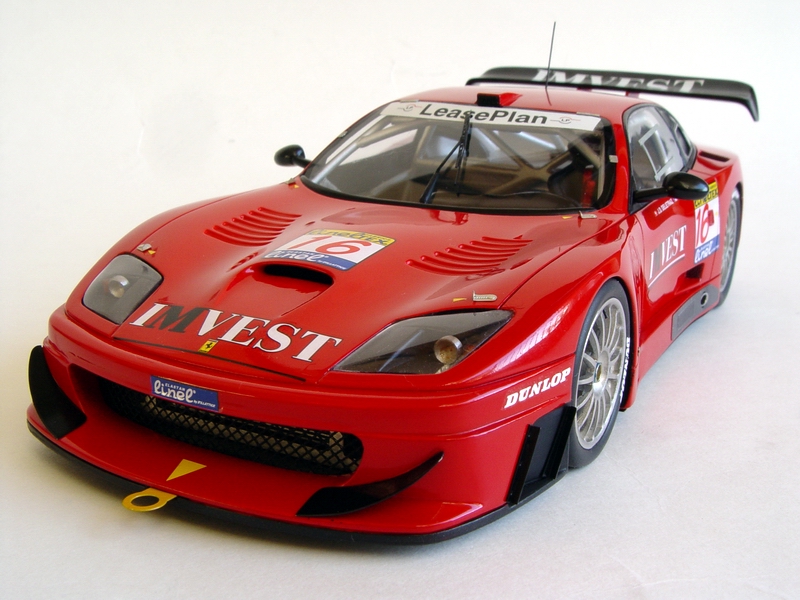
F e r r a r i 550GT Millennio / 2000, First Racing #16
|
Campaigned in a selection of FIA GT Championship rounds by the First Racing team with drivers Fabian Giroix and Jean Denis Deletraz, Italtecnica's 550 GT had a difficult competition career. Valencia 500km, saw the car retire when the water pump broke after 14 laps, being forced to miss Round 2 at Estoril as a result. Monza's 500km race proved even less successful, having blown an engine and broken a gearbox in practice. Things got even worse, when the First Racing entry retired after only 10 laps with another gearbox failure. Skipping rounds 4 and 5 to focus upon rectifying these reliability problems, First were back for Round 6, at Zolder 500km. Although running a lighter, faster and supposedly more reliable spec, the team retired with mechanical problems after completing just three laps. Although car was a fiasco, it was a first step in development of a 550 racer, which paved the way for future very successful GT 550's, such as LeMans class-winning Prodrive 550's. |
 |
 |
|
Kit: 1/24 Craft S Ferrari 550GT Millennio, resin/white metal/photoetched parts/vacuuform/waterslide decals/other, kit # CS 2401, available from http://www.islandcollectibles.net Pros: First impression of the kit - great moldings, almost no flash, very precise castings, excellent quality. Surface of the body is smooth, requires almost no cleaning which is unusual for a resin kit. Molded in grey resin, easy to spot irregularities. Good parts fit, good white metal castings, and kit includes complete roll cage, disk brakes, racing seat, nicely cast OZ rims and other details. Also includes two big PE frets with small details, real rubber slicks (very nice), grille mesh, taillights cast in clear resin, and vacuum formed glass. Great looking and nicely registered decals for two different versions of the car. Cons: When I started working on the kit and cleaning the body while preparing it for paint, I realized that the body is oversimplified. Many vents and ducts molded closed, and there is no way to open them because the body is quite thick in those places. Roll cage is not exact fit, requires a lot of sanding, cutting and testing before it could be assembled to fit inside the car. Price is high, instructions are in Japanese only (color guide is in Japanese!), no decal placement guide for the second version of the car. Curbside, no suspension, simplified interior details. Verdict: There are no plastic kits of 550 Maranello, and other versions of racing 550 are scarce, and all this makes this kit very desirable, despite its shortcomings and price. Of course the kit is oversimplified, and builder will have to do a little scratchbuilding and maybe some kitbashing to make a detailed version of the car. But even then, it could be built into good looking shelf model, and given the only other 1/24 scale 550 kit is Rallye Classics kit (Scale Productions 550 model is not out yet), and the fact that body proportions of Craft S kit are more accurate, makes this kit worth building. |
 |
 |
|
|
 |
 |
|
Buildup
This buildup was also published in Model Cars magazine, February - March 2004, #92, An Italian Job
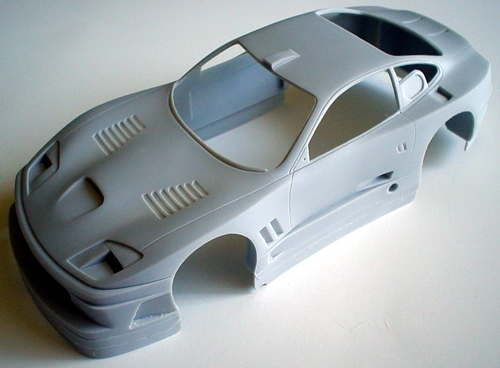 |
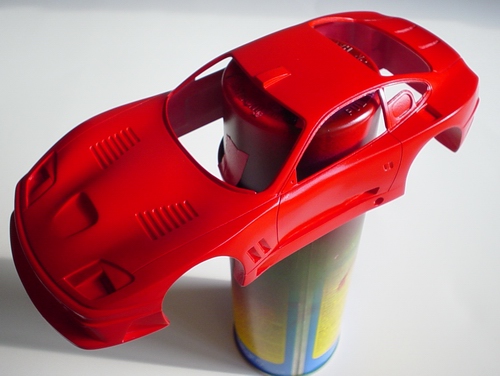
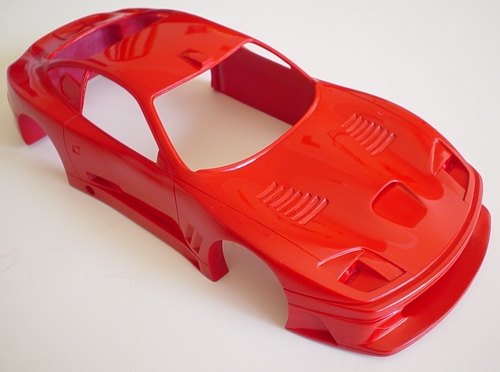
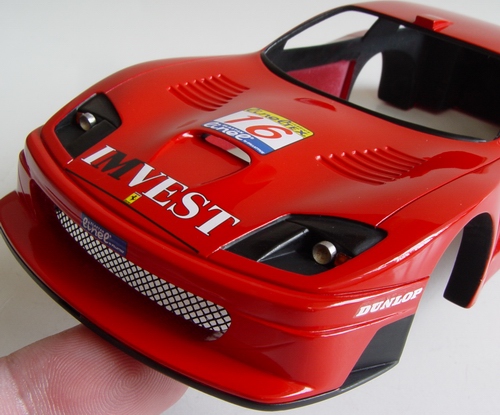
This is the picture of the body how it came in the kit - gray resin, relatively smooth surface, but all vents and ducts were molded closed, and there was no way to drill them out - the body was too thick! I was only able to open up the hood nostril, since casting wasn't very thick in that area. |
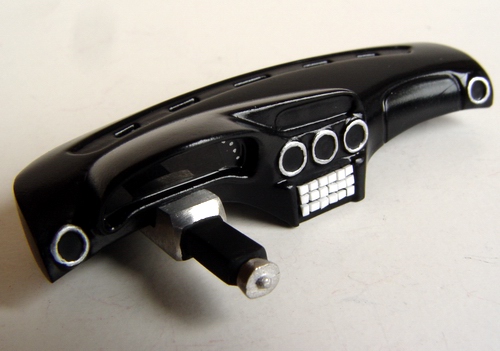 |
Dashboard was cleaned, primed, painted semi-gloss black, and detailed with silver paint and some reflective film for the instrument panel. I also added 18 white lights to the dash made from sheet styrene, and a white metal steering column. |
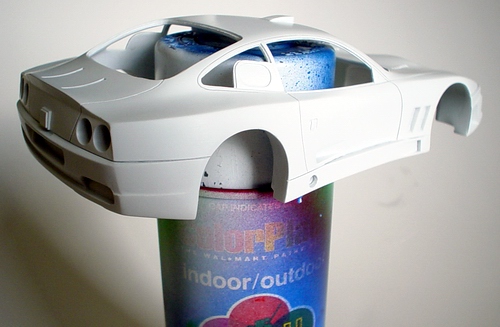 |
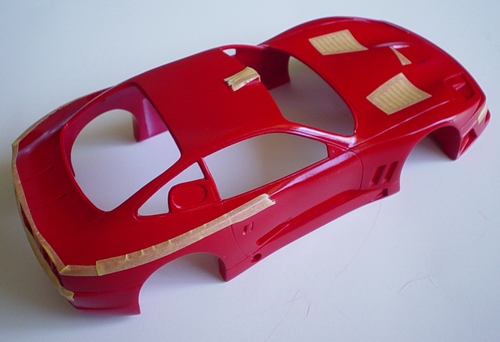
Body shell was cleaned, soaked in detergent to remove mold release agents, sanded smooth, and dried. Then I sprayed a light coat of gray Tamiya primer to check for flaws, and then 2 light coats of Tamiya white primer as a base for Tamiya TS-8 Italian Red. |
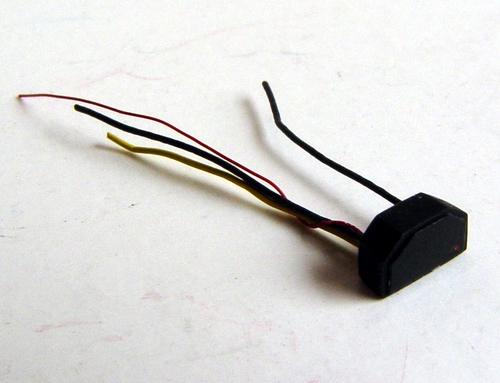 |
Kit lacks in interior detail, so I decided to add some scratchbuilt stuff! This is an additional instrument box, that mounts on the steering column. It was made from sheet styrene, exposed photo film for the dark glass, some Detail Master wires, then painted black. |
 |
This is the picture after 3 mist-coats of TS-8. After paint gassed out, I sprayed 2 wetcoats 30 minutes apart and left the body to dry for about a week. |
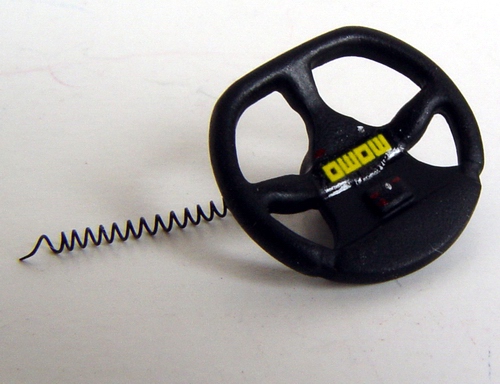 |
Steering wheel was painted flat black, and detailed with MOMO decal (kit). Then I added thin DM wire wrapped around a thin metal rod. |
 |
Here is the body after 2 wetcoats and a week of drying. Since paint was slightly textured, I decided to polish the car with 3M polishing compound. 550's body has a lot of sharp edges, and since paint layer is thin in those areas, I protected them with Tamiya masking tape while polishing. |
 |
Then instrument box and steering wheel were glued to the dash, and dashboard was glued to the interior. The rest of the wires from the harness were connected to the dashboard, as well as the wires from the instrument box. |
 |
After polishing, I removed the tape and lightly polished the edges. I tried to be very careful, though I still managed to cut trough the paint in one place. Thankfully it was not very visible, and I was able to touch it up and polish it out. Finally, body was waxed with Treatment model wax. |
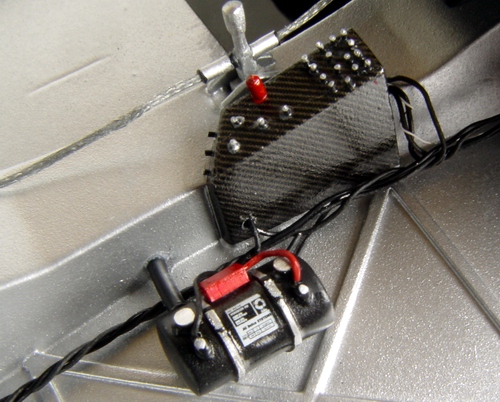 |
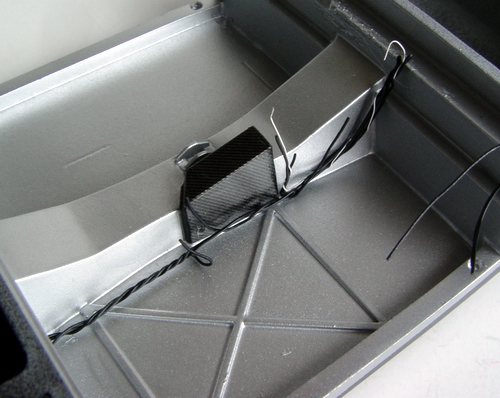
Next step - fire suppression system. Every race car has one, but ever single one is different. Kit provides basic tank, which I painted black, and then added scratchbuilt control box, straps, and some wiring. Then everything was connected to the "system" and topped with "specifications/instructions" decal from a spare box decal sheet. |
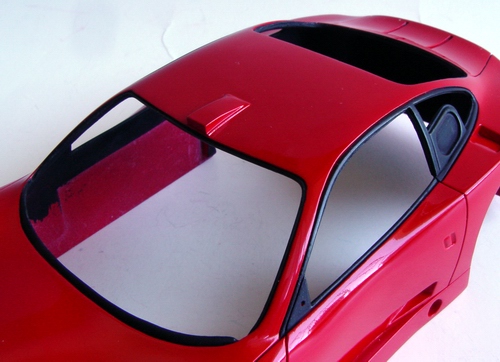 |
Then I masked window trim with Tamiya masking tape, and painted it with Tamiya semi-gloss black acrylic (X-18) using wide brush. Insides of the body shell were painted flat black (XF-1). |
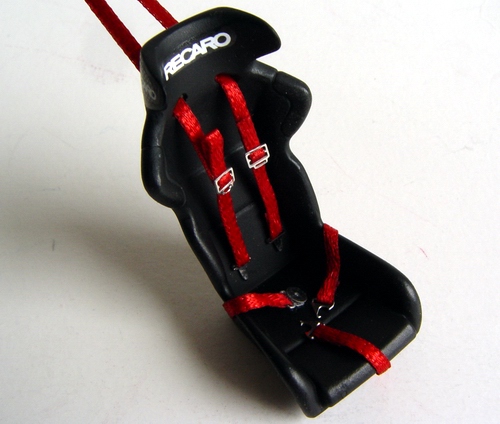 |
White metal Recaro racing seat was cleaned, primed, then sprayed with flat black. Then I used Hobby Lobby 1/32 inch red ribbon and Studio 27 photoetched seatbelt hardware to make 5-point racing harness. Harness was installed, and the seat was detailed with Recaro decals. |
 |
After masking off the headlights and front bumper, I painted them semi-gloss black too. Then I added grille mesh (supplied in the kit), headlight lenses, and started decaling the body. |
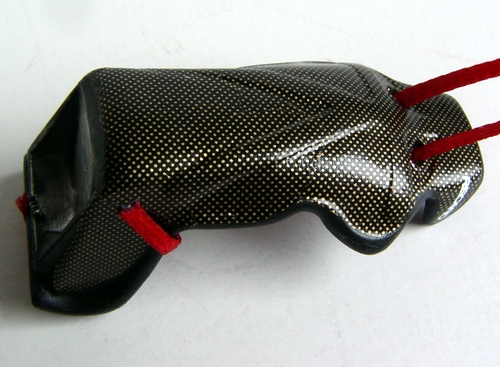 |
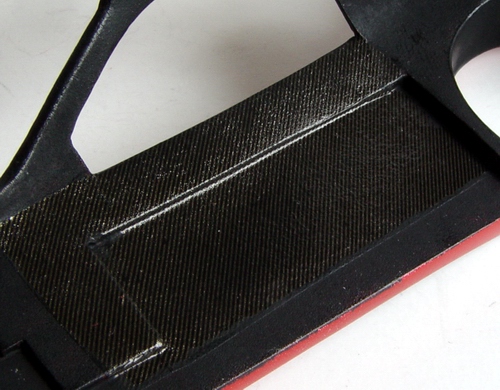
Back of the seat was detailed with some 1/24 SMS Carbon Kevlar decal using custom made template. Decal was applied with Microsol setting solution to help it conform to the curvaceous seat back. |
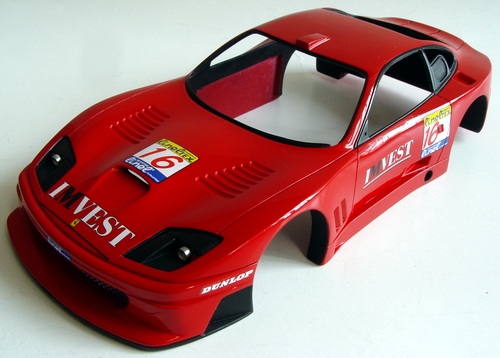 |
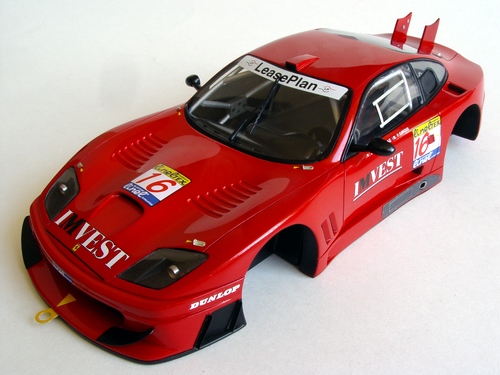
Here is the picture of the body shell with all major decals applied, and all trim painted. I lightly waxed the body one more time before continuing with the build. |
 |
Finally, seat was installed into the interior, and I glued in the roll cage. After the roll cage was installed I attached the seatbelts to the chassis. Finally I test fitted the chassis and the body shell again to make sure nothing interferes. |
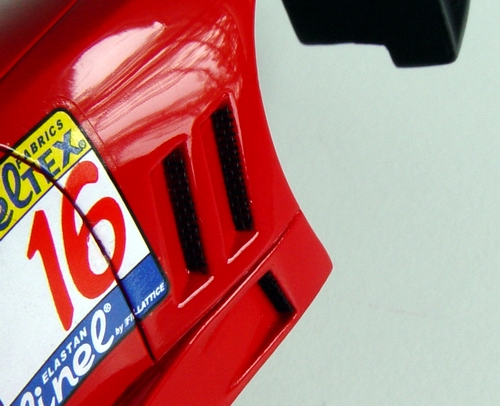 |
Since most of the opening are protected with fine mesh on a real car, I decided to hide awkward looking openings by applying mesh on top. I used fine mesh from Tamiya Ferrari Enzo kit, cut it to size, and glued it on top of all openings with clear paint. Looks much better! |
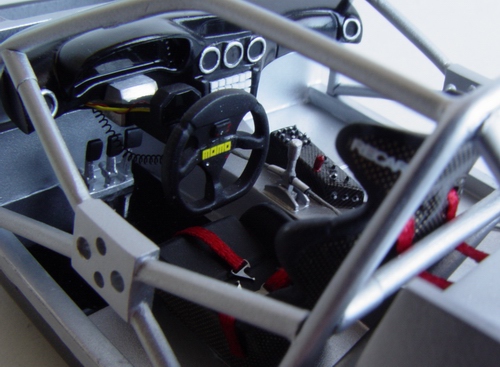 |
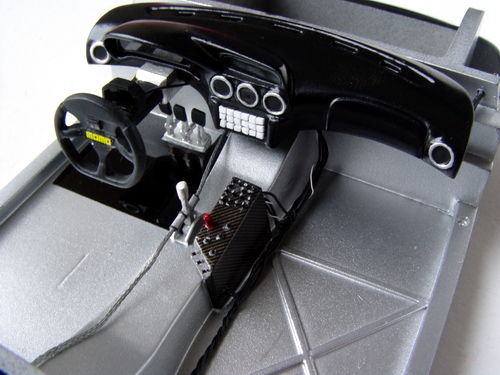
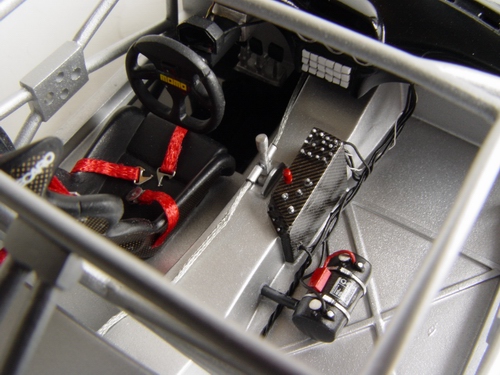
From this angle, the interior looks almost real. All those little additions really make it stand out! Its a pity that all these details will be covered by the body! But before we cover that interior with the body forever, we need to install windows. |
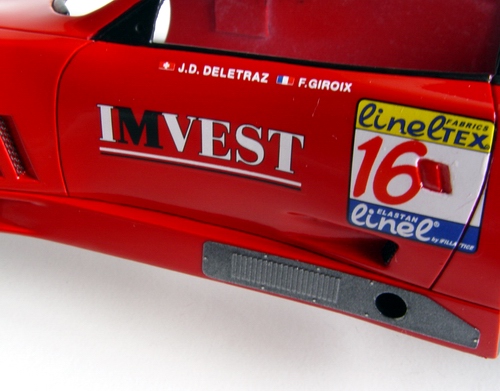 |
After decals dried completely, I slit them with new Exacto #11 blade and applied some Microsol so they would fit inside the panel lines. I also painted exhaust guards with Testors titanium metalizer and applied them to the model. |
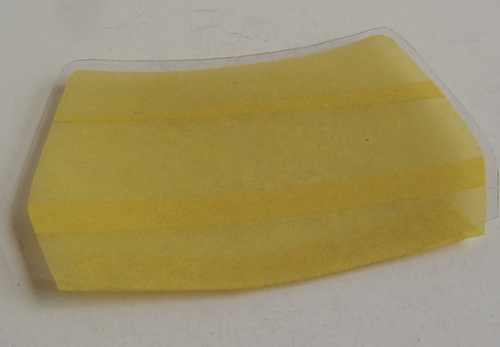 |
This was the worst part of the whole buildup. The windows provided in the kit as a vacuformed approximation of the real windows. But the problem is that the curvature of the vacuformed glass was completely off! I ended up making windows from clear styrene, and warming them with the hairdryer and bending them to shape! The windshield was cut, heated, bent, and masked. |
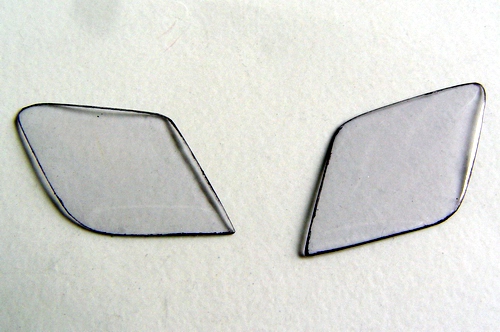 |
Vacuformed headlights covers were awful, and didn't fit well. It took a lot of testing and trimming before they started to look decent. After I was satisfied with the fit, I painted the edges with permanent black marker to simulate glass gaskets. |
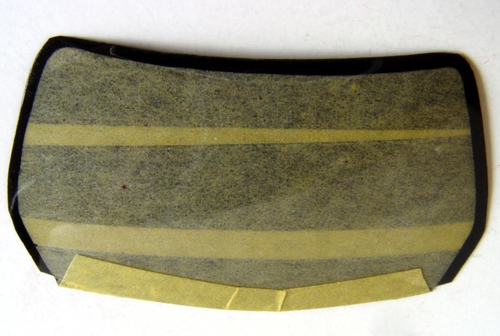 |
Windshield after being painted. I also did the same to the rear window. Side windows were easier to cut and bend, but they were so much more difficult to install! See, the windows are glued from the outside of the model, and black band around windshield/rear window hides the glue joint. Side windows don't have that black band.... |
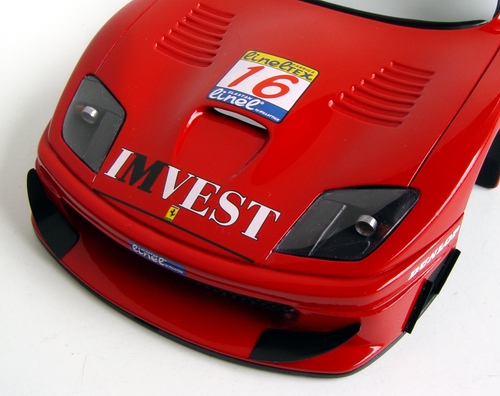 |
Headlight covers were glued to the headlights with Elmer's white glue, and after glue dried, I polished the surface to blend the covers with the rest. Photoetched air splitters and diffusers were also glued to the front bumper. |
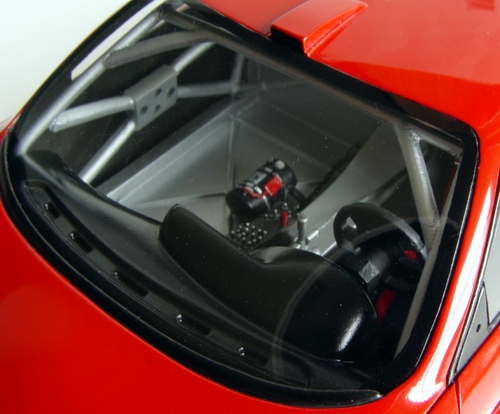 |
...so I had to be very precise in cutting them exactly for the opening, and then used Krystal Klear glue to install them. It was so frustrating! I ended up making 6 driver windows, and 8 passenger windows before I was completely satisfied! Here is the picture of he windshield installed. It looks like a real windshield because it is installed from the outside and sits flush with the body. |
 |
Door panels on the real car are carbon fiber, so I decided to apply 1/24 ScaleMotorSport (SMS) C/F decals inside the body to simulate them. |
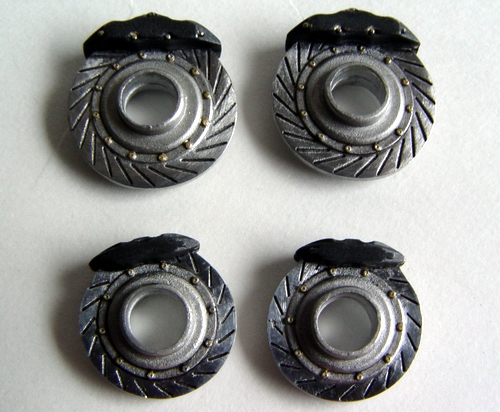 |
One-piece white metal brakes were cleaned, rotors sanded smooth, then scratched with sanding stick and detailed with black wash. Calipers were painted with Testors Titanium metalizer, buffed, and detailer with Tamiya Titanium Silver (X-32). Rivets were painted with Tamiya Titanium Gold (X31). |
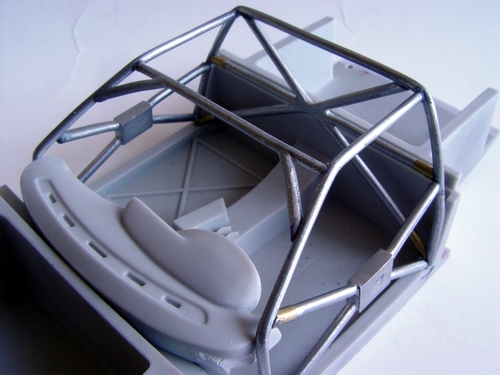 |
Roll cage was a nightmare! The fit was terrible, many parts were longer than needed, some were shorter (you can see extensions made from brass tube), and it took a lot of patience to assemble it. I did a lot of test-fitting at this point to make sure the cage will not interfere with the dash, or any other internal components or the roof. |
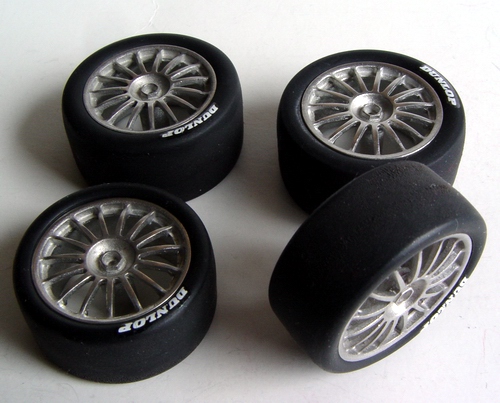 |
White metal wheels were cleaned (quite a bit of flash on the rim spokes) and polished to a high shine with metal polish. Tires were sanded with coarse sandpaper and scuffed a little bit, then decaled. Later I painted the center nuts with Tamiya Clear Blue (X-23) and Titanium Gold (X31), and installed valve stems. |
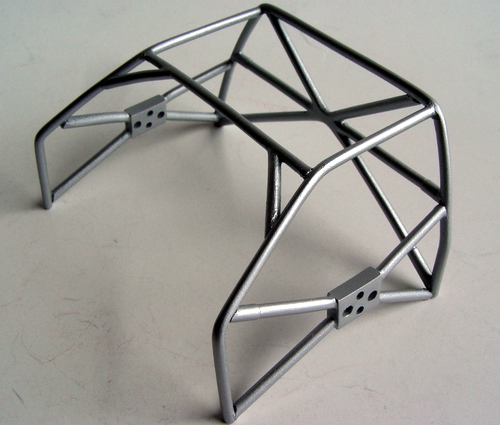 |
Once everything was made to fit, I carefully cleaned the cage (it is made from white metal) and sanded everything smooth, (except the joints - they look like welded), and drilled several holes in the reinforcements, just like on the real car. |
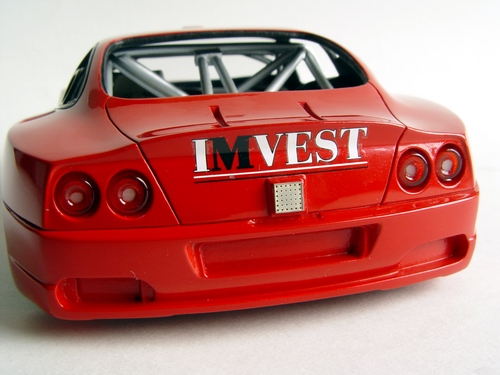 |
Then I started detailing the rear end of the car - taillights were painted with Tamiya Clear Red (X-27) and backed with reflective aluminum foil, then installed into their housings. Not sure what it is (I think its a reflector) was also installed at this time. |
 |
At this moment it was critical to test fit the chassis and the body together with the roll cage and wheels. Although the roll cage fit was perfect, I realized that wheels sit a little bit too much forward. I marked new wheels location points and continued with assembly. |
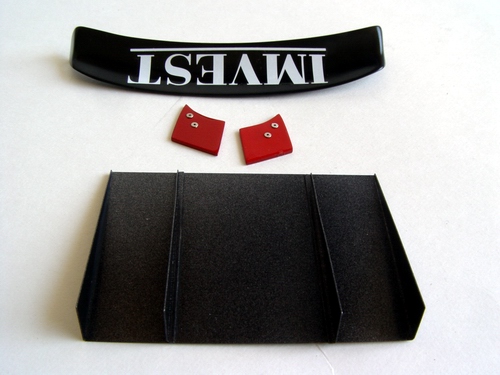 |
Rear wing, its supports and rear splitter. Wing was painted semi-gloss black, its supports Italian red and detailed with some photoetched rivets. Rear splitter was assembled, then sprayed semi-gloss black, and dusted with aluminum metalizer. |
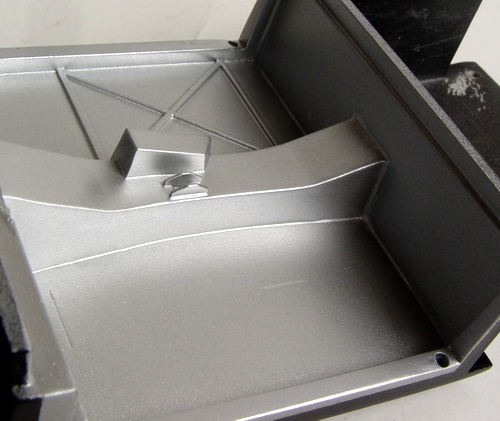 |
Chassis was cleaned, painted semi-gloss black and masked off to paint the interior. After interior was painted with Testors Aluminum metalizer, I removed the masks and started detailing it. |
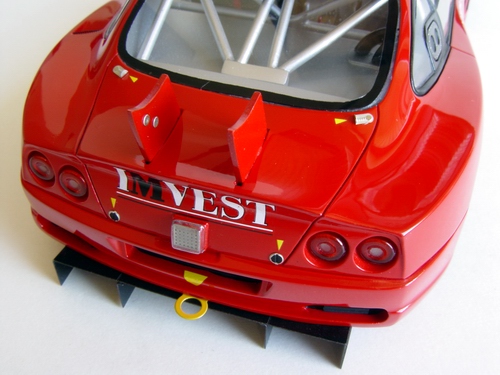 |
Finally rear end was accessorized: rear window, boot lid pins and decals, wing supports, "reflector" cover, more boot lid pins, rear splitter, tow hook, etc. |
 |
Central console was treated to some 1/24 Renaissance carbon fiber decal, and I drilled several holes and run several wires (Detail Master) for the electronics inside the car. |
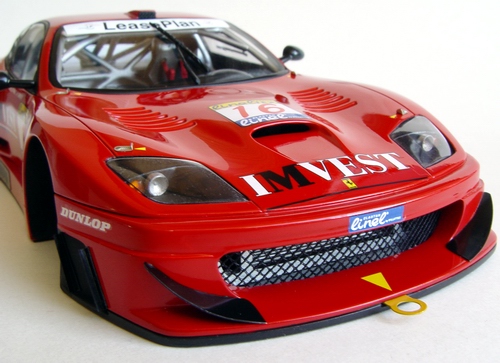 |
Front end received some additional details too: side mirrors with PE faces, windshield wiper, hood pins with decals, tow hook, PE frame for the sliding driver's vent window, etc |
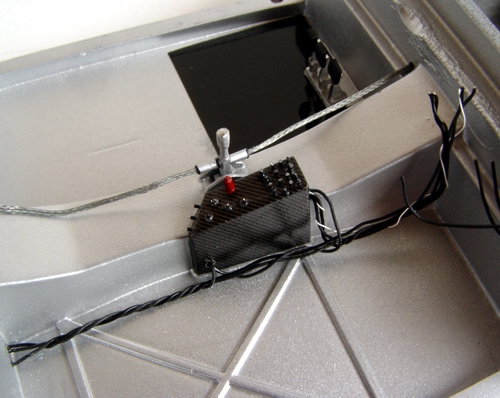 |
Then I installed the pedals with the floor mat, shifter with some Detail Master braided lines, and detailed the central console with two dozens of switches made from thin wire and glued with CA glue. Fire suppression system switch was painted red and C/F decal clearcoated with Tamiya gloss clear. |
 |
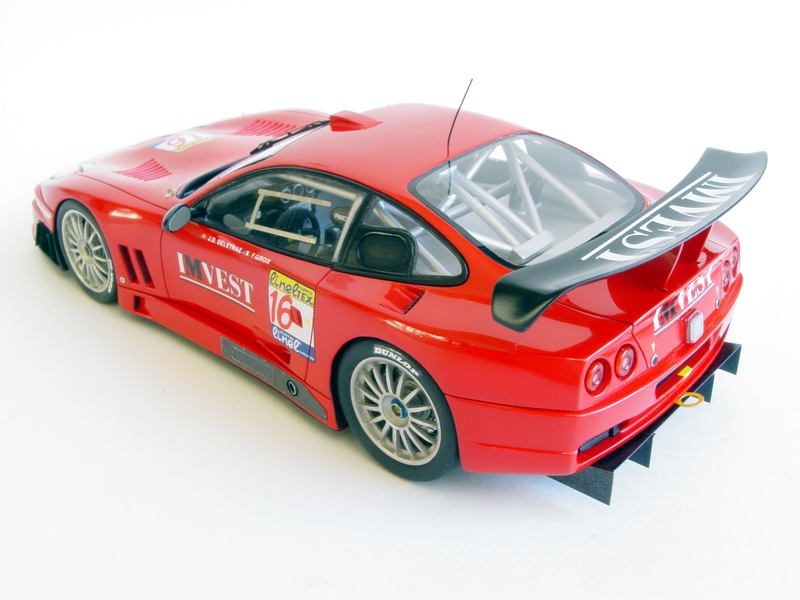
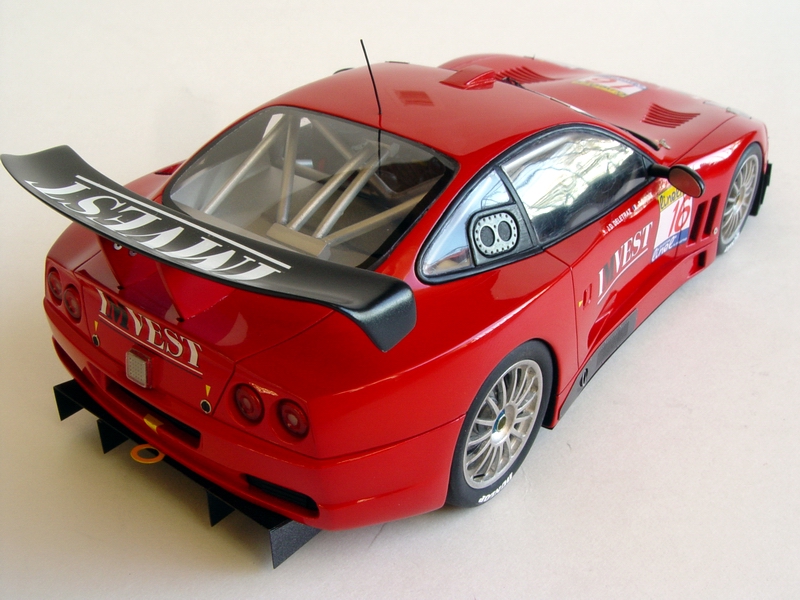
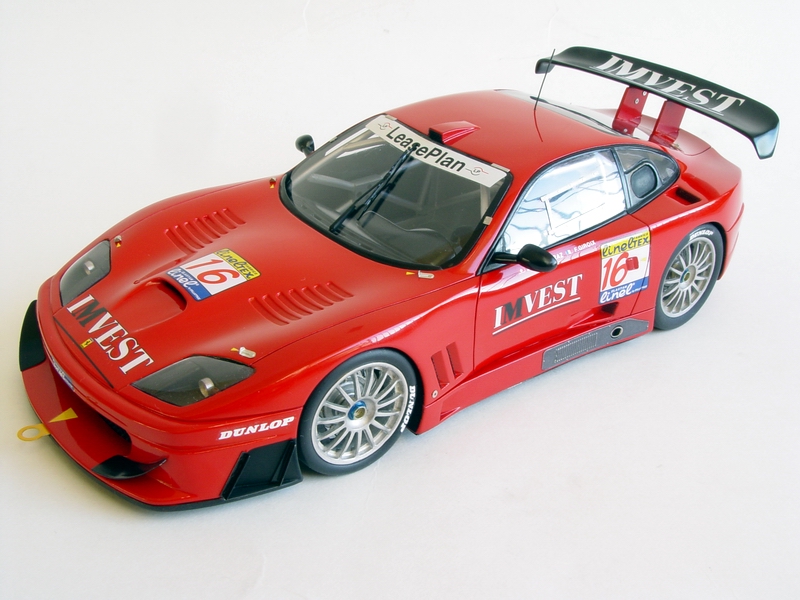
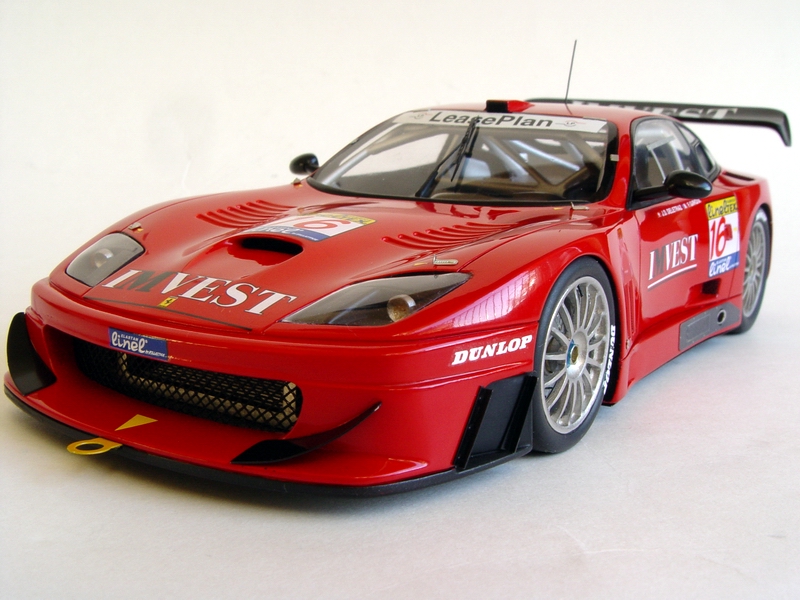
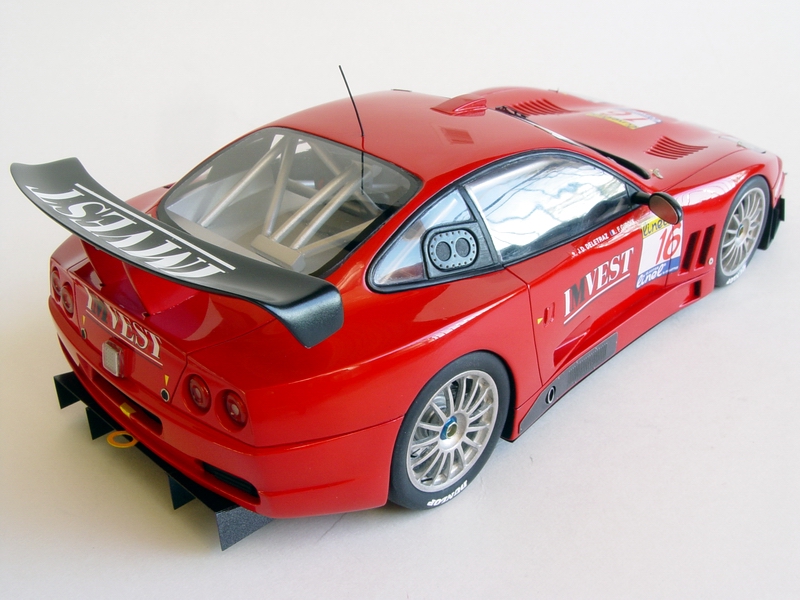
This is a completed model, without wheels, brakes, and a rear wing. At this moment, I gave the model light waxing to remove decal residue and fingerprints, then attached the wing and wheels. Although the model had some issues during assembly, it looks great and true to the original car. |
Copyright 2003 Alex Kustov. No copying or reproduction in any shape or form without written permission of the author.