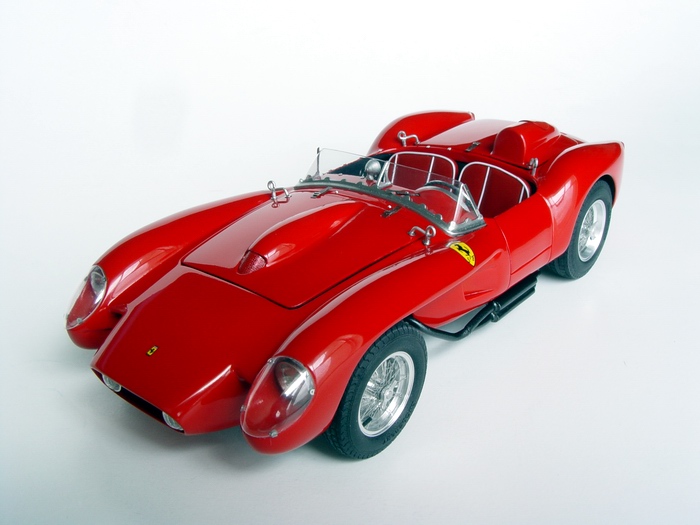
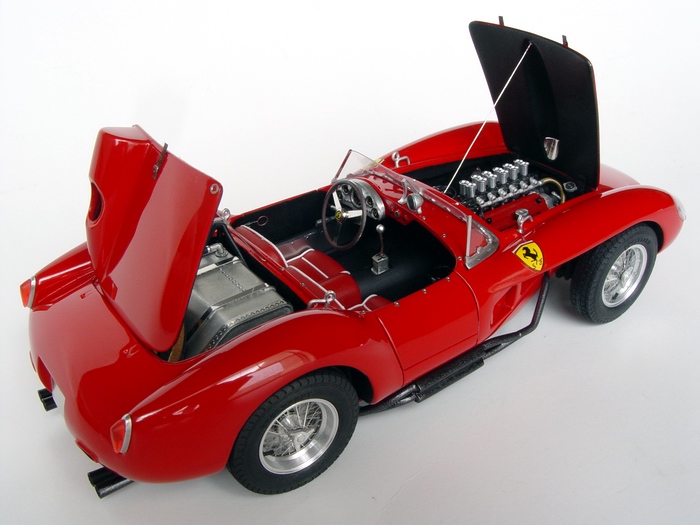
F e r r a r i 250 58TR "Pontoon" Fender
 |
 |
 |
Kit: 1/24 Model Factory Hiro Ferrari 250 Testarossa 1958 Pros: This kit is a gem - excellent body and chassis molded in gray resin. The rest of the parts are either white metal, turned aluminum, or photoetch. The kit also includes 5 rubber tires, vinyl material for straps, several metal rods, shock springs, clear parts for lights and windscreen, and many other little details (see review). Part fit is excellent for a resin kit, almost like a decent plastic kit, which is very unusual for a resin. Attention to detail is unbelievable, and execution is breathtaking. Majority of the moldings are clean, with minimal cleanup required. Instructions are clear, with correct color guide. Decals are provided for several versions of the car (2 race and a road car) in my kit, but Hiro makes 2 more versions with different decals, which are thin, totally opaque, and a joy to apply. Decals are compatible with setting solution (MicroSol). Excellent wire wheels. Great packaging. Top notch multimedia kit. Cons: Not many, and the main is its price. But if you decide to drop $200 for Ferrari model - get this kit. It will not disappoint. Other cons: cleanup of metal parts is somewhat tricky, since some mold lines run over important detail, installation of metal body panels requires a lot of puttying, sanding and test-fitting, front grille mesh is slightly larger and required very delicate trimming, no hood/trunk hinges. Verdict: This is very good kit, but it is definitely not for a beginner. The number of parts could intimidate even experienced modeler, and you must be familiar how to work with white metal parts and tiny photoetched parts (the rivets were a pain to attach!). Built straight from the box, this kit will yield most detailed Ferrari 250 TR replica in 1/24 scale I've ever seen, and with addition of some detailing, this kit will give you a stunning replica that you could study for hours. |
 |
 |
 |
|
 |
 |
 |
|
 |
 |
 |
Buildup
This buildup was also published in Scale Auto October 2004 Volume 26, Number 3, Ferrari 250 58TR: Detailing a Multimedia LeMans Winner
 |
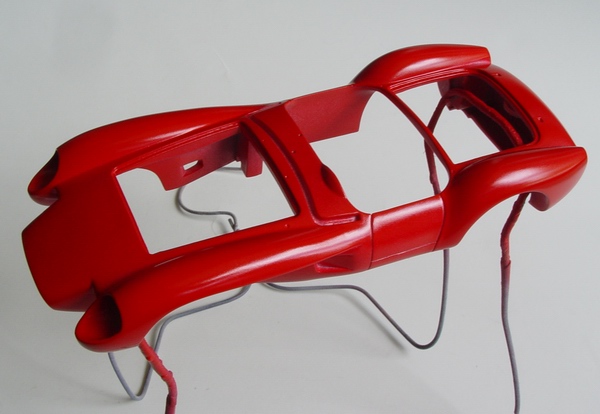
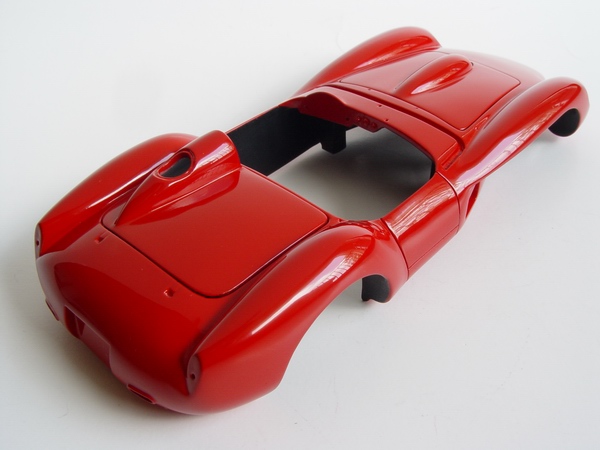
Resin body and white metal body parts were cleaned and lightly sanded. I sprayed metal parts with Tamiya Metal primer (its transparent!) and attached them to the body with 5-minute epoxy. After epoxy dried, I applied Squadron white putty to conceal the joints. |
 |
The resin chassis is molded together with the chassis frame. I installed two elements of the cage to the chassis before painting. Chassis was cleaned from mold lines and soaked in bleach to remove mold release agents. |
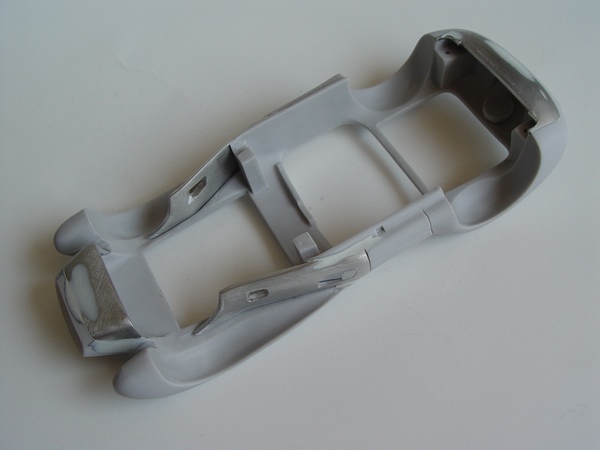 |
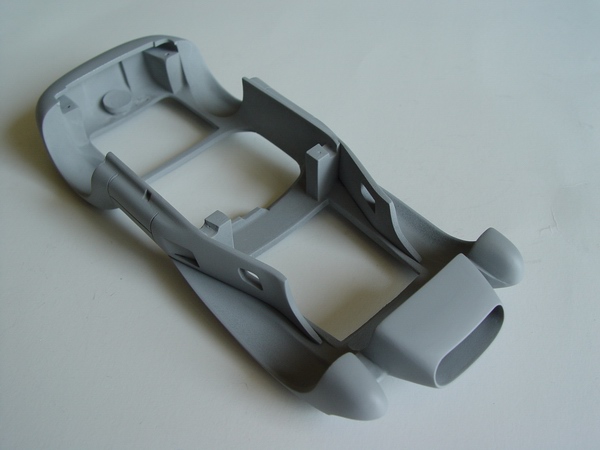
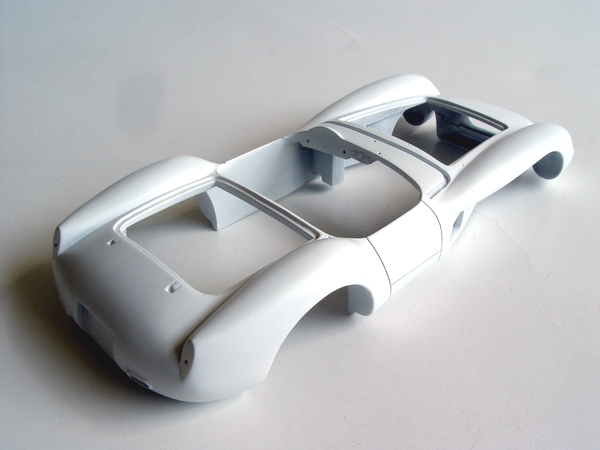
Total of four metal body panels were attached to the body. After putty has dried, I sanded it smooth and re-puttied small imperfections. Then putty was sanded again (and again...) to correct shape. Here is the picture of the body with all bodywork completed and ready for final coat of gray primer. |
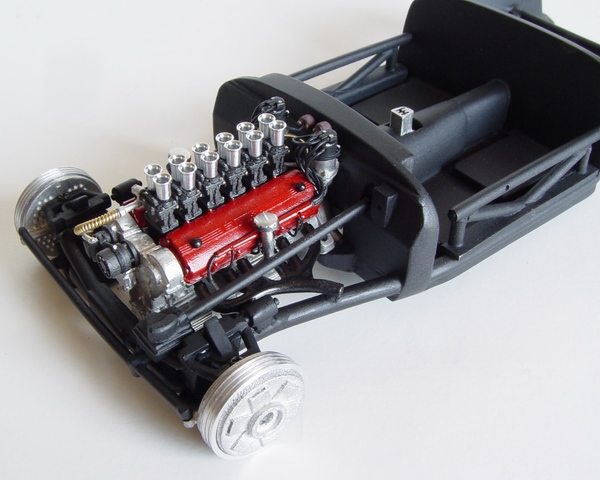 |
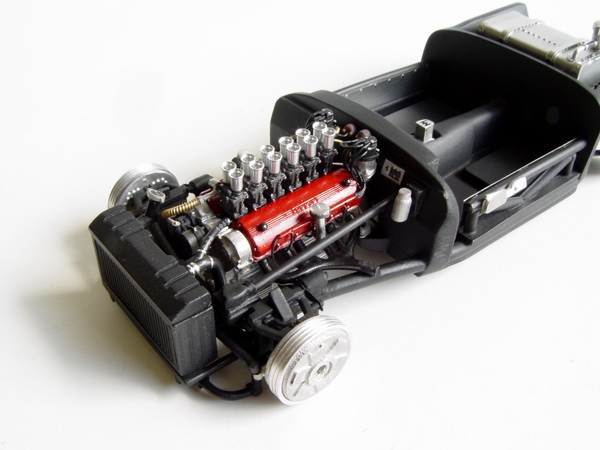
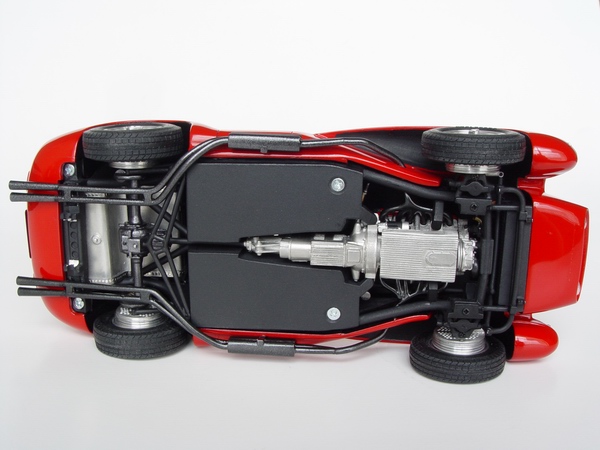
Now we are moving to assembly stage. Engine was installed into the chassis, along with the 16-piece highly accurate front suspension with real springs, drum brakes, and steering rack and linkages. |
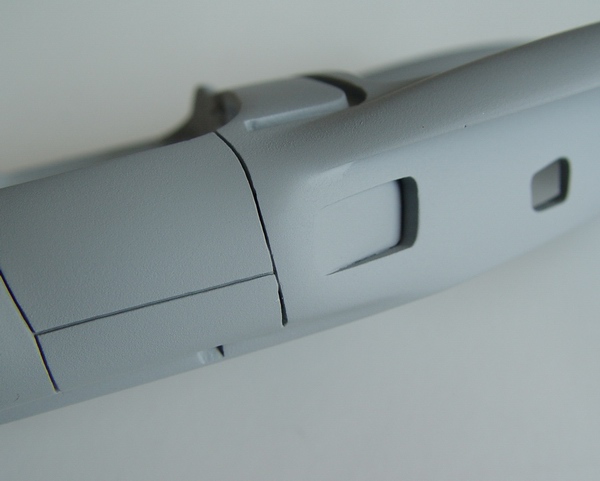 |
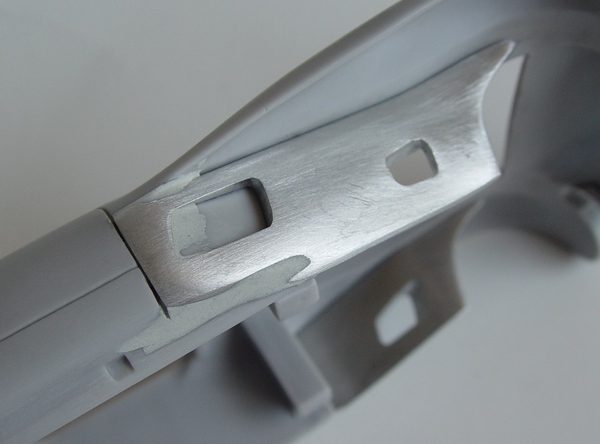
After final gray primer coat I found some more imperfections, like on this panel line. All imperfections were once again corrected... |
 |
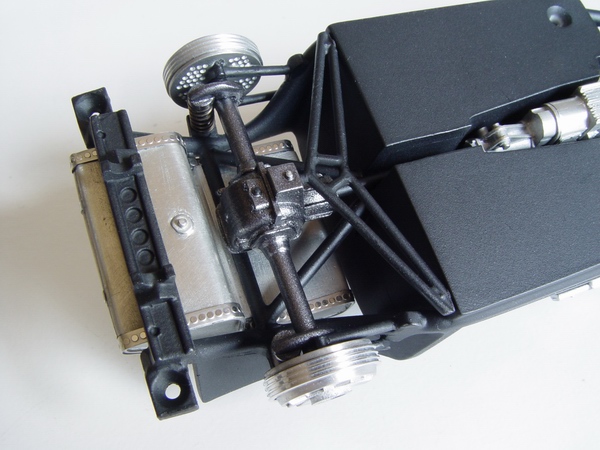
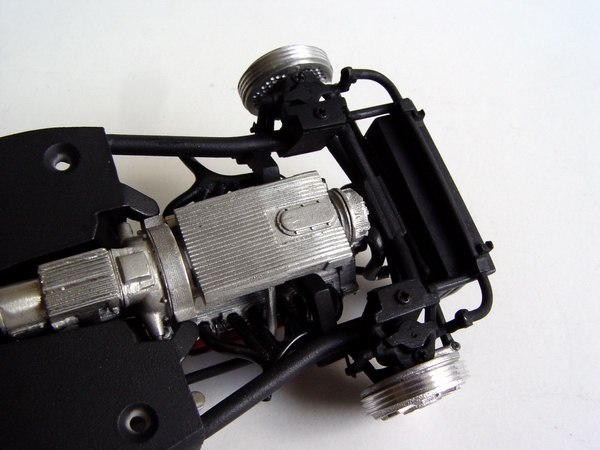
This is the view of the assembled front suspension and installed motor from the underside. Note the springs. Each part of the suspension is reinforced with tiny screws, and it makes the suspension assembly very strong. |
 |
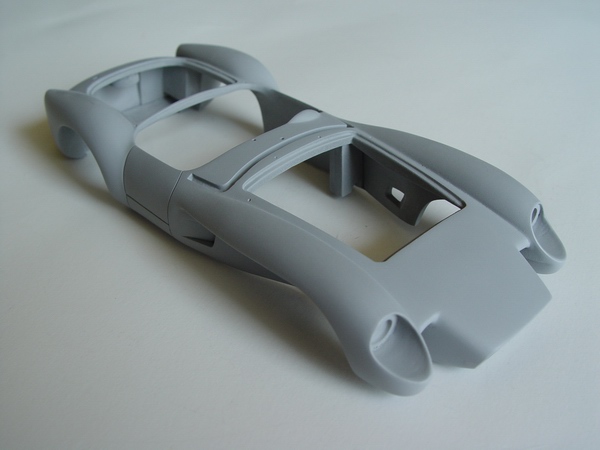
... and body shell was sprayed with gray primer coat one more time. This coat revealed no major mistakes. |
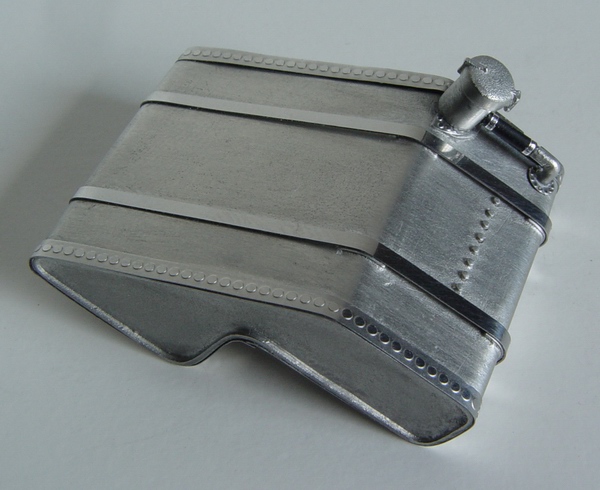 |
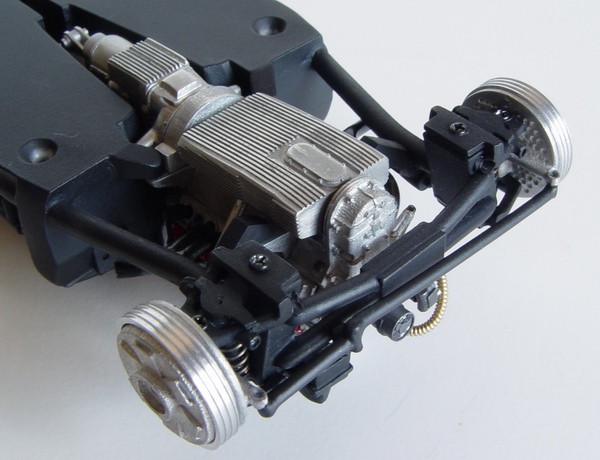
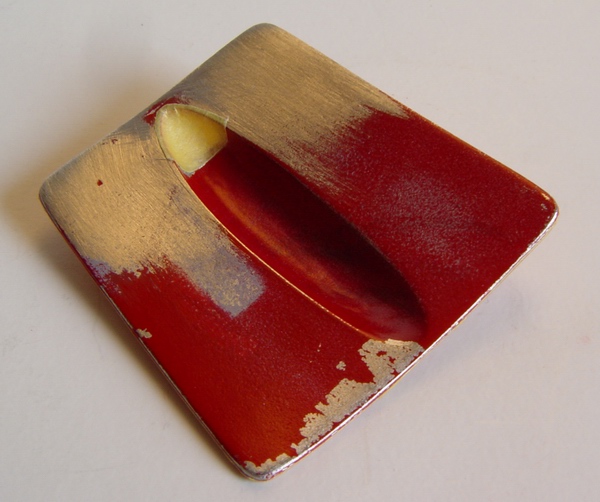
This is the view of the assembled gas tank. Its a 4-piece white metal assembly, with photoetched rivets on both sides, straps, and gas cap/hose. I didn't paint it, instead it was sanded with fine sandpaper and polished to represent polished aluminum unit on the real car. Hose is detailed with BMF clamps. |
 |
Final coat of gray primer went on a little rough, so I gently wet sanded and smoothed it with some toothpaste under running water. This made primer coat very smooth. |
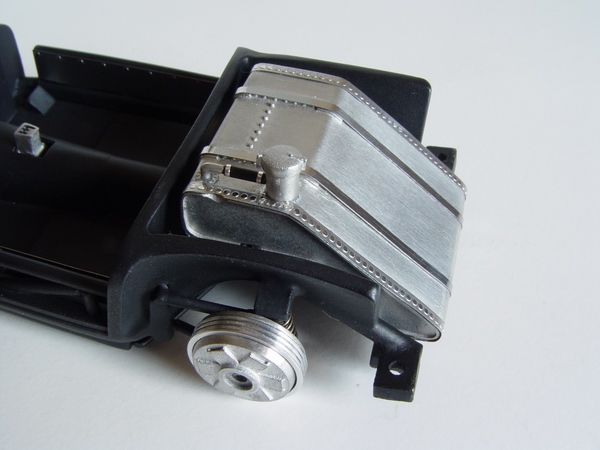 |
Then gas tank was installed on the chassis and I proceeded to assembling rear suspension. |
 |
Italian red is very sensitive to the base coat, and gray primer would make it considerably darker. To avoid this, I sprayed a solid coat of Tamiya White Fine primer as an undercoat for the paint. Once again, the primer was lightly wet sanded. |
 |
Rear axle with differential was assembled with rear shocks (with real springs) and hooked up to the driveshaft. Then I installed brakes with tie rods. Rear suspension was finished with Testors metalizers and Tamiya paints. |
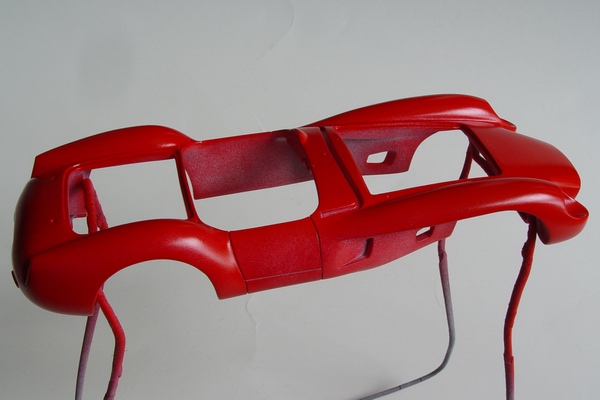 |
First mist coat went on very smooth, but revealed some roughness on front fenders that had to be corrected before application of the second mist coat. |
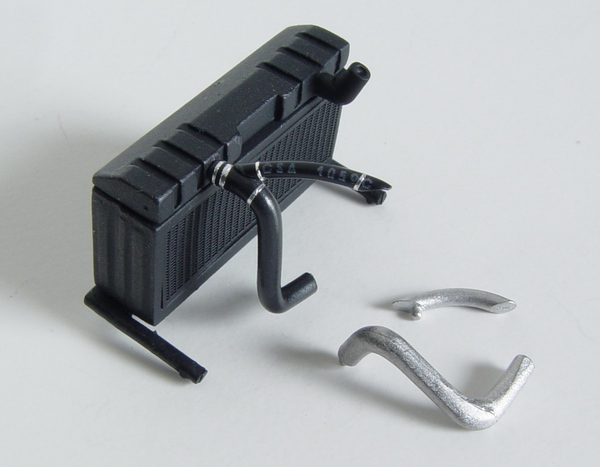 |
Photoetched mesh was glued to the both sides of the radiator skeleton, then topped with the upper and lower covers. Entire assembly was painted satin black. I substituted kit supplied white metal hoses with real hoses and detailed them with BMF clamps. |
 |
Second and third mist coats covered the body very nicely, and completely smoothed out the surface. After about 3-4 hours the body was ready for the final wet color coats. |
 |
Radiator assembly was glued to the chassis, and I started accessorize the engine bay - washer bottle, radiator cap, photoetched chassis plate, handbrake, and few other minor details. |
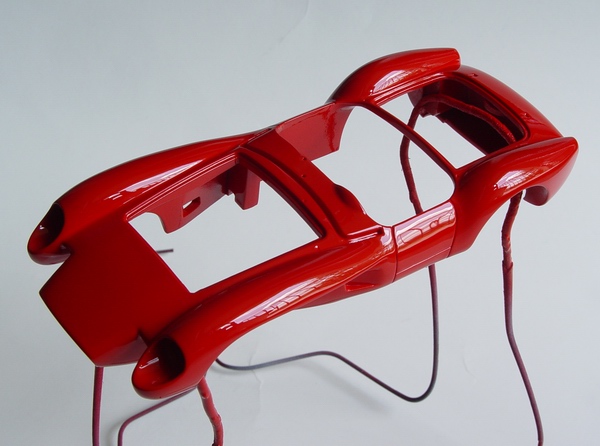 |
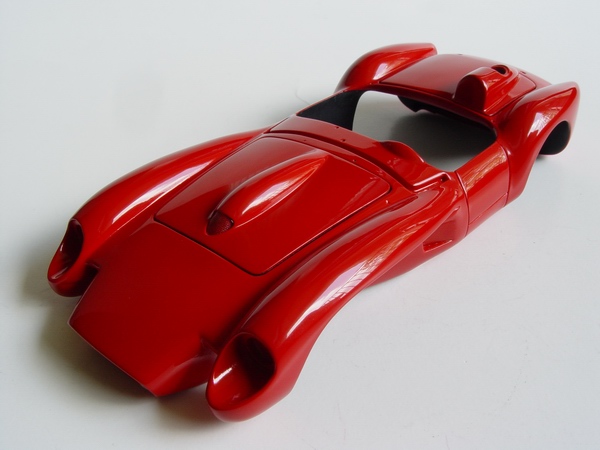
On this picture you can see the body 3 hours after second wet coat was applied. The paint is smooth, shiny, with almost no texture - testament to good preparation. Such paintjob will require minimal polishing and waxing. |
 |
I also added stabilizer bar and connected it to the front suspension. The entire assembly was black-washed here and there, and some nuts and bolts were highlighted with metalizers. |
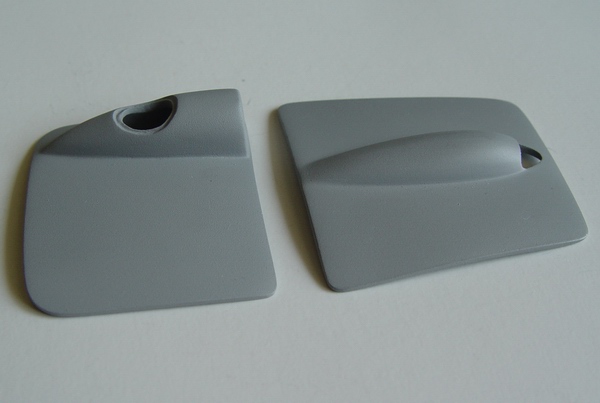 |
Metal hood and trunk parts were cleaned, block-sanded smooth and slightly reshaped to fit the body flush. I also had to thin them a little bit at the edges. Then parts were sprayed with etching metal primer and Tamiya gray primer. After gray primer dried, they were coated with some white primer. |
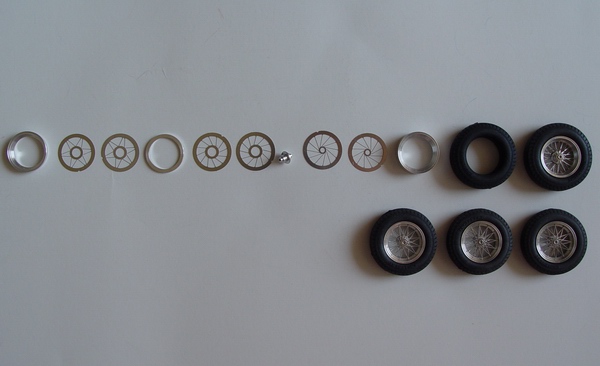 |
Then I assembled wire wheels. Each wheel was assembled from 10 parts and topped off with knock off and very accurate tire, made from very soft rubber. Tire thread is also correct, as well as "ENGLEBERT" markings on the walls. |
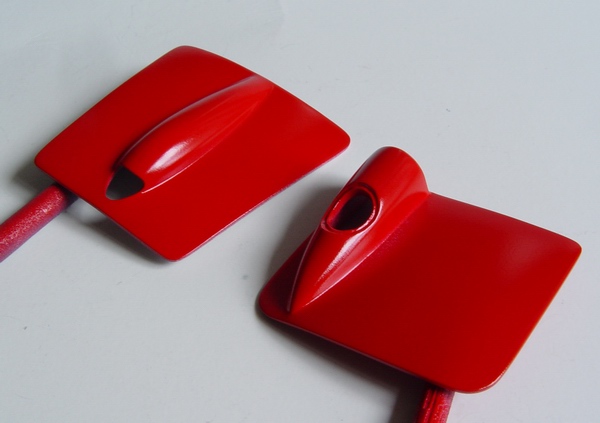 |
Three mist coats and two wet coats of color were applied to both hood and trunk. This picture shows the parts after first wet coat. You can still see some paint texture. |
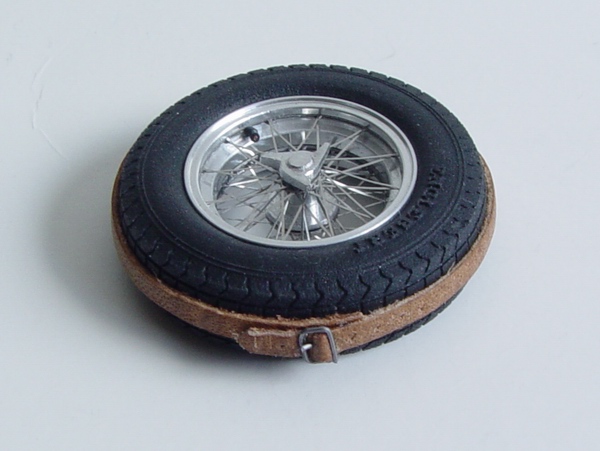 |
To add some more realism to the wheels, I added two-piece valve stems with aluminum core. On this picture you can see spare wheel with scratchbuilt leather strap and scratchbuilt metal buckle. The wheel will be visible when you open the trunk lid, so I wanted to detail it as much as possible. |
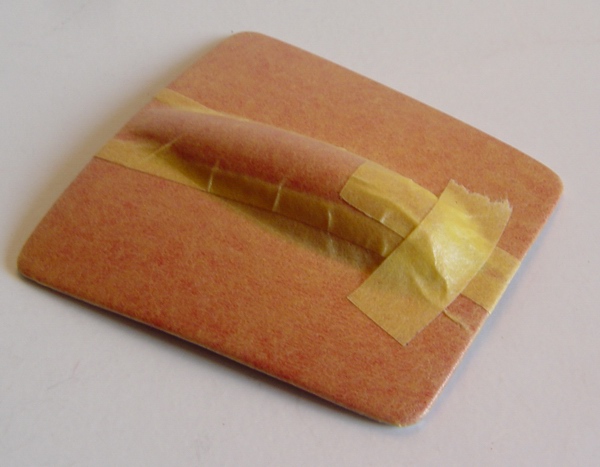 |
When paint was completely dry and polished and waxed on both hood and trunk lid, I masked them off with Tamiya masking tape, and cut the tape off at the edges to be able to spray the underside flat black. |
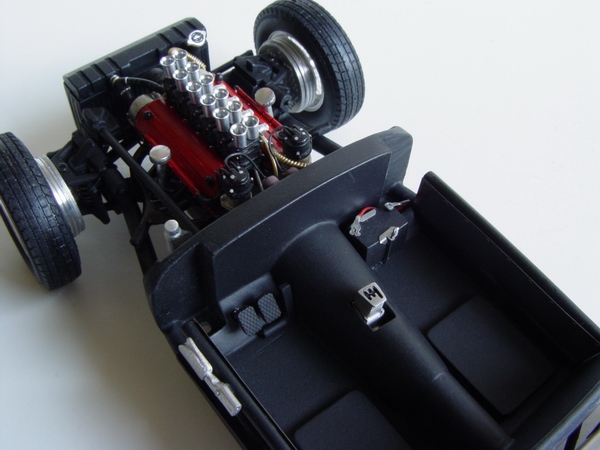 |
Wheels were attached to the chassis, and I also added the battery with Detail Master photoetched wired terminals and clamps, and pedals with photoetched faces to the interior. |
 |
After test-fitting the hinges, I slightly sanded of the surface, sprayed a coat of metal primer on exposed metal areas, and also masked off the vent opening on the hood, and gas cap opening on the trunk lid. Both parts were sprayed with flat black. |
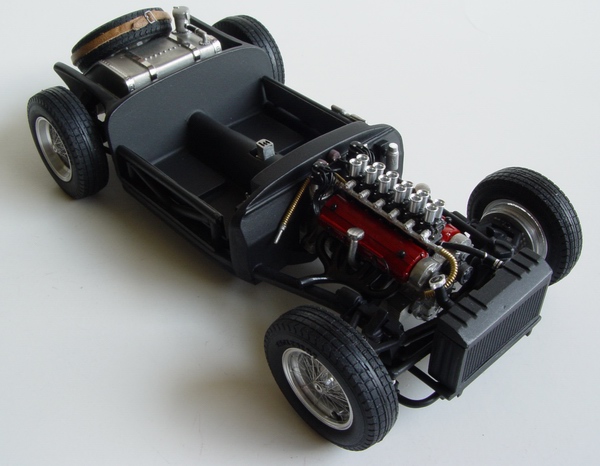 |
Spare wheel was attached to the gas tank, and all minor details added - rolling chassis is completed. |
 |
After about 3-4 days when paint on the body was completely dry (lacquers dry relatively fast), it was polished with 3M rubbing compound, and then with Novus polish. |
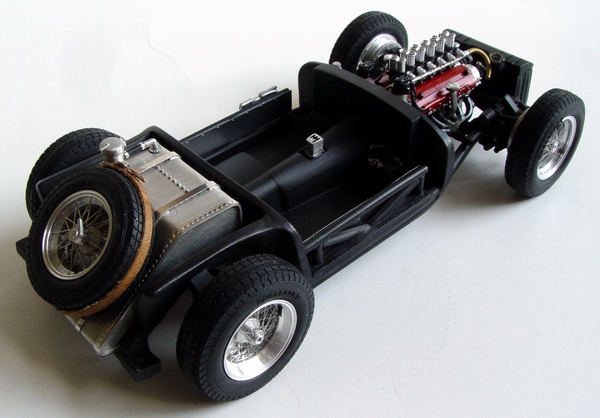 |
Here is another picture of the completed chassis - its missing only seats, shifter, and knock-offs for the wheels. |
 |
Finally I washed the body to remove all polish residue, attached the hood and trunk lid, darkened the panel lines and waxed the entire assembly with Last Detail "Treatment" model wax. |
 |
Seats in most TR's were trimmed with vinyl piping, and it was also molded on the kit seats. I decided that it would be more realistic to reproduce this trim with real vinyl piping, so molded-in trim was removed with sharp knife and sanded smooth. |
 |
The entire body shell was painted flat black from the inside. |
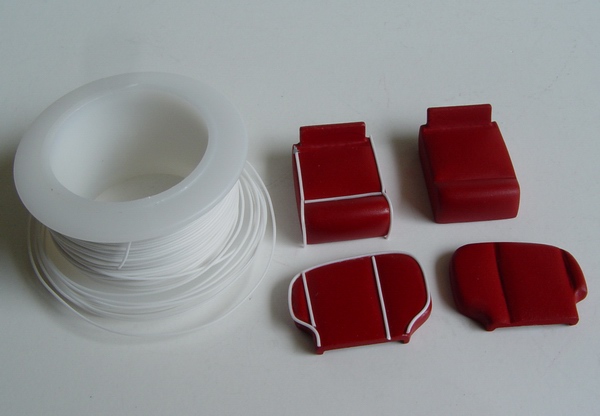 |
Then I used fine white wire of suitable diameter to add piping to the seats painted with custom mixture of Tamiya acrylics that simulate red leather upholstery. Piping was glued with CA glue. |
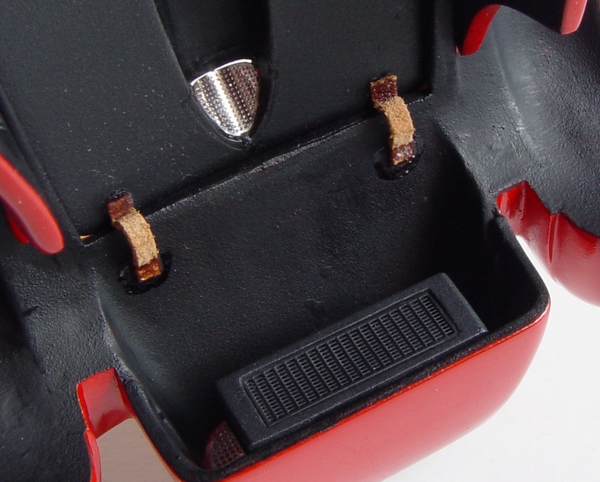 |
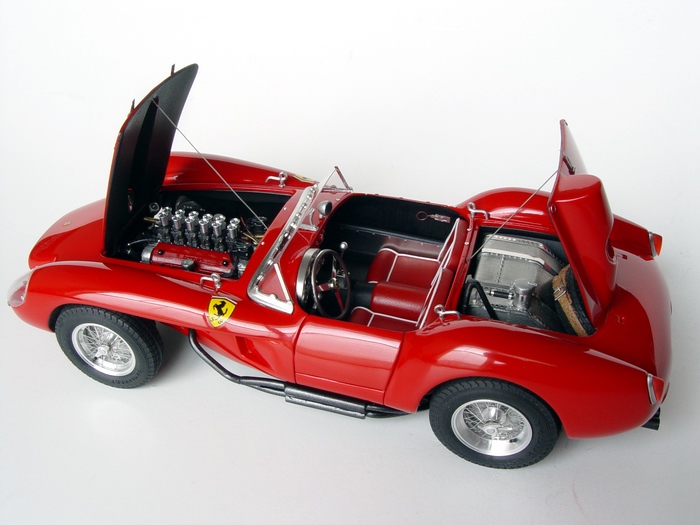
Originally I planned to install metal hinges to both trunk lid and the hood, but some internal components prevented this. I opted for the leather hinges. On this picture you can see leather hood hinges and small engine oil radiator installed in front of the main cooling unit. |
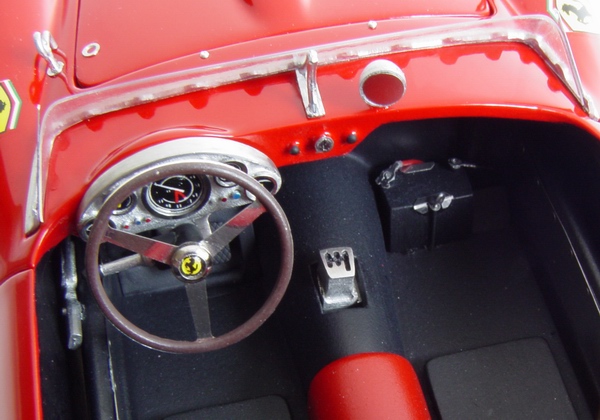 |
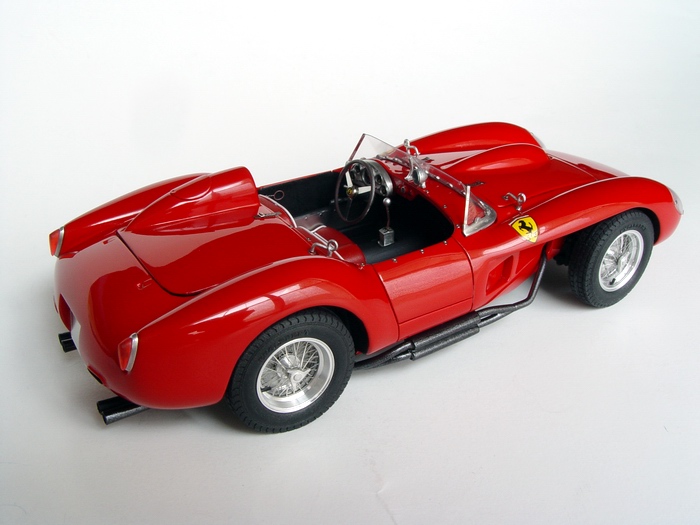
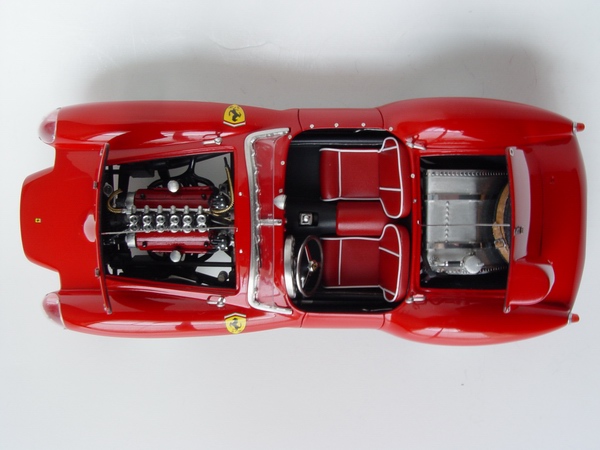
Chassis was screwed to the body, and then I installed previously assembled dashboard with instruments, steering column, and steering wheel. I also detailed steering wheel with BMF to simulate aluminum rim of the wheel. Finally, I installed windscreen support and a rearview mirror, ignition lock, and windscreen frame with vacuum-formed class. |
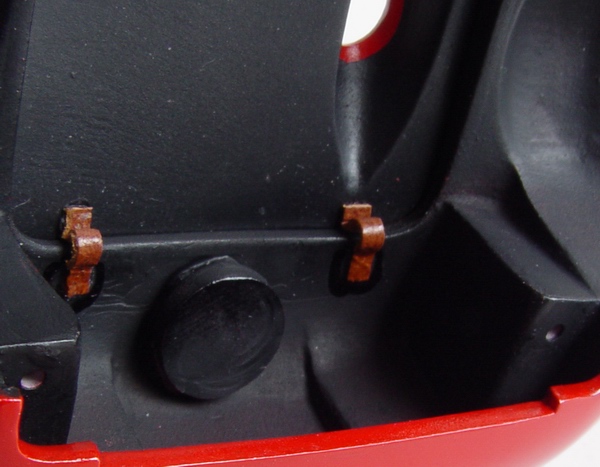 |
Radiator in the engine bay, and spare wheel in the trunk allowed installation of leather hinges only. They are flexible and more compact than metal ones. |
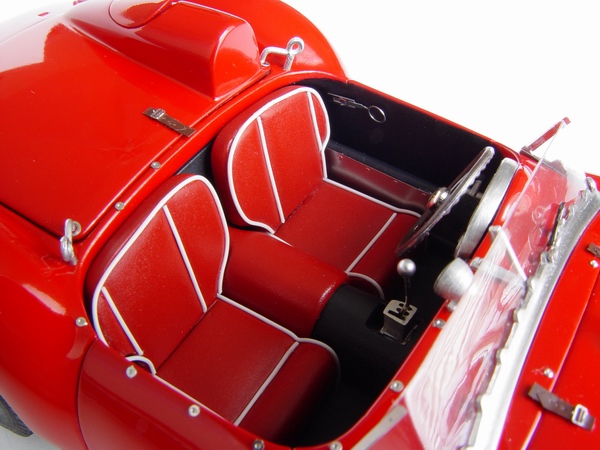 |
Seats were also installed at this time. I also glued in the shifter, door handles, tonneau cover rivets, and trunk lid catches and straps. |
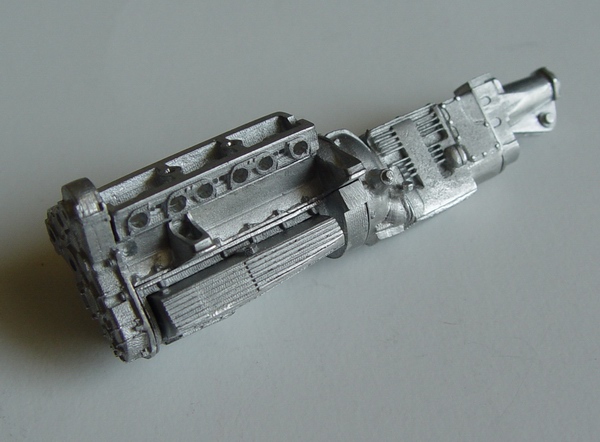 |
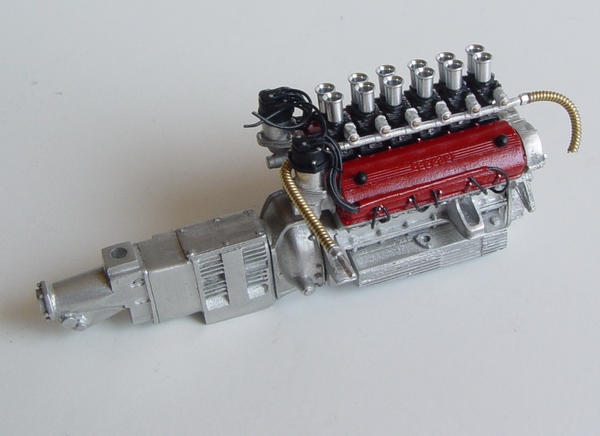
Engine block was constructed from 8 cast metal parts. All parts were cleaned, sanded, test-fitted, and assembled using CA glue. Then I polished the metal with fine metal polishing compound. |
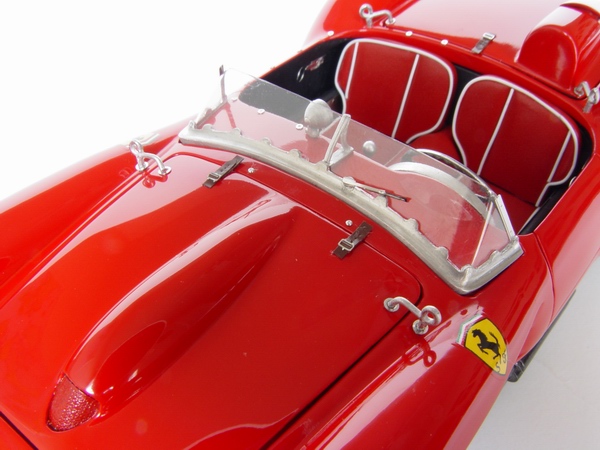 |
To finish with the exterior detailing, I added hood straps, catches, Scuderia shield decals, and windscreen wiper with real rubber stripe. |
 |
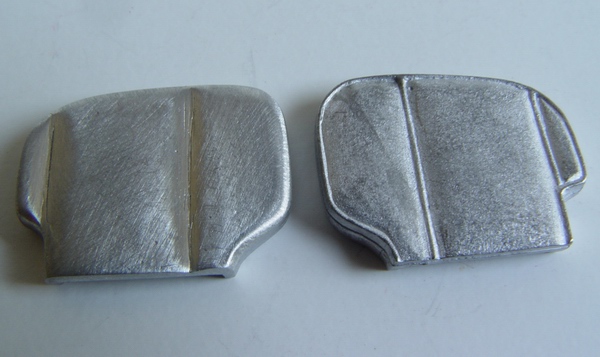
Cam covers were also cleaned, test fitted, and primed. Then I applied photoetched "Ferrari" scripts to the covers, and painted entire assembly red. |
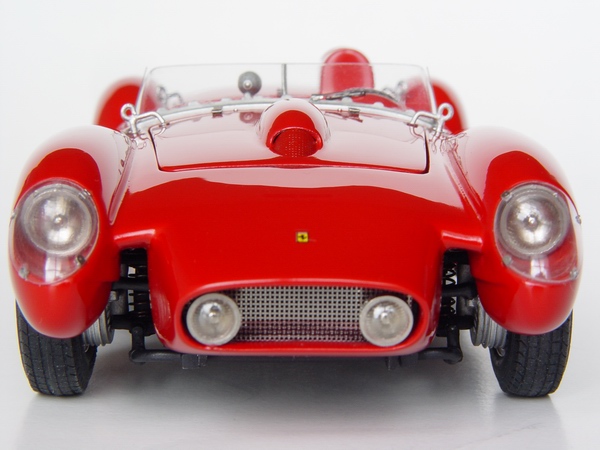 |
Then I installed grille mesh, and assembled fog lamps and headlights, and also glued them in place. Headlight covers were cut from the sheet, and fitted with tiny photoetched fixtures. They were glued to the clear plastic with CA glue, and entire assembly was clearcoated with acrylic clear coat and polished. |
 |
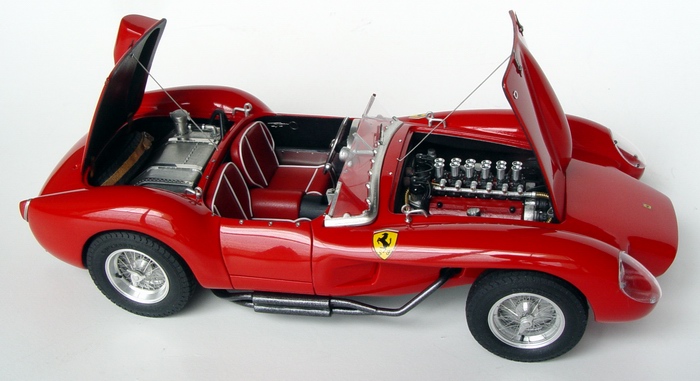
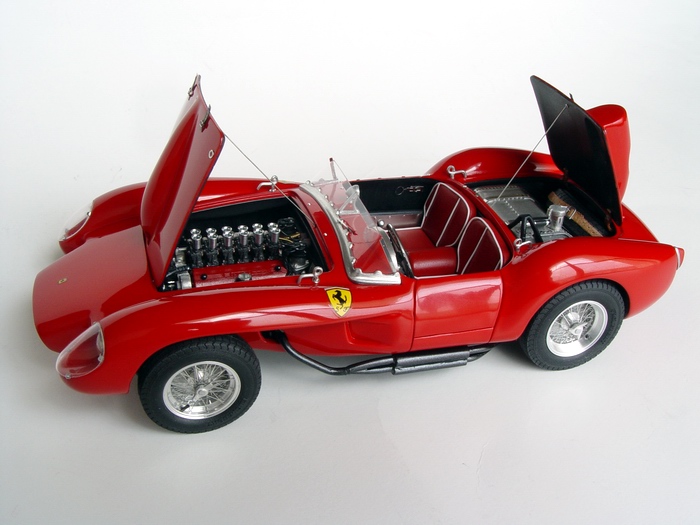
Cam covers were glued to the engine block, then I added carburetor supports, carburetors with 12 separate bell mouths, carburetor fuel fixtures with fuel lines from guitar strings, wired distributors with wires running trough wire tubes to spark plugs. Then I added ignition, and water pump. Everything was painted with different shades of Testors metalizers. |
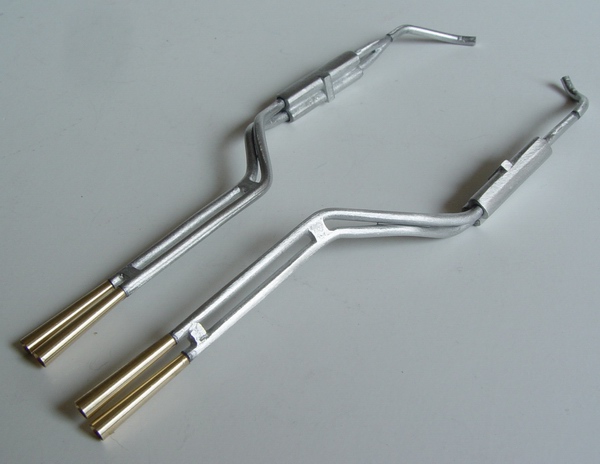 |
Exhausts were also assembled and test-fitted to the body to check their shape - it was not correct. I bent the exhausts to fit all locator holes. I lightly sanded the surface, and sprayed some etching primer on them. |
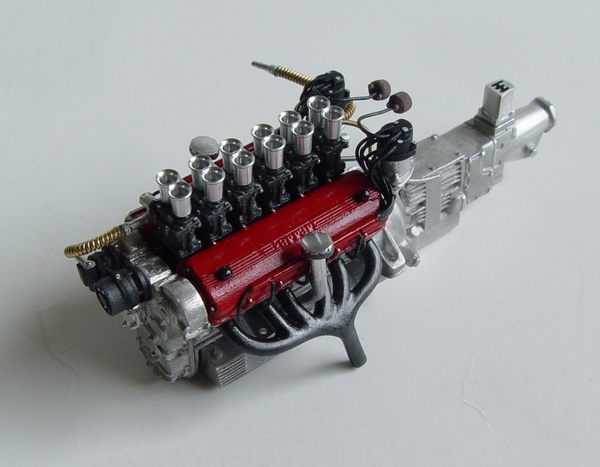 |
Continuing on the engine: Generator, oil breather pipes, exhaust manifolds. Then I scratchbuilt two distributor coils and wired them to the distributors. Finally, gearshift gate was installed on top of the transmission. |
 |
Exhausts were sprayed with Tamiya Black Metallic semi-gloss from the spray can, and attached to the body. I weathered the tips with Testors titanium metalizer, and painted insides with flat black. |
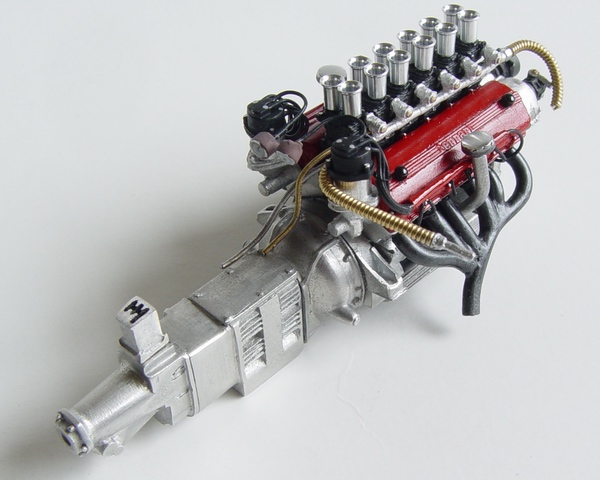 |
I also added one more fuel line to the carburetor fixtures, and a small oil line, both made from thin guitar strings to the back of the engine. The completed engine looks fantastic, feels very heavy, and is the best 1/24 scale representation of V12 3-liter Ferrari engine I've seen to date. |
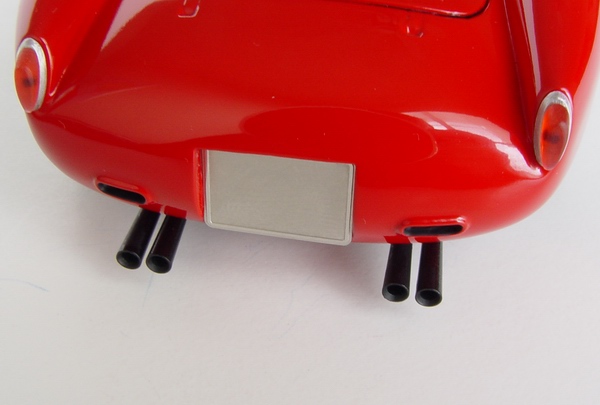 |
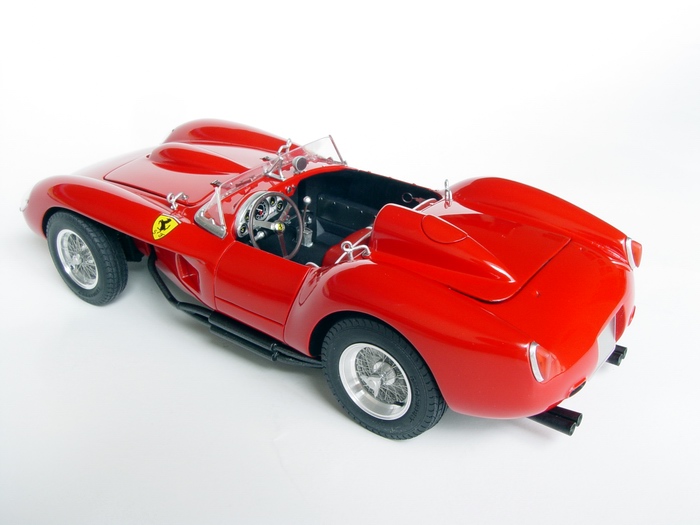
Taillights were assembled and glued to the body. I also installed license plate frame (no plate decals provided in the kit for the road car) and painted extractor slots flat black. |
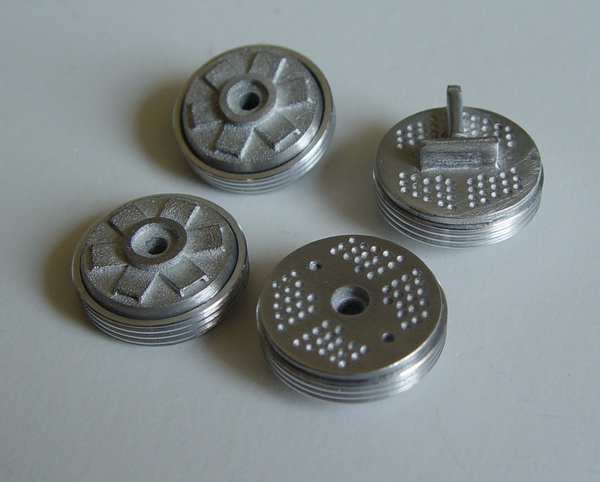 |
Each brake drum was assembled from two white metal and one turned aluminum part to a highly accurate representation of the 250-series Ferrari drum brake unit. Front drums have steering linkages molded in place. |
 |
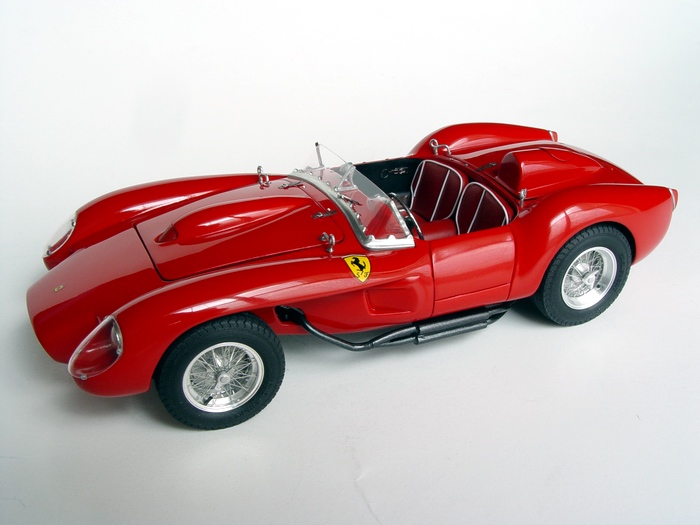
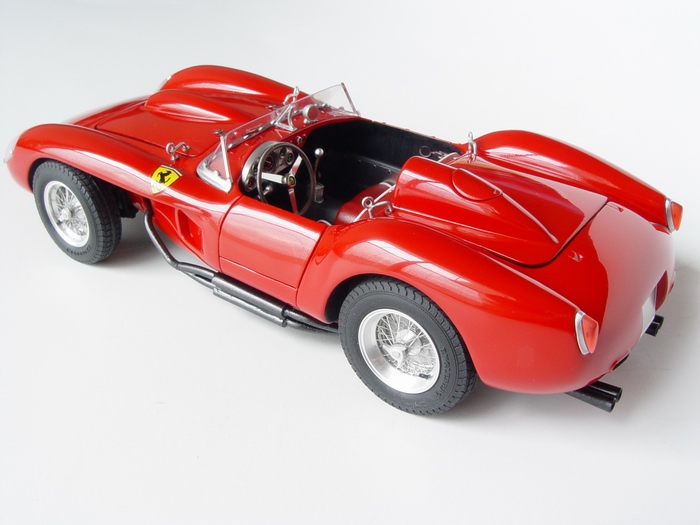
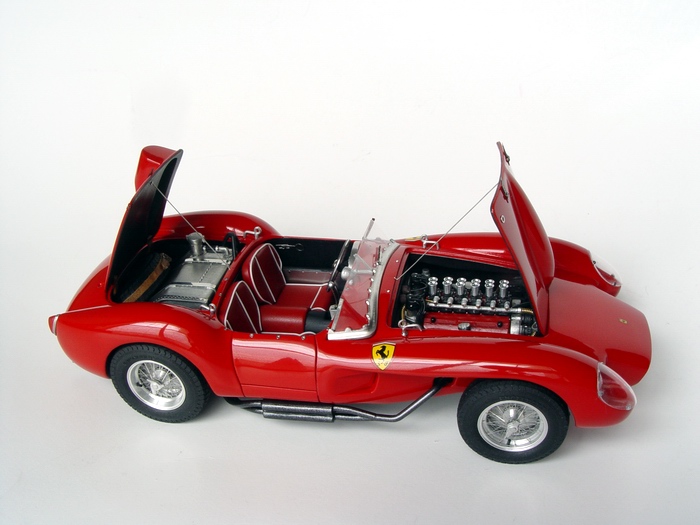
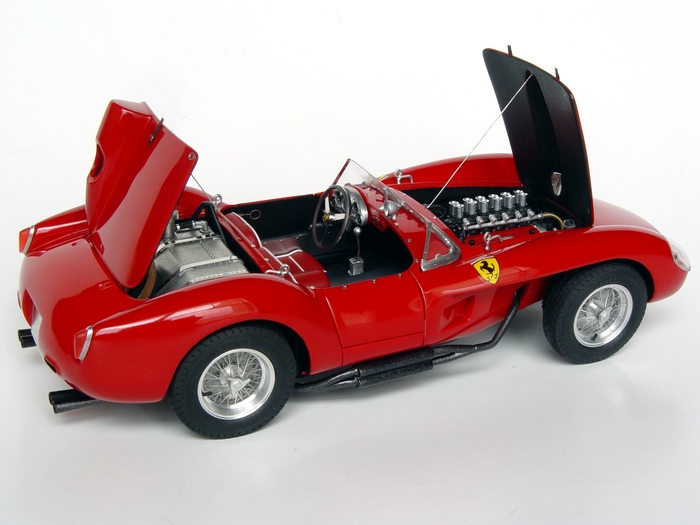
Model was carefully waxed for the last time to remove all fingerprints. I also made two support rods for the hood and trunk lid from the guitar string. The model was dusted, photographed, and sealed into display case. Amazing kit-great looking model! |
Copyright 2003 Alex Kustov. No copying or reproduction in any shape or form without written permission of the author.