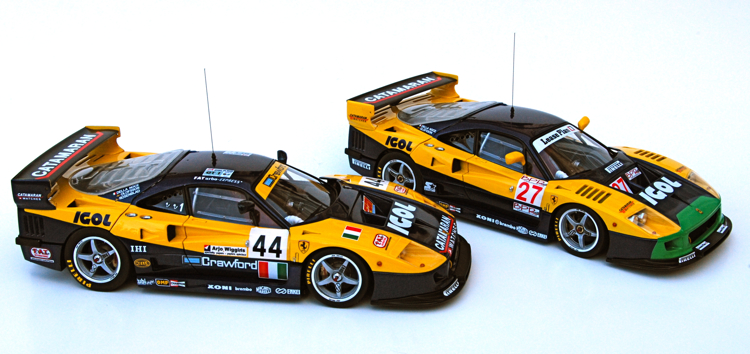
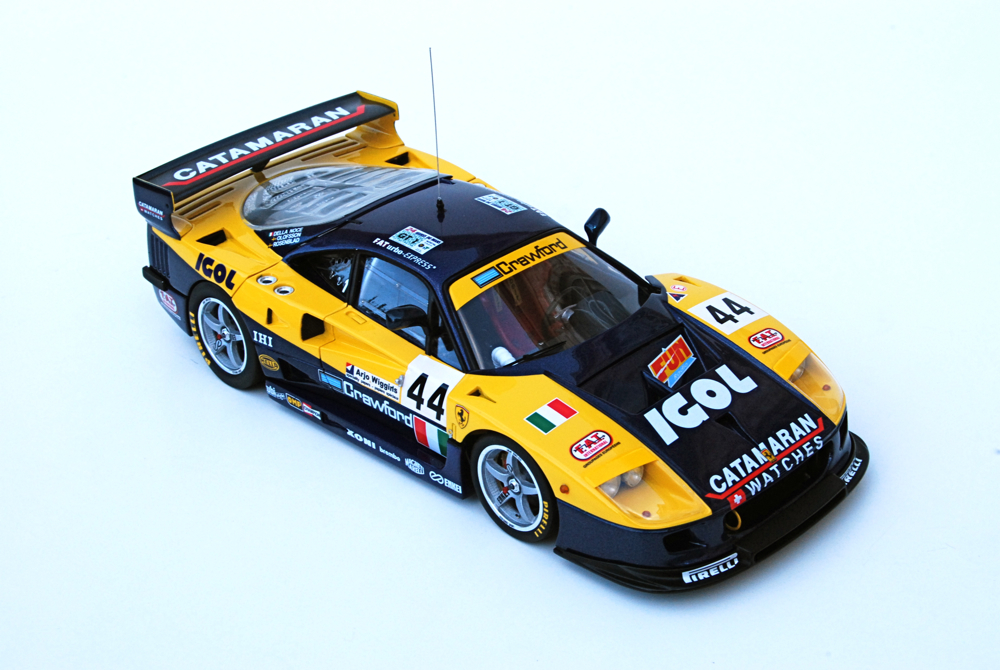
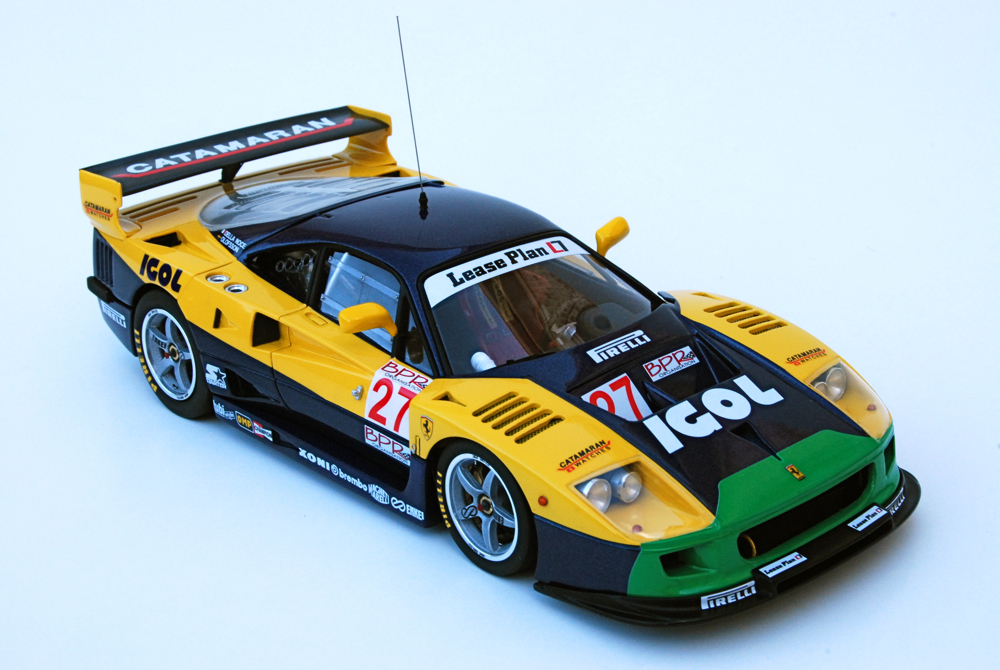
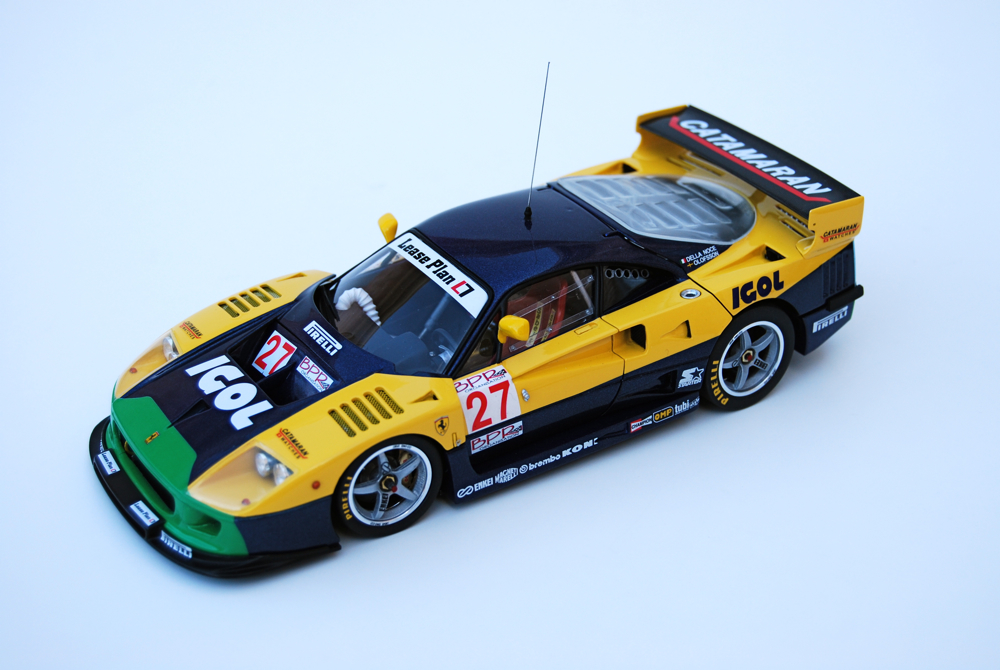
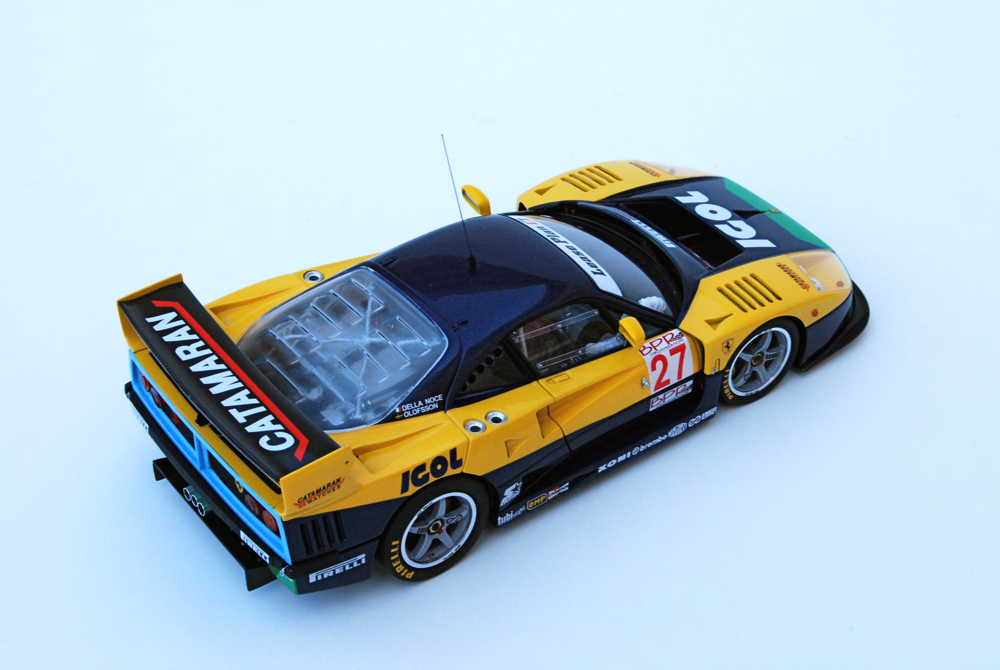
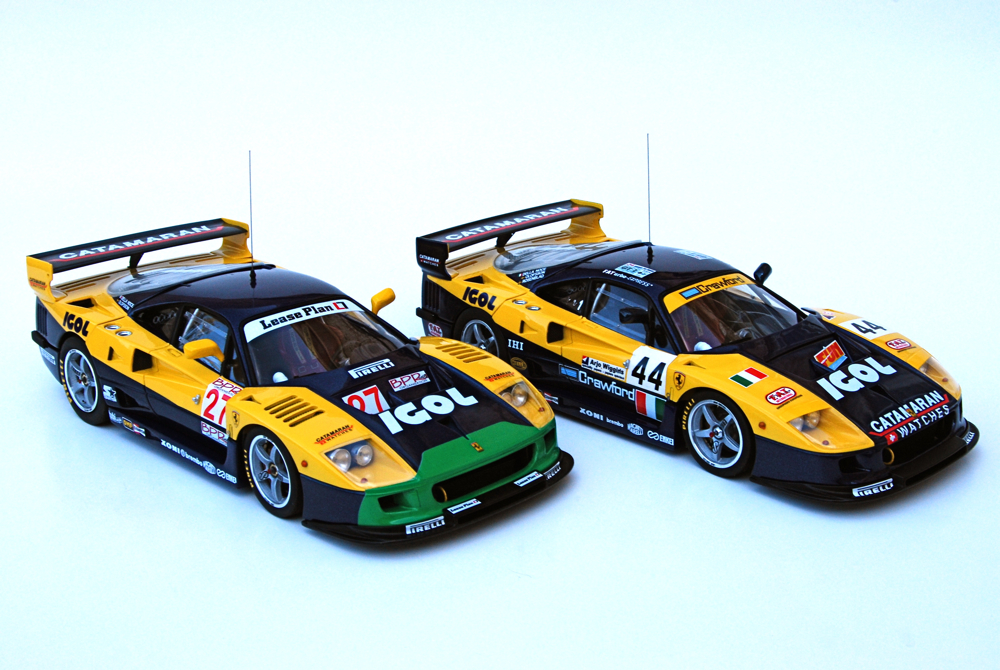
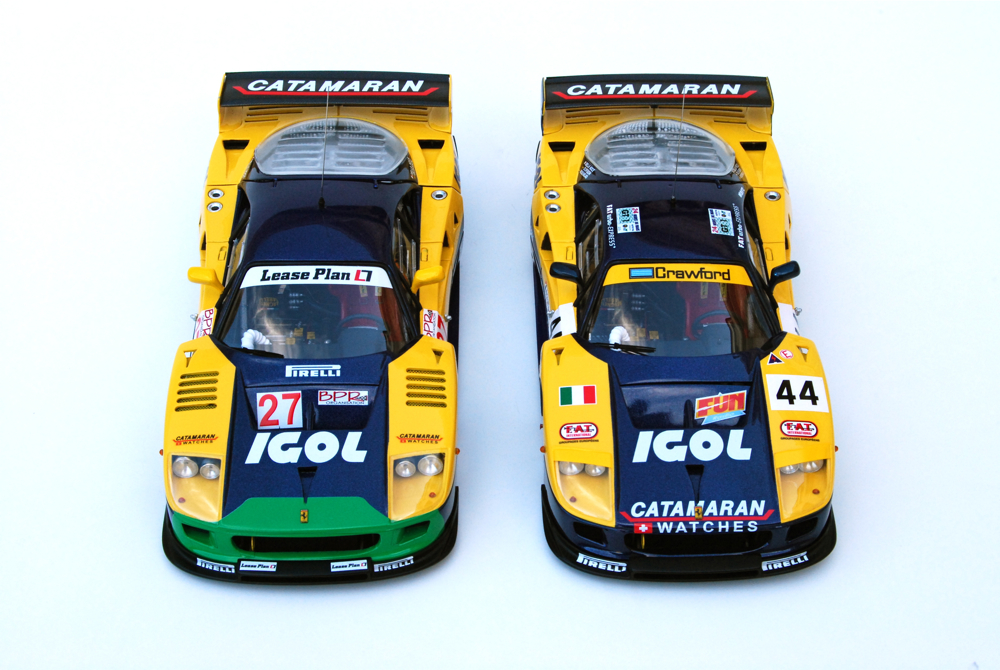
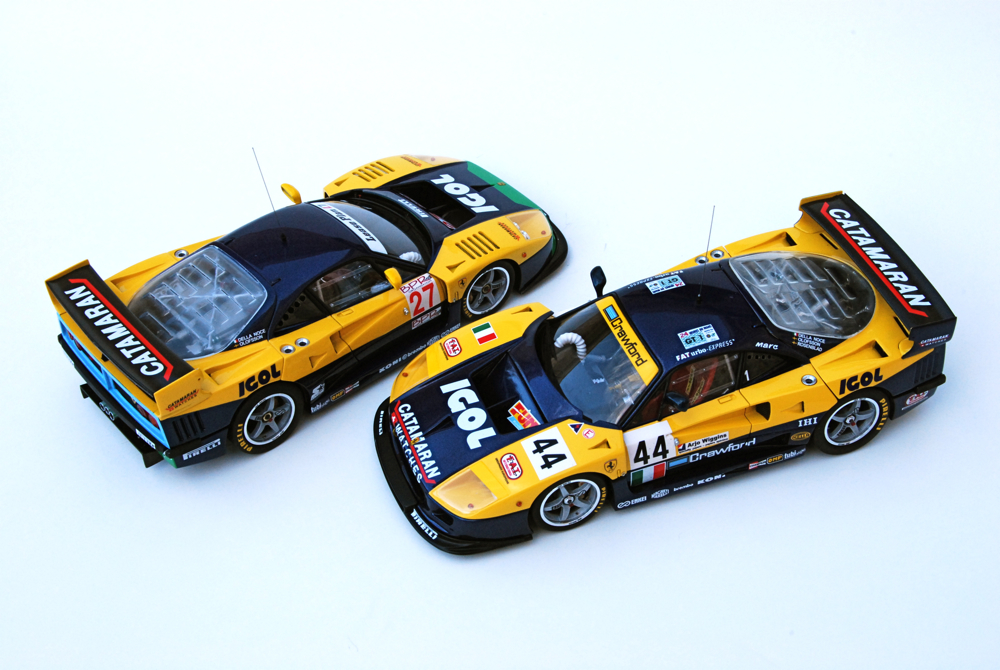
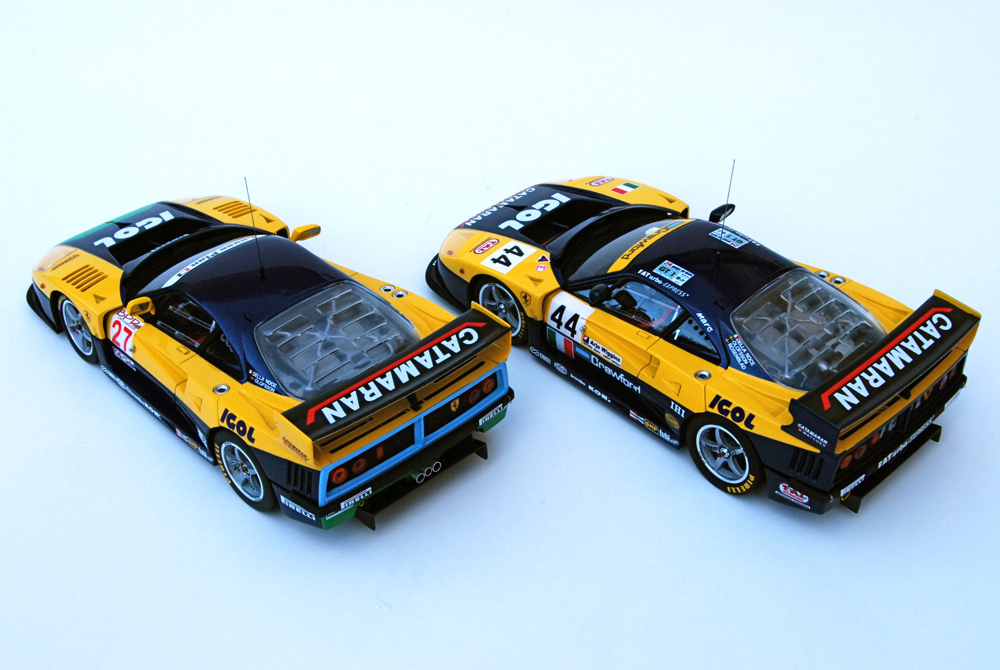
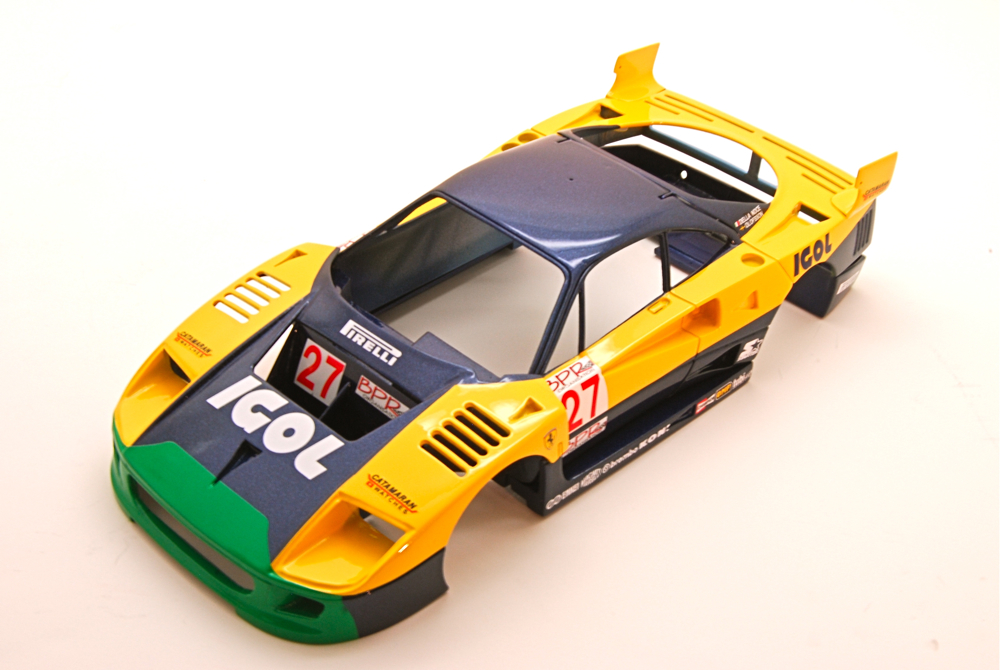
F e r r a r i F40 GTE IGOL #44 & #27
 |
 |
 |
Kit: 1/24 Model Factory Hiro Ferrari F40 GTE Igol ##27 & 44 Pros: This is one detailed kit! I didn't count the parts, but there are easily over 400 parts, maybe more! Most of them are white metal, and that made assembly a bit of a nightmare! Body moldings are super clean inside and out, absolutely no flash in my kits. Beige resin is top quality, and castings are almost perfect - few very small bubbles and imperfections - but all were taken care of with simple cleanup. Surface on all body panels is very smooth and shape is spot on (except for the front cowl - more on that later). Decals are made by Cartograf, and sheet is big and very colorful. Decals are thin and perfectly registered, with very little clear film around the edges. They are also very opaque, and work perfect with decal setting solutions. All correct markings for all versions provided on the sheet. Main photoetched fret is also great. Ever since MFH has released 275 GTB/C kit, all their photoetched parts come on a rubber backing, and this makes them so much easier to remove and work with. There is no need to file off the attachment points too. Just peel and use. Both rear and front suspensions are very detailed, same goes for almost any area of the kit. Nice and clear instructions, great packaging. Cons: White metal is very hard to clean and Hiro's castings are not the best - mold lines on delicate parts, casting defects on small parts and flat surfaces. In addition, fit of these metal parts leaves a lot to be desired - I had fit problems on almost all stages of assembly. Many parts had to be modified, bent or otherwise altered to fit. Most holes were not drilled or way too small. Front cowl shape is a bit off, which makes completed model look a bit off (nose is not down to the ground as much as it is on the real car). Lack of C/F positioning in instructions, sparse English directions. Price is high, but that was expected from a limited release kit from Model Factory Hiro. Verdict: Definitely not a kit for a beginner, and even an experienced builder will face many problems during assembly. I have modified the model quite a bit, so I'm sure assembly would be a bit easier if built out-of-the-box. This is possibly the most detailed kit of a racing F40 ever made and looks absolutely terrific on the shelf when finished. There is something magical about it when you look at the model with all the cowls open. |
 |
 |
 |
|
 |
 |
 |
|
 |
 |
 |
|
 |
 |
 |
Buildup
 |
I had no idea what I was getting myself into by starting this double build! Model Factory Hiro kits are wonderful, but it takes a lot of work and patience to make them look good. I set out to do that, times two, and add more aftermarket stuff while doing it. Sounded like fun! |
 |
Finally it was time to move up front. Molded-on front suspension was carefully brush painted with aluminum MM metalizer. |
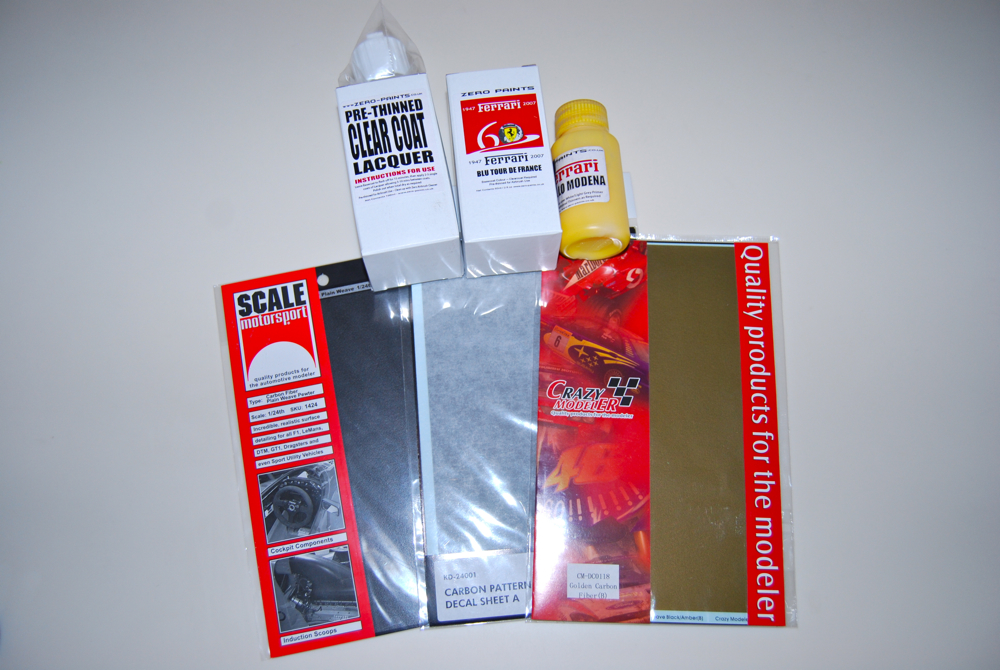 |
I started by ordering two kits, both IGOL sponsored cars #27 and #44. Striking IGOL livery is one of my favorites on F40 GTE, so I wanted to do it justice. Zero paints were bought for the body, and several sheets of various composite decals from SMS and KA Models for decaling. |
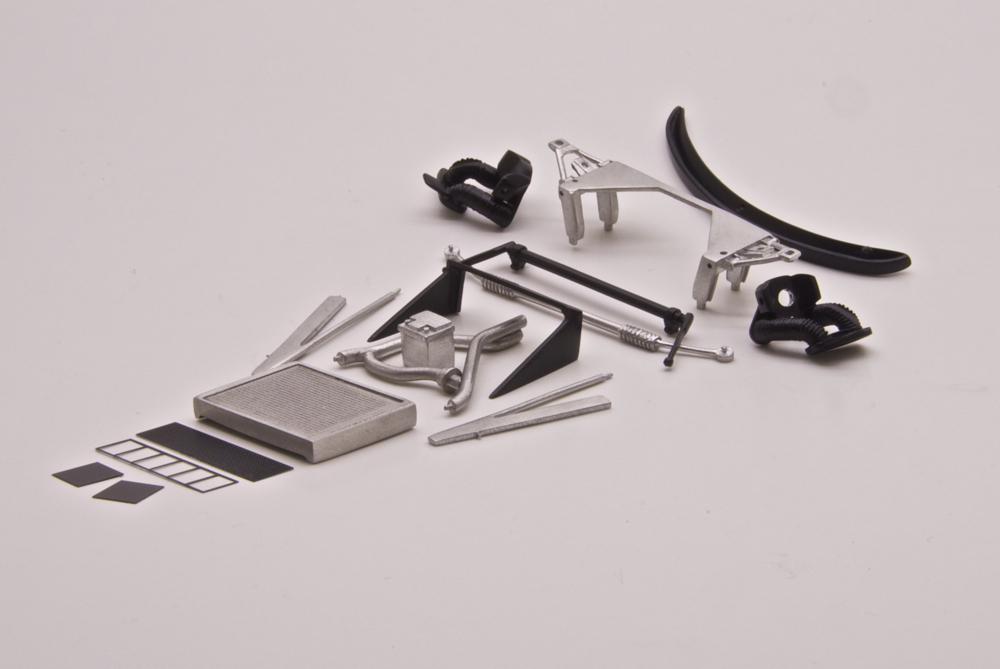 |
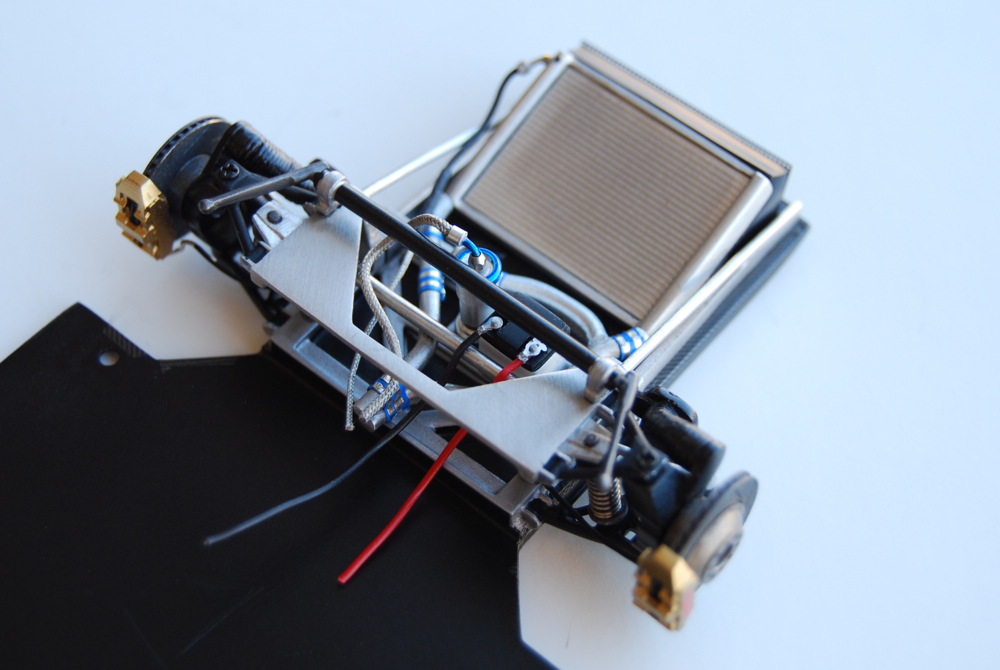
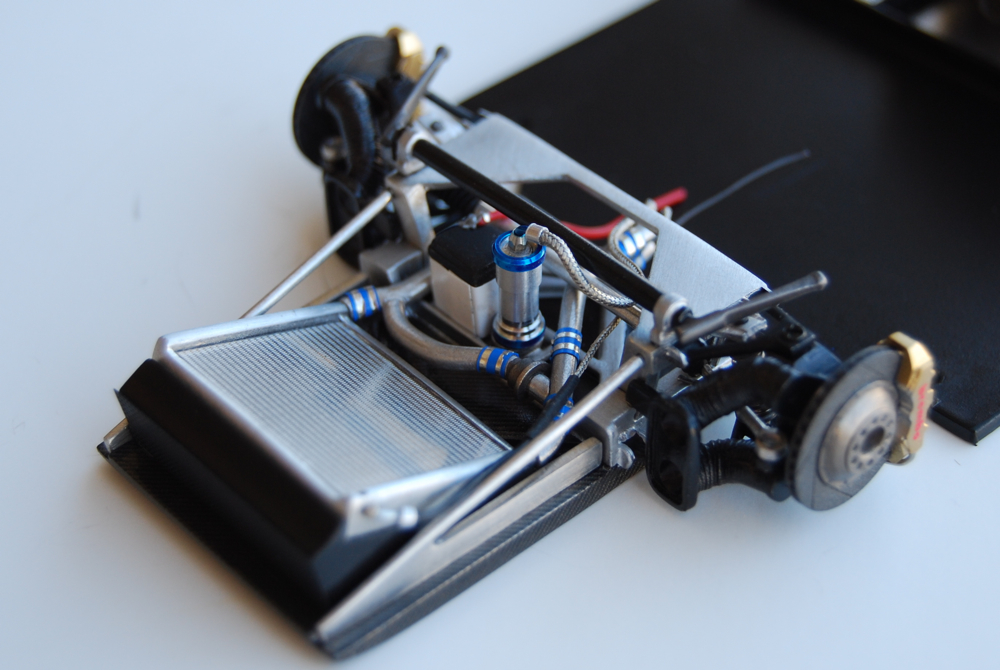
Parts of the front suspension, steering rack, brake ducts, stabilizer, radiator and its supports, water plumbing, etc were cleaned up, and painted. |
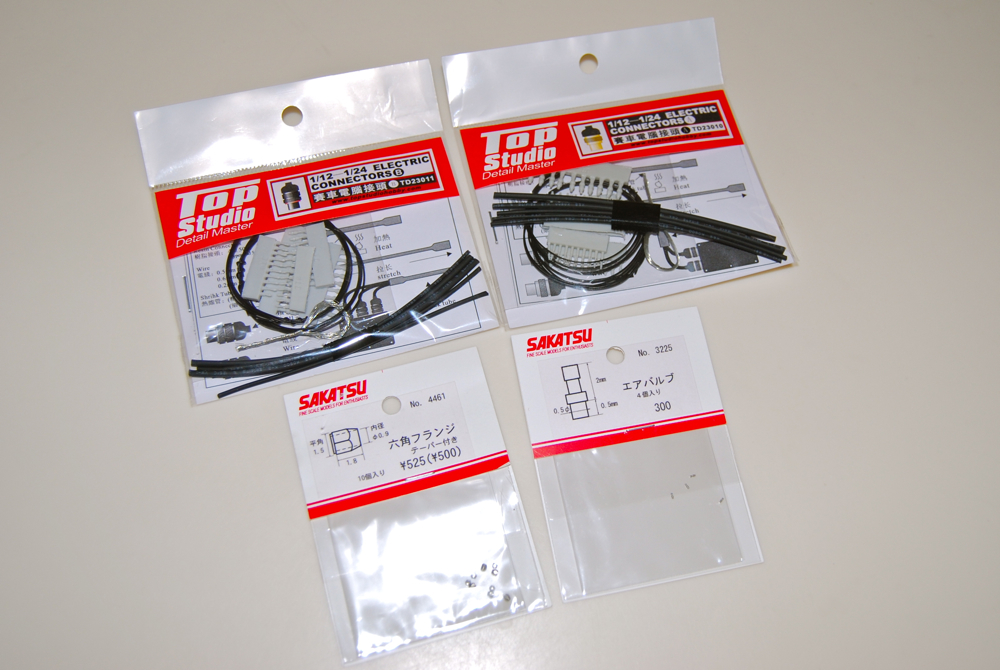 |
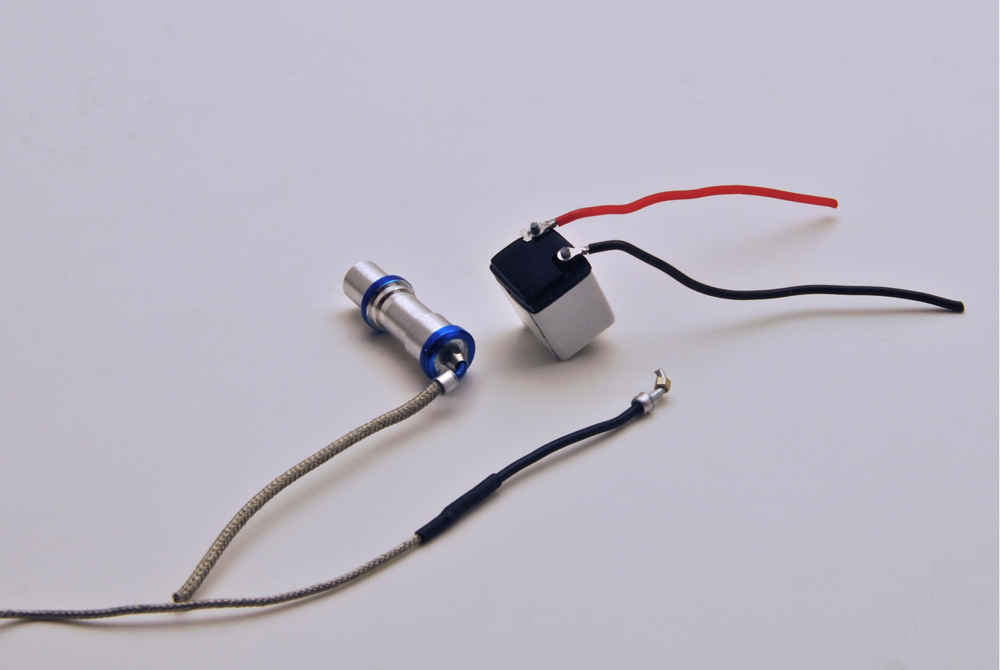
For internal wiring I decided to try some of the new Top Studio wiring sets which included nicely molded resin connectors of various sizes, wire, and some shrink wrap. I also acquired some Sakatsu fittings of various sizes for engine and cooling system plumbing. That was the start. |
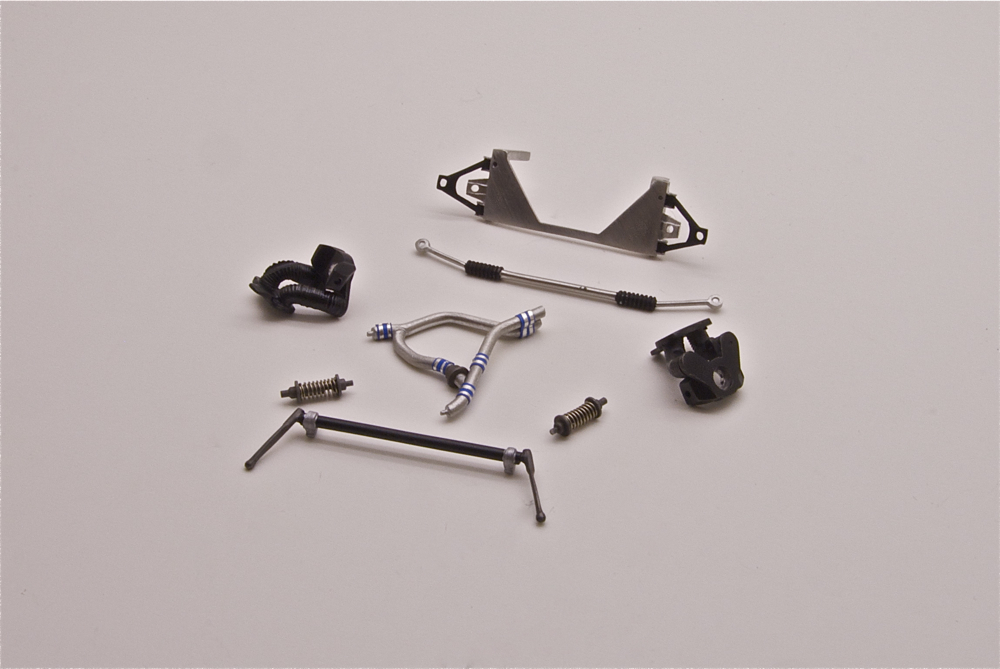 |
Then I assembled front shock absorbers, detail painted suspension arms, stabilizer, steering rack, and cooling system hoses (clamps made from BMF). |
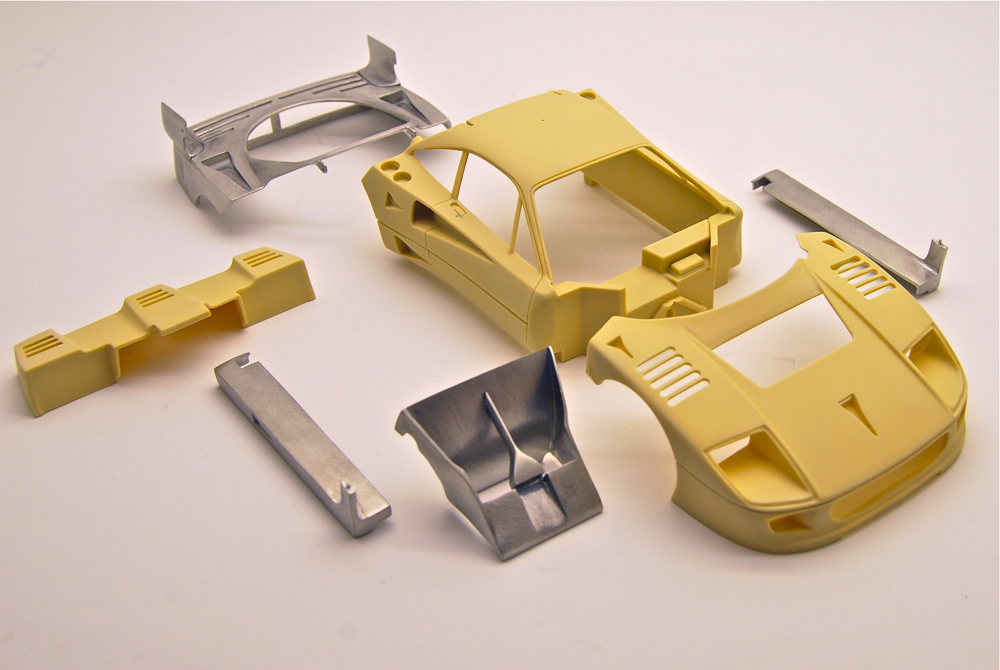 |
Body is assembled from both resin and white metal parts, but the rest of the kit is mostly white metal. Resin castings were pretty clean and crisp, and except for the cockpit, rather thin. Took some time to clean up though. Metal parts were rather bad, and required lots of block sanding. |
 |
Then everything was carefully put together and detail painted. |
 |
When everything was prepped, cut, sanded, adjusted and fitted together, I dry-assembled everything to make sure it was ready for primer and paint. Lots of time was invested in making the parts look and fit good, and I was doing it times two! |
 |
Exact same procedure was done on the second
chassis. |
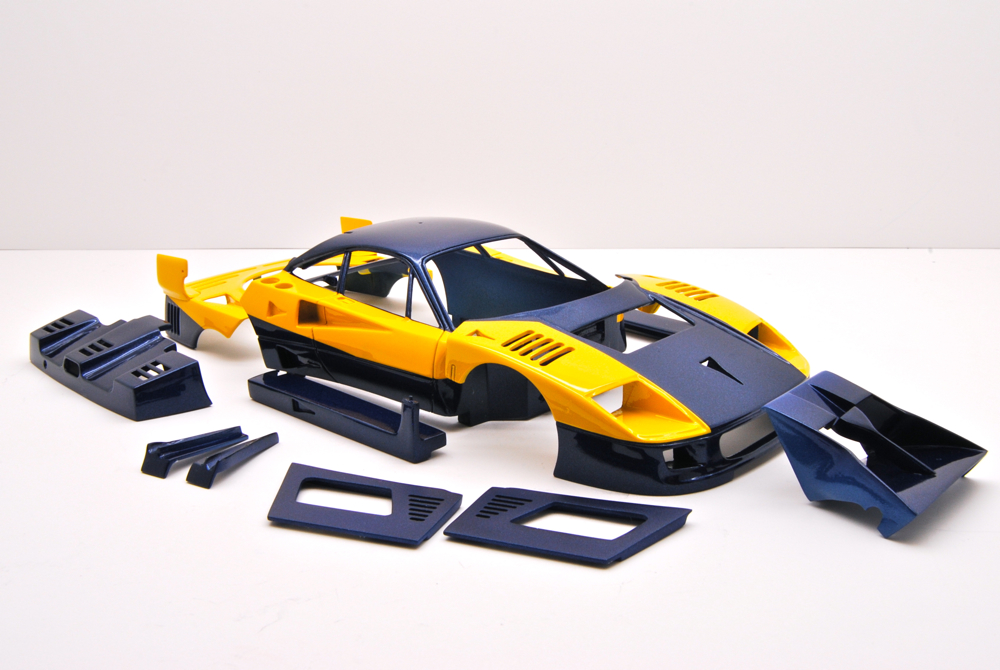 |
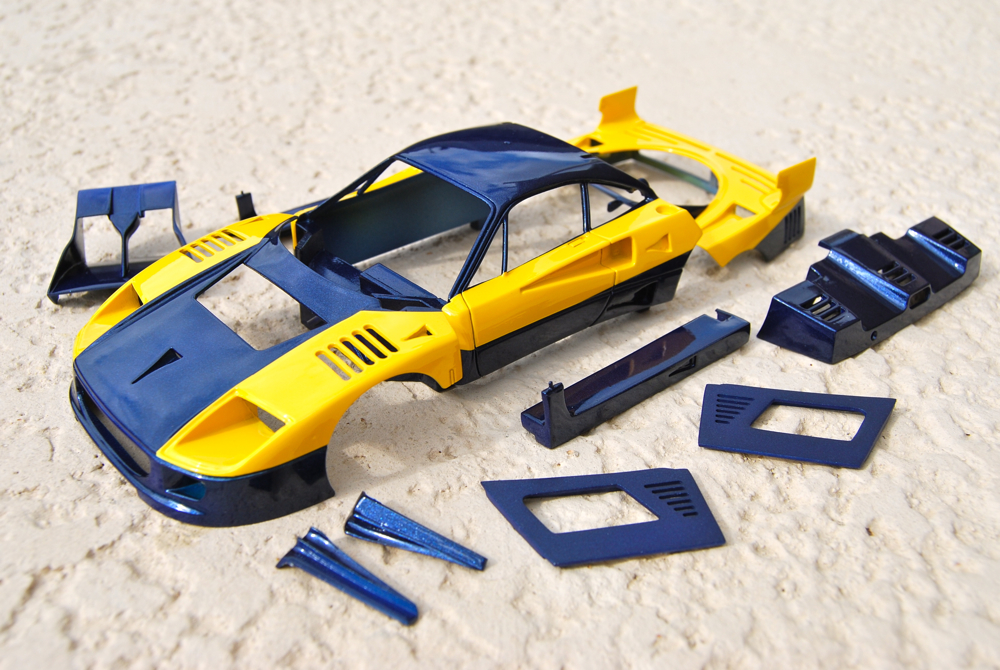
A coat of gray and white primer, then two coats of Zero yellow, then masking with BMF (to avoid the paint edge), then two coats of blue. After the paint was dry, I took the masks off and sprayed a light coat of clear to seal the paint. it looked good, but matt. |
 |
Battery was wired using Detail Master battery wiring kit and some spare wires, front air jack was plumbed using Pro-Tech braids and Sakatsu fittings. |
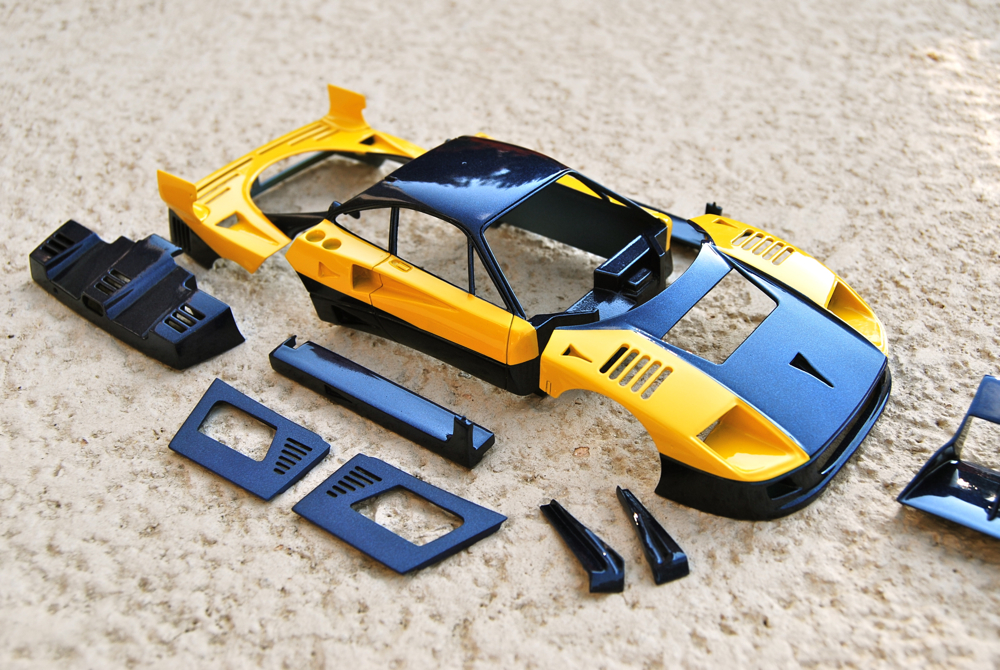 |
Few more coats of clear, and paint started to sparkle. I continued adding more coats until I was satisfied with the depth of the shine. Then I repeated the process for the second body. |
 |
Then everything was installed on the chassis together with front hubs and brakes. I also attached scratchbuilt overflow hose to the radiator |
 |
After clear was completely dry, I sanded few small imperfections with 2000 sandpaper, then followed with 3M polishing compound, and Tamiya Fine. When paint looked nice and smooth, I waxed both bodies with Treatment model wax. |
 |
Lots of additional wiring and plumbing raised some concerns about proper fit of next assemblies, as the fit was rather tight and not much room to manipulate anything there. |
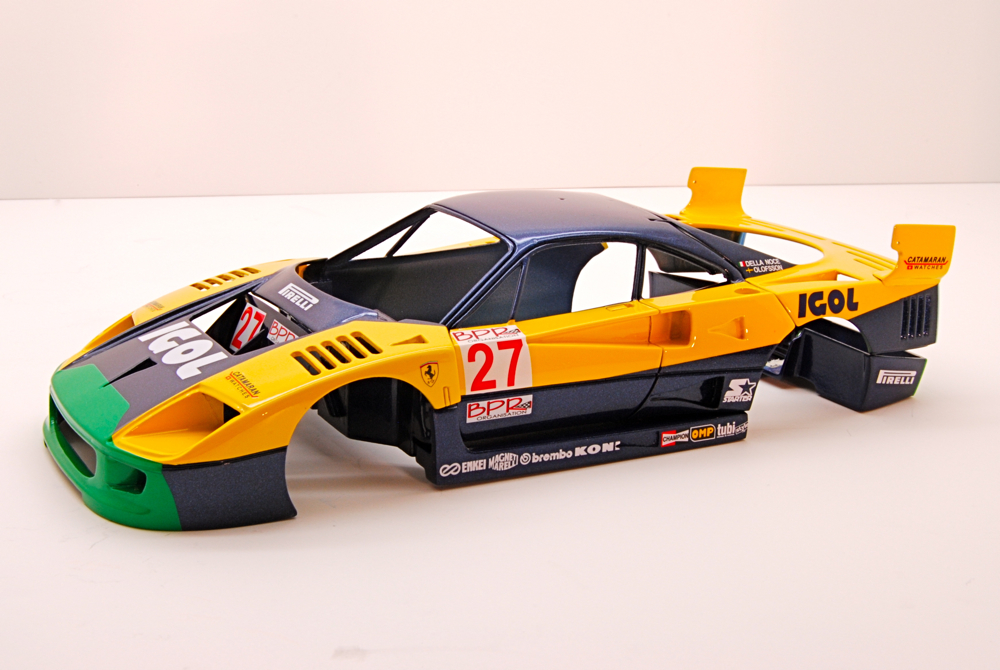 |
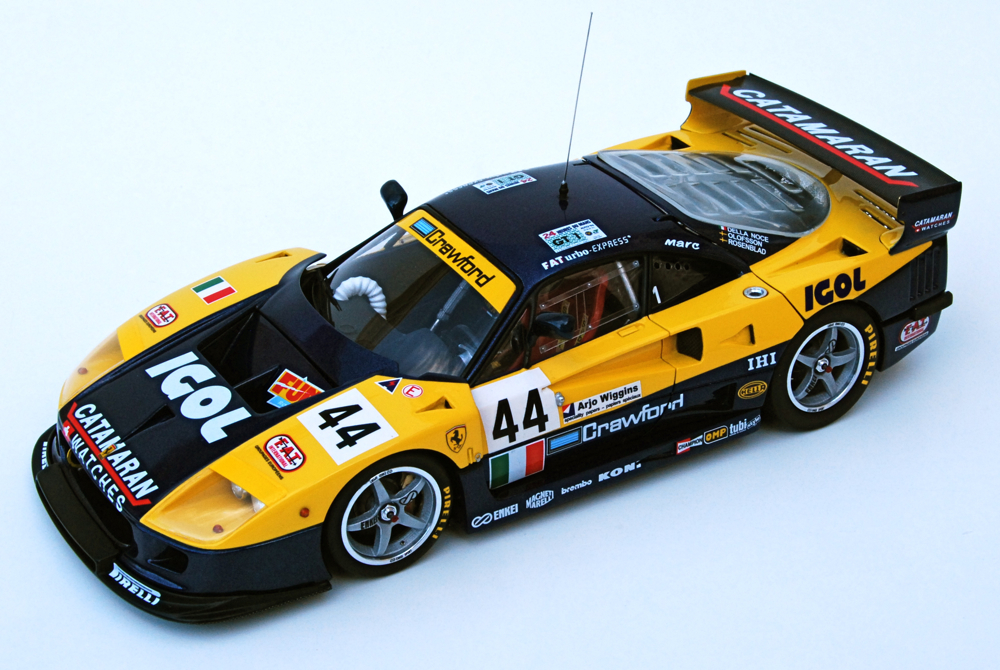
Decals were next, and they were excellent. Even the very complicated green portions over the nose of #27 car, and blue over the engine lid were relatively easy to apply. |
 |
Luckily, all wiring and plumbing was easily clearing the cowls and interior tub. I just needed some additional holes to route the wires and braids to their appropriate places. |
 |
Testament to excellent Cartograf decals. They react so well with Microset and Microsol, and opaque to cover any paint lines. |
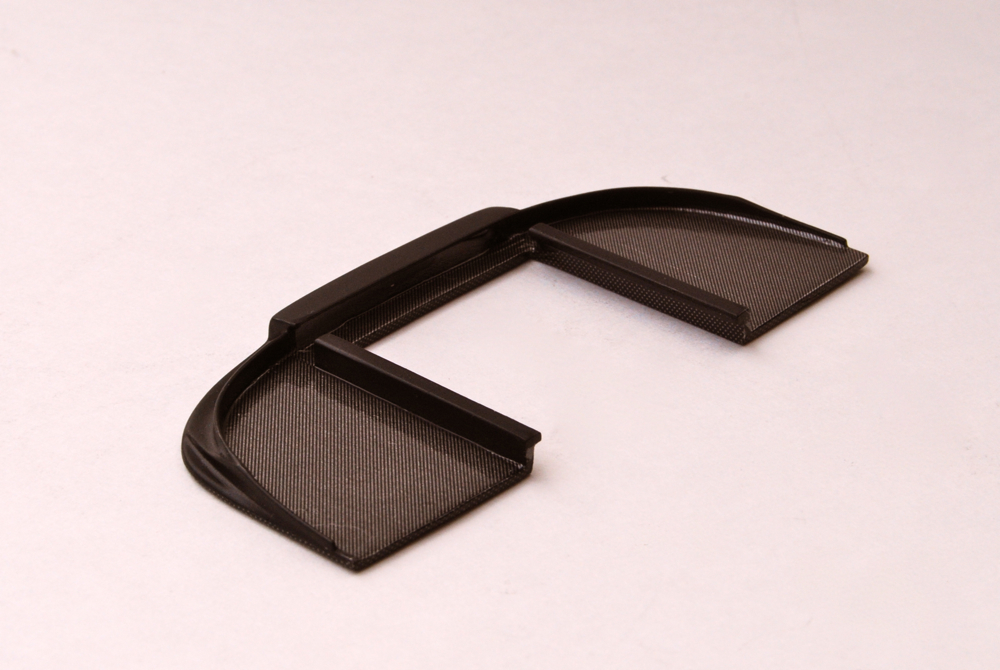 |
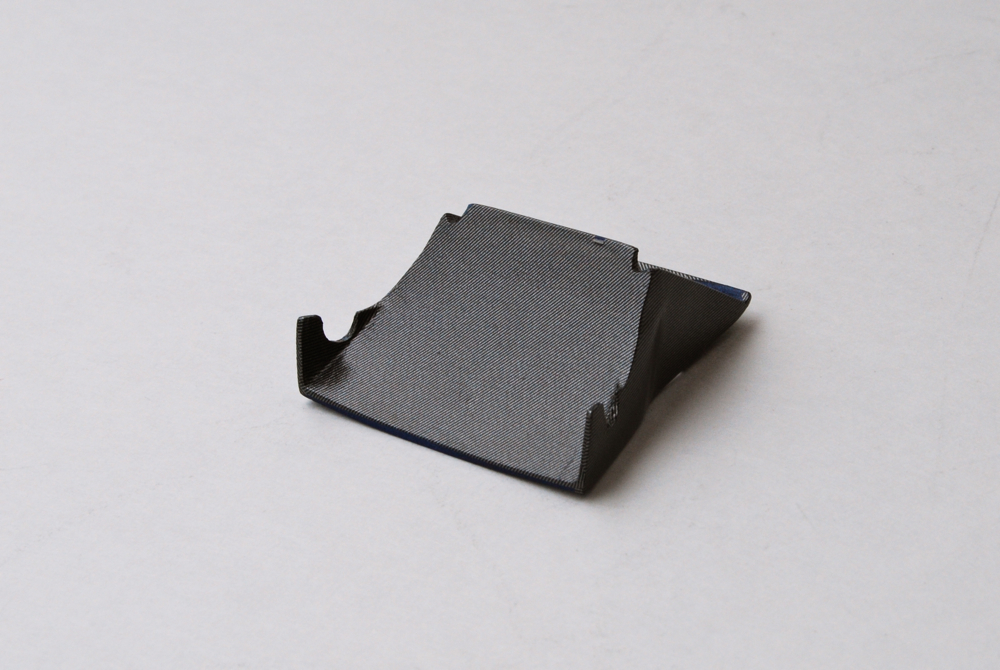
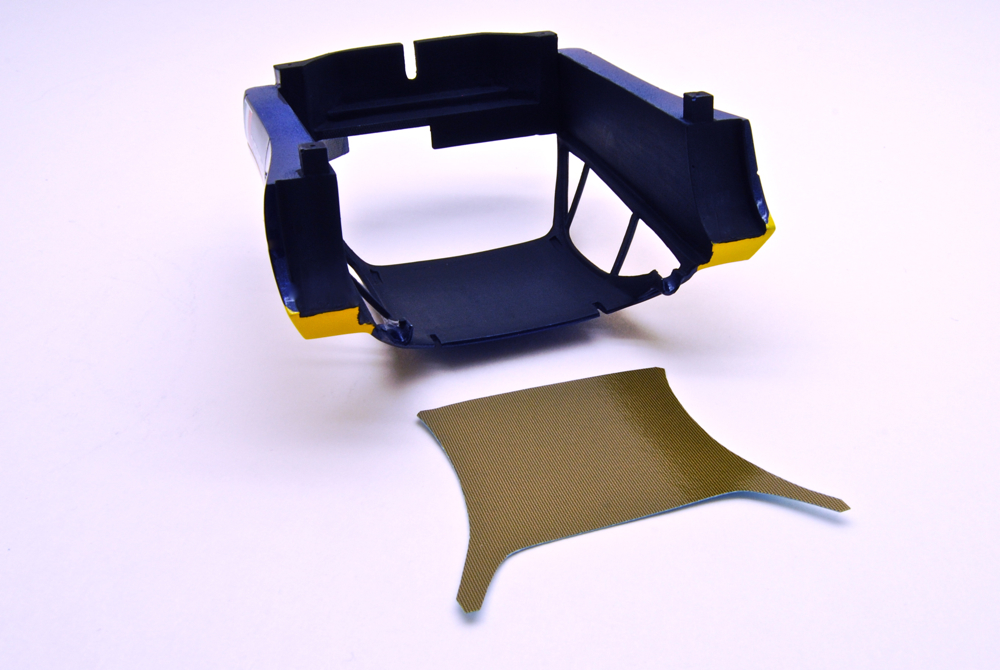
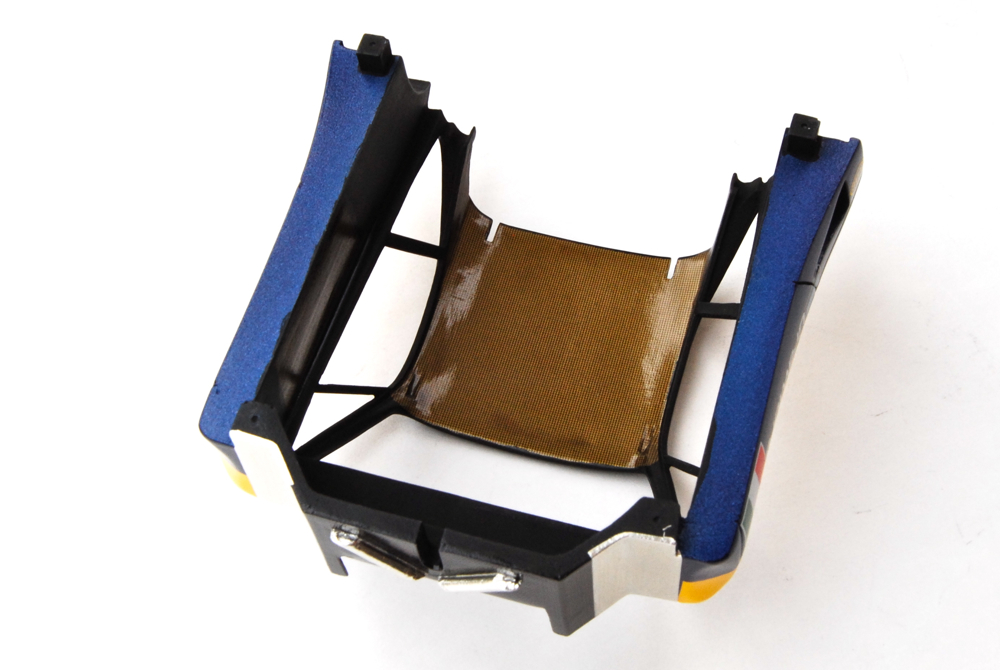
Front cowl floor was detailed with some carbon fiber, on the inside, and then clearcoated. |
 |
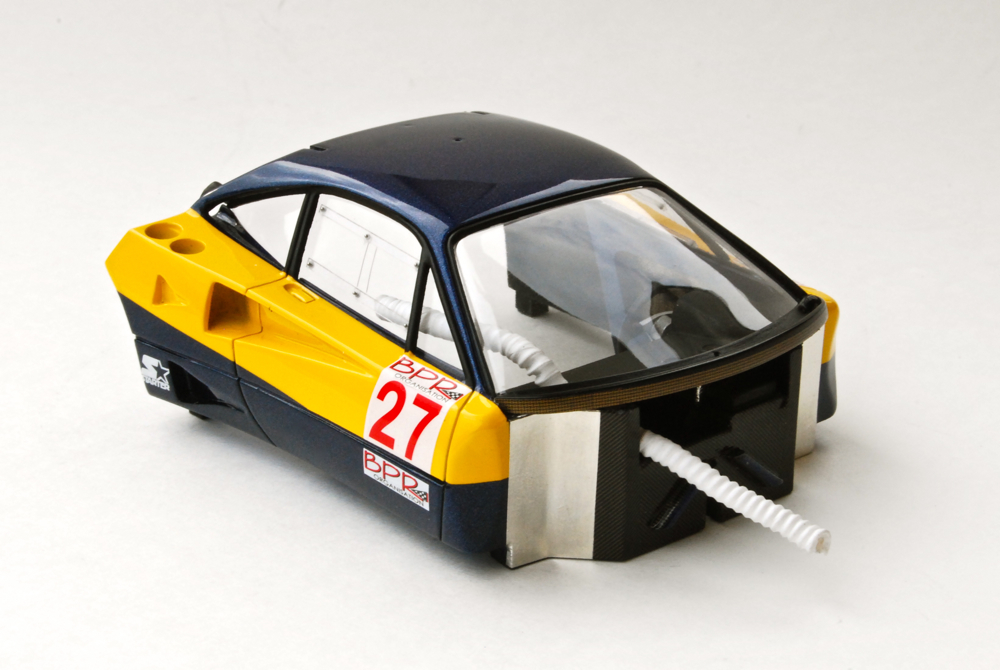
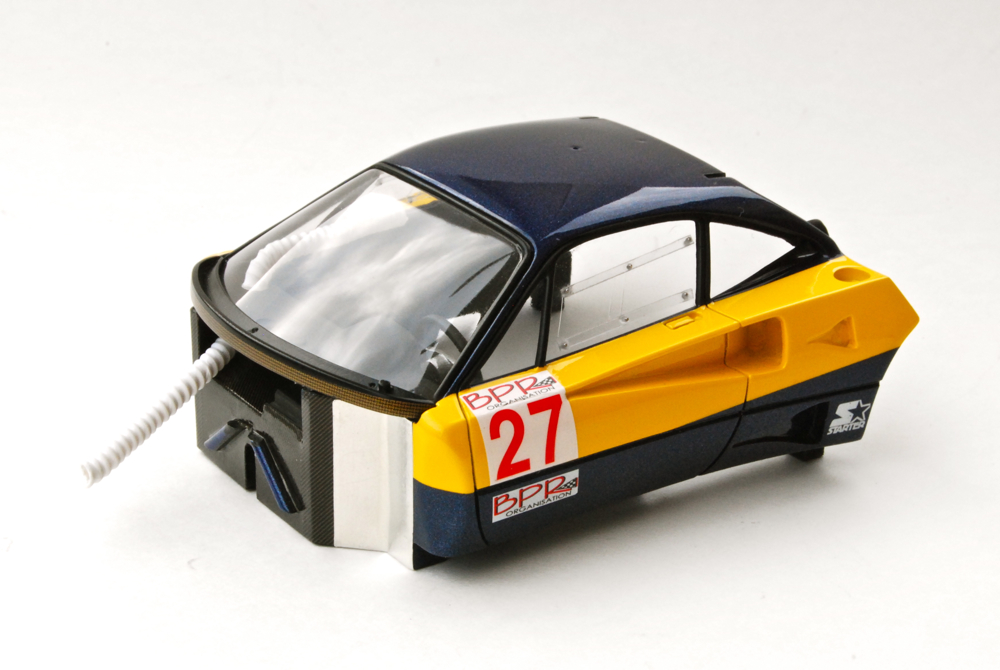
Completely decaled, polished, and test fitted #27 body. Unfortunately, I totally forgot to take pictures of completed #44 body. With both bodies completed, I moved on to the internals - engine and chassis. |
 |
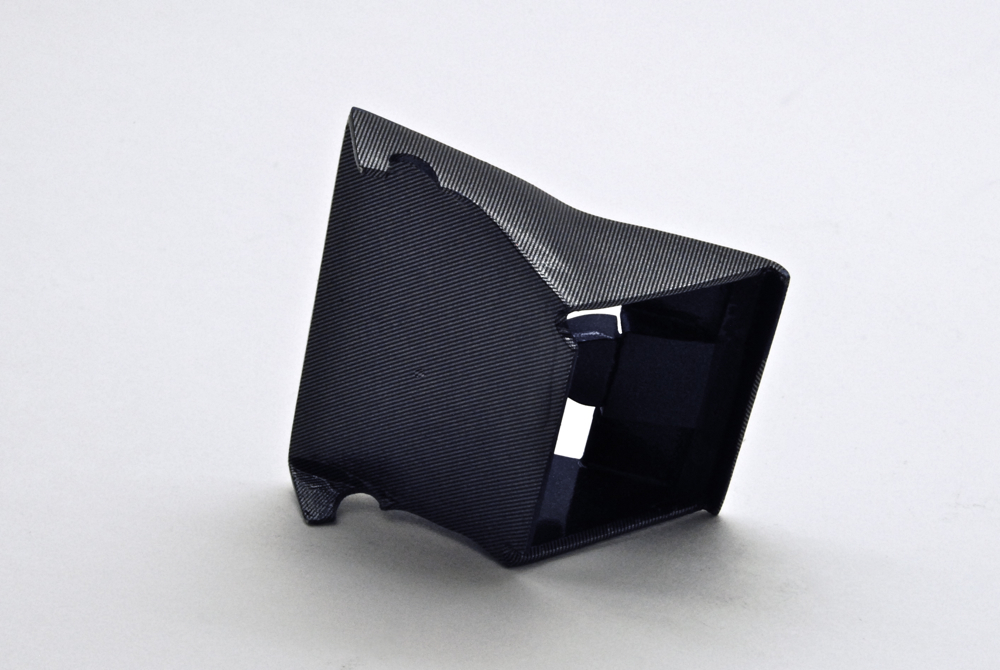
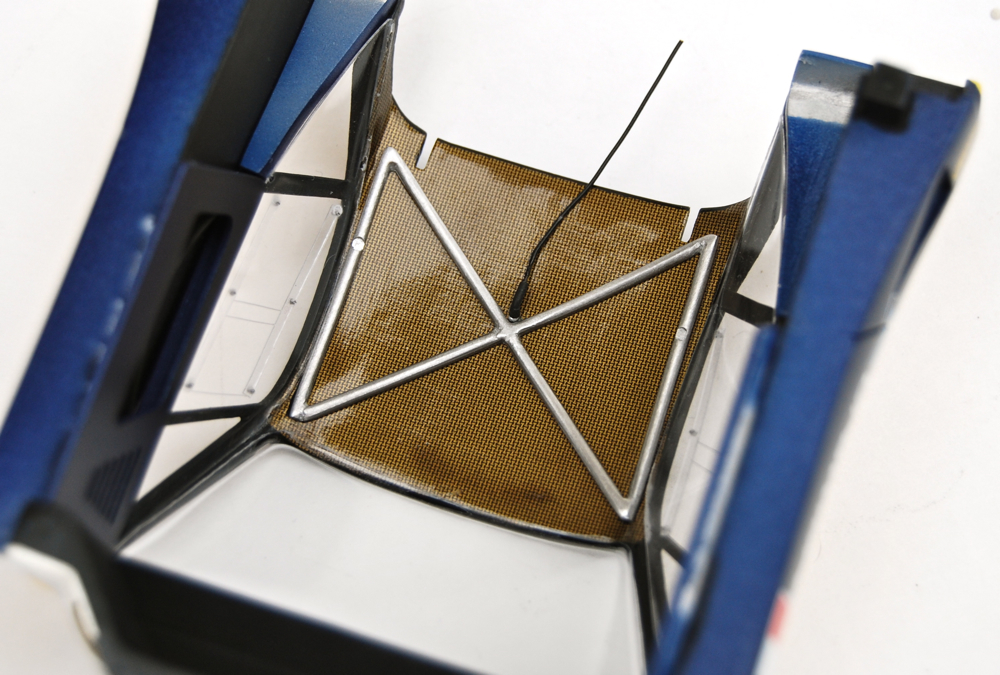
Front air ducting panel was made completely out of carbon fiber on the real car. It was quite a challenge to cover every possible visible surface not covered by paint with C/F decals. |
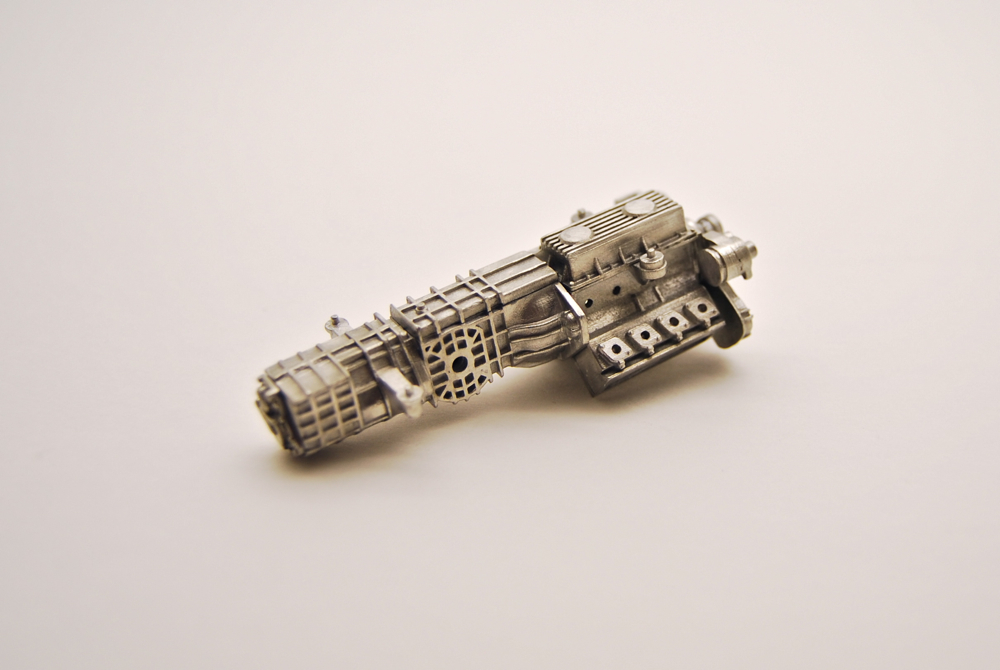 |
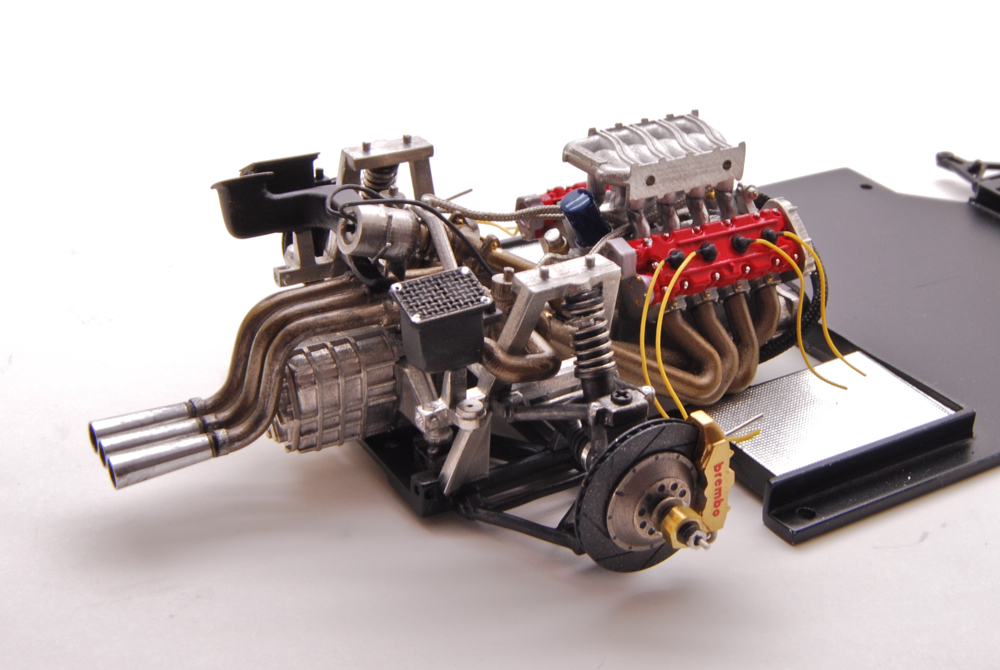
Engine block was put together, cleaned, all imperfections sanded with needle files, sanding sticks, and sandpaper. Hiro castings are rather rough, and it always takes lots of work to make them look good. |
 |
Few delicate parts that were sticking out proved most difficult, but nothing that a fresh bottle of Microsol and hair drier set on "hot" couldn't handle. |
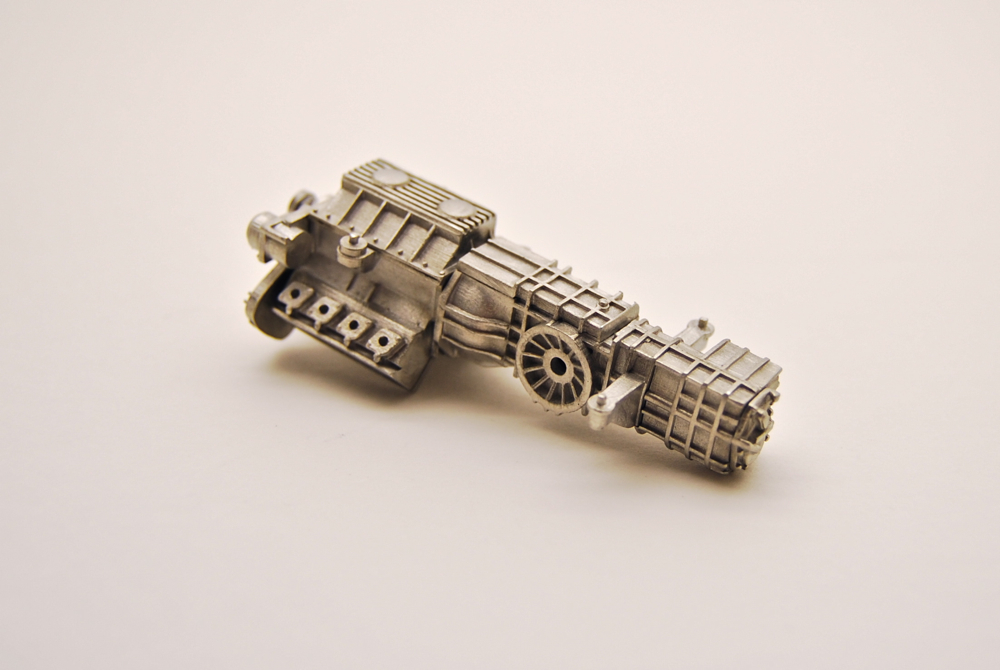 |
Finally, block was cleaned with steel wire brush to bring out natural metal sheen. I decided against painting the block, as it looked so good as is. |
 |
Few hours later, I had a completely authentic looking duct. Now I needed to do it all over again for the second car! |
 |
Similar cleaning technique was used on most of the white metal engine parts - clean, sand, use wire brush. Here you can see gigantic GTE intercoolers, and intake manifold. |
 |
After putting so much effort to cover every possible visible surface of the model in C/F, I decided to go completely nuts with composite decals! Front cockpit wall was detailed with C/F and BMF. |
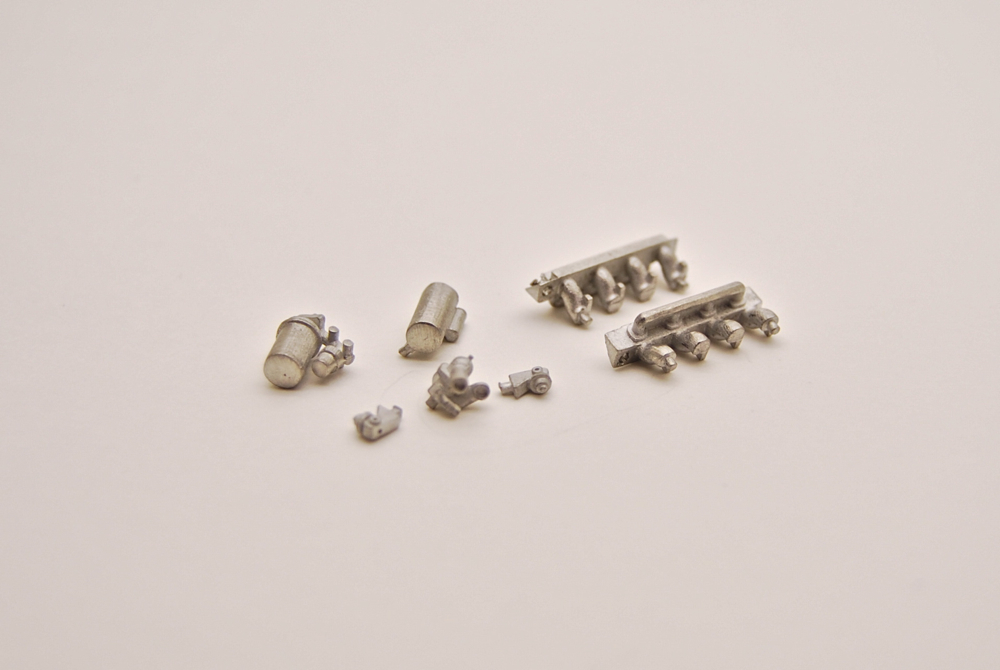 |
Small engine parts were also cleaned, sanded, pre-drilled. |
 |
Using paper template, I made a kevlar decal for the roof. I also cut some decals for the sides of the body (since see-through door panels would show the raw body kevlar on the real car). |
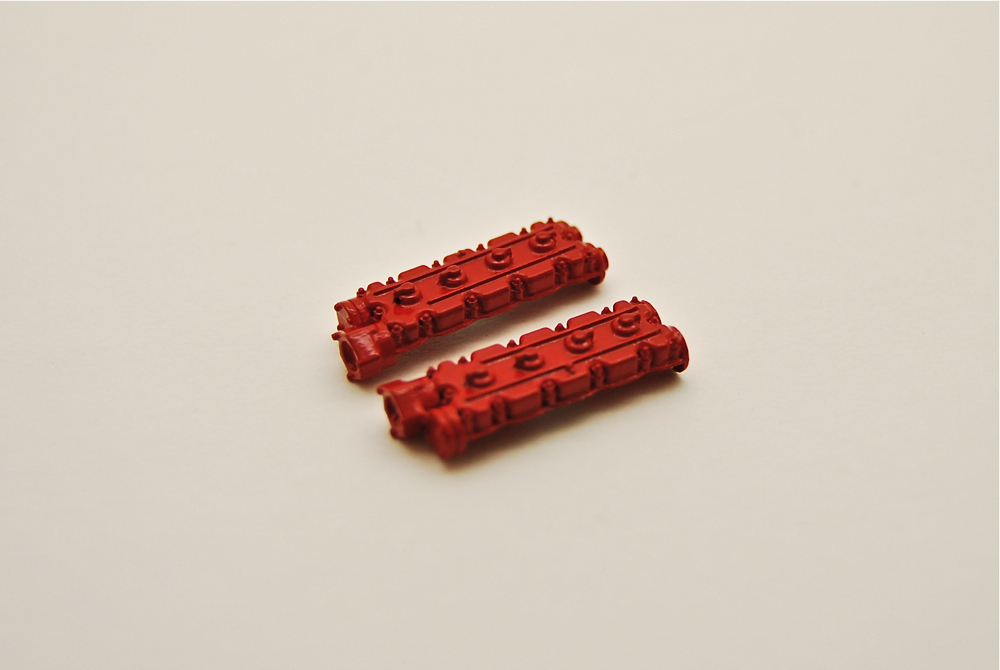 |
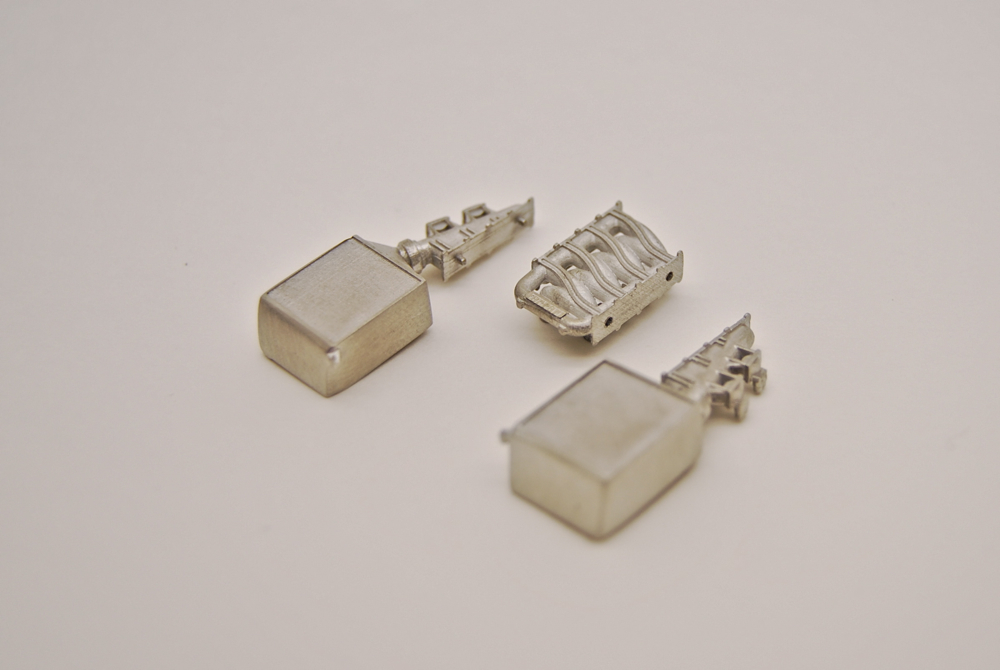
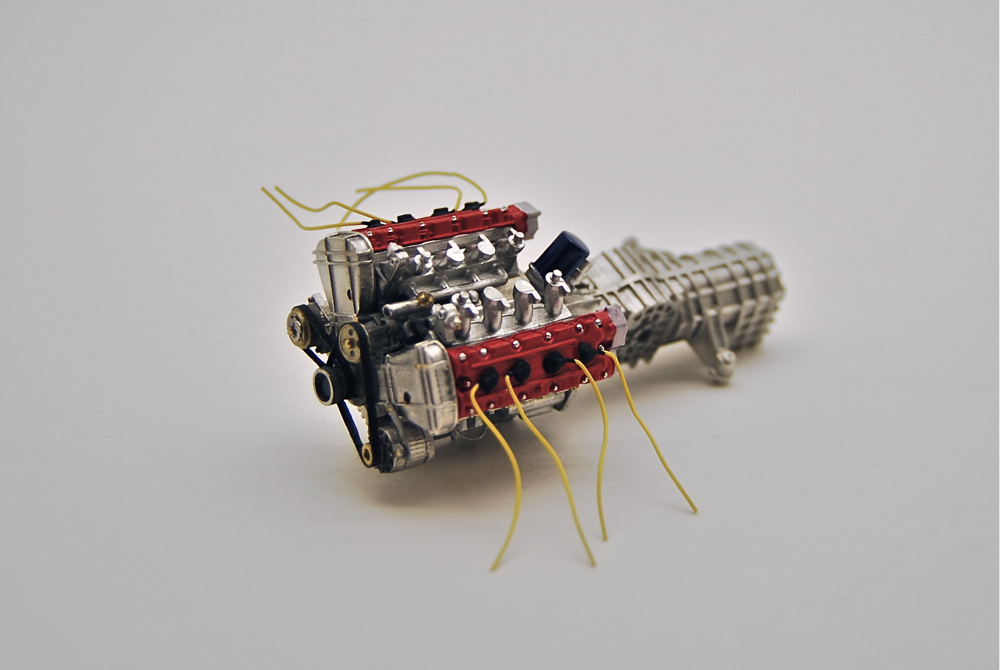
Cam covers were cleaned, primed, and painted red from a distance to simulate rough casting texture of the real covers. The effect was less pronounced than I hoped for, but still looked good. |
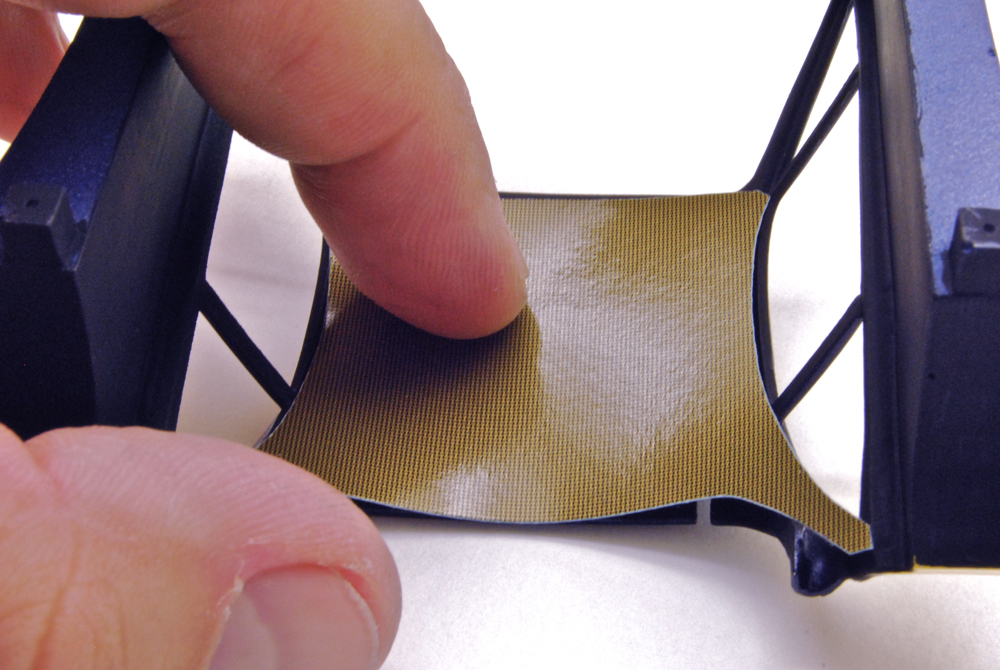 |
I had to double check the fit several times, as I didn't want to waste rather large piece of C/F decal. The fit looked good. |
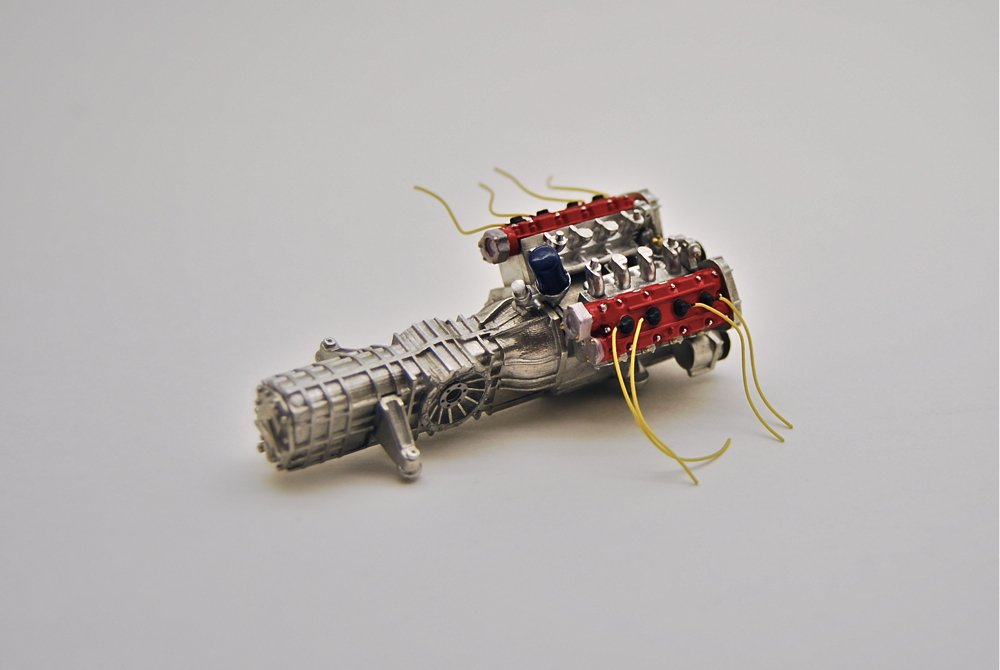 |
Then covers were drilled for spark wires, wired, and mounted on the block. I also added intake manifolds, oil filter, front block cover, and engine mounts. |
 |
After decal was applied and dry, I applied several coats of Future with a wide brush, couple of hours apart each. |
 |
Then I assembled alternator, generator, and attached all pulleys to the front cover. Belts were made from thin self-adhesive rubber-like tape that was provided in the kit. |
 |
Similar kevlar treatment was applied to the windshield frame. |
 |
Second engine block was assembled identically to the first one. Building two of the same made it easier as far as painting and assembly. It made it much worse as far as parts cleanup, as I had to do it twice! |
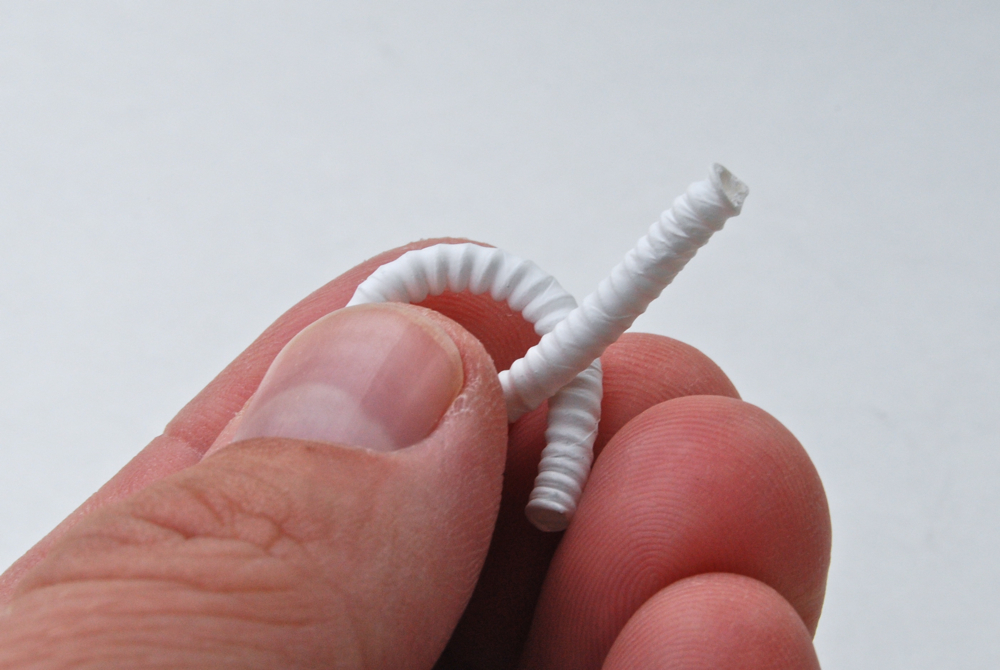 |
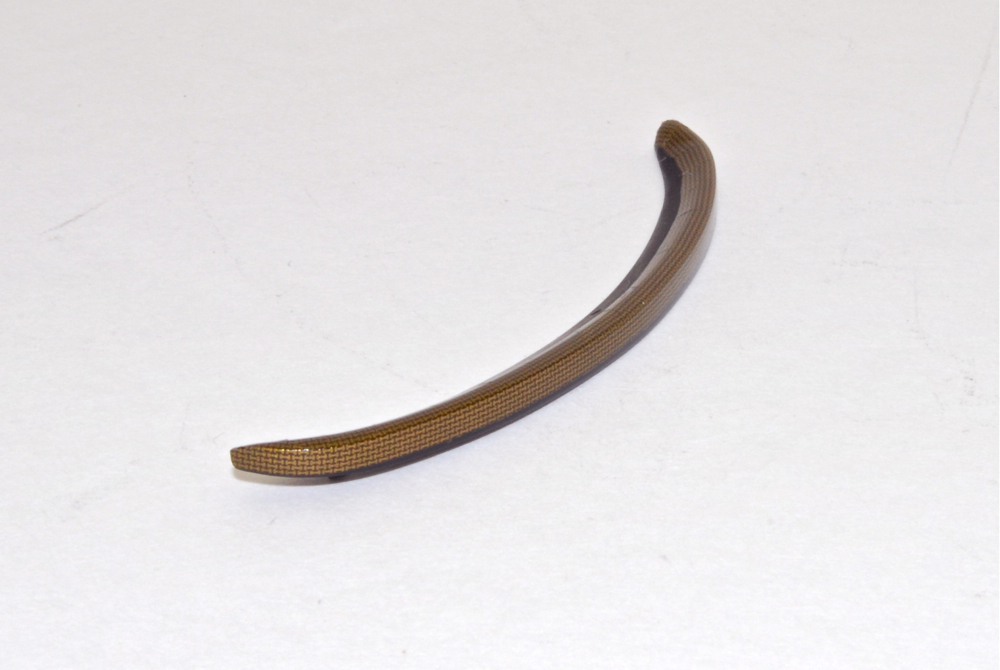
Then I made several flexible ducts and vent hoses using technique from my duct hose tutorial here. |
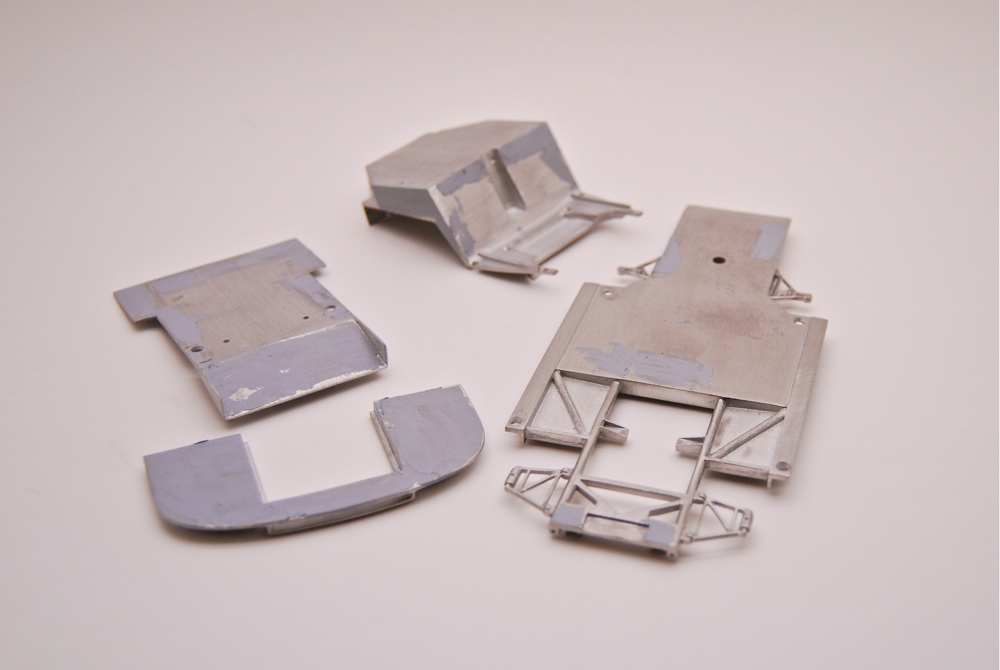 |
Chassis parts were all warped, pitted, scratched, and generally very rough. Took quite a bit of block-sanding, then sanding with needle files, and various sticks to make them look presentable. |
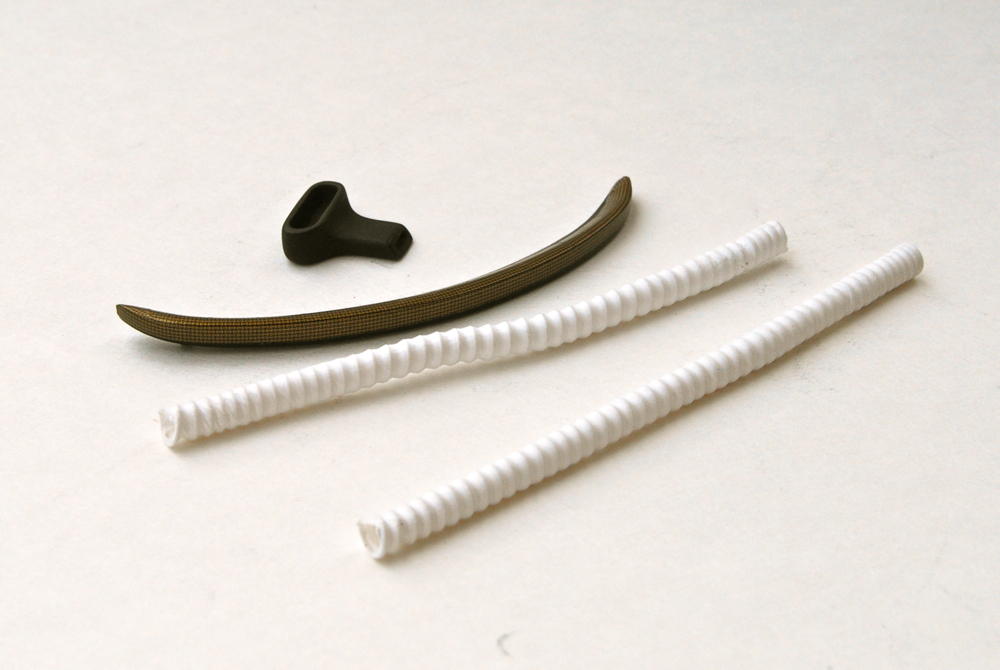 |
Couple of completed hoses, kevlar-covered windshield frame, and interior ventilation duct. |
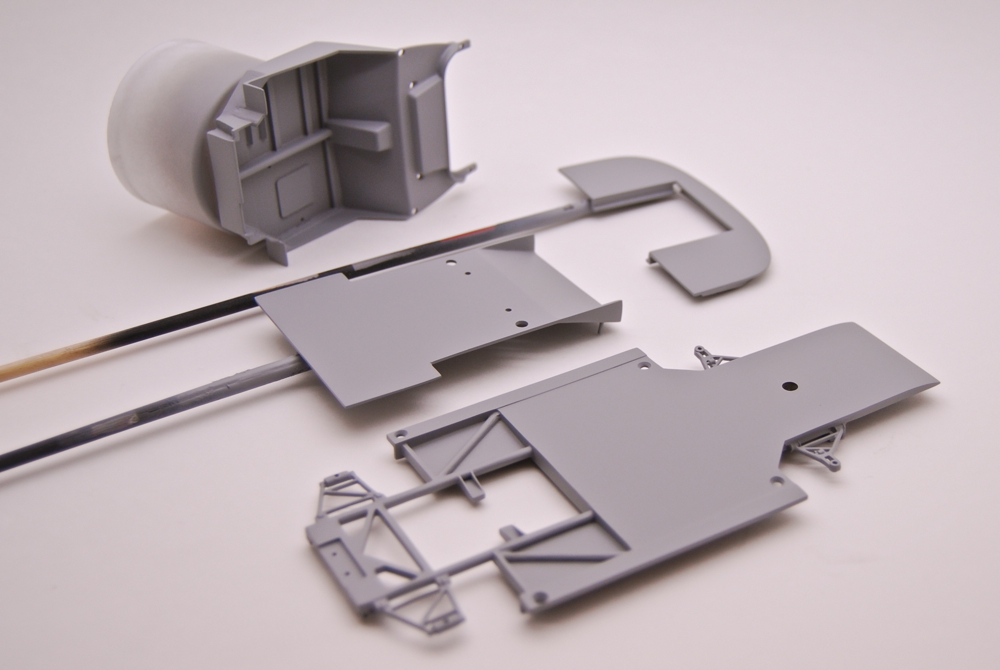 |
Finally, after hours of cleanup the parts were ready for primer, and I sprayed two thin coats of Tamiya Metal primer, followed by a coat of gray primer with light sanding in-between. |
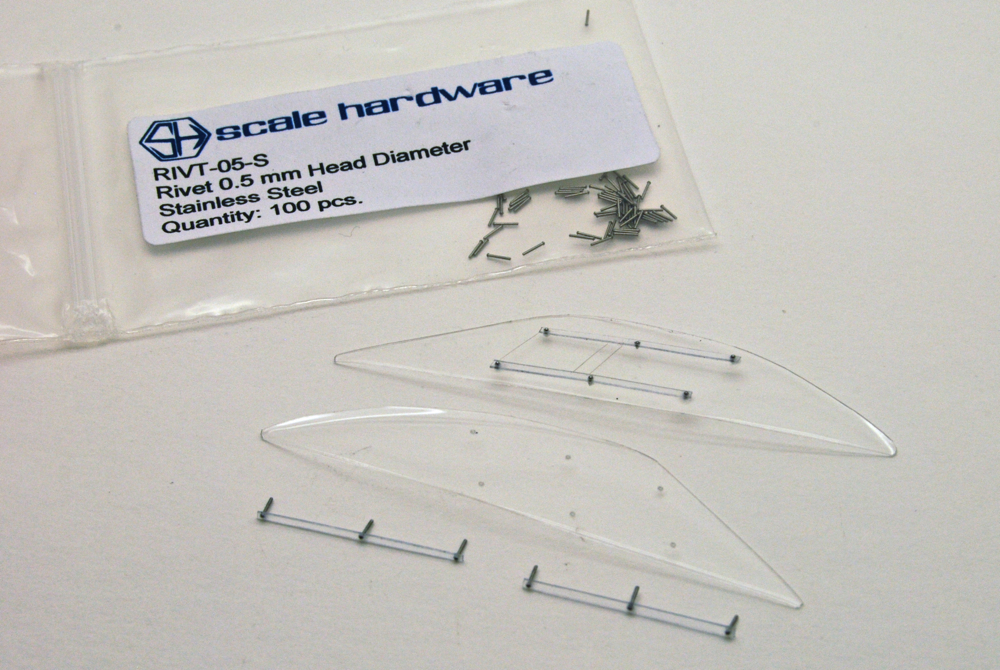 |
MFH instructions suggested scribing window frames on the supplied clear plastic. I had a better idea. Frames were cut from clear styrene, and then drilled, and attached to the window with Scale Hardware rivets and tiny drops of superglue. Looked much better! |
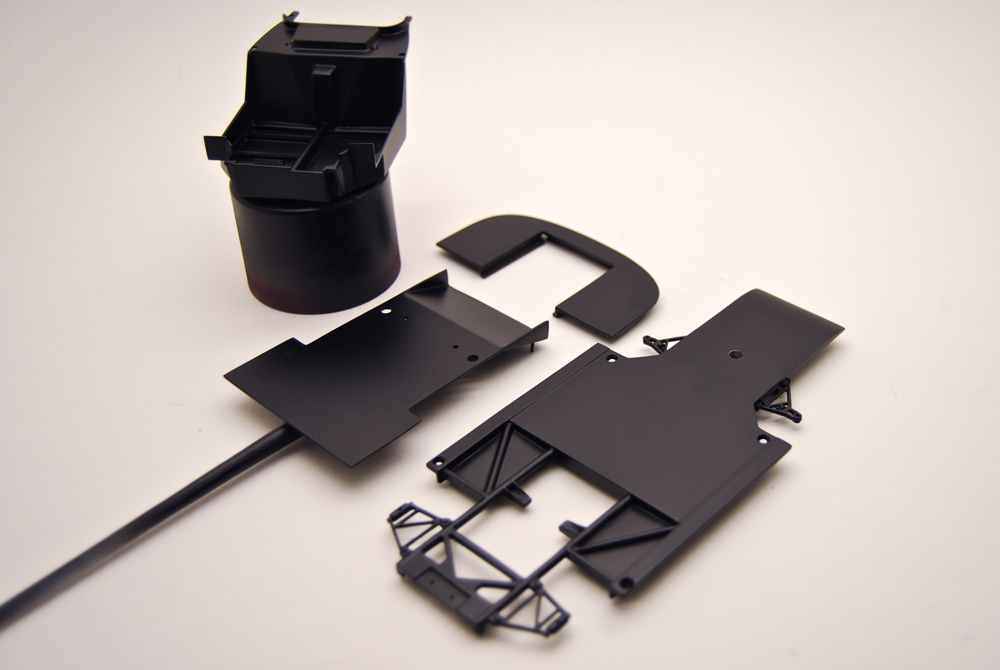 |
Then all these parts were painted with Tamiya semi-black paint from TS line, decanted and sprayed with an airbrush. This will be base for carbon fiber decals from SMS. |
 |
Dashboard, steering wheel and column were cleaned, primed and painted. Couple of photoetched parts and decals were added prior to detailing. |
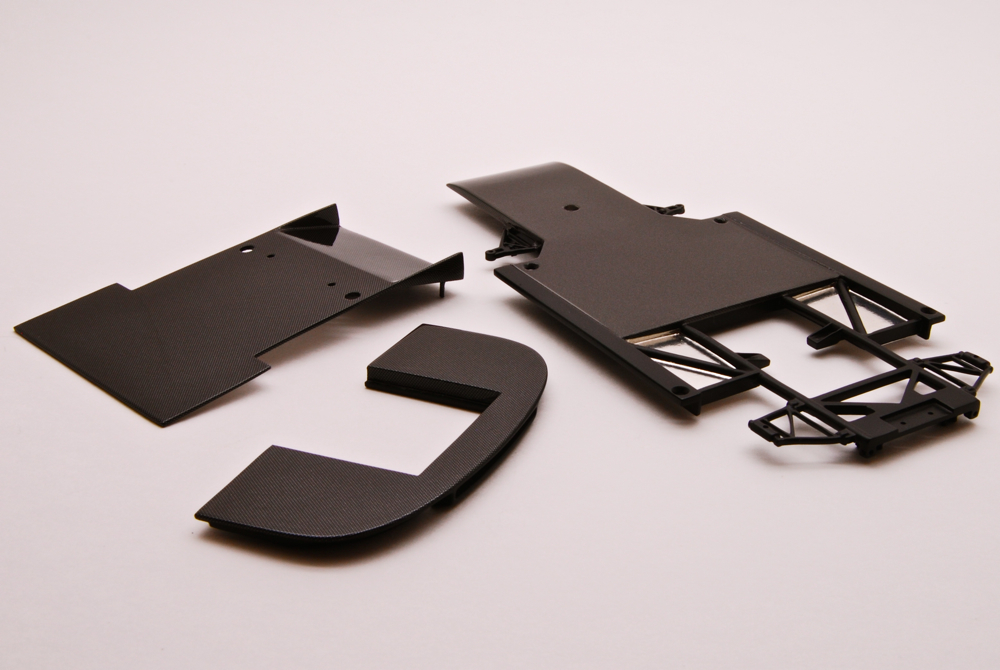 |
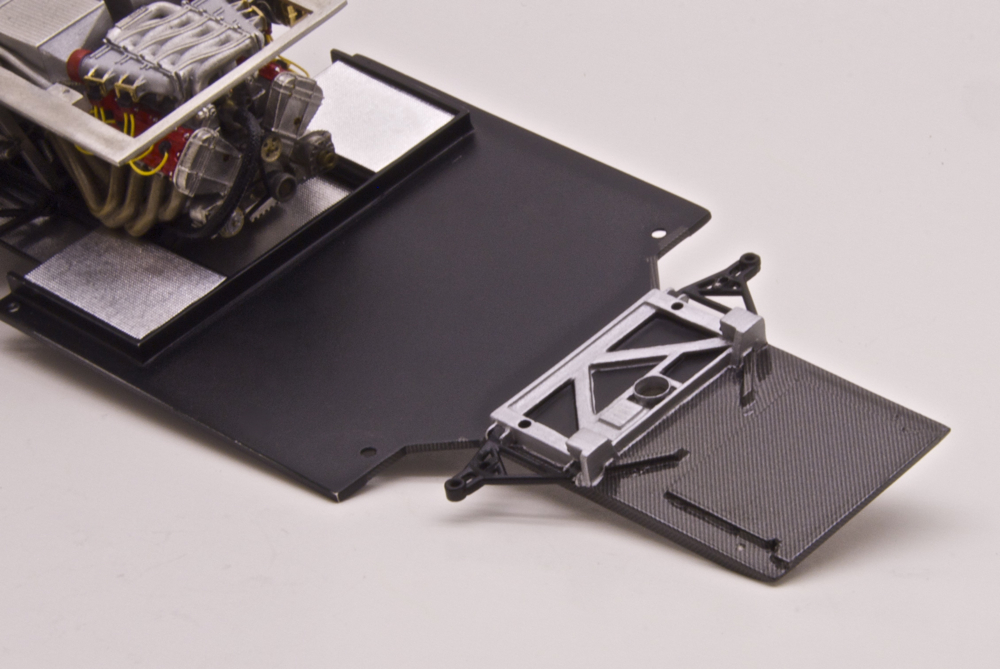
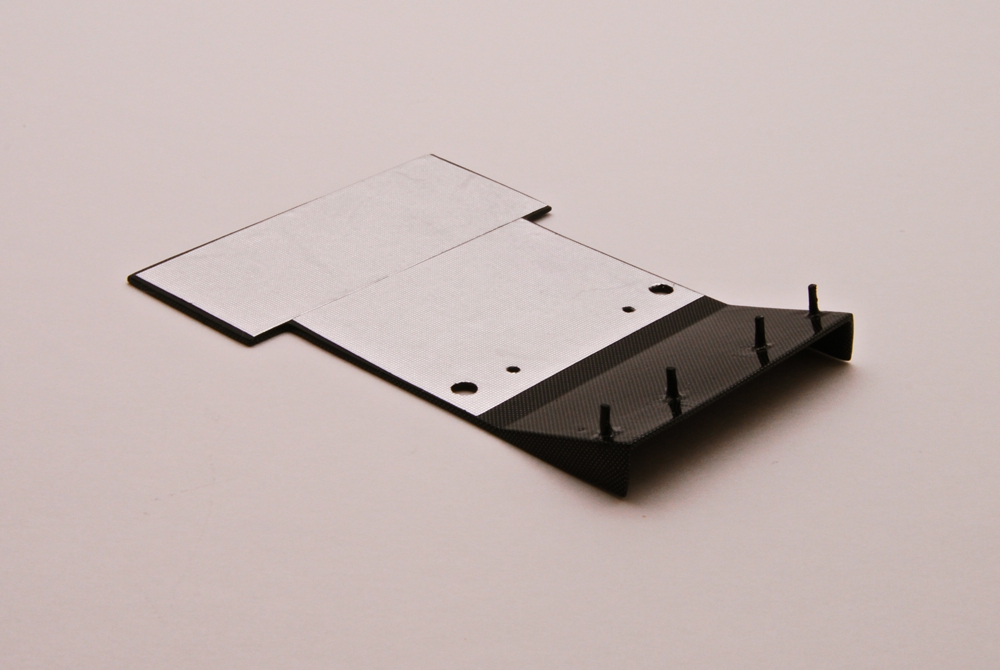
Chassis plate, rear diffuser, and front plate were covered with carbon fiber decals and left to thoroughly dry before clearcoating. |
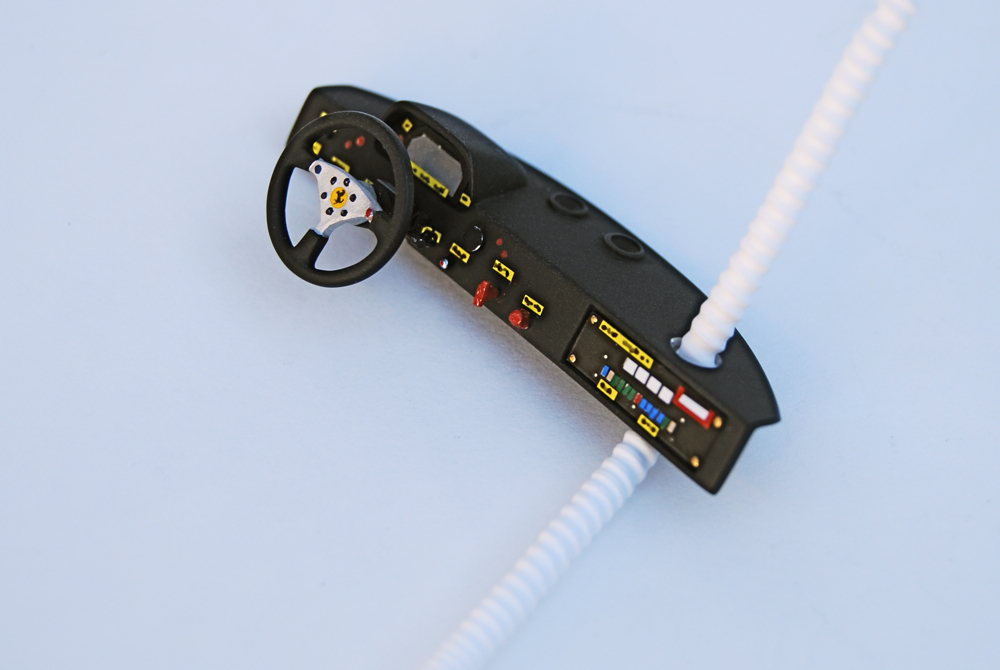 |
Later, dashboard was decaled and detail painted. I also added few knobs and buttons, tags made out of yellow electric tape, and a duct hose for the interior air. |
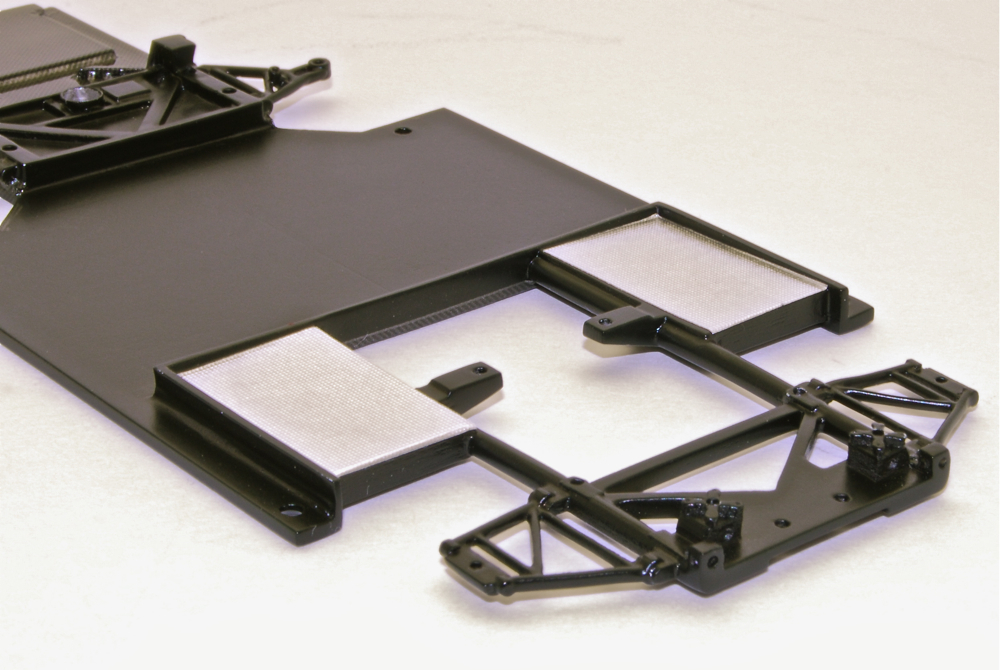 |
Model Factory Hiro self-adhesive heat shielding was applied to the parts of the engine bay on the chassis plate |
 |
Finally, windows, windshield, frame and ducts were installed in the cockpit. |
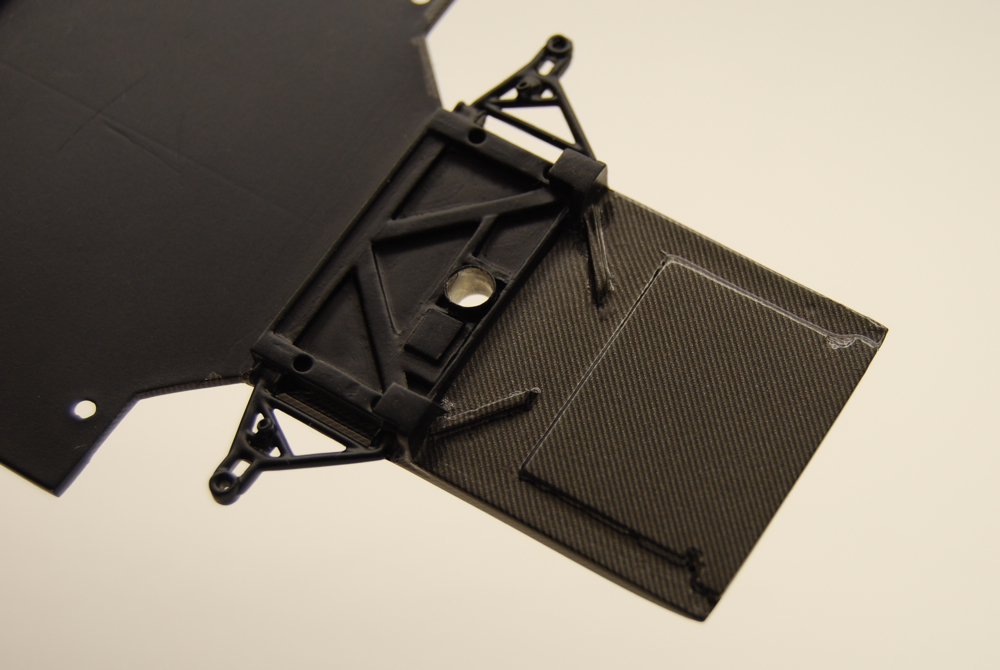 |
Front section of the chassis was also detailed with carbon fiber decals. This part will be visible when front cowl is taken off the model, and needed to look realistic. |
 |
Fit of the windshield was not the best, but after playing with windshield frame, and adjusting the dashboard, I was able to make it fit flush. |
 |
Rear diffuser was also detailed with MFH self-adhesive heat shielding material. Then I carefully cut the holes for the air-jacks and screws that hold the diffuser in place. |
 |
Dashboard and door panels were glued inside the cockpit, and test-fitted with interior tub to make sure they clear the tub and fit with the chassis. Couple of small adjustments were necessary, but nothing major. |
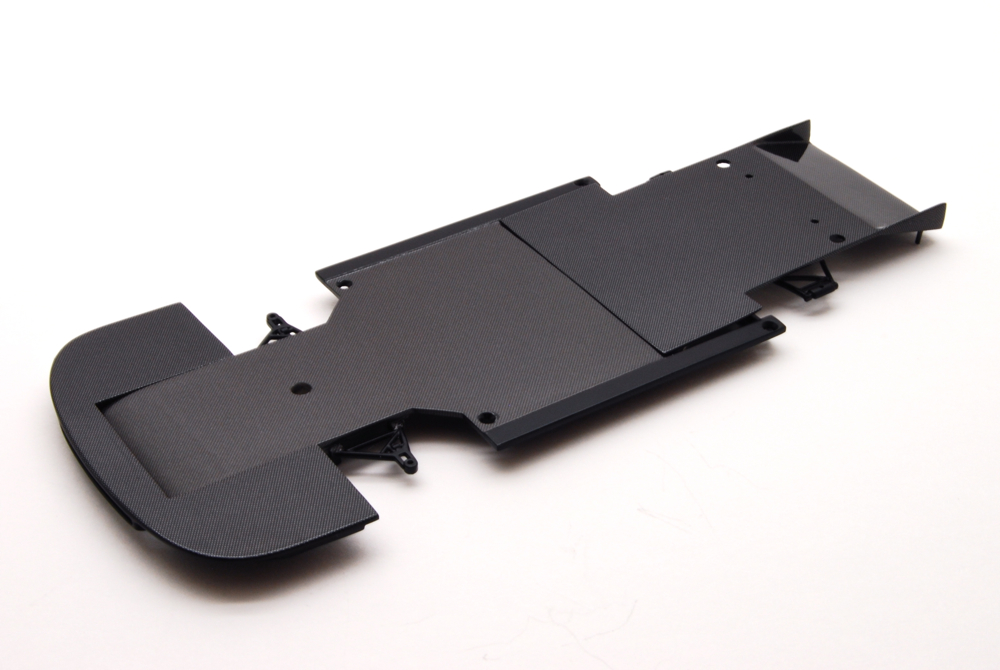 |
Finally, when decals were completely dry, I sprayed few coats of clear and polished chassis to make C/F look smooth and nice. |
 |
At last, it was time to build the interior. Both interior tubs were covered with kevlar over the course of a few evenings. After decals were dry, I sprayed couple of coats of clear (not on this picture). |
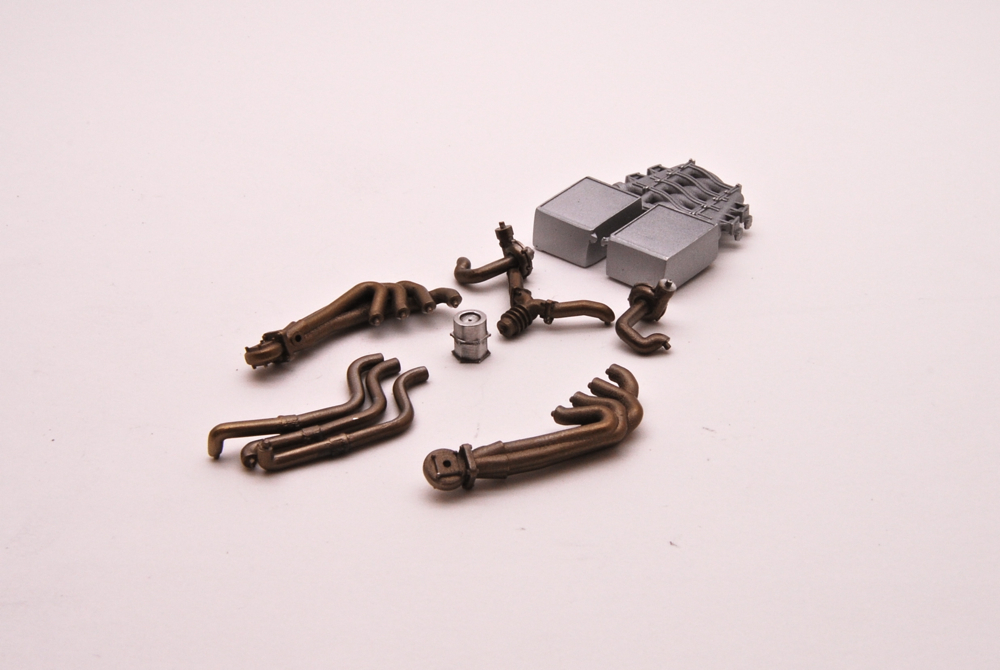 |
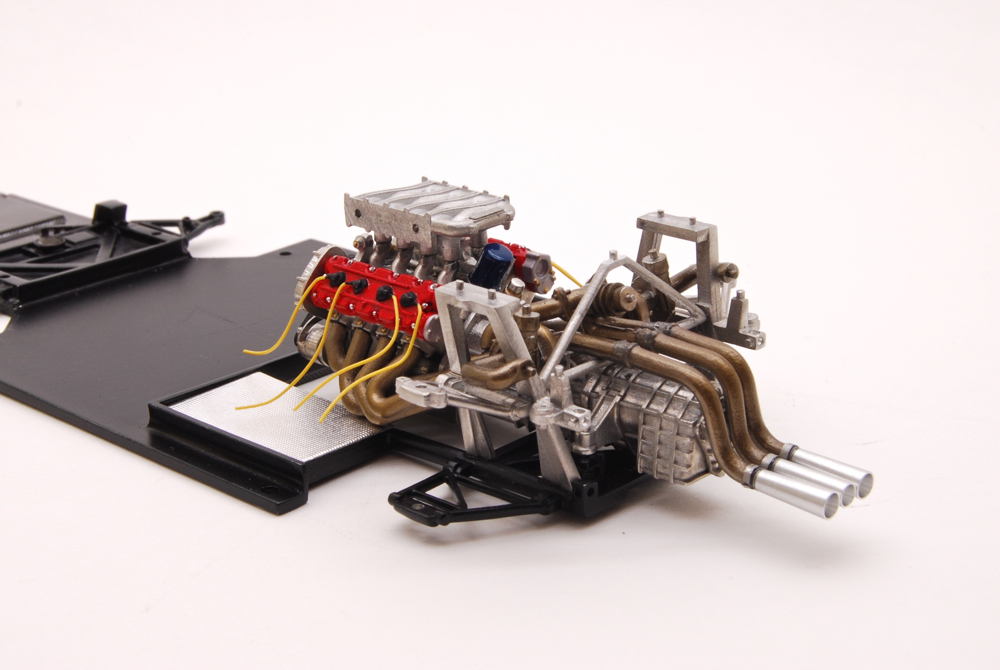
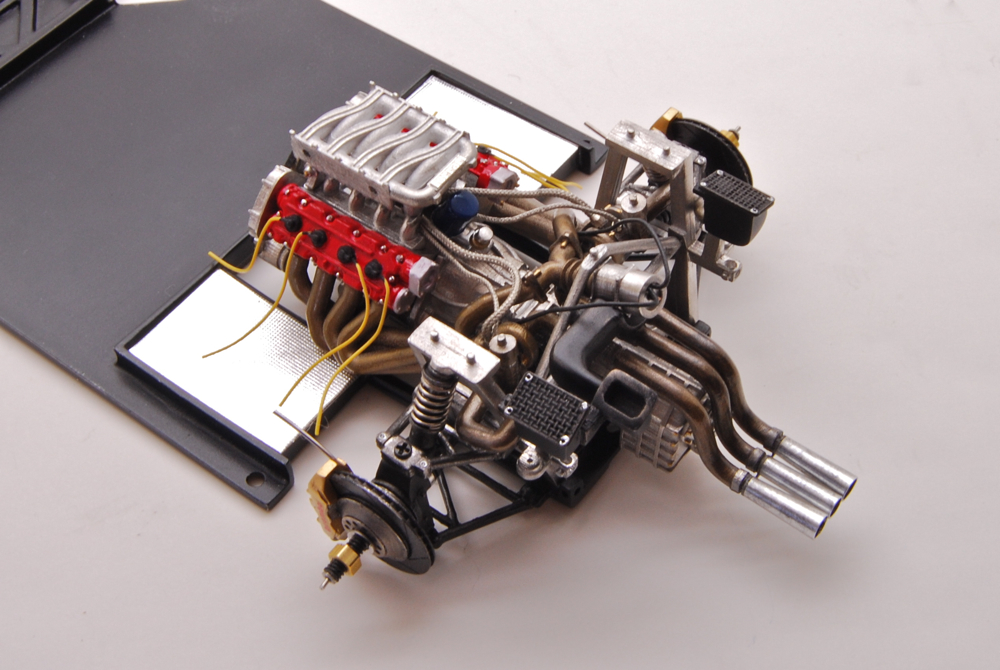
With chassis plate ready, it was time to get back to the engine. Enhaust manifolds were painted with various Model Master buffing metalizers and lightly weathered and buffed for natural look. I also painted the intercoolers with MM Aluminum and lightly buffed them. |
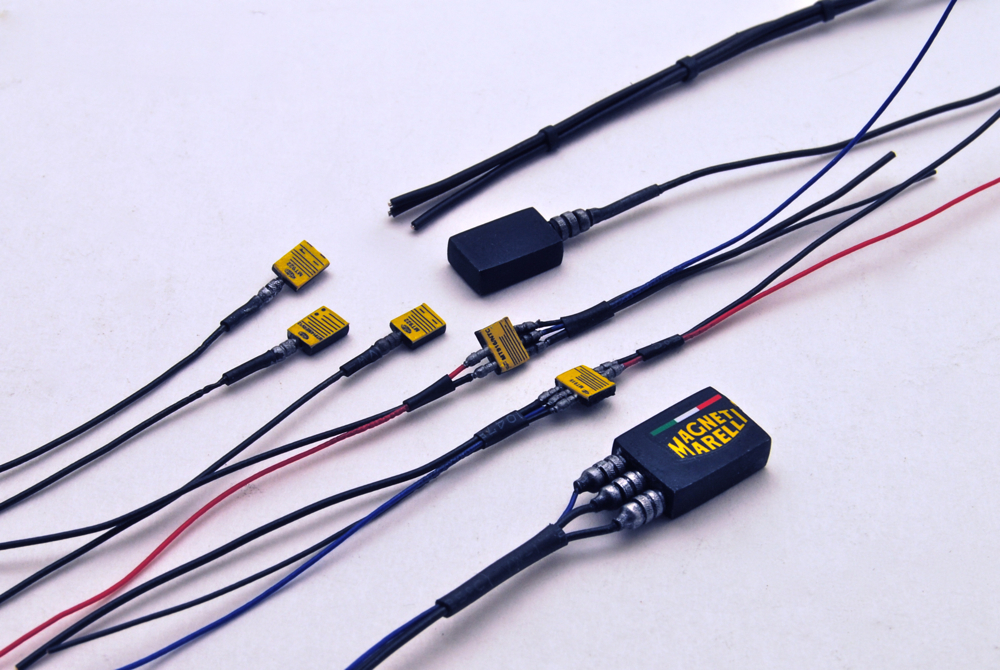 |
Electronics and control boxes were built using kit parts, Top Studio electronic connectors and wiring, and decals from the kit. |
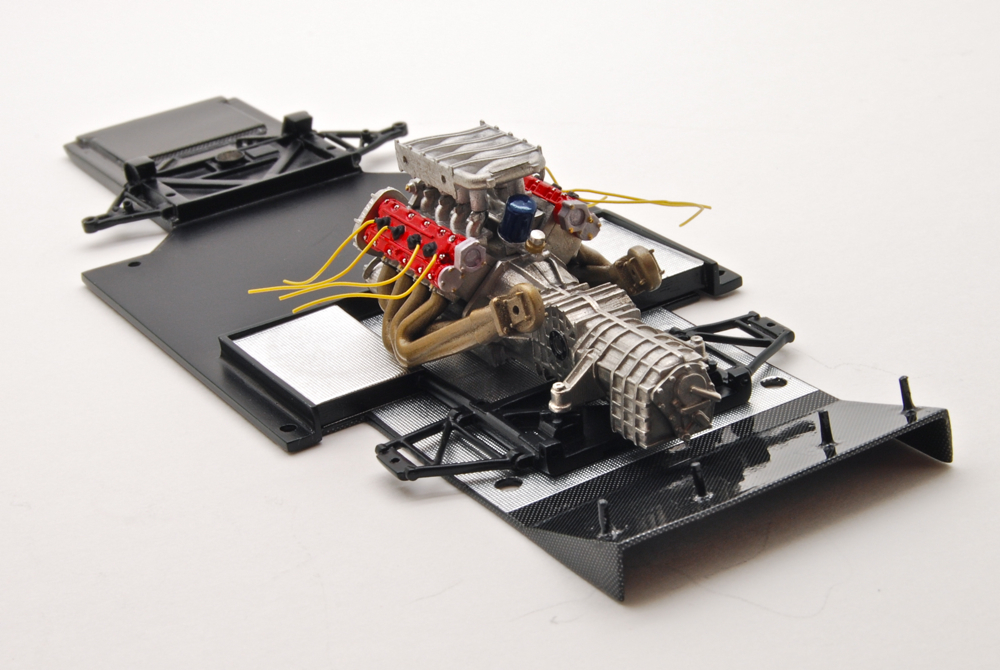 |
Intake manifold and exhaust manifolds were glued to the block, and engine was test fitted to the chassis to make sure that everything aligns right and nothing needs to be adjusted for clearance. I also test-fitted rear diffuser. |
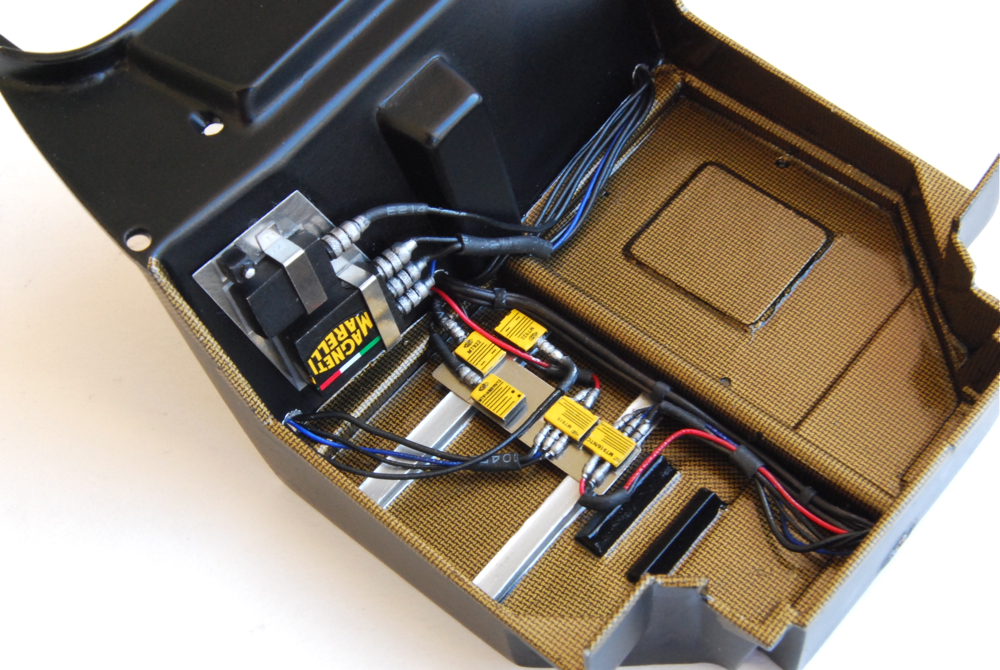 |
Then wiring was installed and routed in both interiors according to my reference pictures. I had to drill la few holes here and there to help with wiring distribution. |
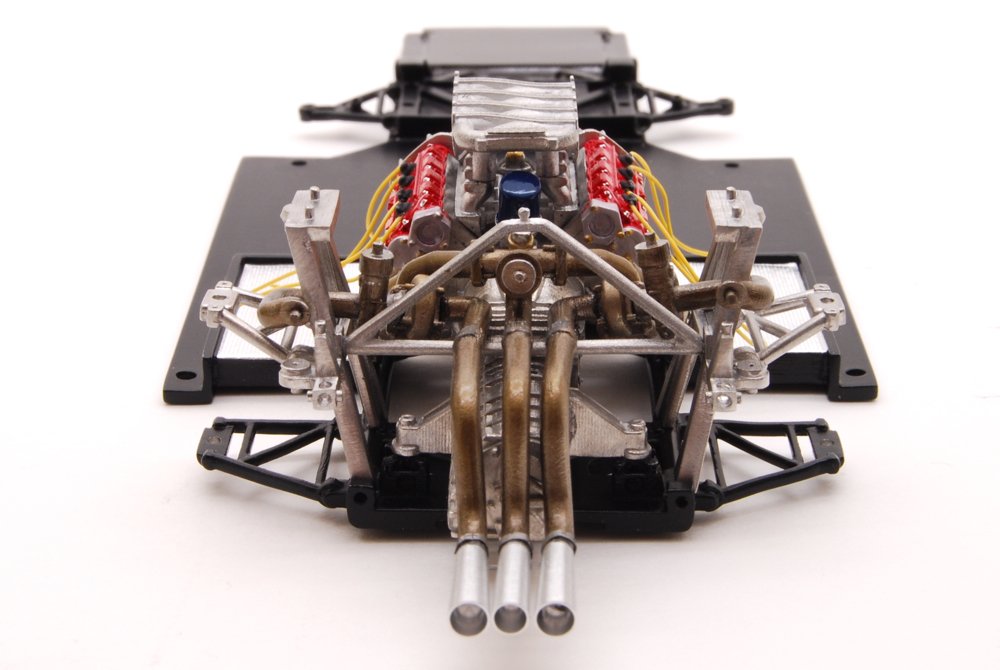 |
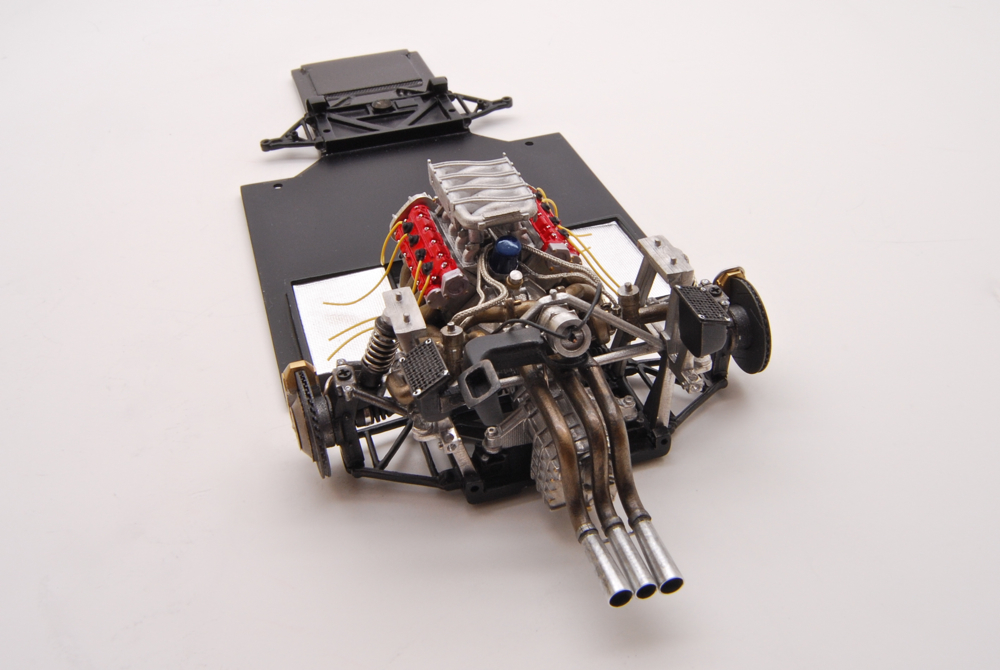
Rear suspension arms, exhaust system, turbos, and blow off valve were all assembled together and installed on the chassis. |
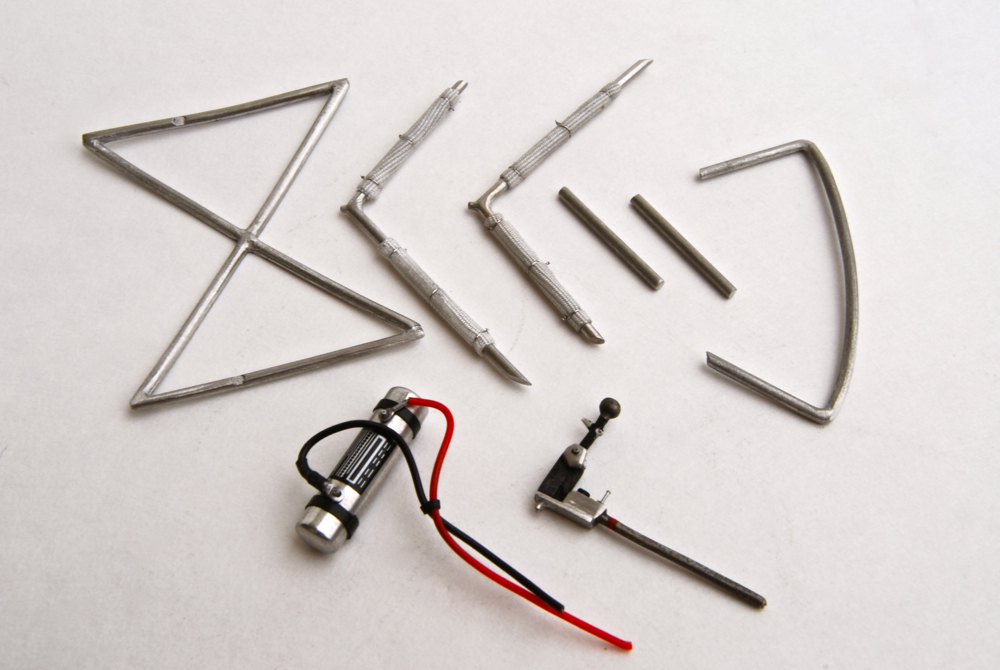 |
Fire suppression system tank was wired using scratchbuilt connectors and spare wires, roll cage parts were cleaned and sanded, padding was made from medical tape and thin wire was used for the tie-downs. I also detailed and painted the shifter. |
 |
The exact same procedure was done for the second chassis. It was time to work on the rolling stock - brakes and wheels for the chassis. |
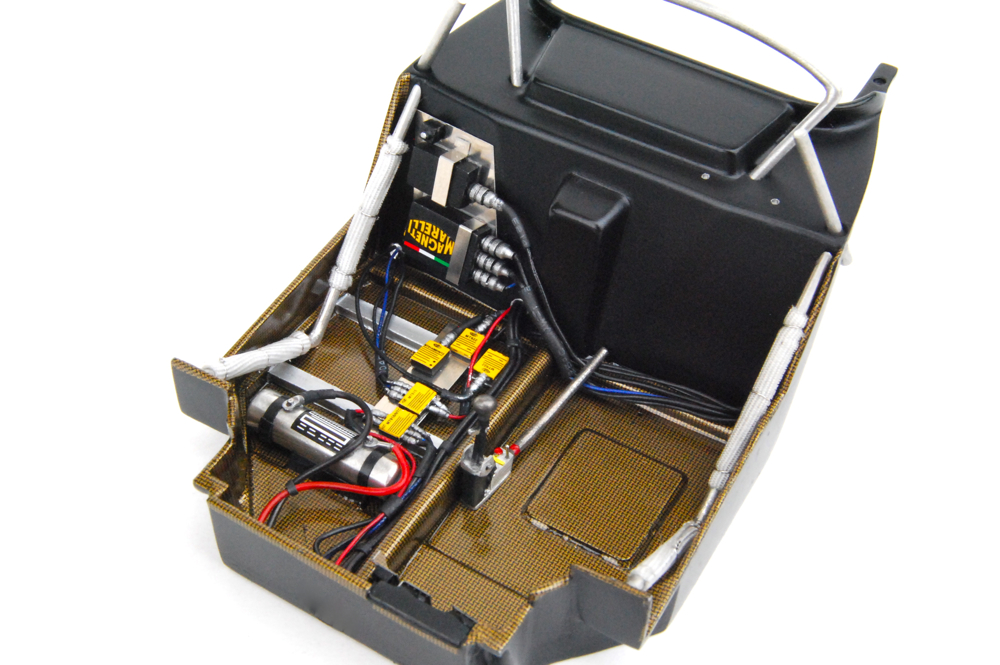 |
Shifter assembly, fire suppression system tank, roll cage, and pedals were installed into interior tub. Little by little, interior started to take shape. |
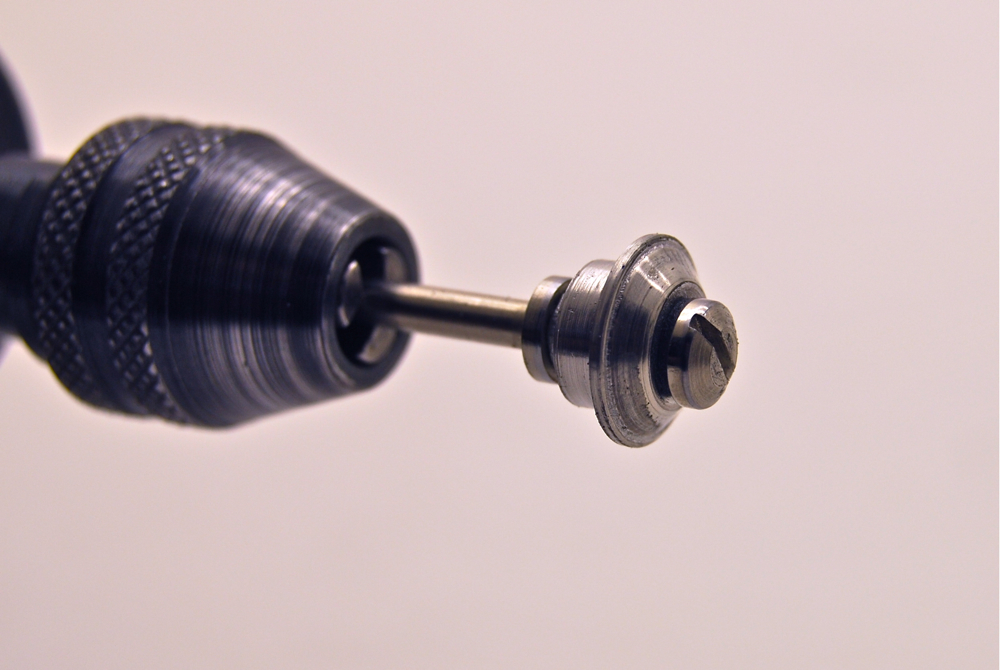 |
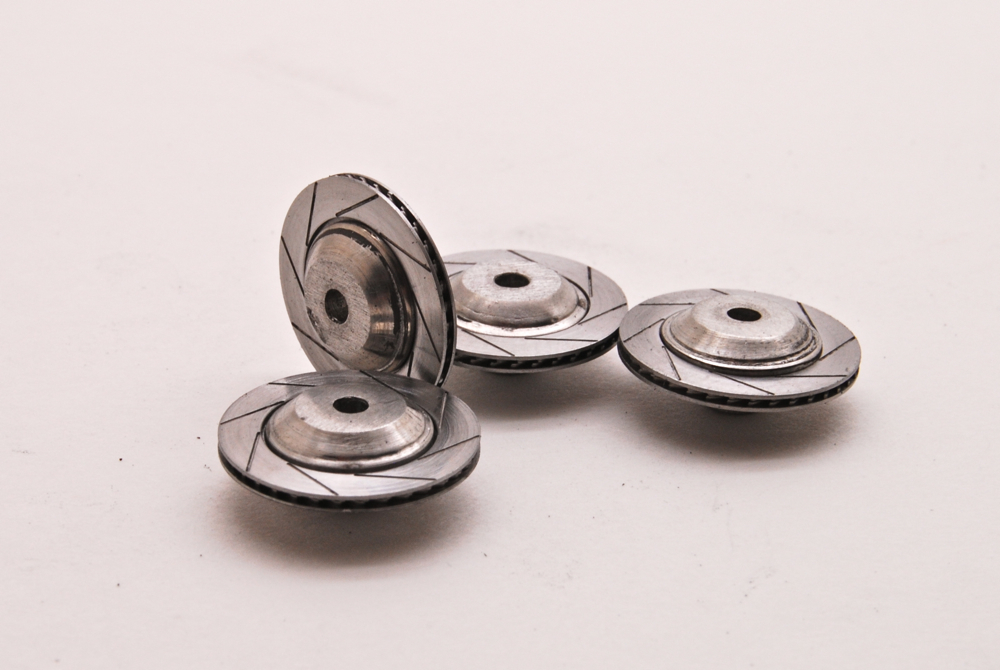
Rotor hats were provided as a rather rough castings, so I clamped them into my Dremel and smoothed them out with some coarse sanding sticks. |
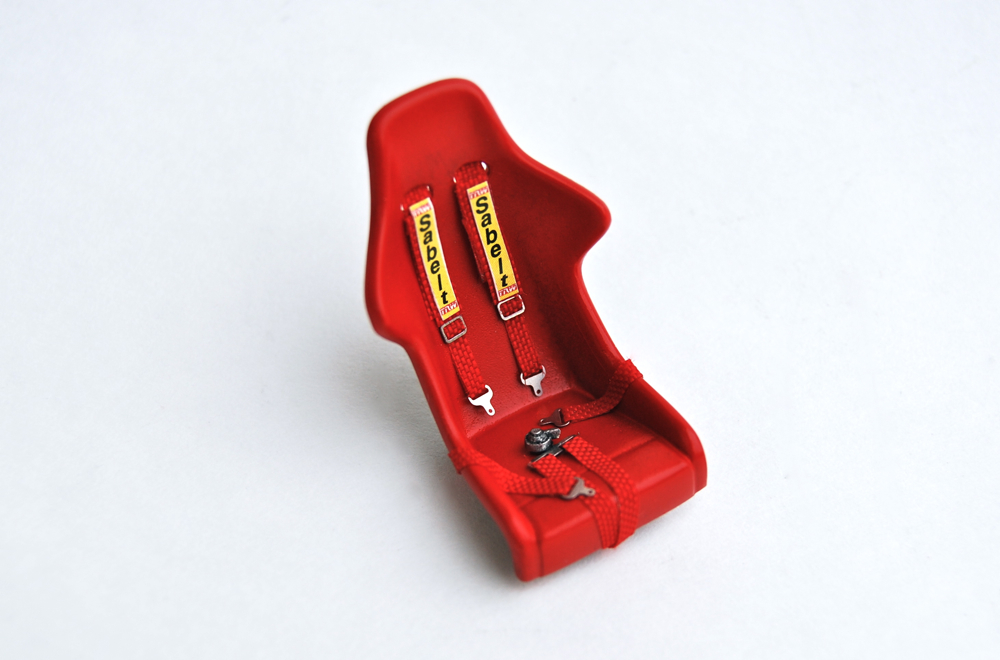 |
Seat was cleaned, primed, and painted. I also decaled back of the seat with carbon kevlar, and used racing harness set from Crazy Modeler and thin ribbon from Hobby Lobby to create the harness. Decals are from CM set as well. |
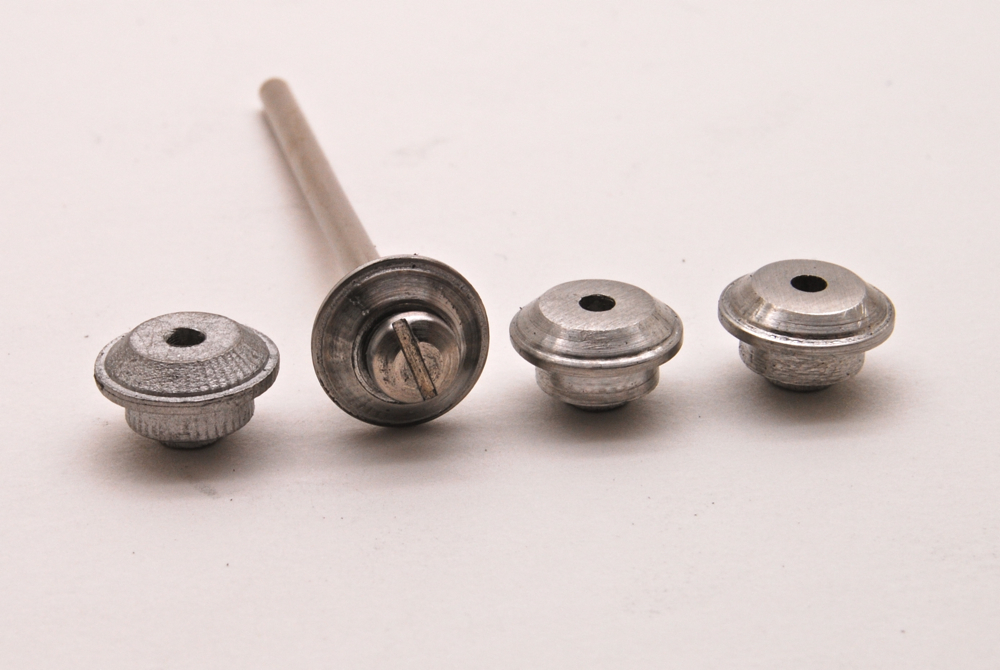 |
Original part is on the left, two sanded parts are on the right, and one "in-process" part is still on a Dremel shaft. |
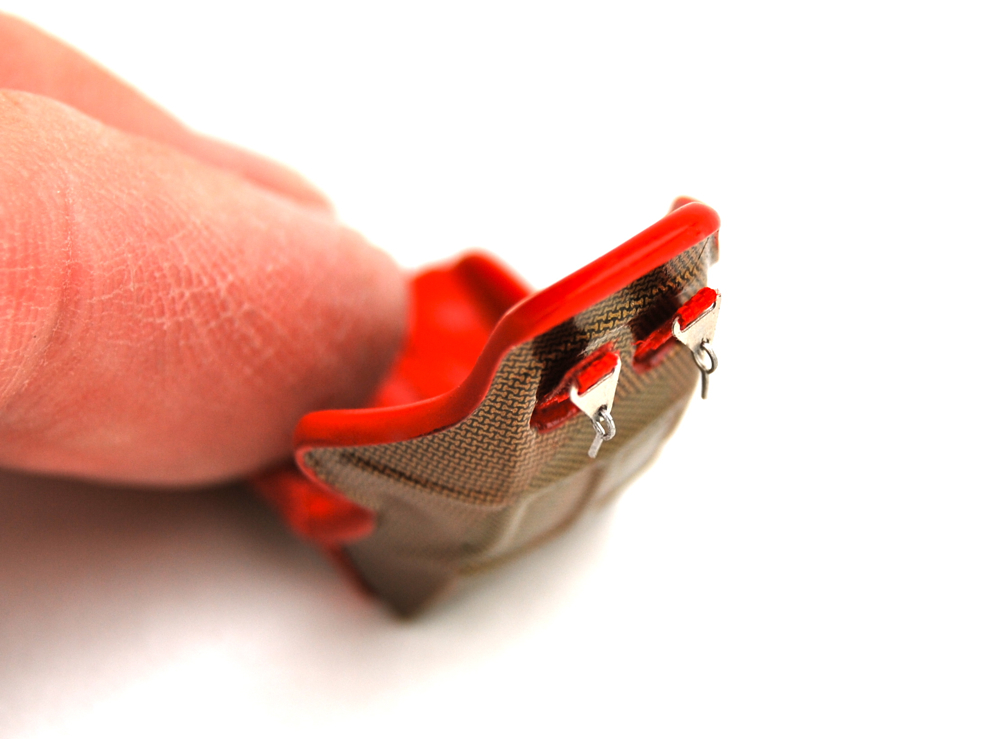 |
I also made couple of hooks from a thin wire to attach the harness to the interior tub. You can see couple of pre-drilled holes behind the seat in the interior tub on the picture above. |
 |
Once the hubs were ready, I glues photoetched rotor sandwich (two rotor faces and one "vent' slice) to them. Then I spun them in my Dremel while touching them with fine sanding stick to create lightly worn appearance. |
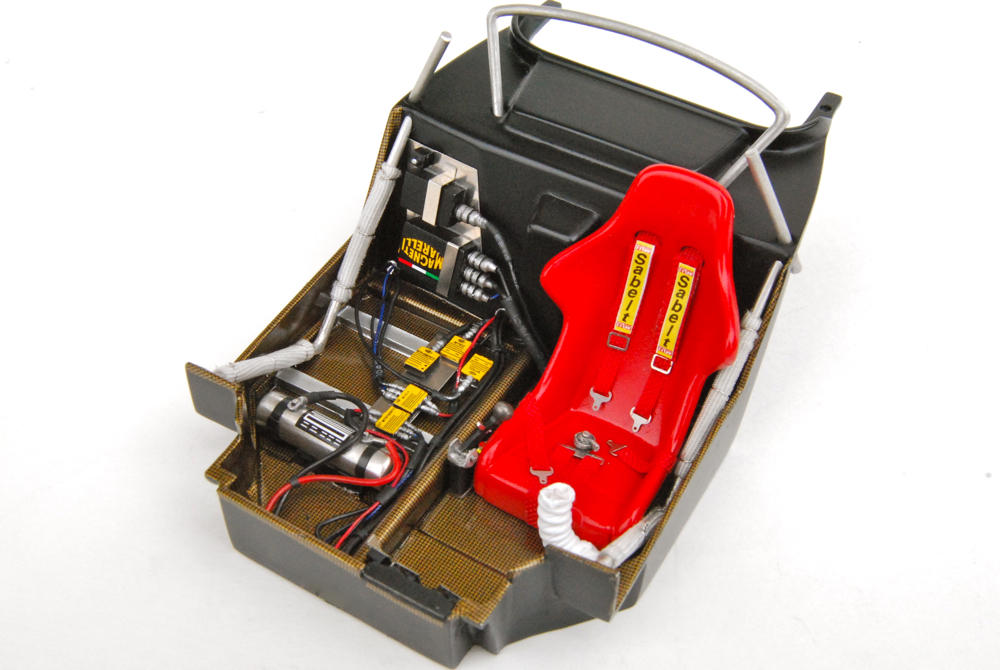 |
The seat was installed into the interior tub, racing harness fastened to the firewall, and lower interior air duct glued inside the tub and aimed at the driver. |
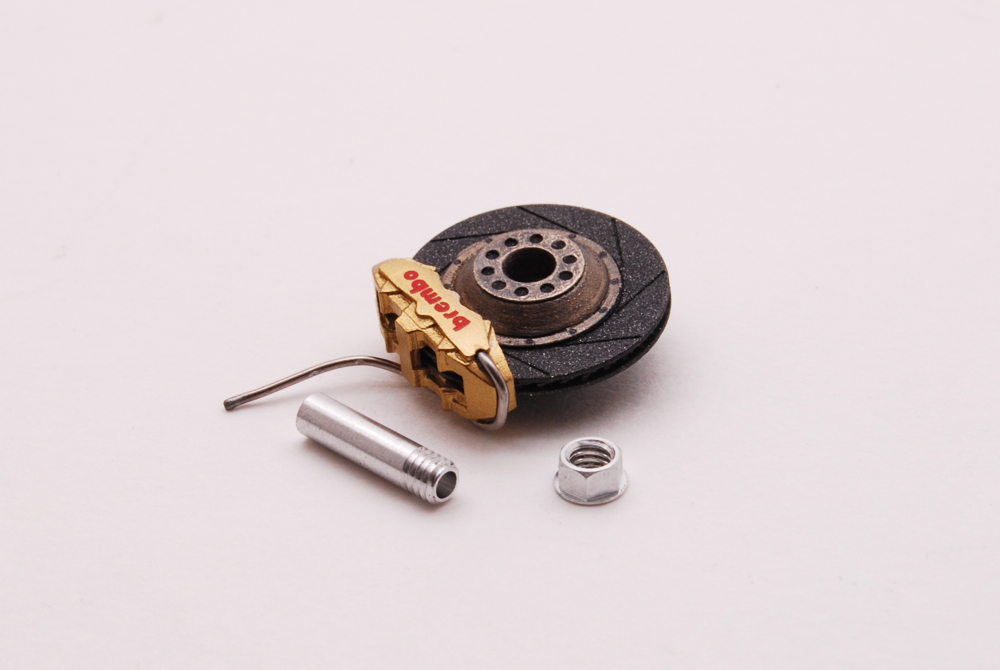 |
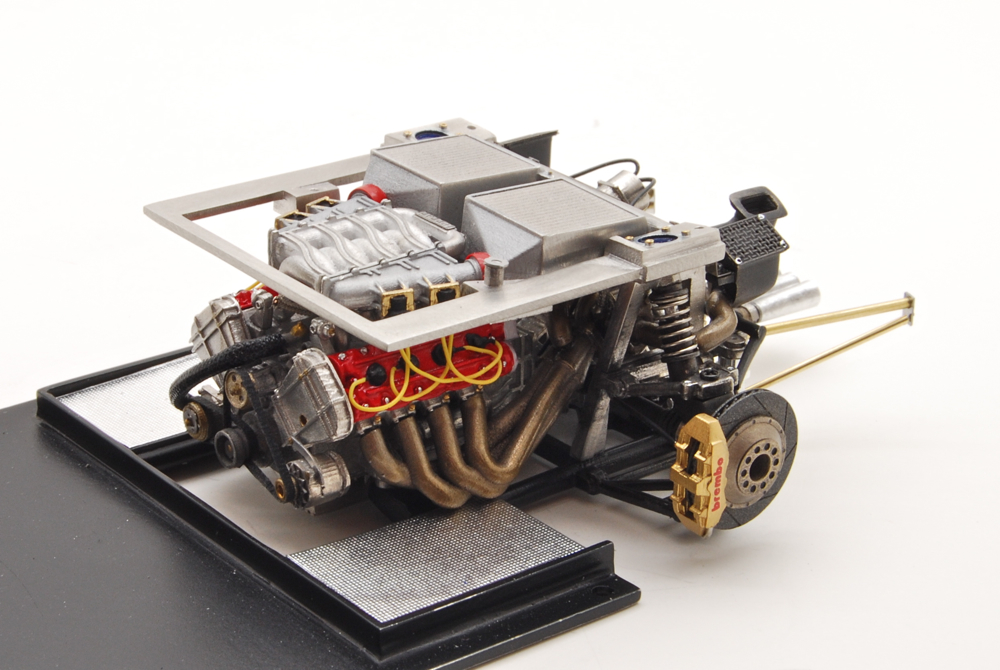
Rotors were painted with various shades of MM metalizers. Calipers were painted with Alclad Pale Gold, and fitted with solder brake lines. Axles and center nuts are Acu-Stion items. |
 |
Second interior was done in exactly the same way. |
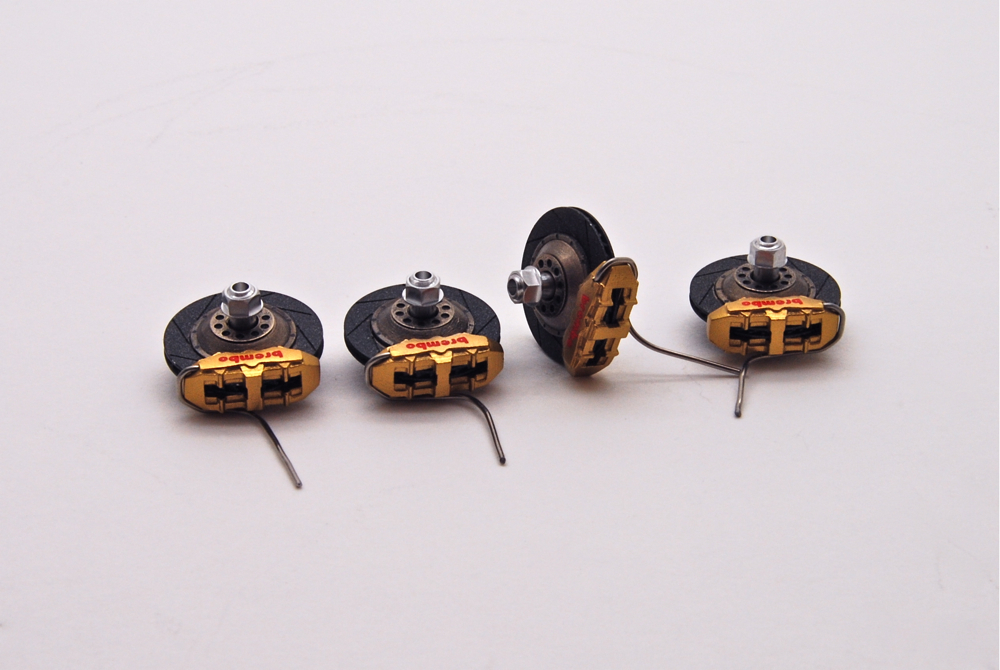 |
Completed set of brakes awaits their installation to one of the models. |
 |
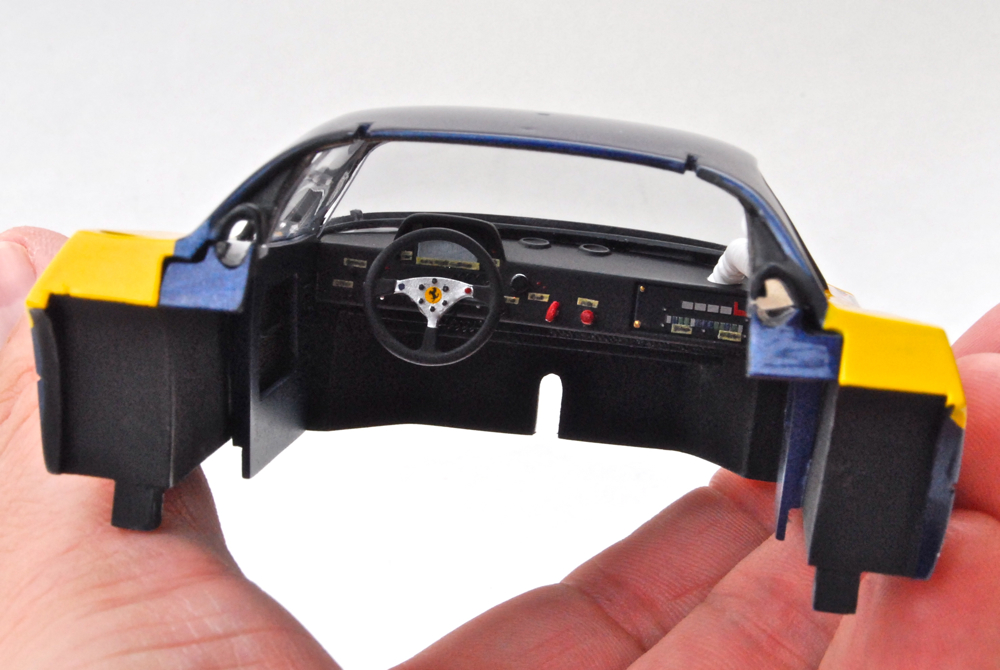
To make sure everything is aligned correctly, I tack glued the dashboard in place - everything seemed to fit right - the interior was ready to be installed into the body. |
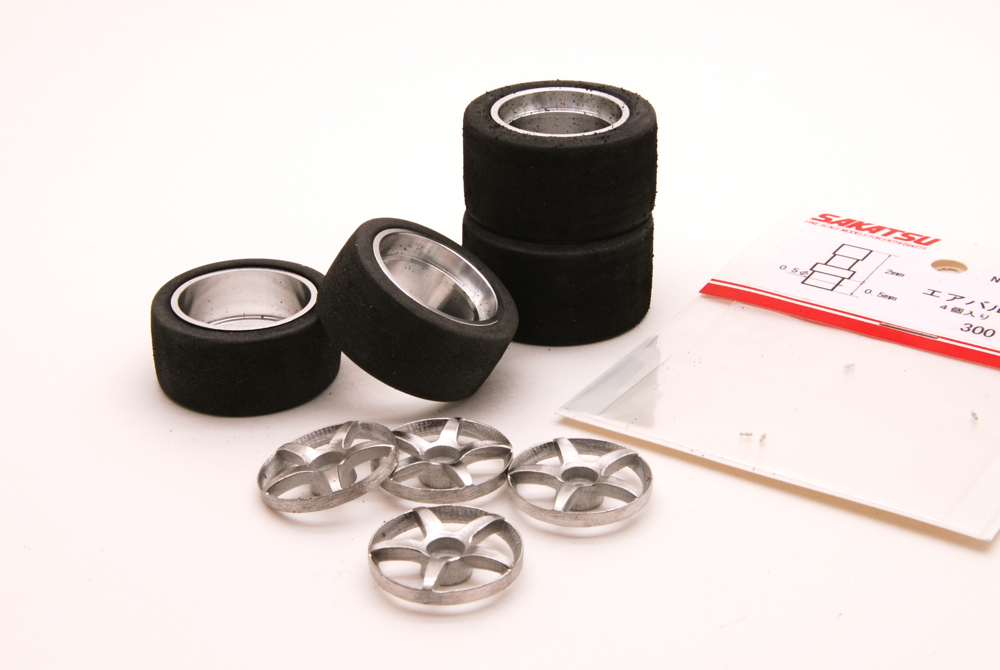 |
Wheel inserts were rather rough, so the first thing I did is sand them and make sure they fit inside turned rims provided by MFH. Tires were also sanded using the method from my tire scuffing tutorial. I also used Sakatsu turned tire valves. |
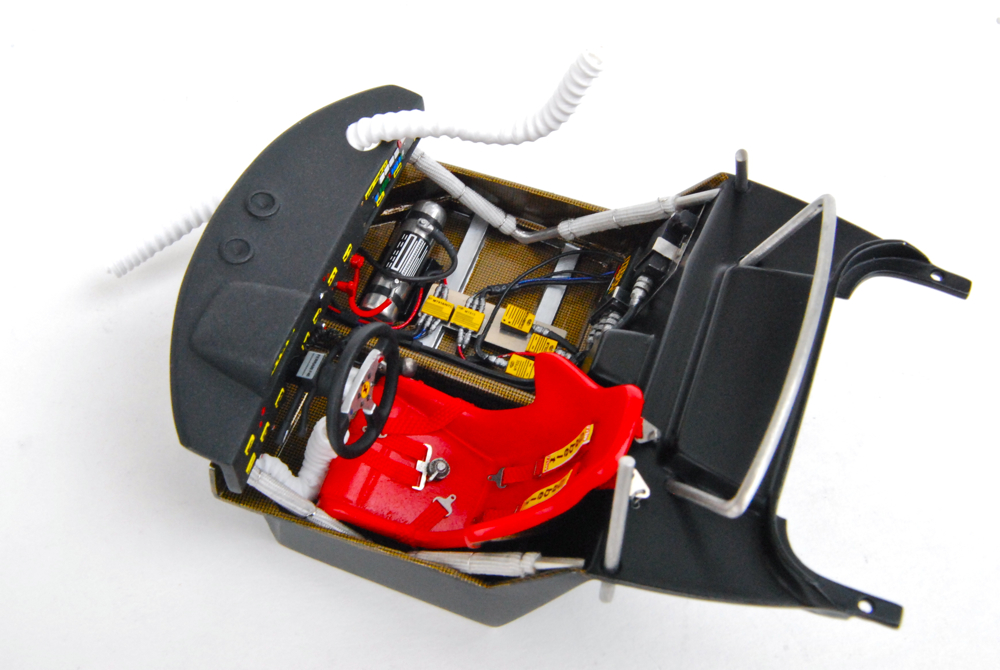 |
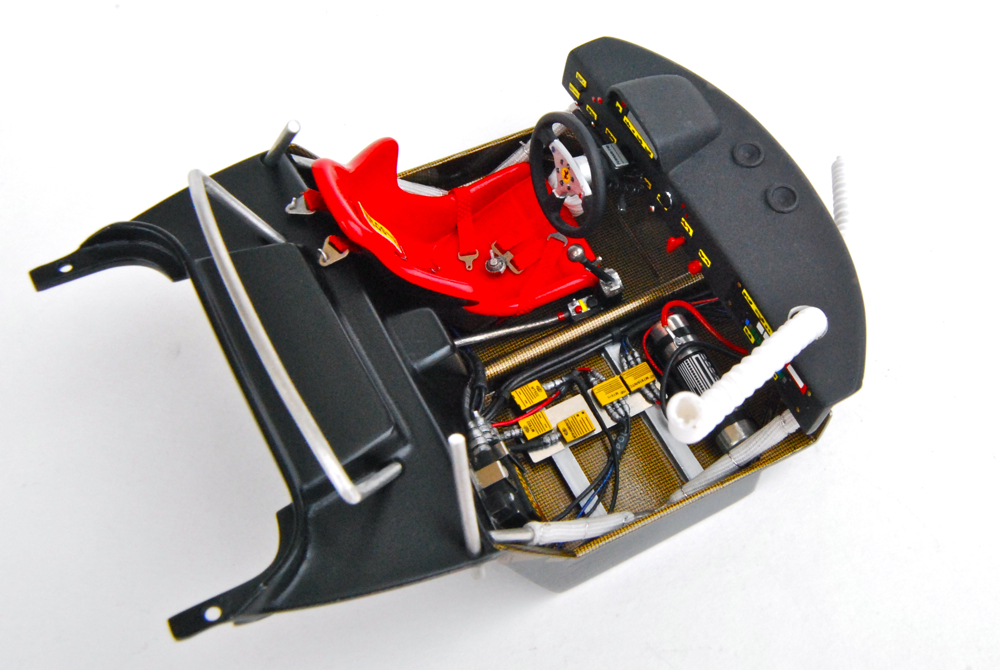
Drivers' side view of the completed interior. |
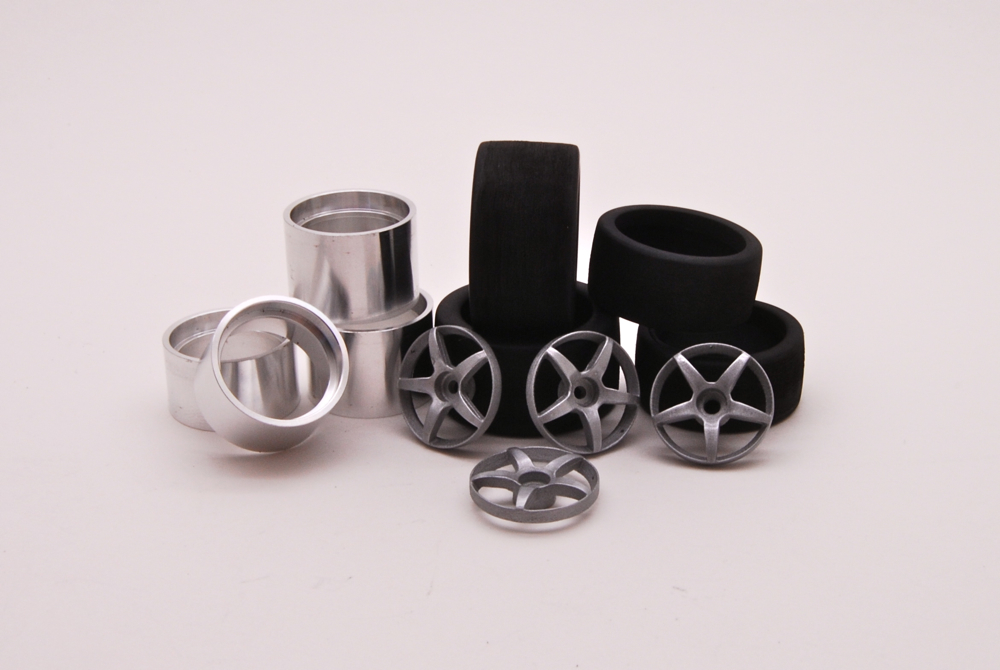 |
The wheel inserts were all cleaned up, primed, painted and clearcoated. I also pre-drilled them for the tire valves. |
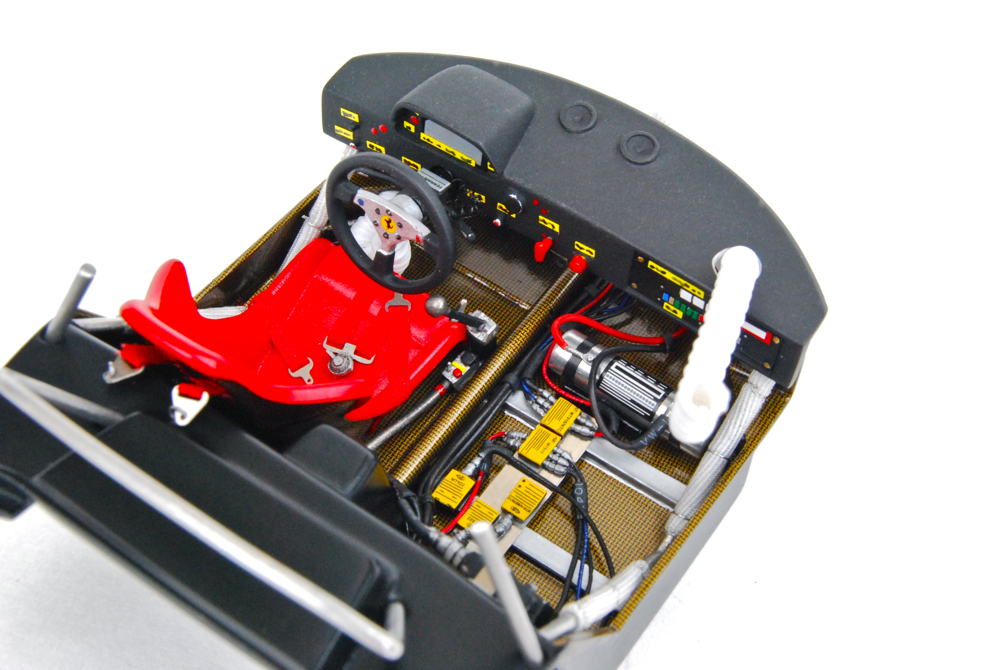 |
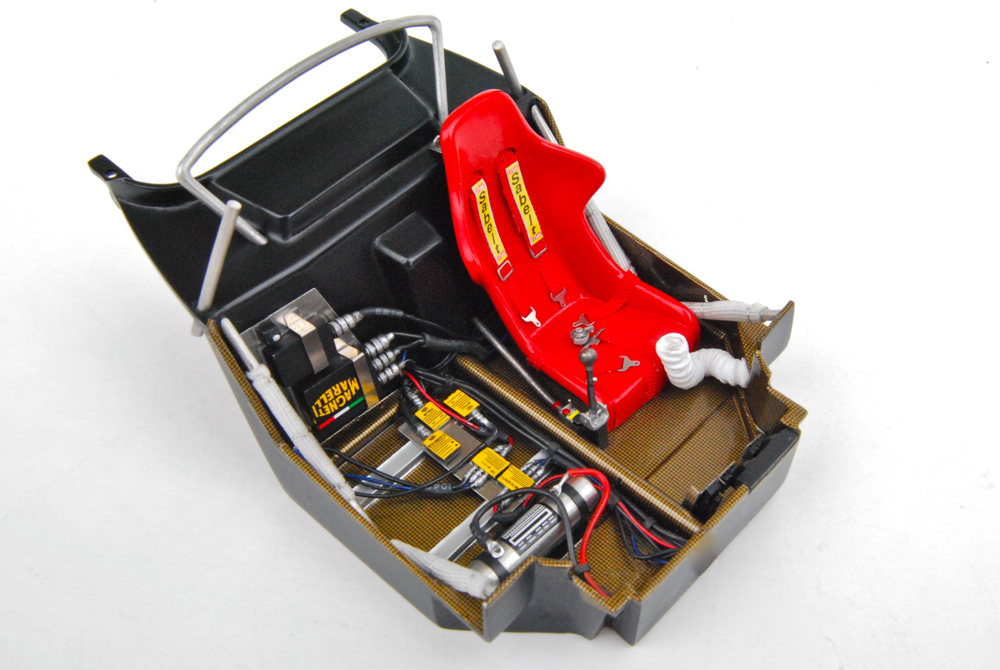
Another beauty shot of the completed inferior with dashboard attached in place. |
 |
I had to enlarge the openings in the wheel centers for the axles so they would fit Acu-Stion items. Then everything was assembled together and decaled. |
 |
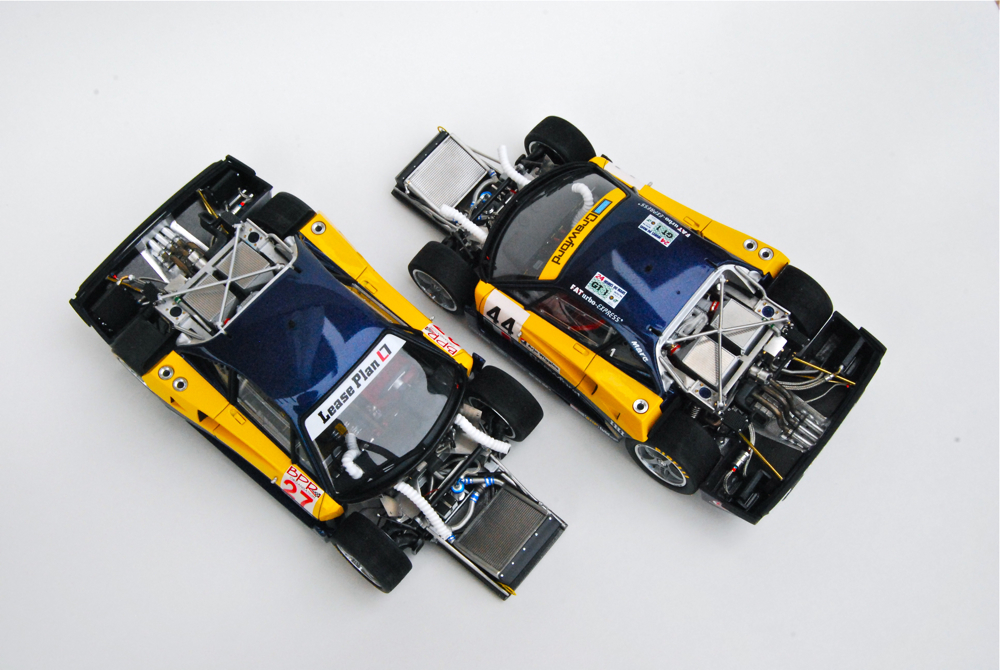
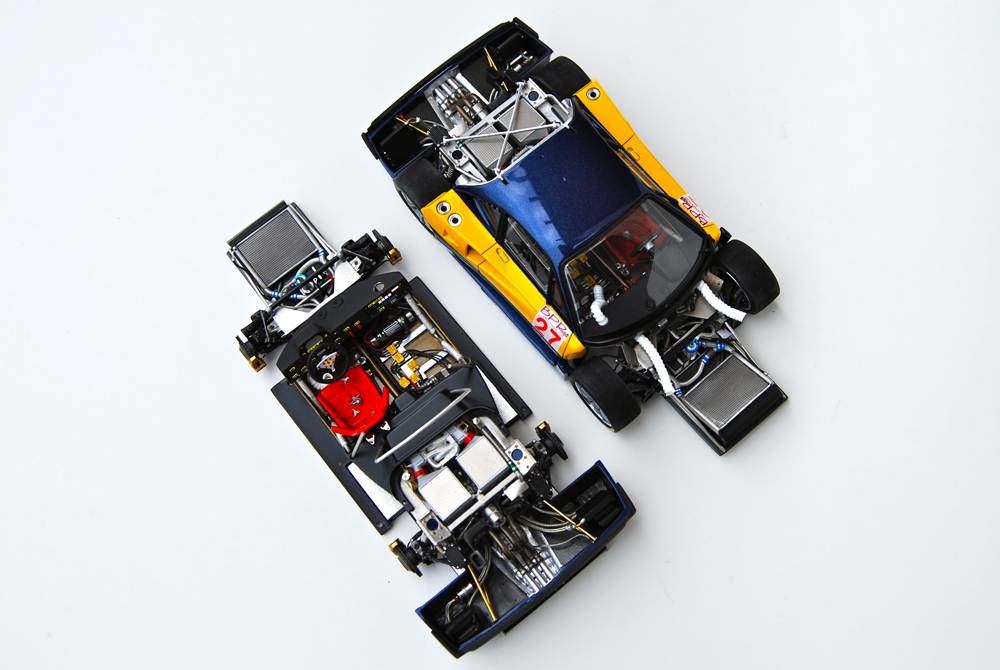
Finally, interior was glued to the chasis for both models, and I took a few "naked chassis" pix - before the wheels and body installation. |
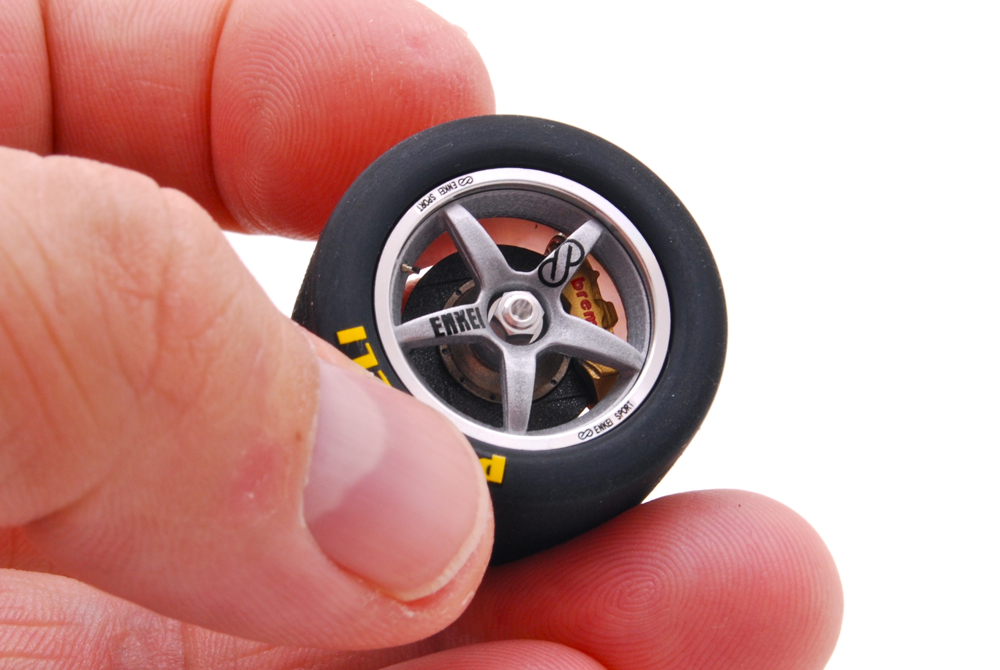 |
Brakes were test fitted inside the wheel to make sure that they fit right and nothing interferes with the brakes and wheels spin free. |
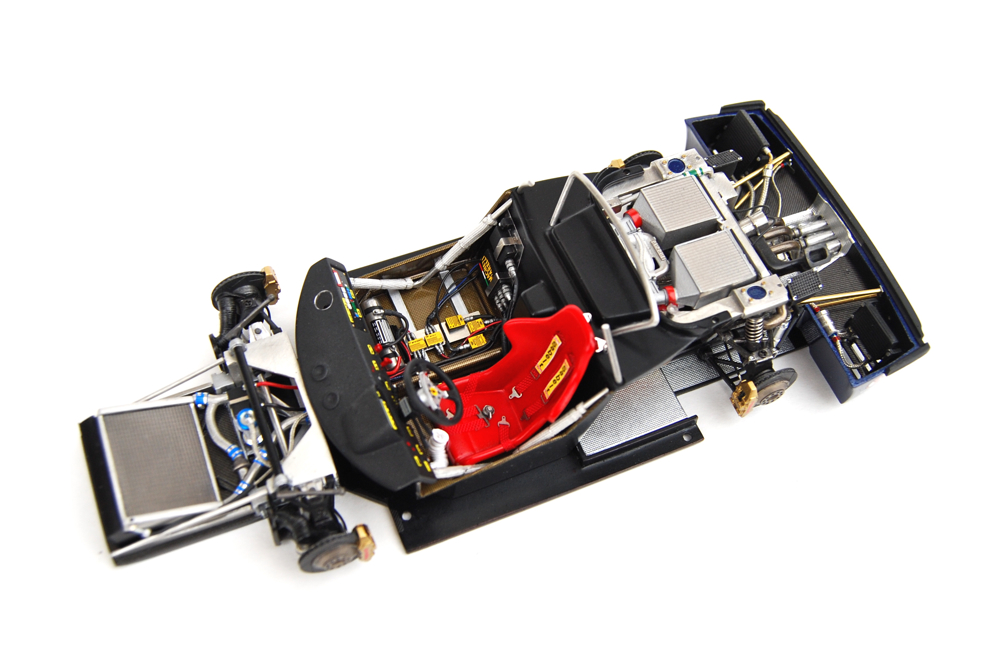 |
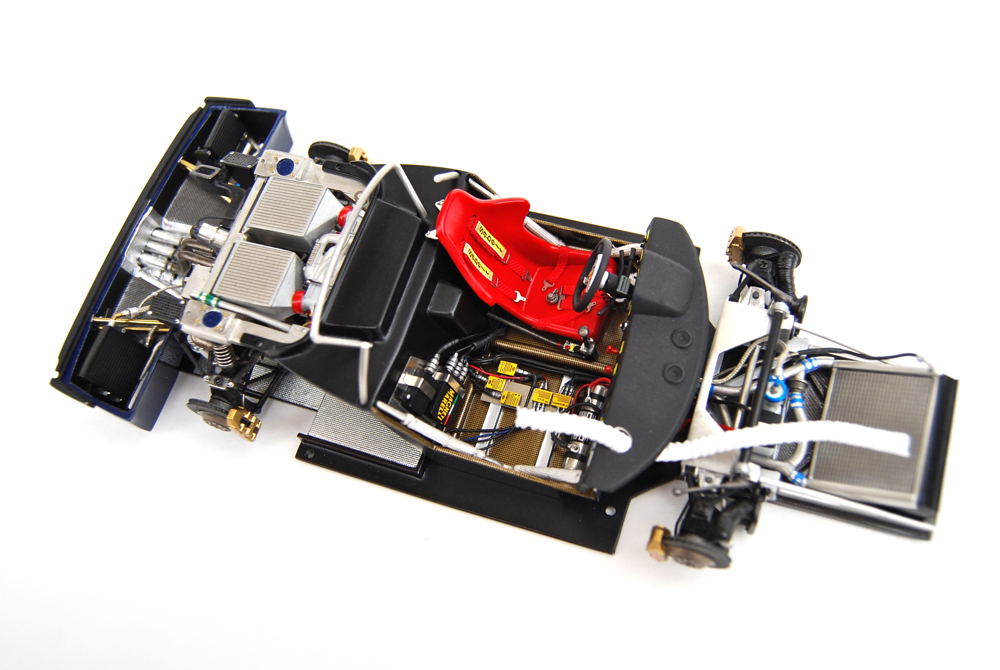
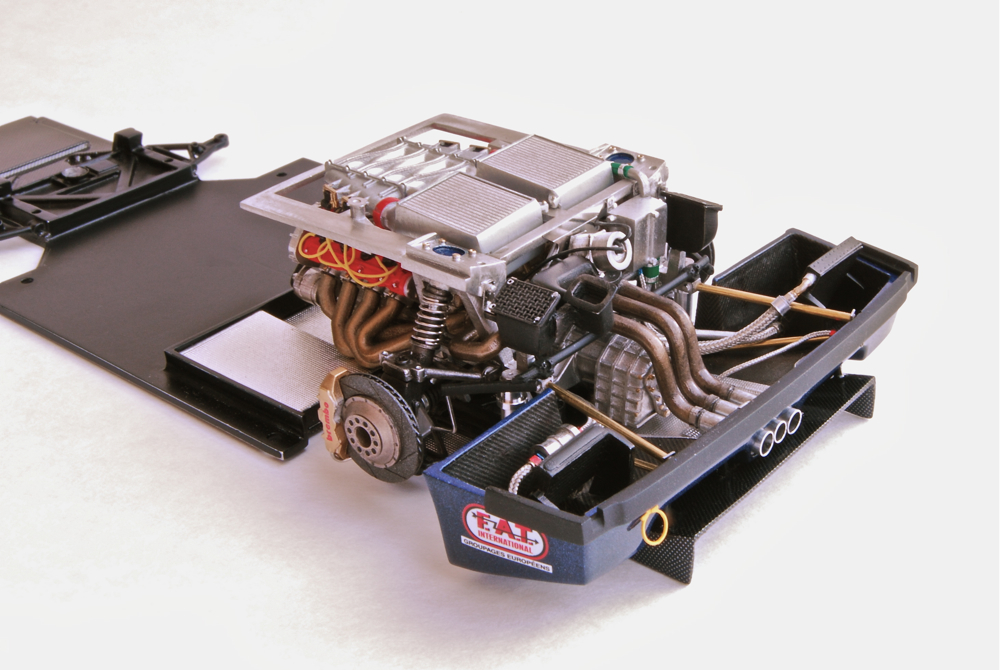
Chassis for car number 44. This picture gives you an idea of how much detailing was put into these two models. Completed chassis also weights a ton, because most parts were white metal. |
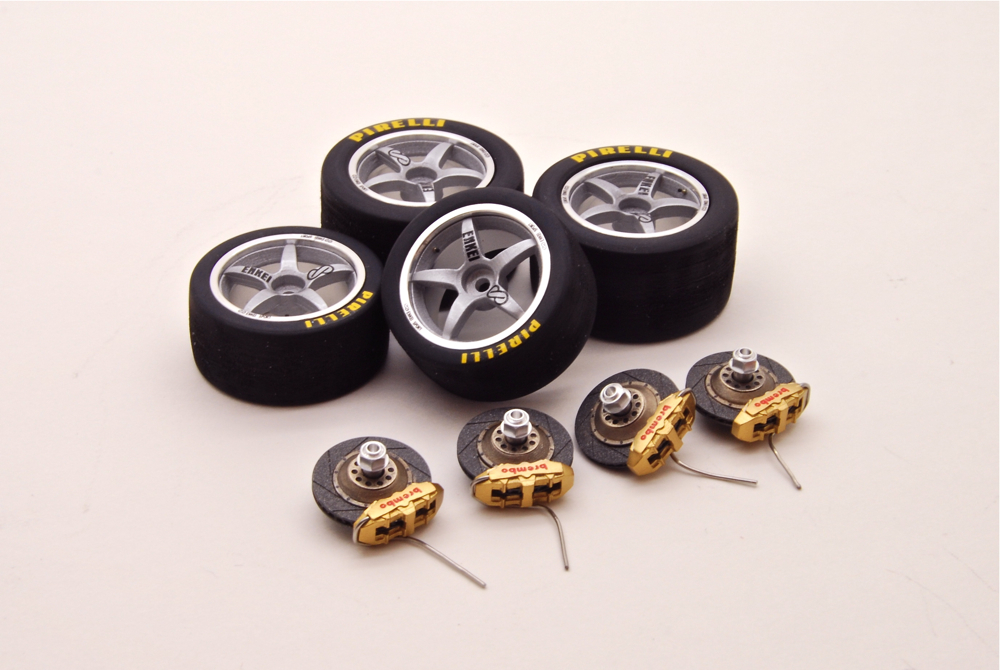 |
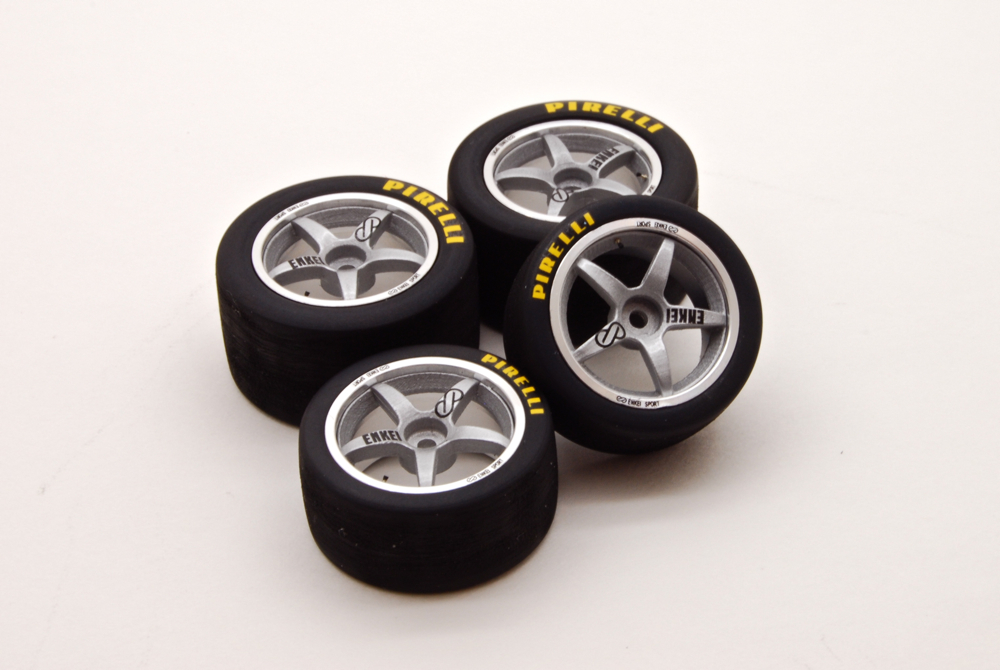
Set of four wheels and for brake assemblies ready to be installed on the model. |
 |
Before putting hte body on the chassis, I installed upper part of the roll cage on the roof, and routed antenna wire. |
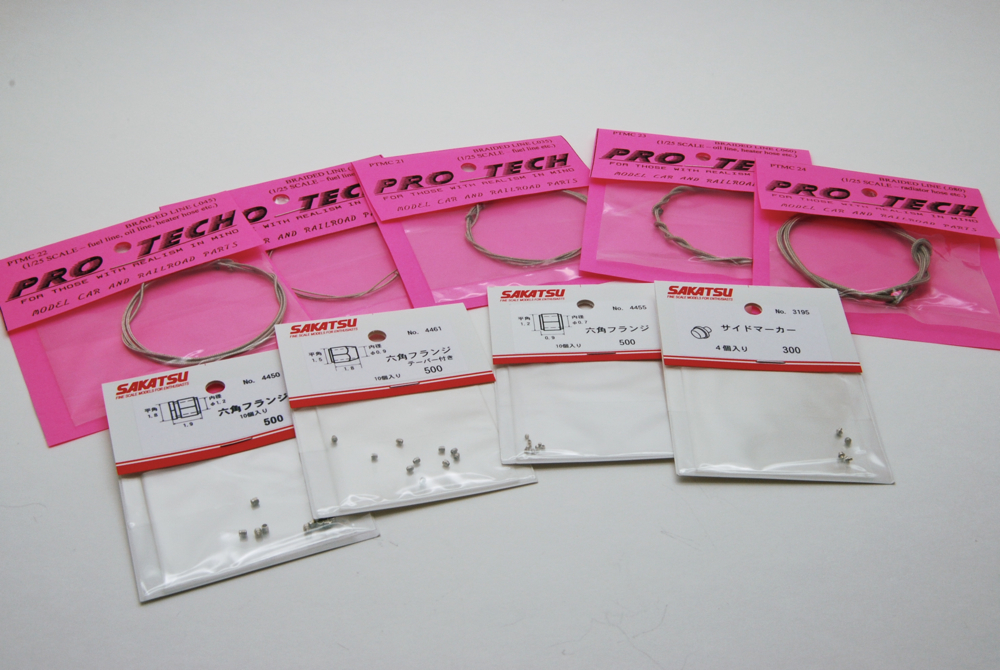 |
Once the brakes were ready, I continued with engine assembly. Using Pro-Tech excellent braided lines, and various sizes of Sakatsu fittings.... |
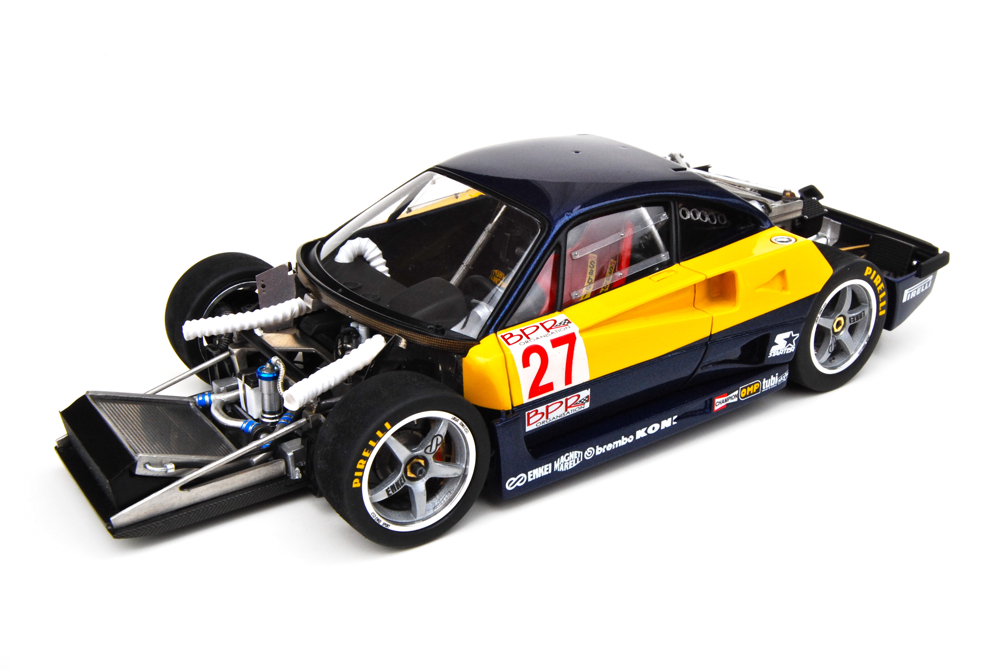 |
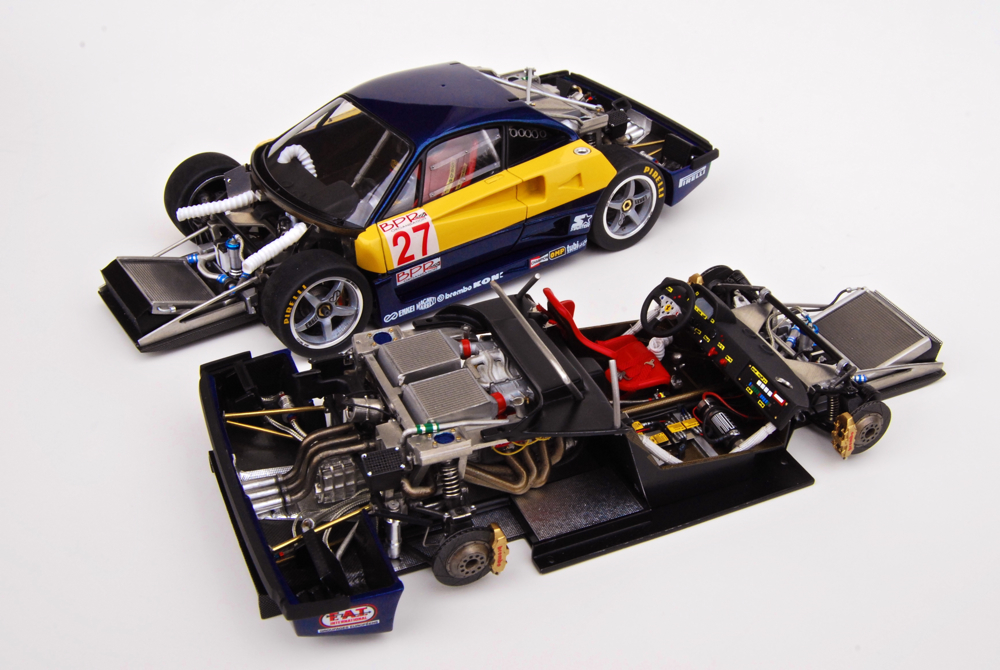
Finally, body was was attached to the body with four screws, and wheels were put on the brakes. Everything aligned perfectly, except rear wheel arches. They required a bit of an adjustment to look right. |
 |
...I plumbed the turbos, and blow off valve. Then I installed air boxes and intakes, wheel hubs, brakes, and intercooler support framing. |
 |
Few minor details, such as shields, and additional air ducts were added up front, and small details, such as gas caps and rivets were added to the body here and there. |
 |
Shocks were assembled from kit parts, though I had to cut he springs and shorten the absorbers to make them properly fit on the suspension. |
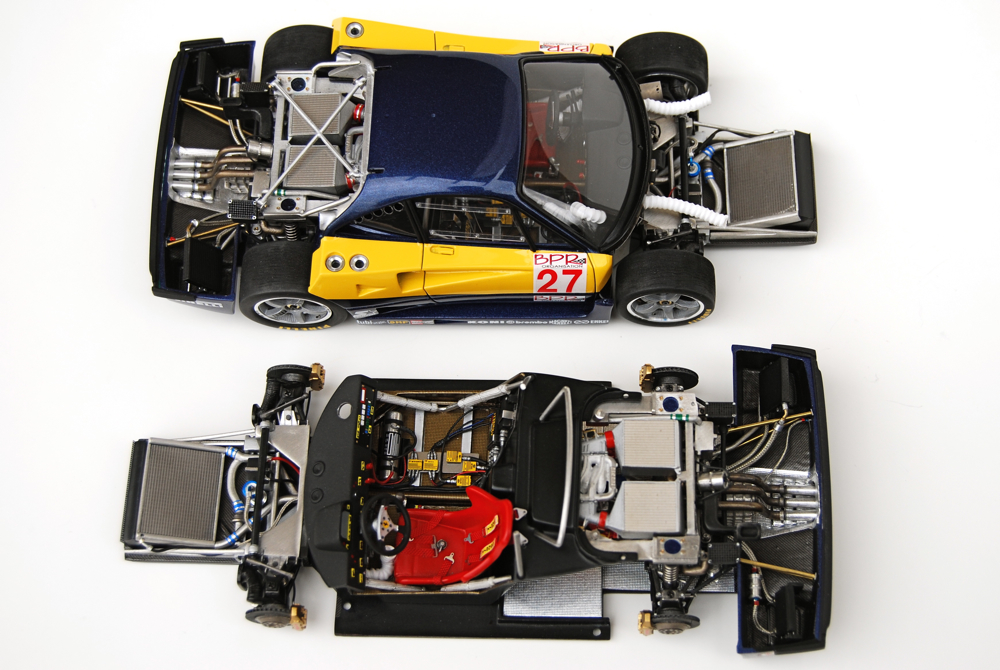 |
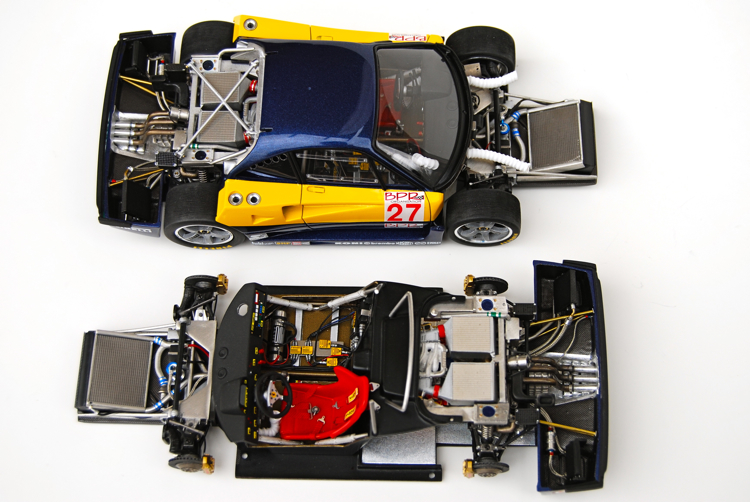
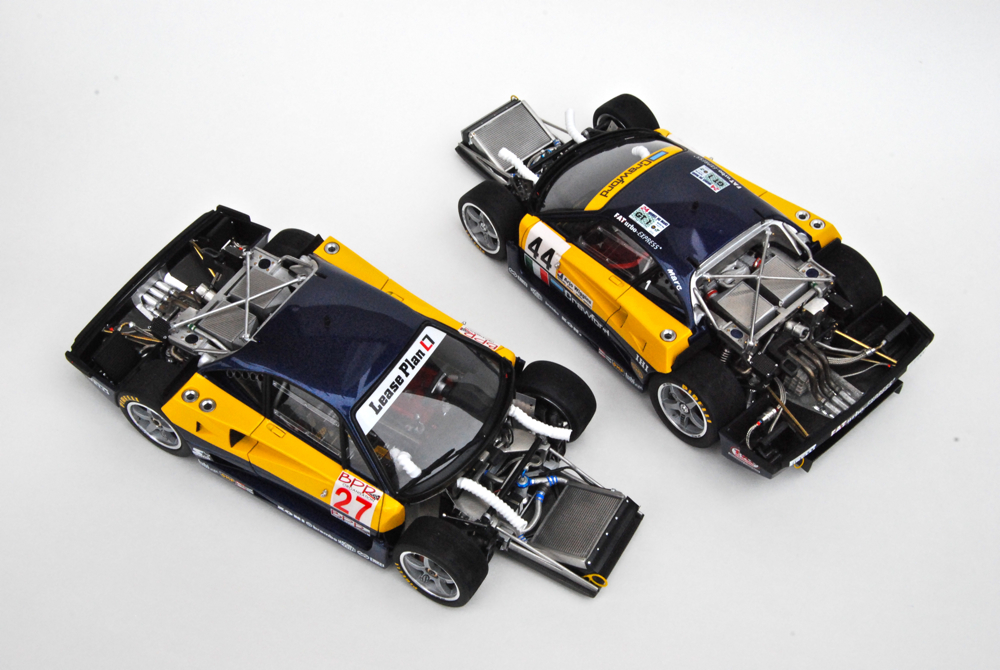
Completed rolling chassis for car #27, and completed "naked" chassis for car #44. |
 |
Similar "surgery" was performed for the second chassis, and both were ready for the rest of the engine accessories. |
 |
Another shot of the two chassis together. |
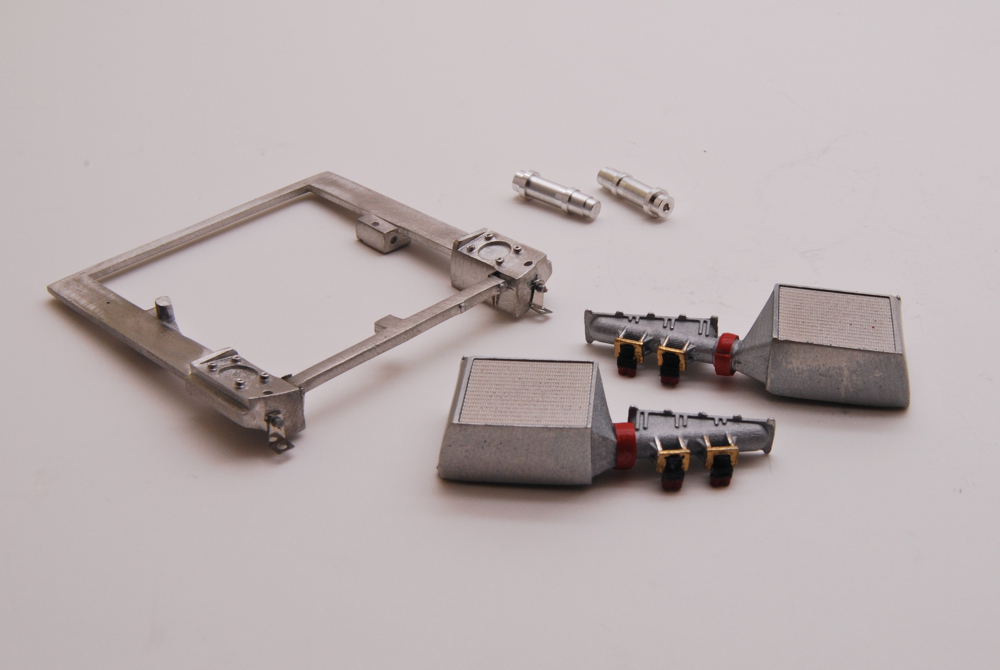 |
Took a while to clean the frame. Quality of casting on some parts was simply horrible. Intercoolers were detail painted and pre-drilled for wiring. Boots were made from red electric tape. Still missing the clamps in this picture. |
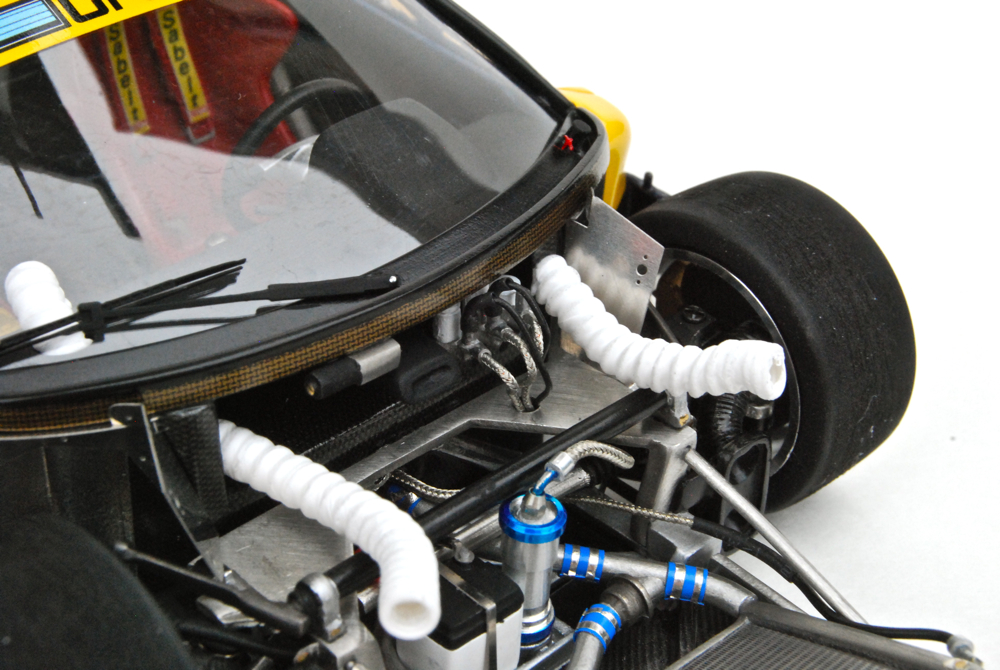 |
The beauty is in the details! Wiper, wiper motor, and quick release pull were added to the windshield frame. I also completely wired and plumbed brake booster and added it to both cars. |
 |
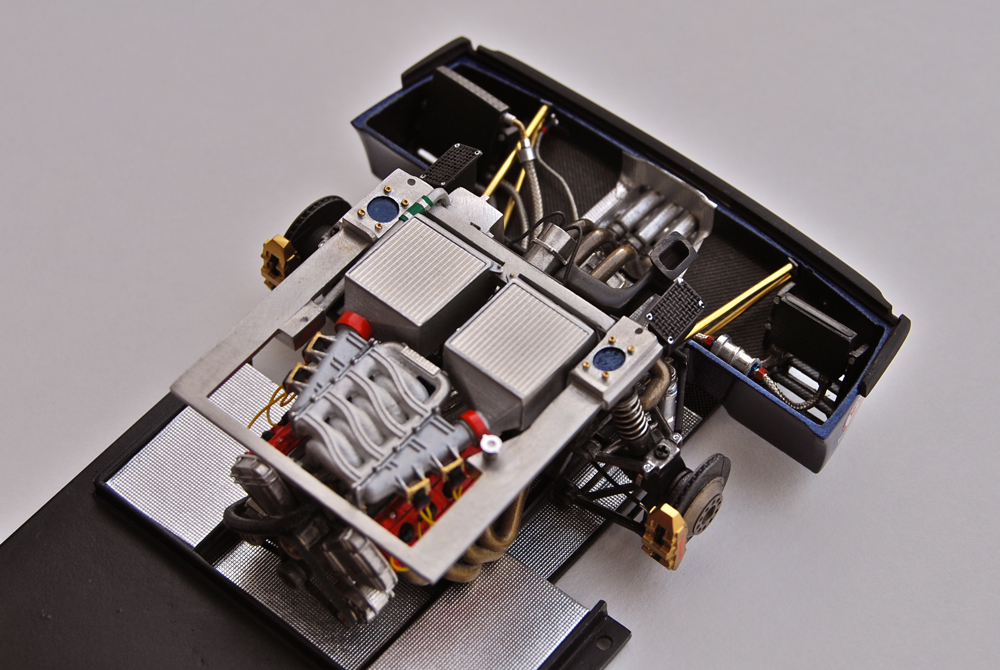
Intercoolers and upper frame were finally installed on the engine block. Parts fit was rather bad, and I was very careful not to break prior assemblies while pushing the frame down. |
 |
Air duct hoses are unrestricted, as they need to be tucked into special places when main body air duct installed into place. It can be removed after the model is complete. |
 |
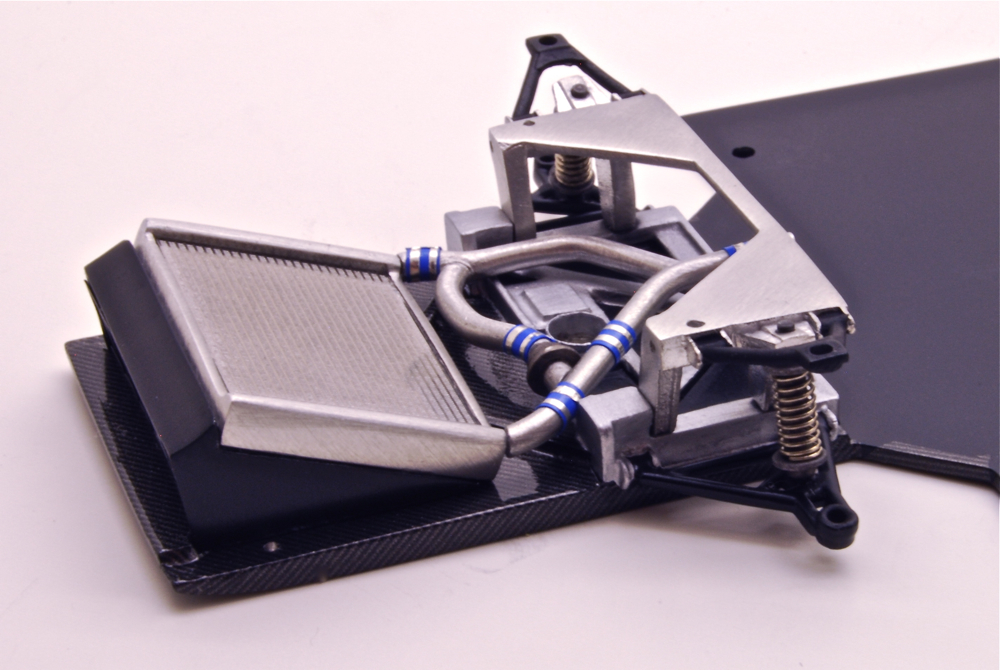
Air jacks, rear space frame, and suspension stabilizers and links were also installed at this time. I had to fabricate several links from thin wire as parts supplied in the kit were simply out of scale and unusable. |
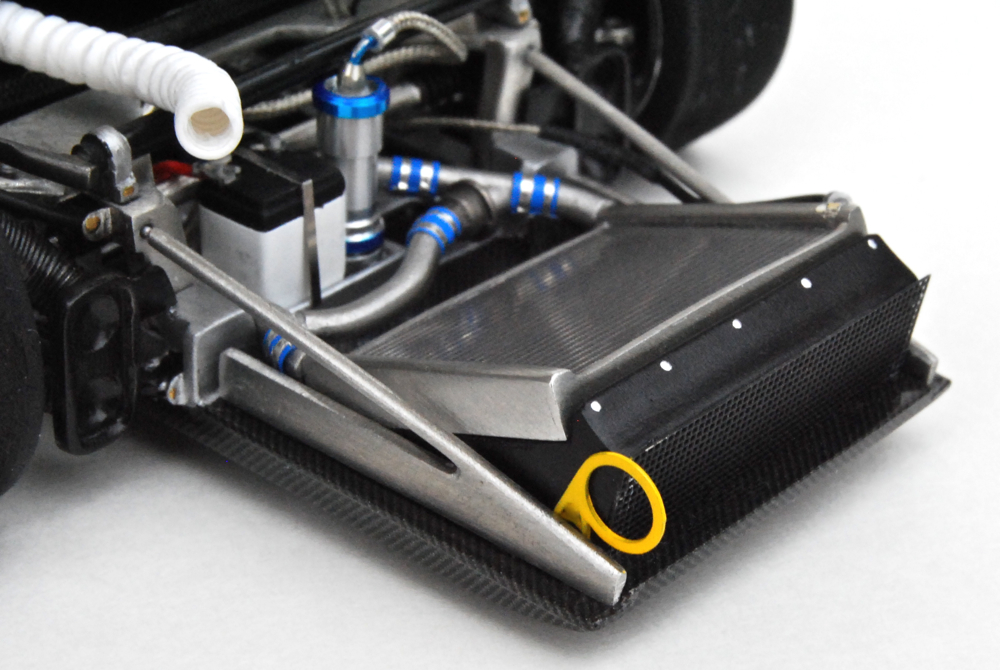 |
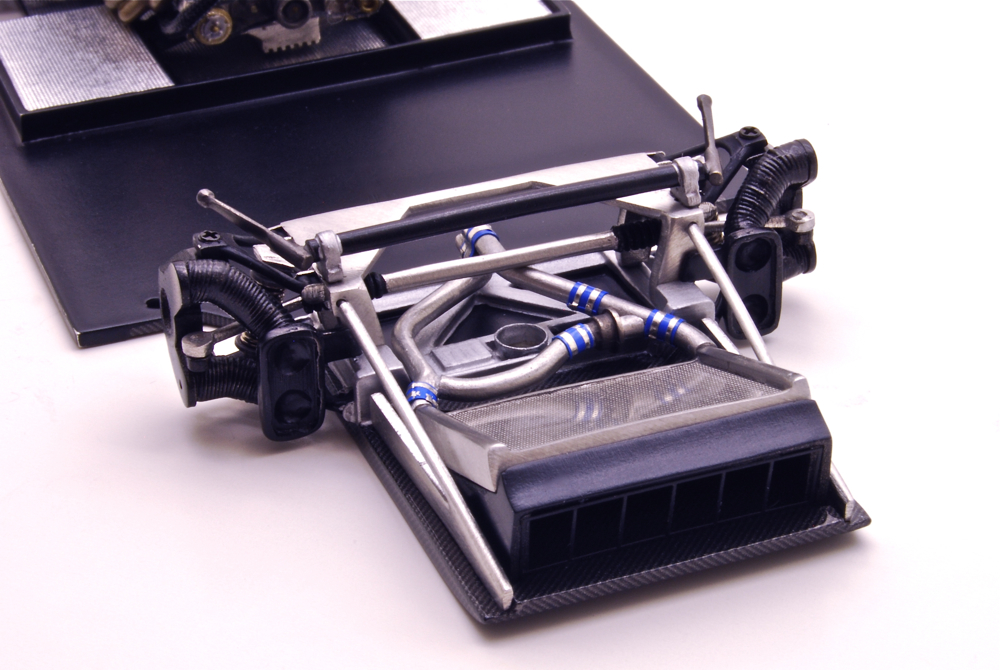
Radiator was given a matt black wash, front tow hook was painted and glued to the frame, and some detail painting was done to the front of the chassis |
 |
View from this angle shows the stabilizer assembly very well. Luckily, after some work, everything aligned really well. |
 |
To replicate rubber valves under the gas caps, I used pieces of black electrical tape. Few minor details, such as photoetched chains, and number decals were added to the side windows, and black mesh was glued to all body openings. |
 |
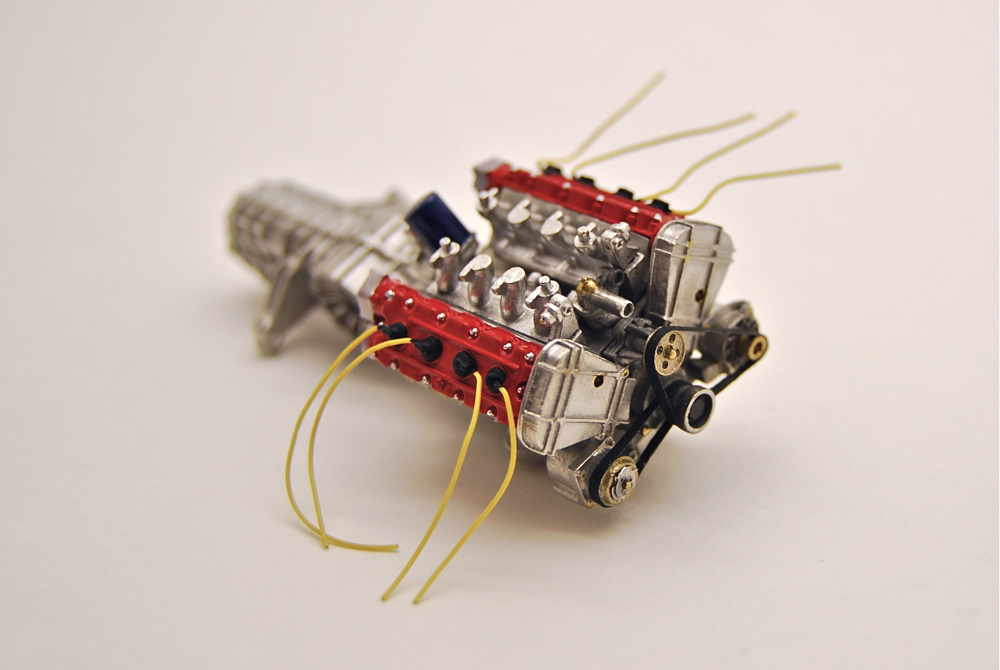
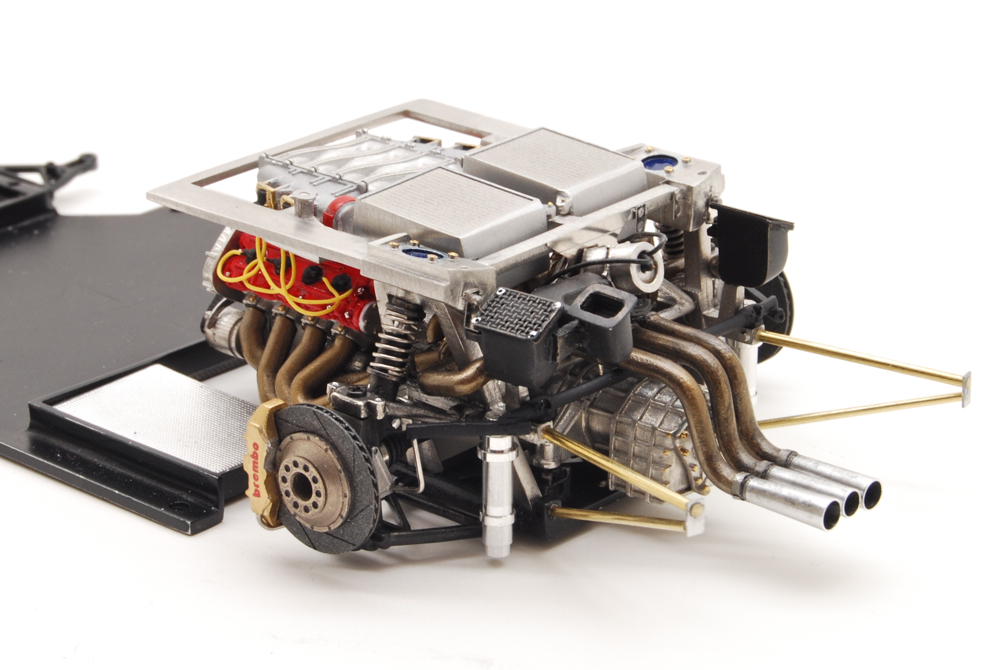
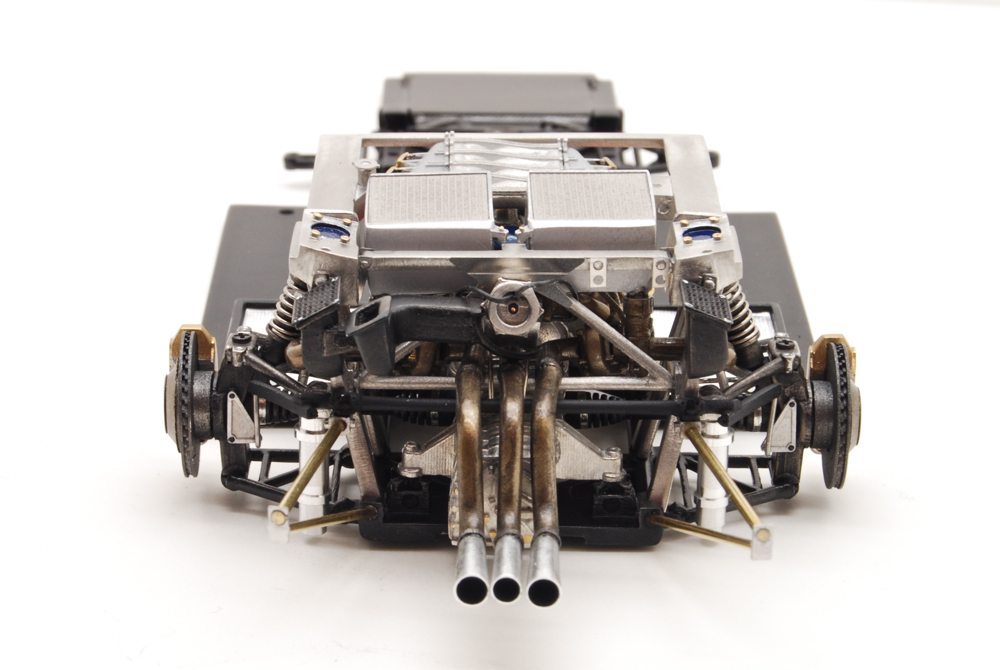
Finally, spark pug wires were attached to the coil packs, engine cooling system plumbed, and all little nuts and bolts on the engine picked out and small pieces detail painted and weathered. |
 |
Several photoetched rivets were added throughout the engine bay, and some nuts and bolts were picked out with metallic paints. Exhaust tips were painted flat black inside. |
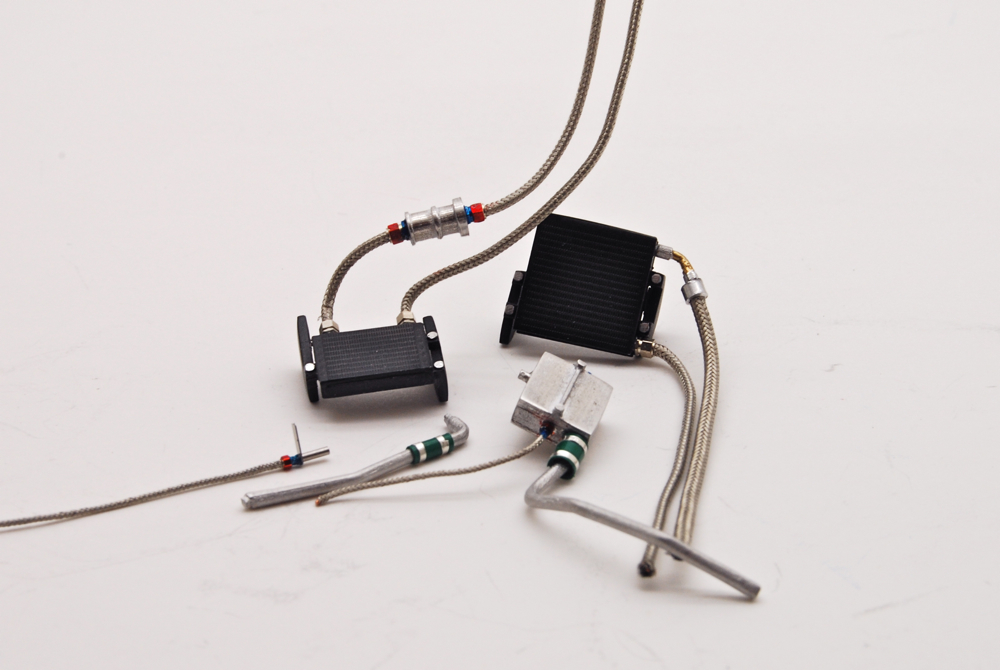 |
Radiators, together with few other things, like expansion tanks and air jack line fittings, were wired using Pro-Tech braids, and Sakatsu fittings. |
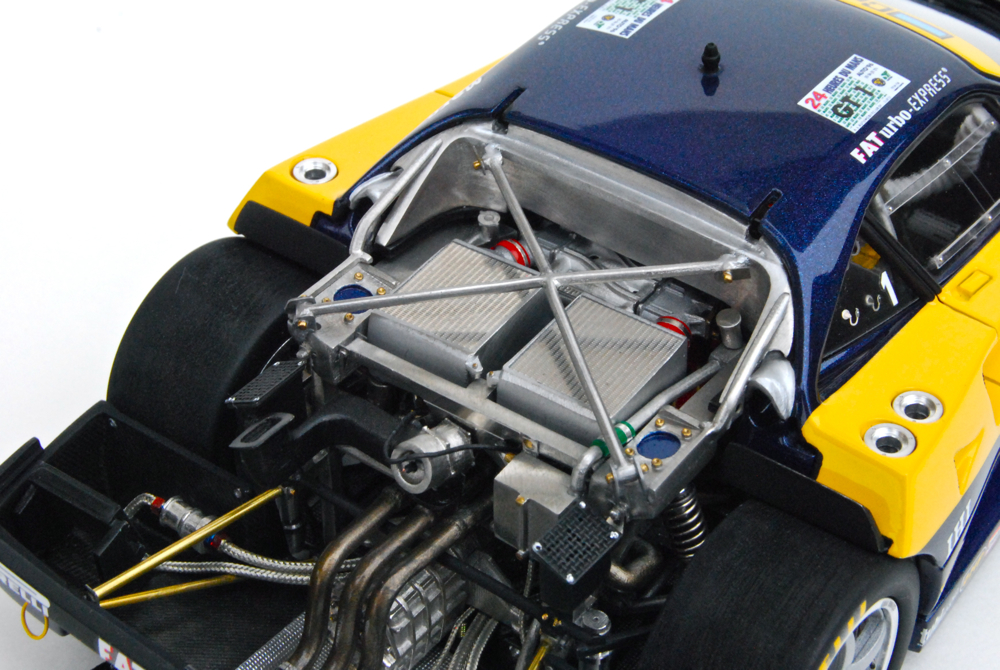 |
Metal firewall, and top engine brace were cleaned, polished, and installed in the engine bay. All the was left to add were front cowl and engine lid. |
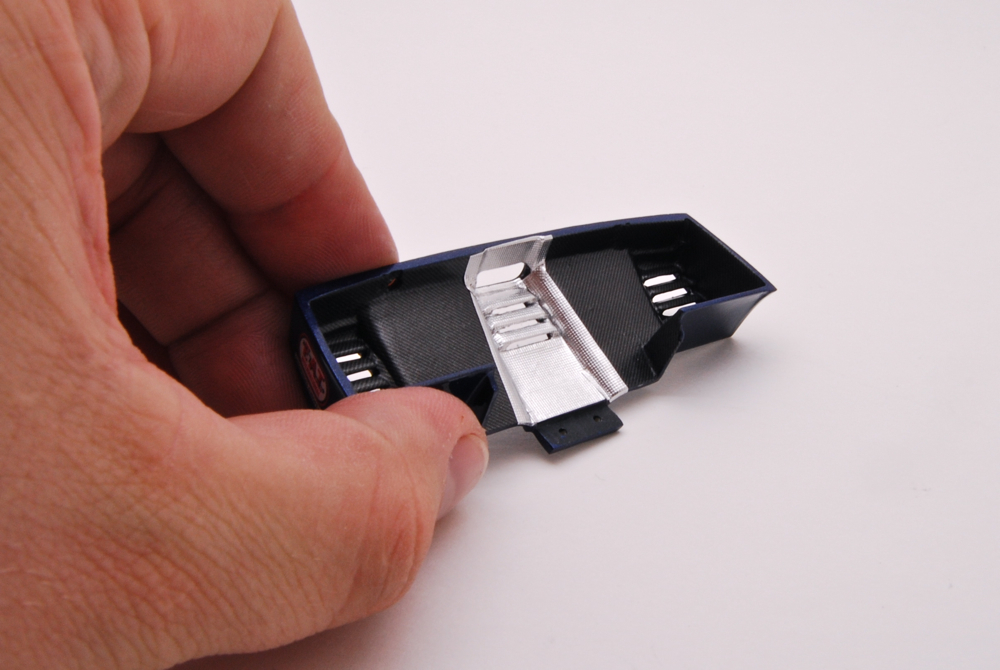 |
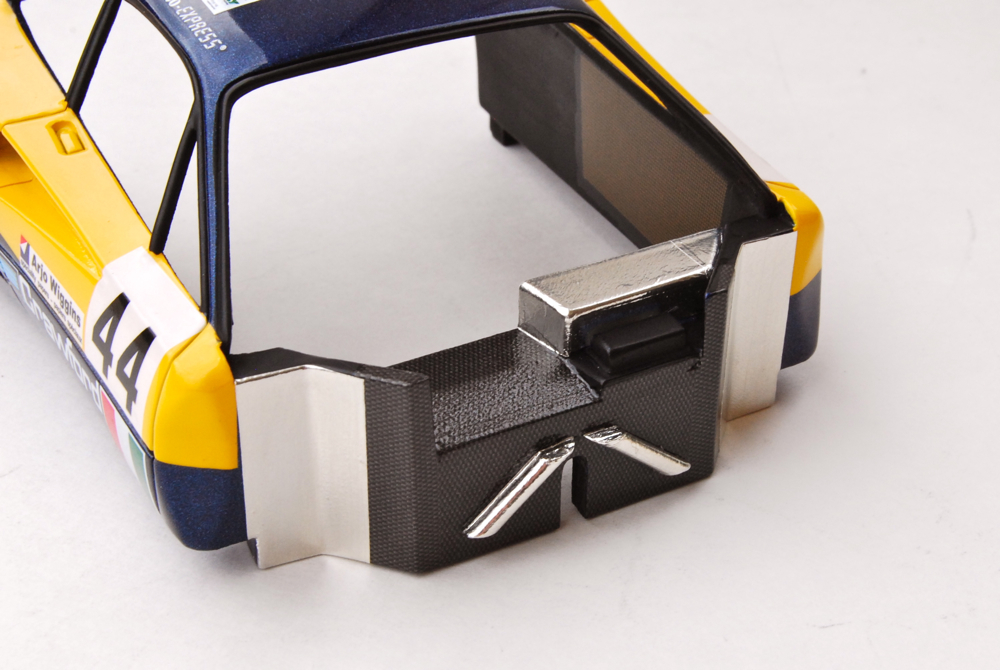
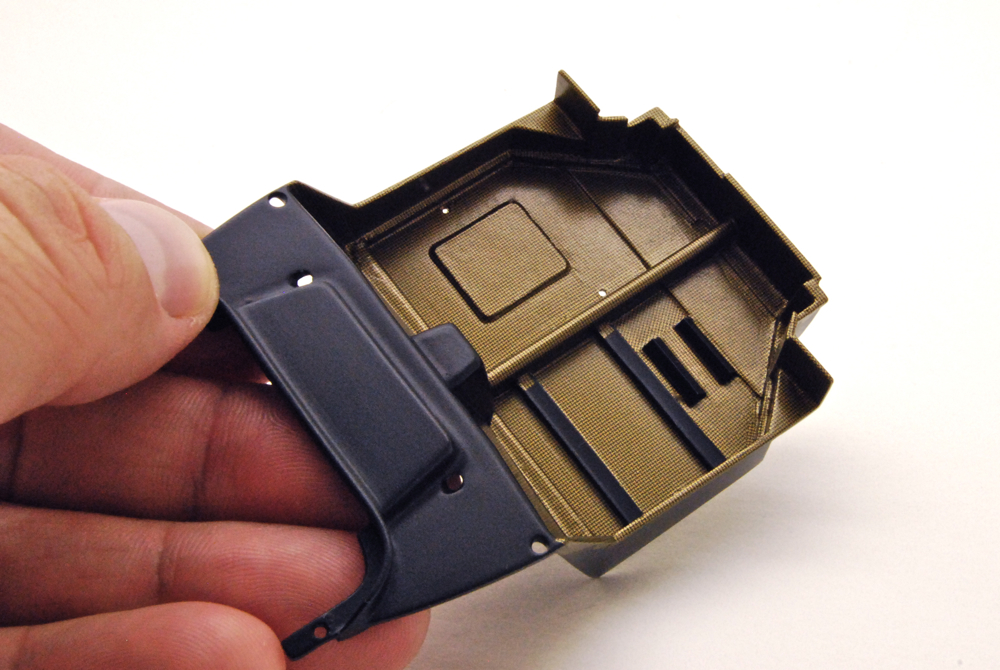
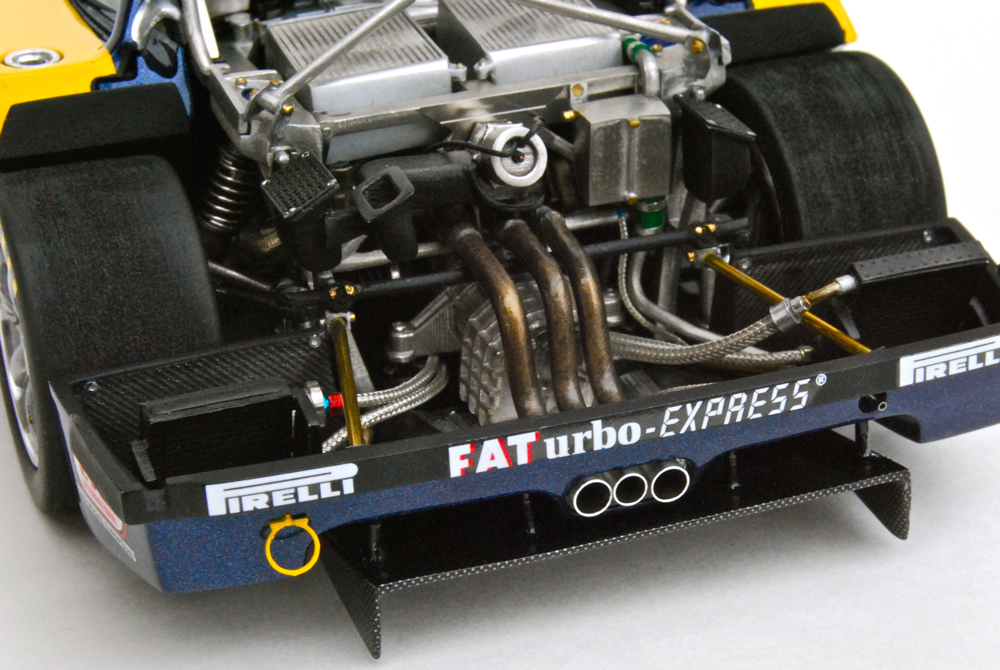
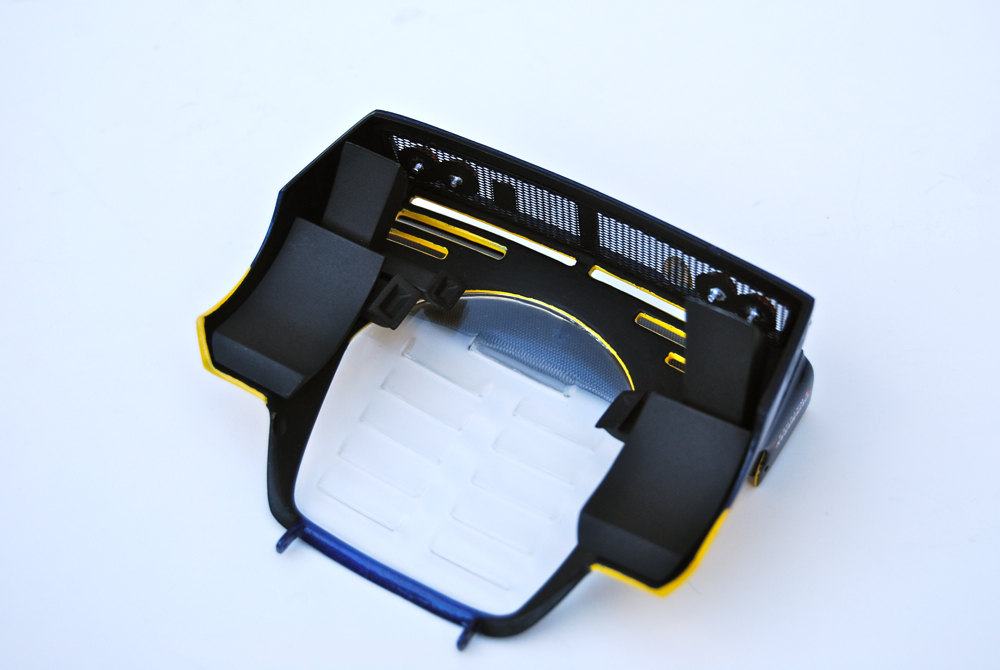
Rear bumper/tray was covered with carbon fiber and heat shielding from the inside. Good thing MFH heat shield conforms to crevices so well, as working over those louvers was a nightmare! Followed by C/F application to those same louvers. |
 |
Both assembled and fully detailed chassis before front cowl and engine lid installation. |
 |
Finally, everything was put together. Radiators, jack fittings, and rear tow hook were installed on the bumper, and bumper was screwed to he chassis from underneath. |
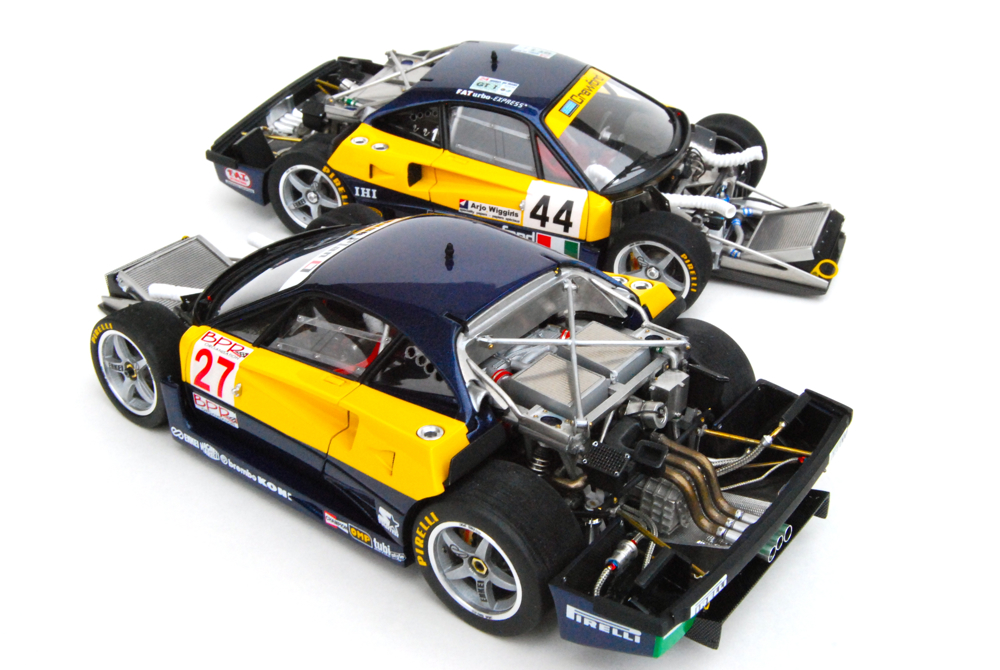 |
Another picture of both cars without cowls. |
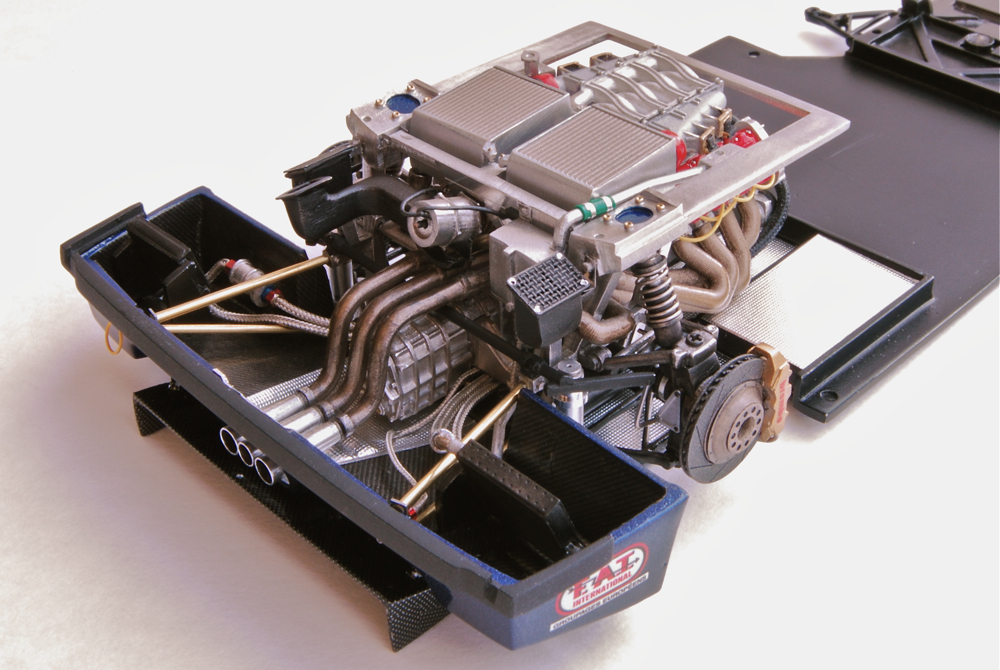 |
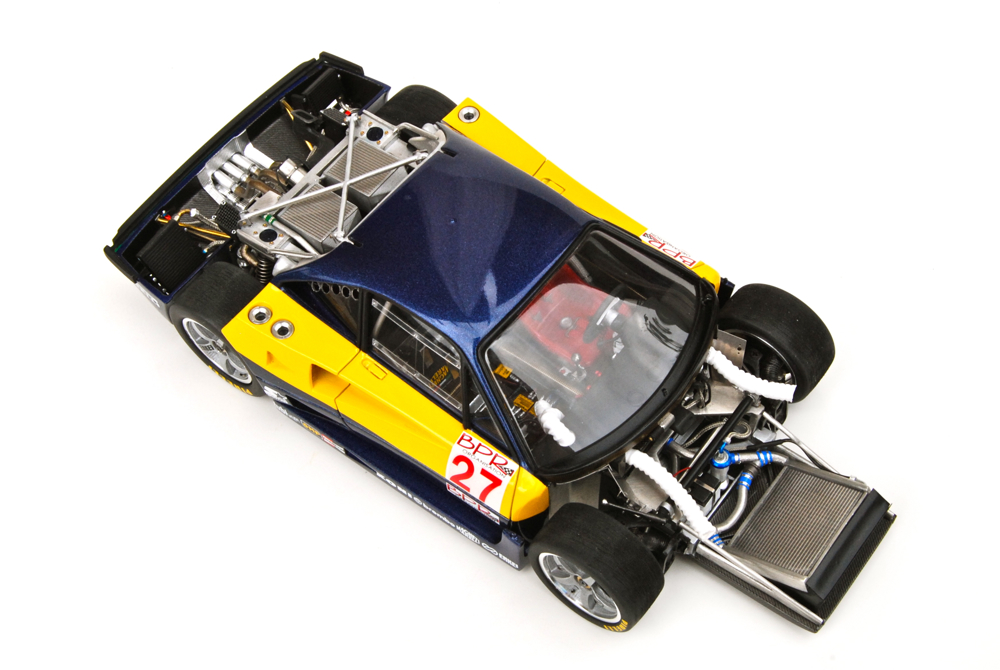
Rear diffuser followed next, together with rear bumper guard, expansion tanks, some additional piping, clamps, and few little touches here and there. |
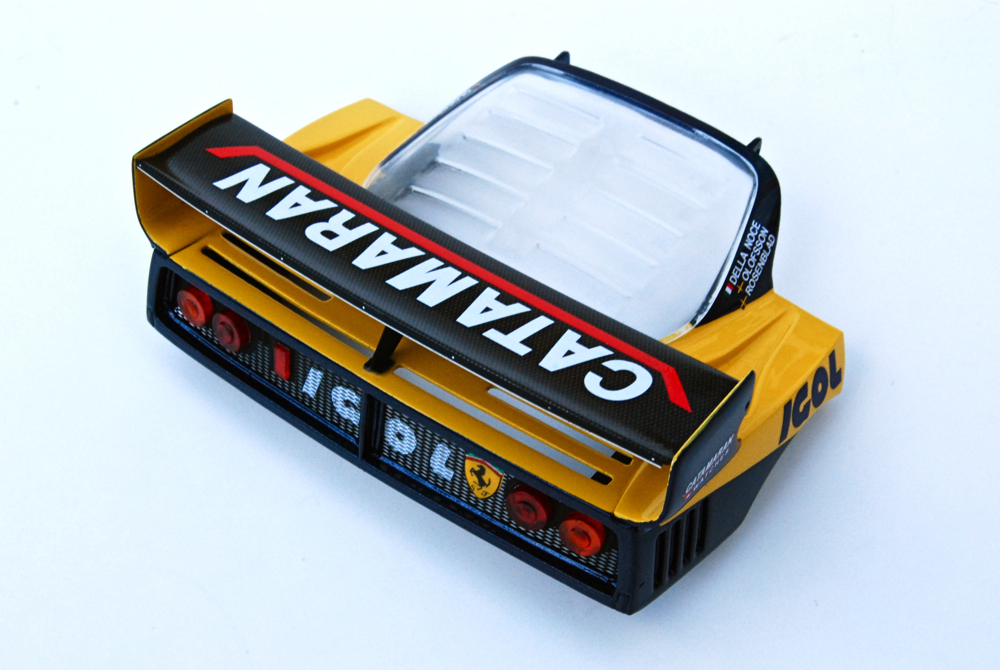 |
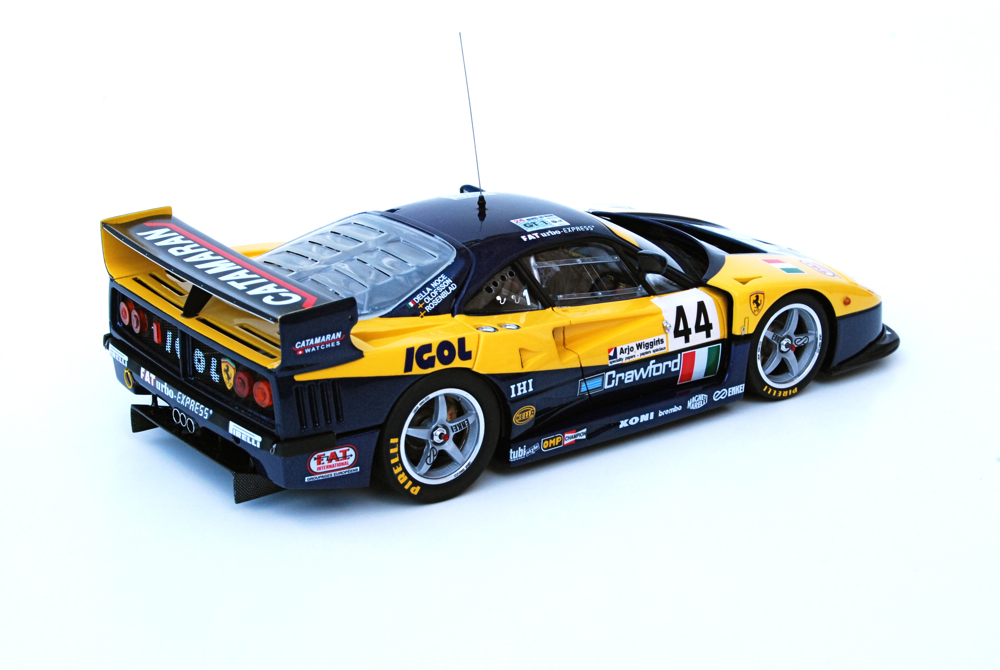
Rear mesh was detailed with IGOL stencil and Ferrari emblems, then I added taillights and attached it to the engine lid. Wing, and read glass were glued to it as well. |
 |
Then the same exact procedure was done for the second chassis. Knowing where everything goes surely made it easier to put it together the second time around. |
 |
On the other side, I added wheel wells, and air ducting for radiators and airboxes. |
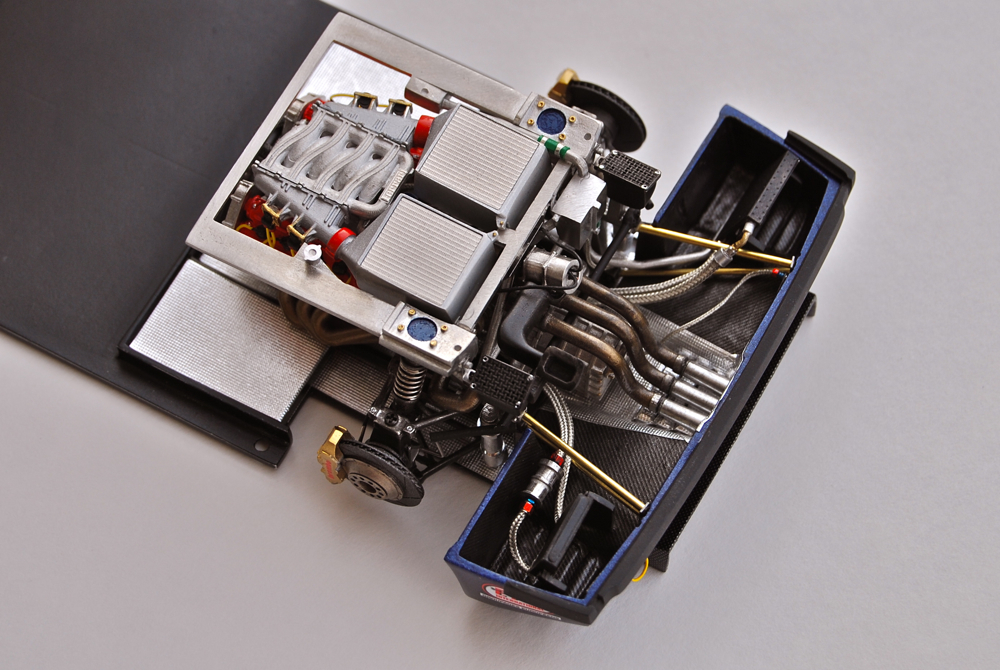 |
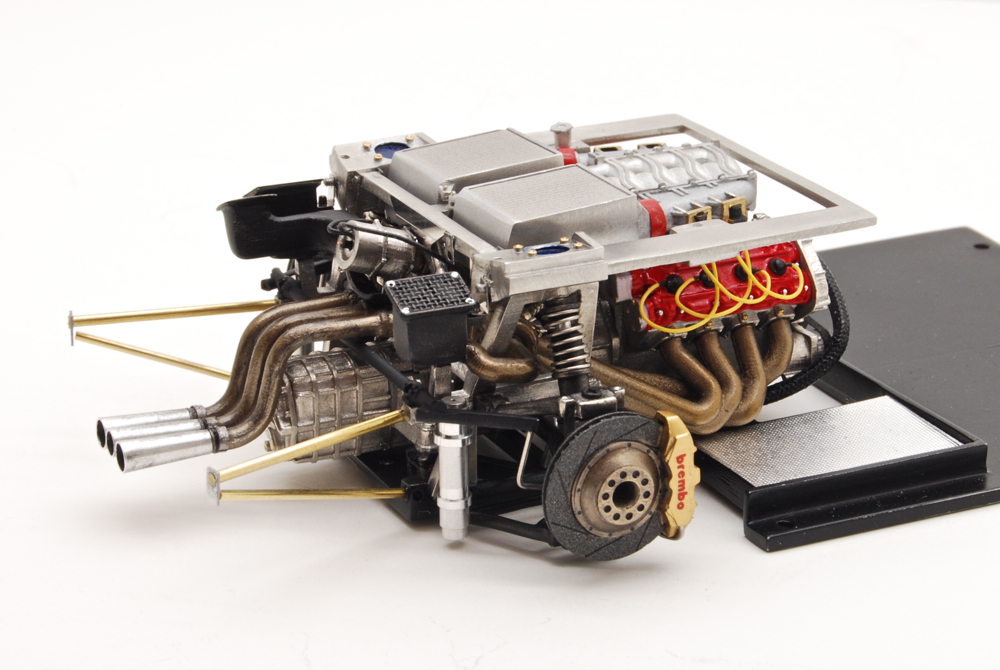
Another view of the completed engine bay of #44 car. |
 |
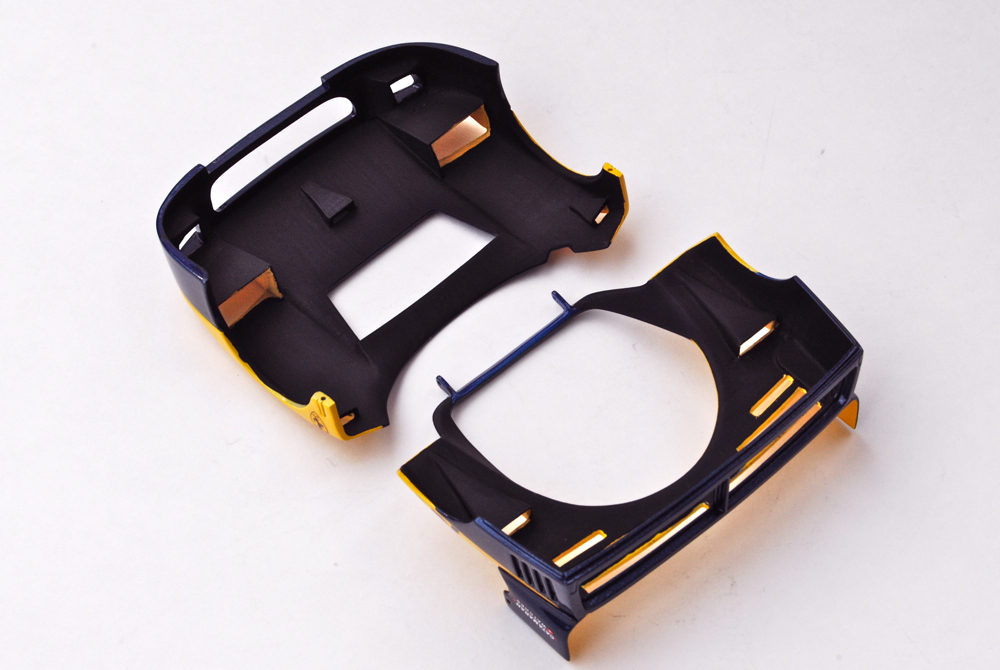
Headlights were assembled, detailed, glued in and put behind the light covers. Front cowl itself was glued to the floor. |
 |
To avoid complicated masking, front and rear cowls were preliminary brush-painted black from the inside. Additional coats later on will help eliminate some of the brush marks. |
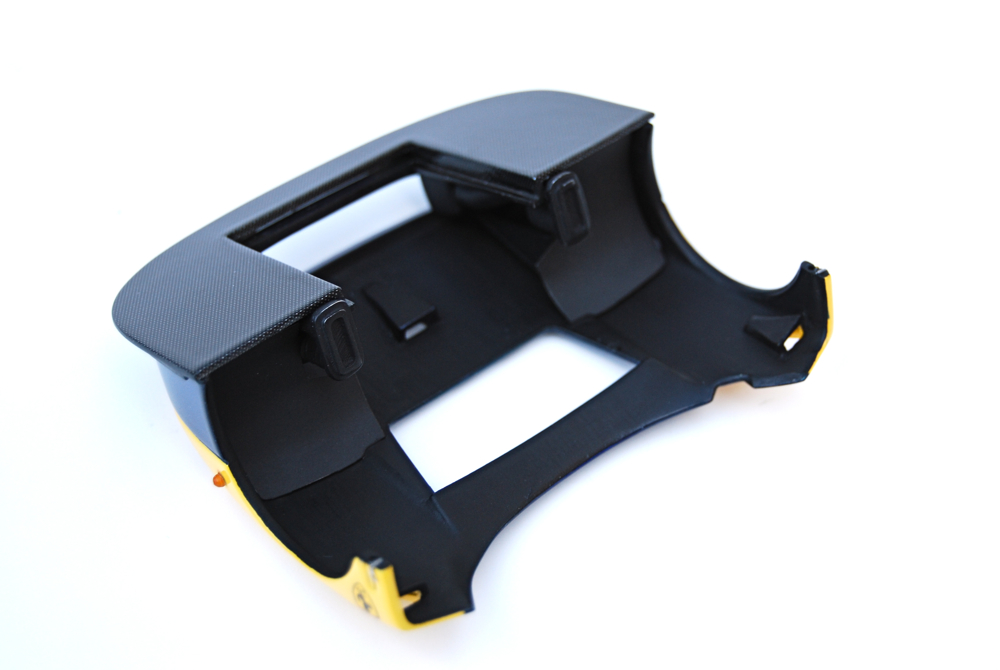 |
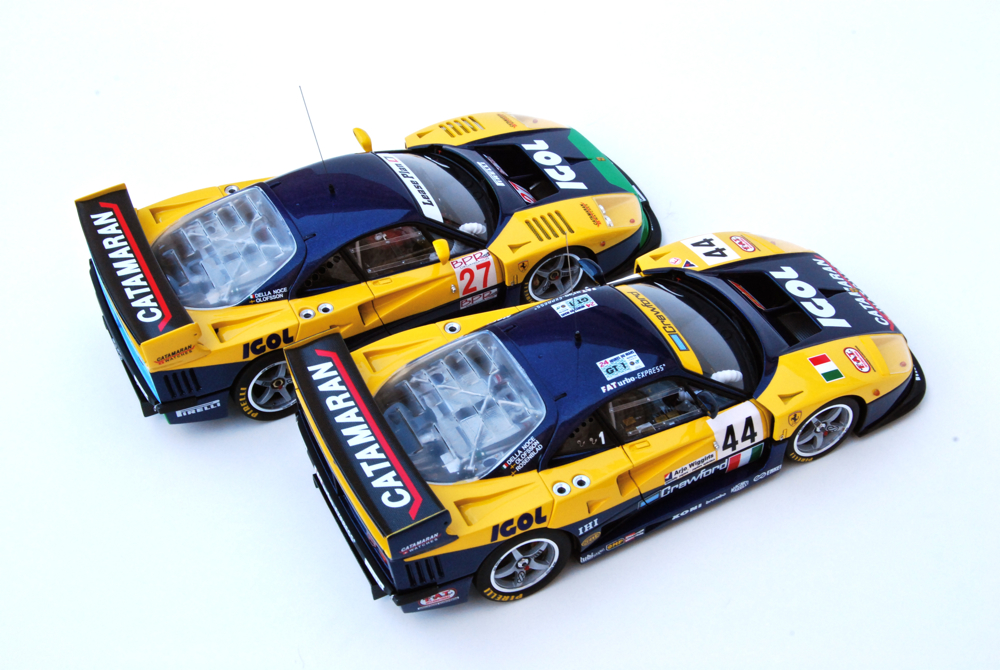
Inside of the front cowl were painted black, and couple of the air ducts for the brakes installed on the floor. Finally, both models were completed. |
Copyright 2010 Alex Kustov. No copying or reproduction in any shape or form without written permission of the author.