
Lusso is a luxury cruiser, and I decided that the only way to recreate this luxury on a model would be to upholster interior in real leather. I went to a leather shop and purchased some tan leather. It was very soft to the touch, but way too thick to use. I had to thin it down by skiving it with a very sharp knife.
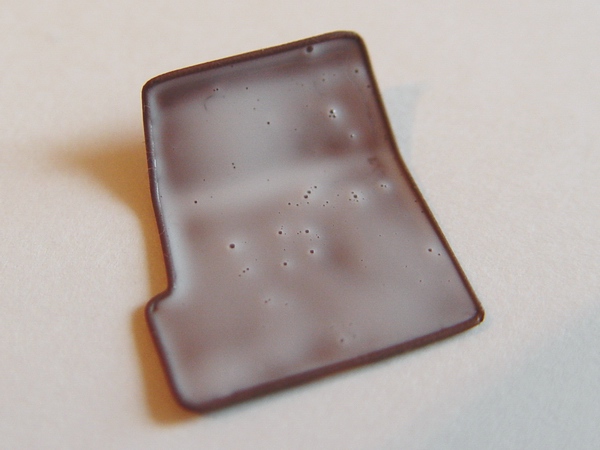
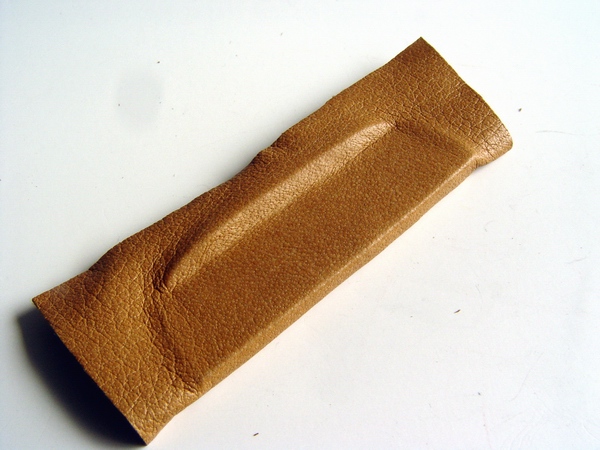
Both mats were airbrushed with darker shade of brown (I wanted a darker trim) using Tamiya acrylic paint.

With new blade in my knife I started skiving the leather. Its relatively easy to do when you work with thin leather strip, but it gets very complicated when you work with larger pieces. Key to success is to work slowly and always have a sharp blade, or leather will tear. Surprisingly, leather dulls blades very quickly, at a rate of about one blade per square inch!
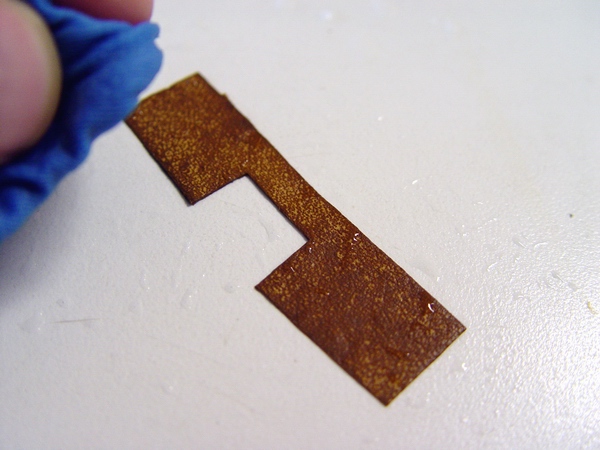
Then I applied Elmer's white glue to one of the mats with fine brush, carefully trying not to put any glue on the trim.
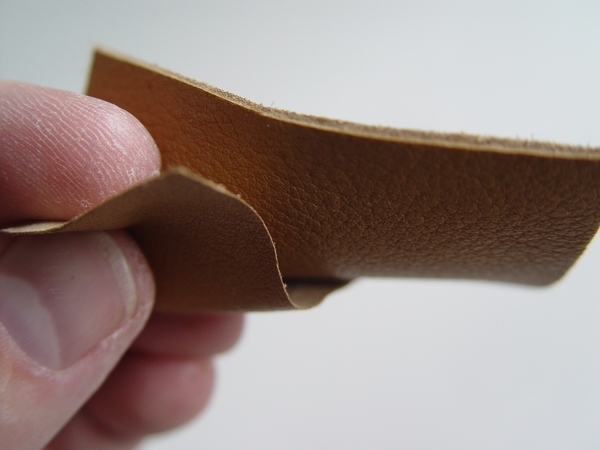
You can learn more about the skiving technique in my Leather 101 tutorial. After spending some time skiving leather, I had few square inches of very thin leather to use for interior upholstery. Using this technique, you can make the leather almost paper thin, and it will conform to the surfaces of the interior perfectly.
When the glue started to get tacky, I sprinkled some Detail Master light brown flocking on it. Then I repeated the same process for the second mat.
Looking at my reference pictures I determined which panels need to be upholstered and started wrapping them in leather. I used white glue to avoid glue stains on leather (CA glue soaks right through leather and leaves dark stain). The process is simple, but takes a lot of time for the glue to dry.
This is how both mats looked after the flocking has dried. I was very satisfied with how darker trim accented the mats.
Glue should be applied to every crease on the panel so the leather would stick and mimic the panel shape correctly. The most complex task was to wrap it around the package shelf, because there was too much folding involved.
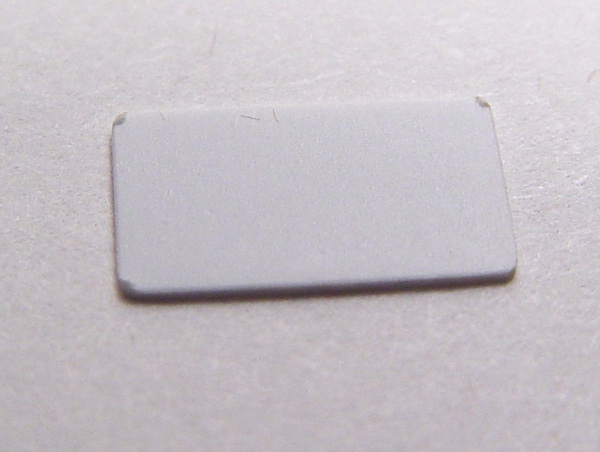
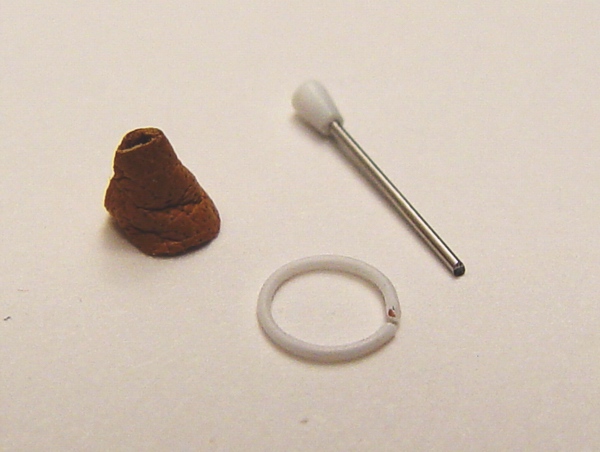
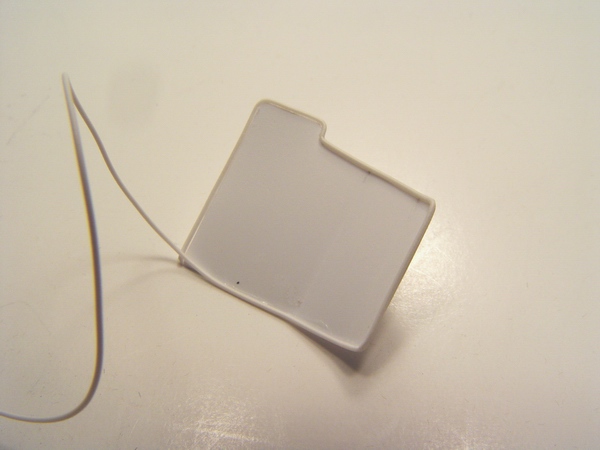
To finish off the mats I decided to add a rubber pad, typical for driver's mat. I cut piece of very thin sheet plastic and rounded the edges.
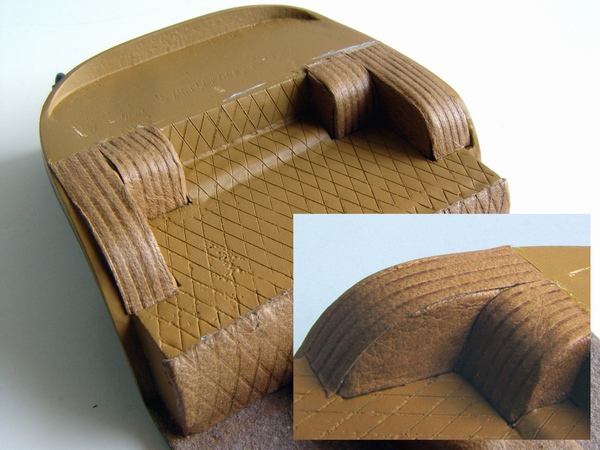
When I finished wrapping the package shelf, leather was fixed with tiny droplets of CA glue on the other side in inconspicuous places. I trimmed the rest and ended up with very realistic, leather-wrapped package shelf. This inspired me to continue and cover the rest of the interior. But I faced one problem - diamond pattern on leather in the cargo area.
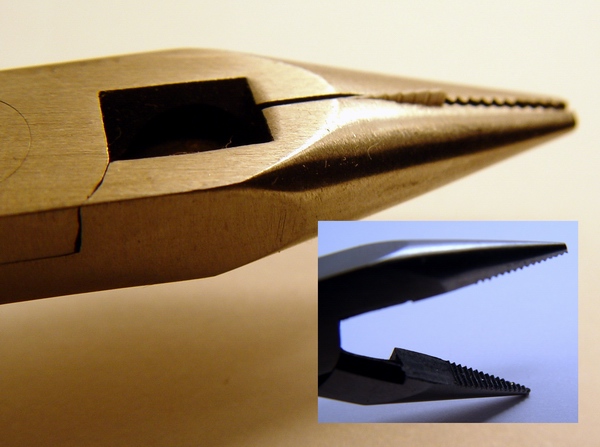
To recreate ribbed surface of the pad I used small pliers with ribbed jaws. I just squeezed the plastic pieces and...
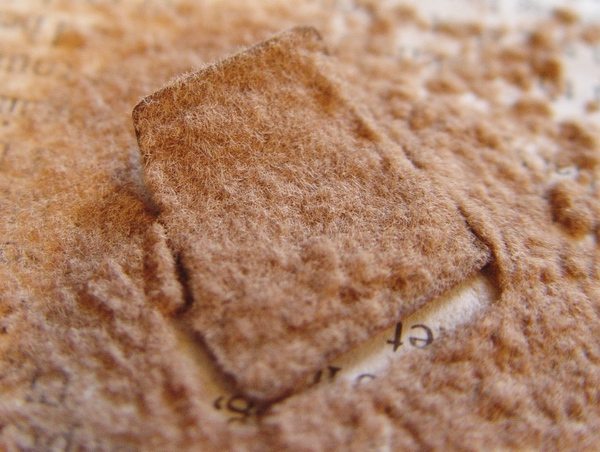
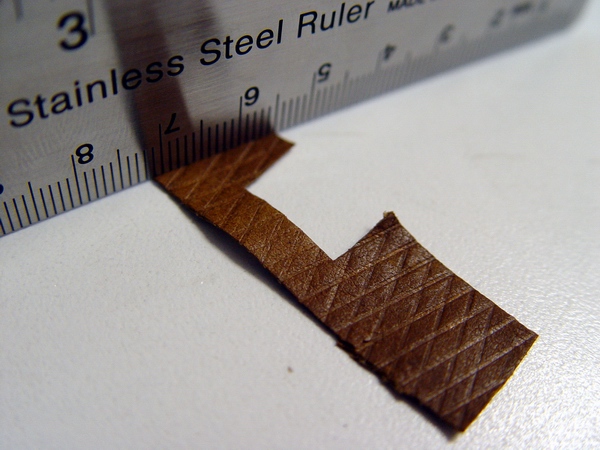
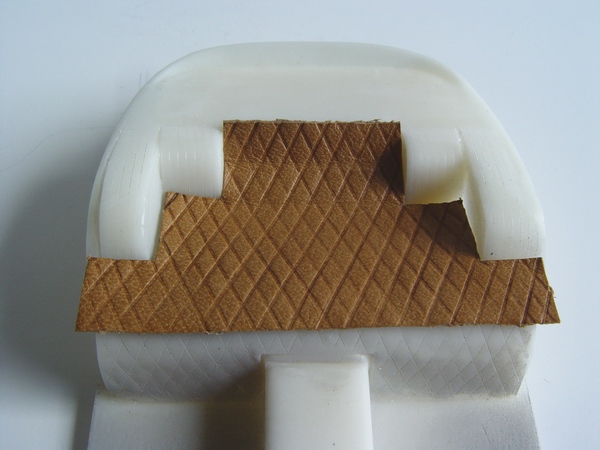
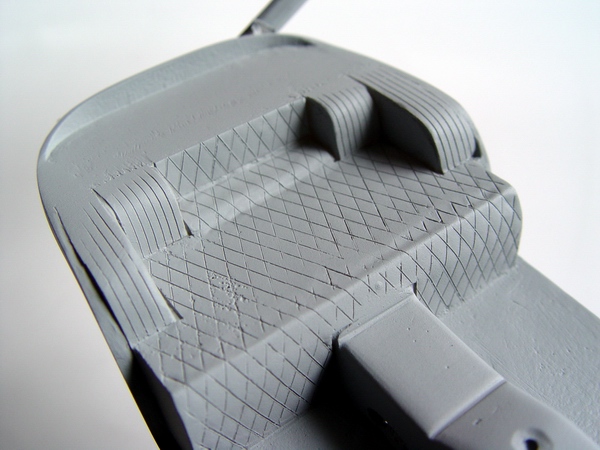
I searched internet trying to find a technique that would allow me to create this diamond pattern on leather, but without much success. One of the fellow model builders had the answer - embossing! Before embossing I cut the leather in pieces using templates created with masking tape. The leather was moistened with water on both sides.

.....this resulted in a plastic piece that was ribbed similar to real thing on the drivers mat. The jaws of my pliers were not wide enough, so I had to squeeze plastic twice; next time I will use wider pliers.
Then using a metal ruler and a hammer, I embossed wet leather, creating angled parallel lines in one direction. I had to hit the ruler two three times before it created a good impression on the leather. Embossed lines were much darker then the rest of the leather surface.
Plastic pad was painted flat black and glued to the driver's mat.

After I finished first pass, the leather was almost dry (with nice, dark embossed lines), so I had to soak it in water again. I also noticed that leather started to get a little rough from the water, but it dried smooth and soft.
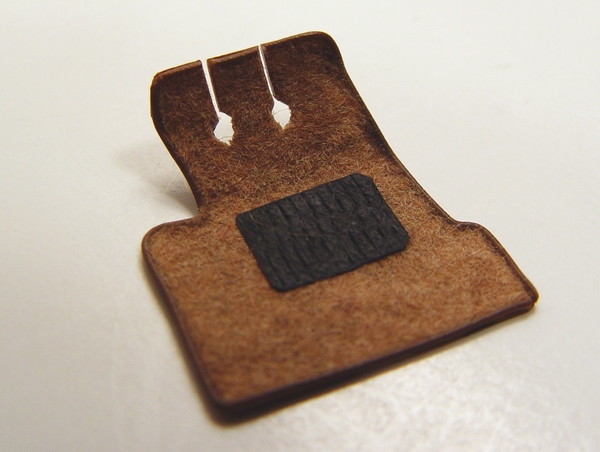
Finally, driver's mat was measured and cut for clutch and brake pedals. I used sharp xacto blade to slice through plastic and wire, and pin vise to drill holes for the pedals.
Using the same technique, I made a second pass, creating a very nice and great looking diamond pattern on my leather panels. I was very satisfied with the result, especially after trying a dozen other techniques that failed. It was a relief - now my Lusso can have an authentic pattern on the leather!

Mats were fitted with superglue to the floor. Shifter was glued to the boot and then I glued the boot to the central tunnel. This allowed the shifter to move freely in the boot, creating an illusion that it can be shifted!
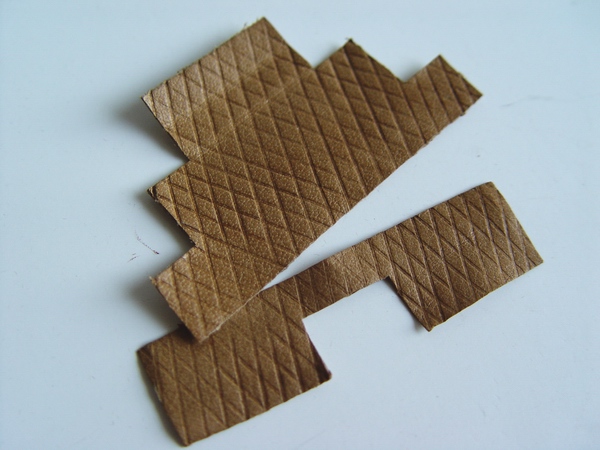
This is how diamond-patterned leather panels looked before application to the interior. As you can see, the leather dried just fine, getting back its color and softness.

Then I cut the original resin pedals off and glued them to thin metal rods. Resin gas pedal was modified into the footrest (it was too thick for the gas pedal), and new (correct shape) gas pedal was made from sheet styrene. I also made a kick-plate from piece of photoetched fret.
Using the same technique, I created several different patterns for other interior panels. After the leather was completely dry, I started cutting and fitting it to the interior.
All above parts were painted and installed. Together with the floor mat, driver's side foot well looks very realistic.
Each leather piece was test-fitted to the interior panel and trimmed to fit exactly and cover the panel completely. All the folding was done before gluing.
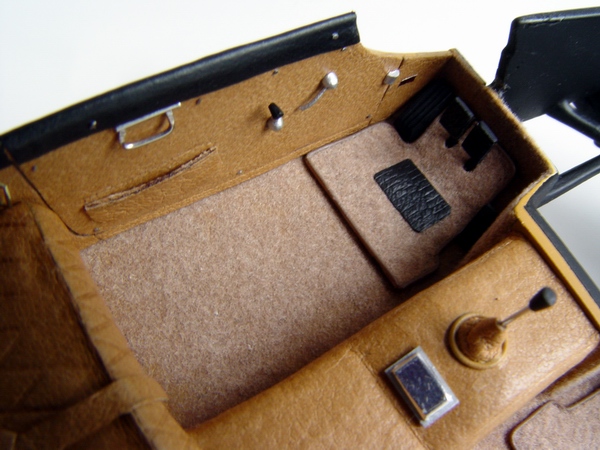
Finally I installed leather upholstered door panels (see Doorpanels/Dashboard for detailed buildup) to both sides of the interior.
I left most interior panels as they were (except for some minimal cleanup) before application of leather pieces. As you can see, first coat of gray primer revealed how bad the engraving and detail on the panels actually was.
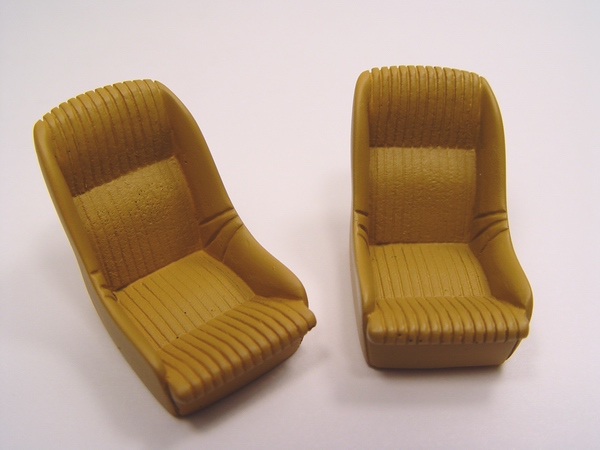
Seats were cleaned and lots of holes filled with CA + baking soda mix. Resin really had a lot of bubbles. Then I primed the seats with gray and white primers, and painted with few coats of custom mixed Tamiya acrylic matching the leather.
In order to create a background for the flocking and leather, I sprayed some custom mixed tan color that was close to the leather color. For some reason it turned a bit orange in the pictures.
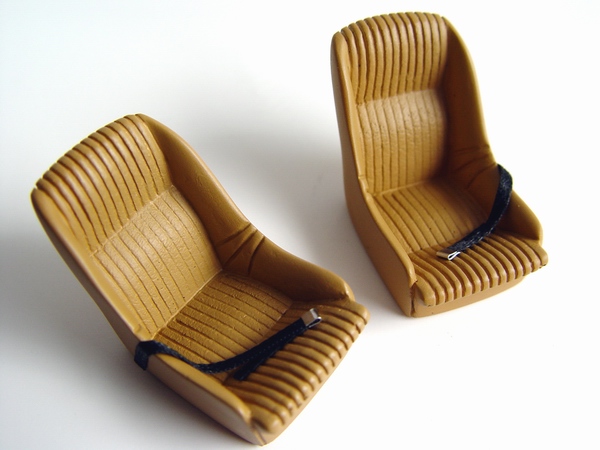
Part of the lap belts (the one with the buckle) was attached to the door panels, so I glued the other one to both seats. I used craft store ribbon for the seat belts.
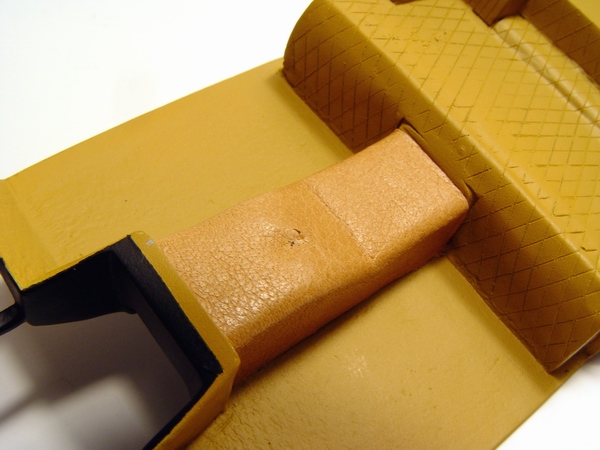
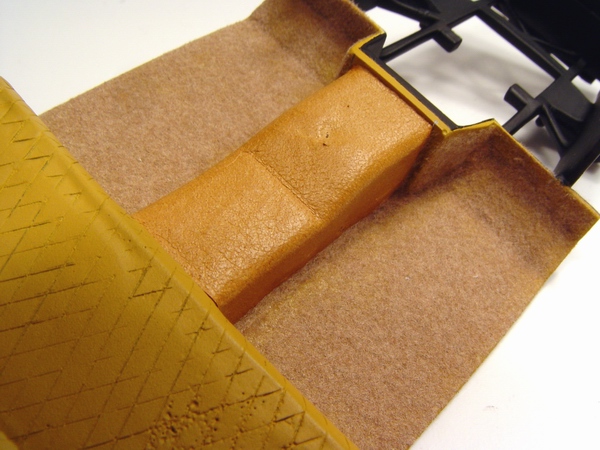
Central tunnel was covered in leather, and carefully trimmed. I glued this piece before applying flocking so the flocking would cover the seam between the leather and the floor.
Then I glued the seats inside the interior with drivers seat slightly closer to the dashboard (looks more realistic). With the seats in, interior was almost complete.
Then I applied some Detail Master light brown flocking using white glue method.
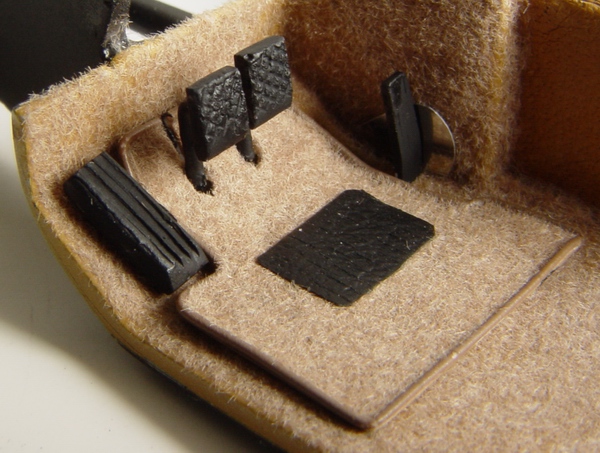
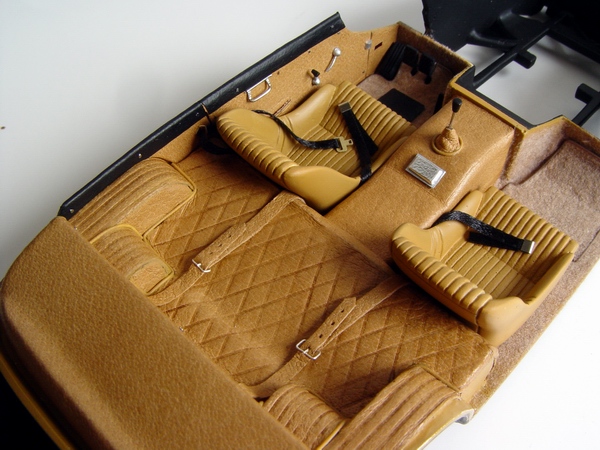
I added few little photoetched details, like rivets, bolt heads and nuts. All that was left is the dashboard with the firewall. This picture of the interior shows the leather upholstery particularly good!
After flocking has dried, I started fitting other leather panels to the cargo area. I started with the rear bulkhead, and continued with the wheels arches. Every piece of leather was carefully measured and trimmed before application.

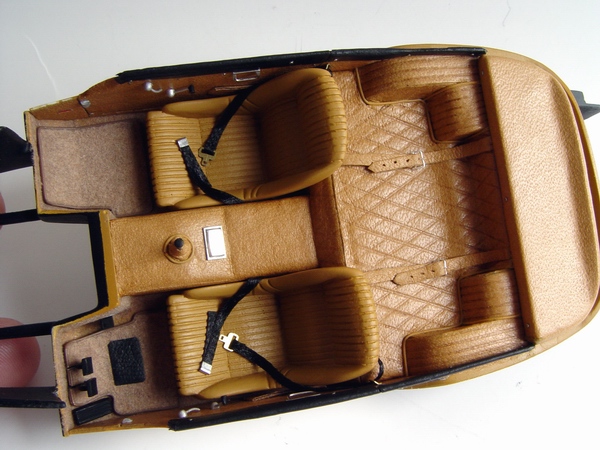
I compared completed interior with the pictures of the real car, and was very satisfied with the end result - the leather makes a big difference! It is really hard to believe the whole model will fit on the palm of your hand!
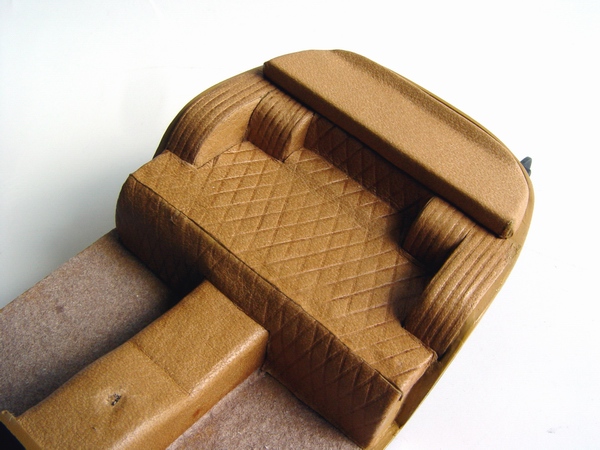
I attached largest diamond leather panel and package shelf at the last moment, because they helped to mask some of the seams created by other panels.
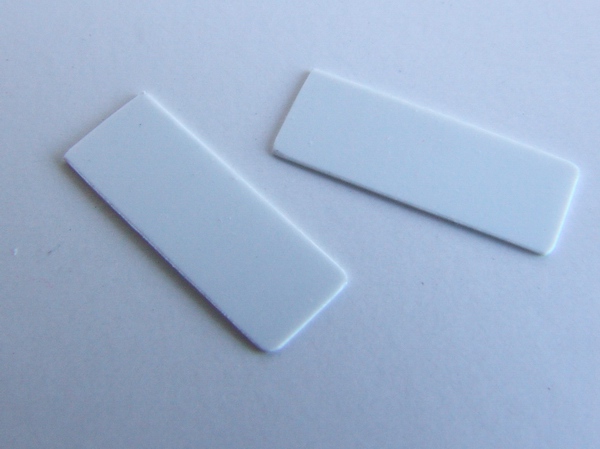
With such a beautifully upholstered interior it was impossible to skip the headliner detailing! After looking at several pictures of the headliner on the real car, I determined few parts to add - headliner itself, rearview mirror, and sun visors. I cut two thin pieces from sheet styrene and rounded the edges.

To recreate the piping of a real car, I used thin wire purchased at Radio Shack and glued it to the seams. It served two purposes - creating realistic-looking piping, and covering the seams in leather.
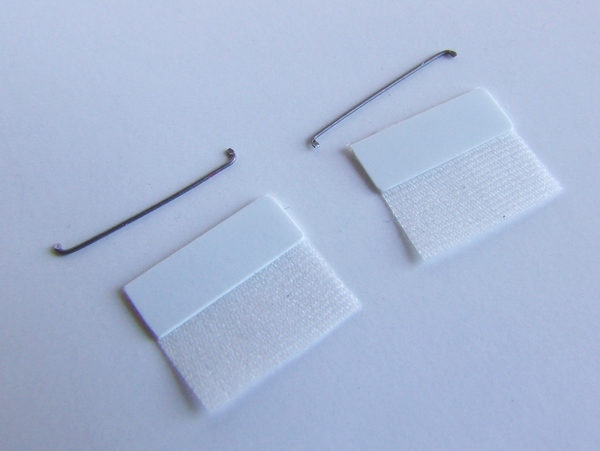
Then I cut two pieces of adhesive cloth tape (with pattern similar to Lusso's headliner fabric) and stuck them to plastic visors. I also made two hinges from thin wire.

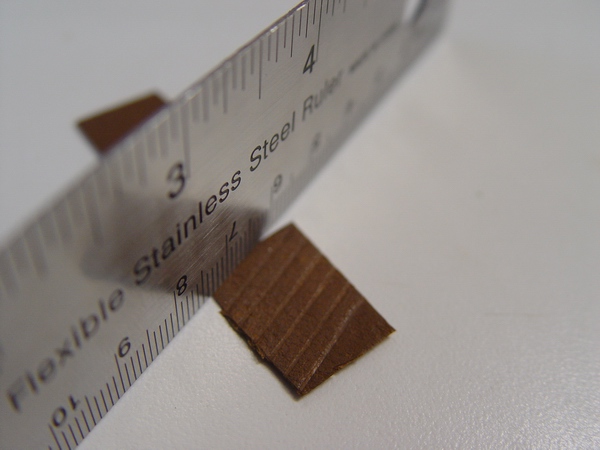
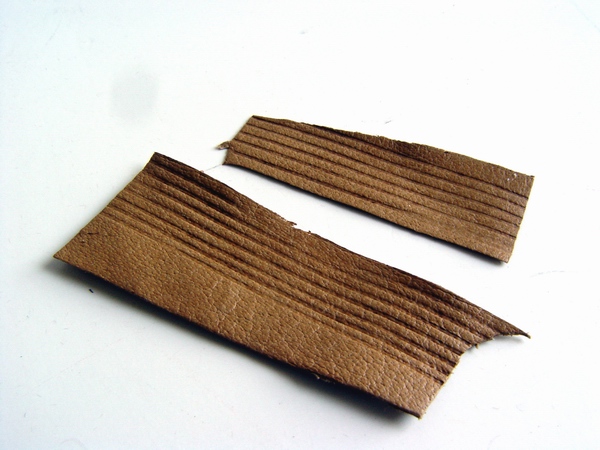
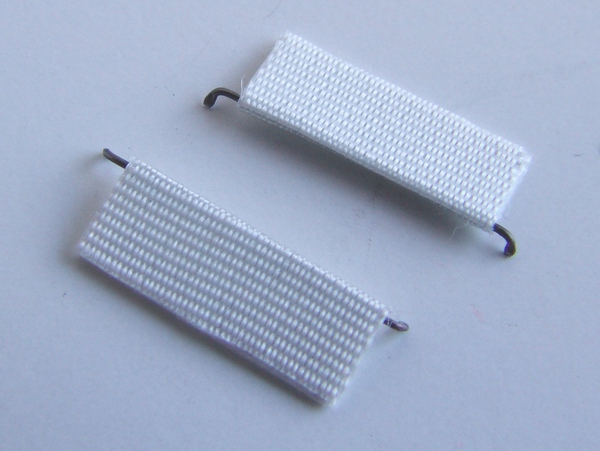
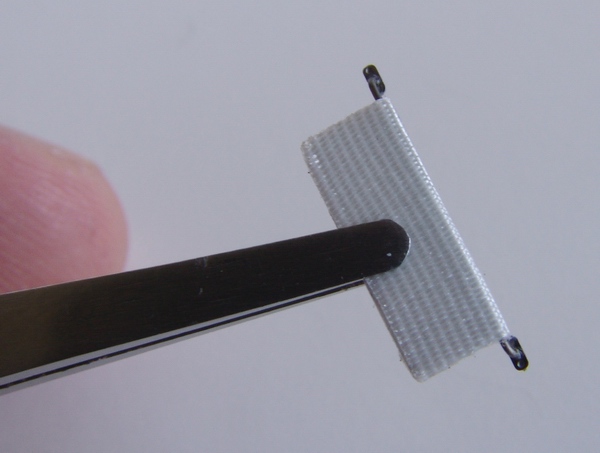
Then I cut four thin strips from thinned leather to make luggage straps. Two of the straps were fitted with buckles made from same Radio Shack wire (stripped of its insulation). The other two were punctured with a thick pin to make holes in the belt.
Hinges were glued to the plastic, and then visors were wrapped with cloth tape. The rest of the tape was carefully trimmed at the edges.
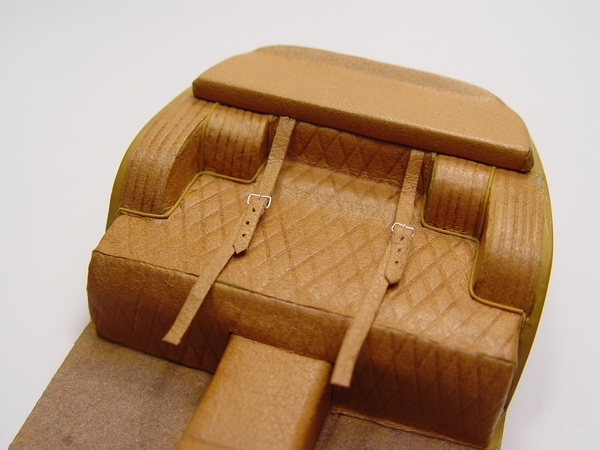
Luggage straps were assembled, and glued to the cargo area. Then I painted the piping with leather-matching paint. The interior really started to take shape.
Finally, I glued tiny photoetched bases to the hinges (p/e pieces were taken from Hiro 250 TR kit) and sun visors were completed.
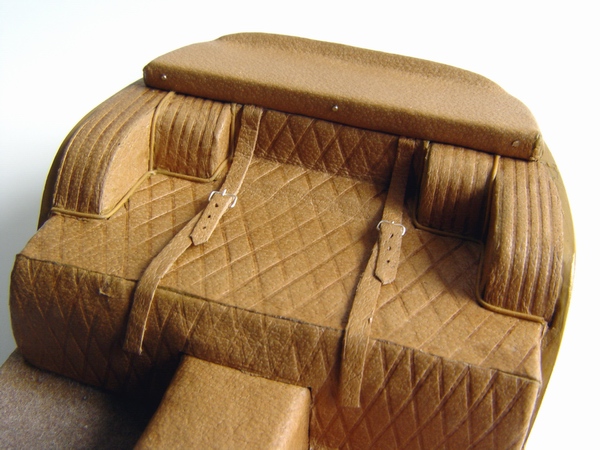
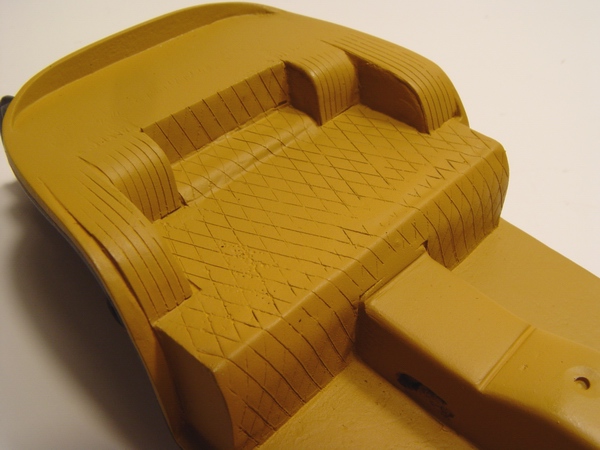
Final touch was the addition of photoetched rivets on the side of the package shelf (three of them). I later used a lot of these rivets on the door panels.
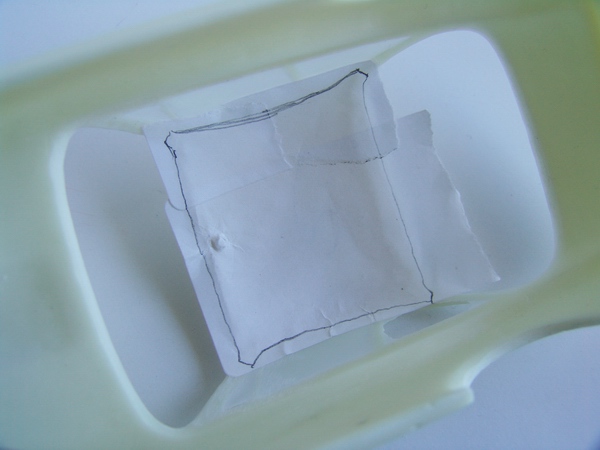
To get an accurate shape of the headliner, I used spare body and attached some sticky paper to it (you can use masking tape as well), and then transferred headliner contour to the paper.
Shifter was made from thin metal and plastic rods. I also made a shifter boot from the leather, and boot trim from same Radio Shack wire.
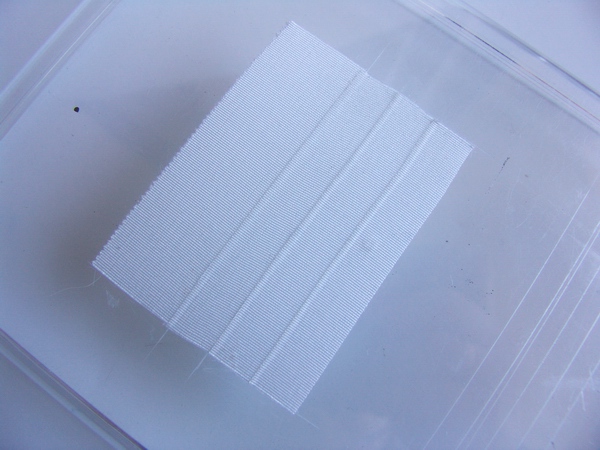
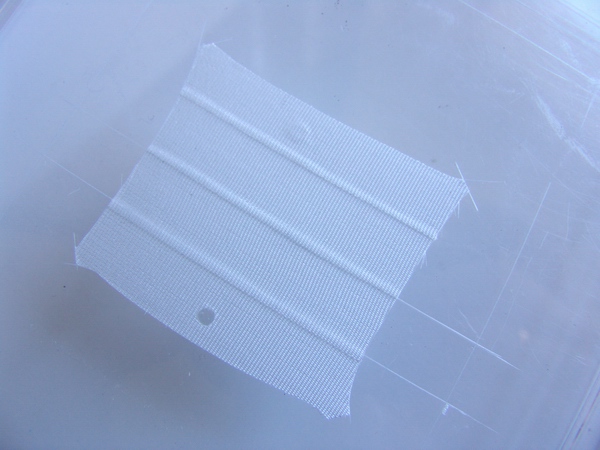
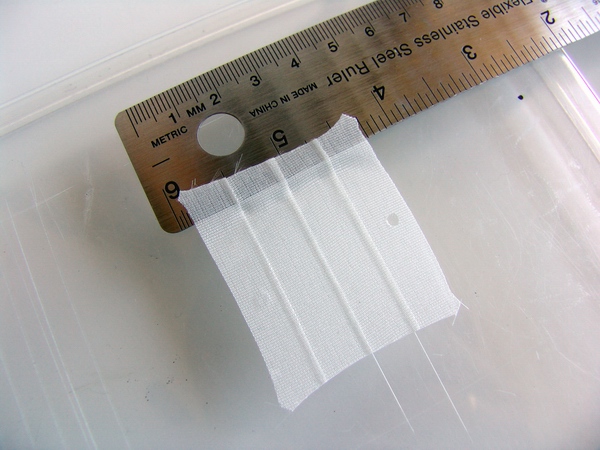
Then I attached few thin tape stripes to a piece of glass (it is much easier to remove tape from gloss surfaces), following the pattern of the real car's headliner.

The trim was glued to the central tunnel, and then I cut the hole in the leather for the shifter. I also made new ashtray (I shaved the original one when I was applying leather to the central tunnel) from sheet styrene and covered it with a piece of BMF.
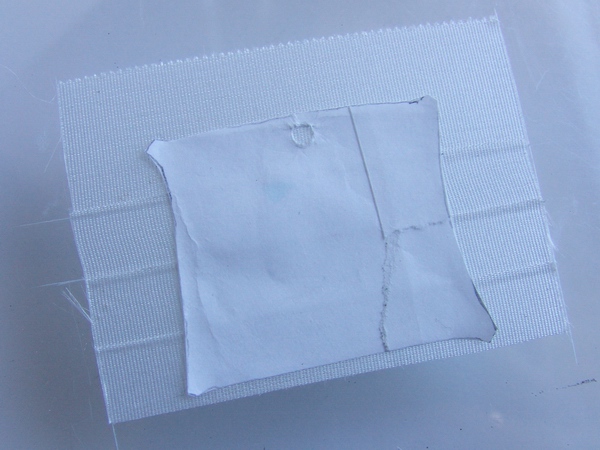
Paper template was removed, cut out and attached to the cloth tape.
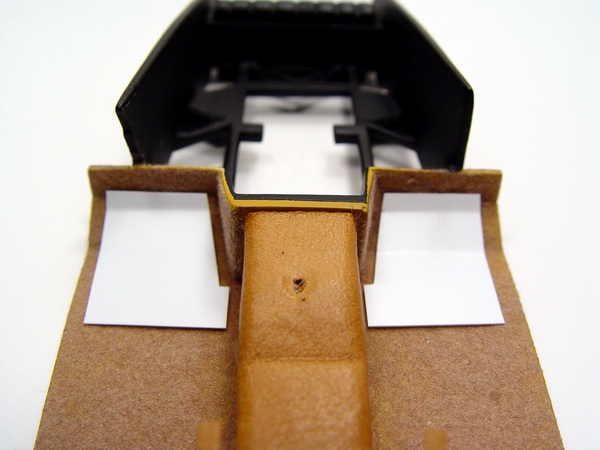
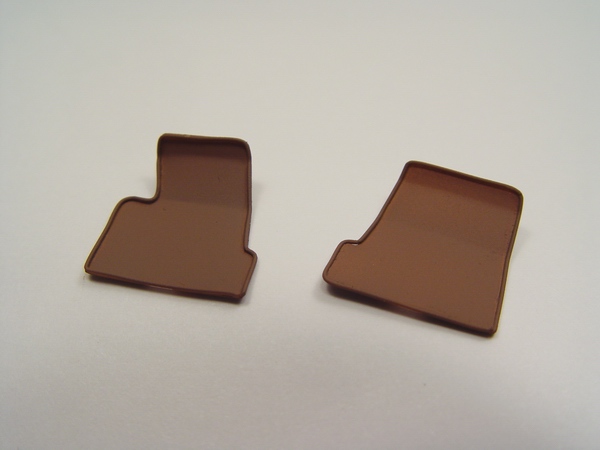
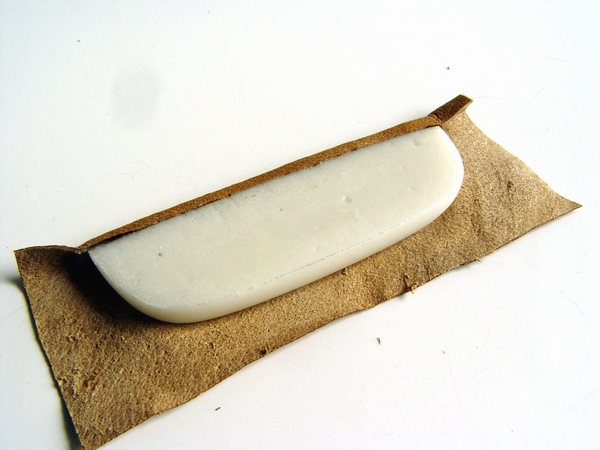
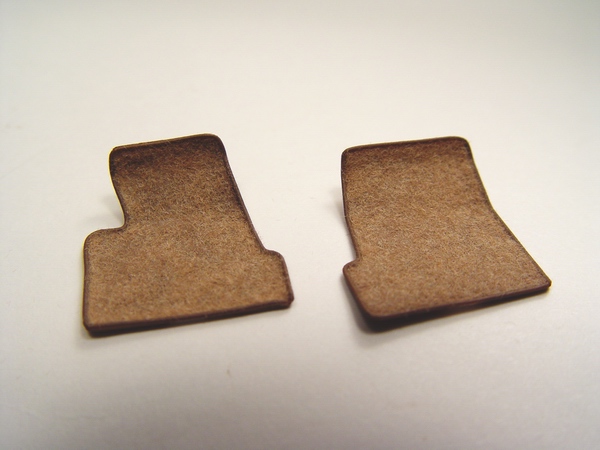
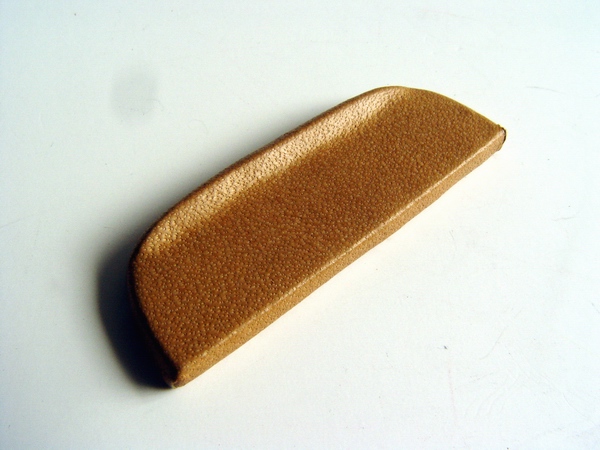
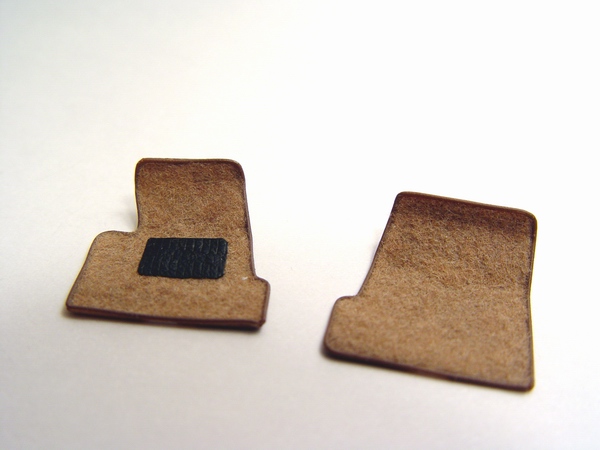
At the same time I decided to make floor mats. I made two patterns from masking tape and then transferred them to the thinnest sheet styrene I had. Then I cut two mats from the styrene, bent and test fitted them inside the foot wells.
Then I carefully cut the tape with hobby knife (use new blade) following the template.
I then rounded the edges and glued wire trim to the mats using superglue.
Using the ruler, I carefully removed the headliner, and glued it to the roof.
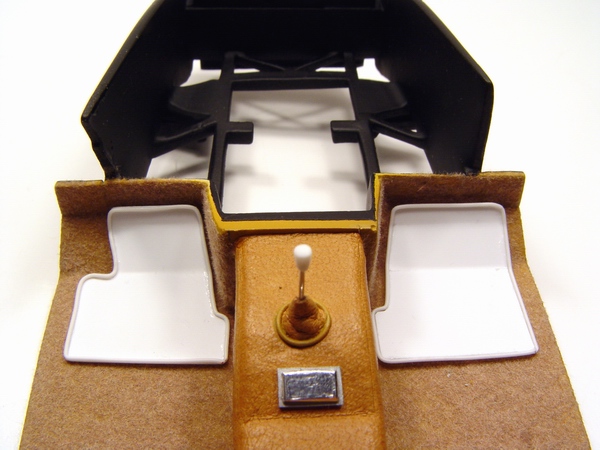
Before it was too late, I realized that configuration of the driver's mat should be a little different (to accommodate footrest and pedals) so I changed its shape.
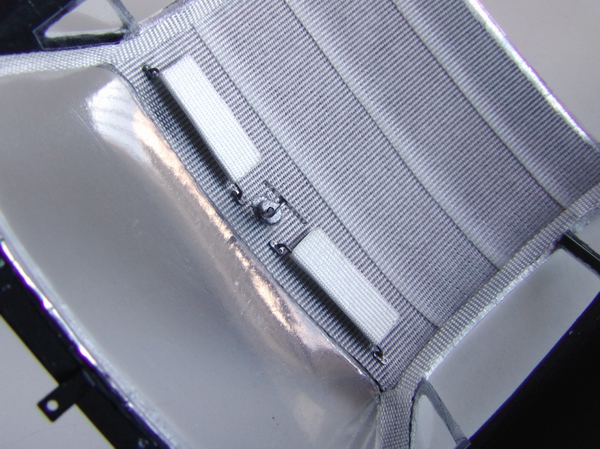
Edges of the headliner were trimmed with the same cloth tape. Then I glued sun visors and rearview mirror, made from a piece of photoetched fret and thin wire. Looks much better!