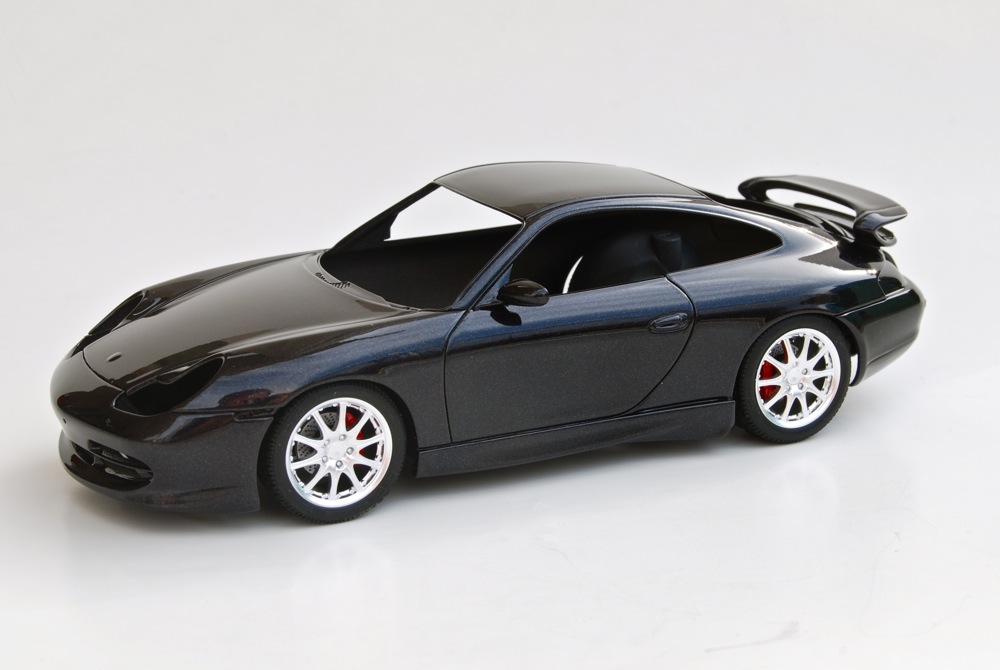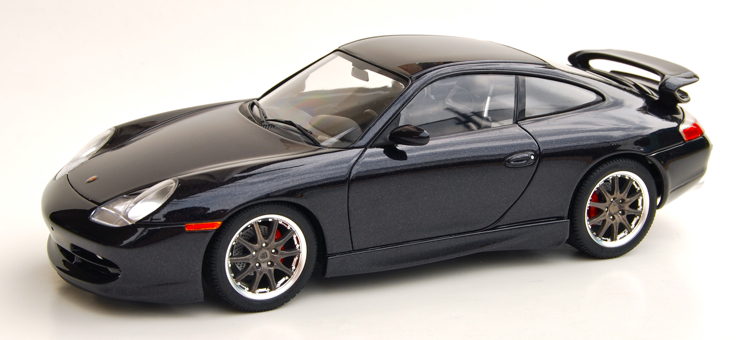
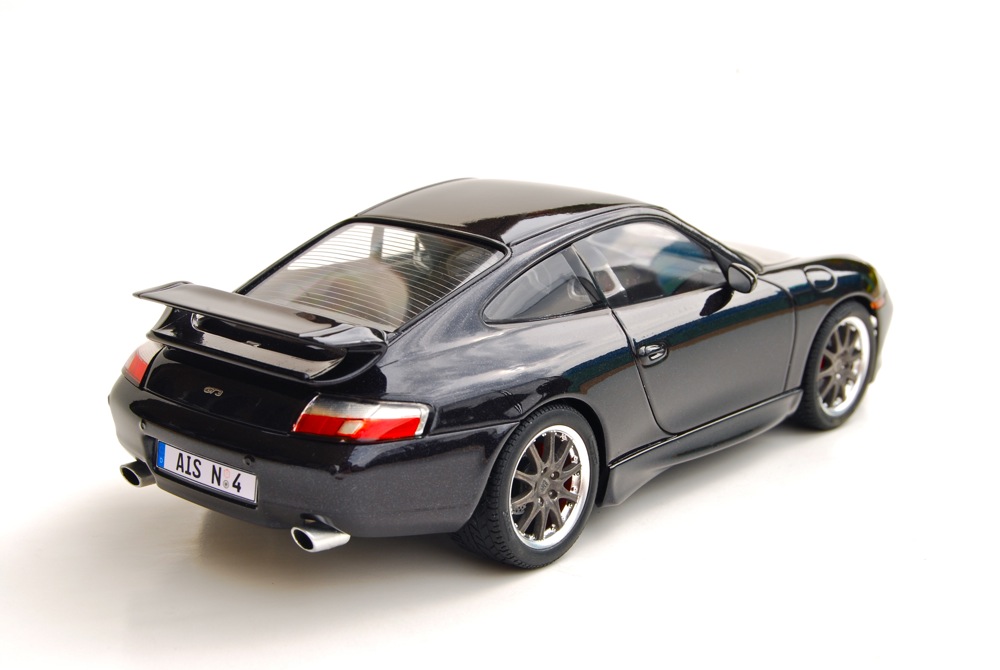
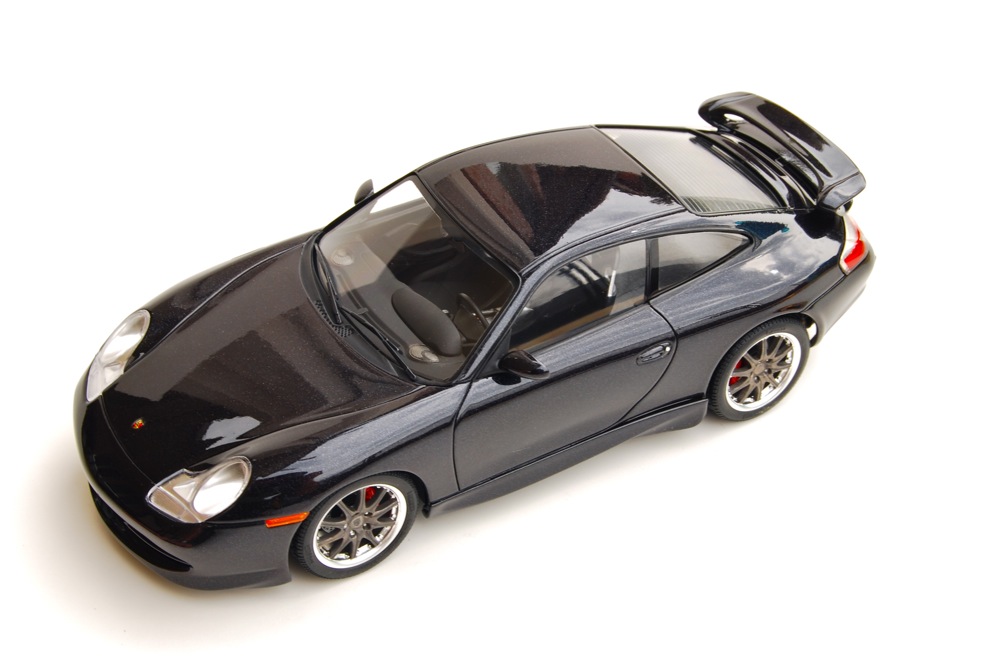
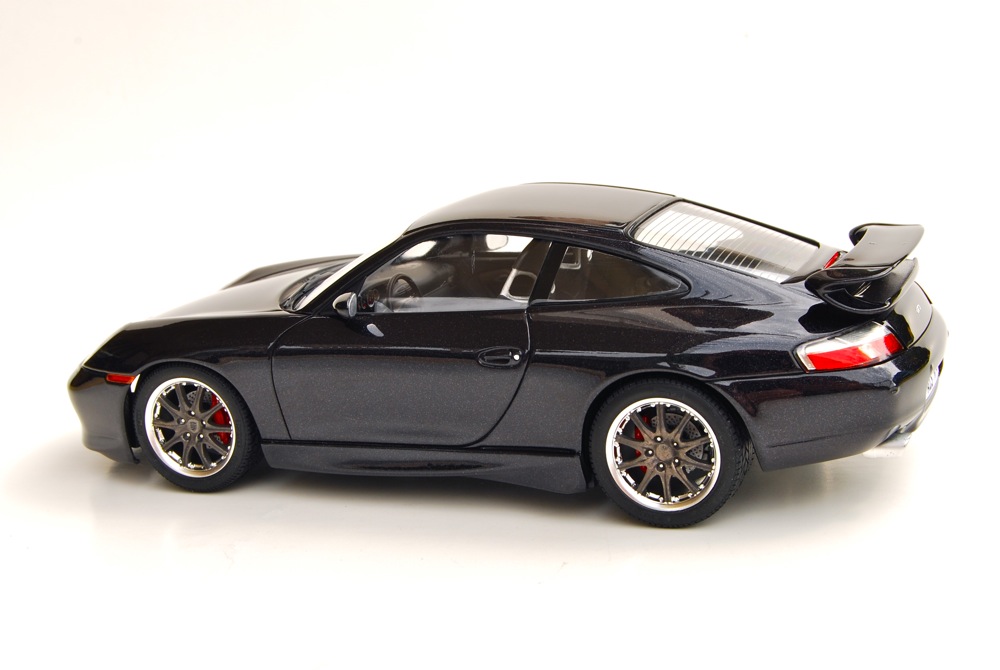
Porsche 911 (996) GT3
 |
 |
 |
Kit: 1/24 Tamiya Porsche 911 GT3, kit #24229 Pros: Accurate body proportions, good parts fit, not a lot of mold lines or other flaws. Soft rubber tires with correct thread pattern and correct size rims. Self-adhesive interior carpeting, metal transfers for badges and mirror face (only interior), and great decals. Clear and easy to understand instructions. Typical Tamiya quality kit. Cons: Curbside, chassis plate is a one-piece part, very hard to accurately detail-paint. Frosted part on the windows is very faint, hard to paint window trim. Simplified door panels and interior in general. Plating on the wheels is too bright, almost chrome - not appropriate for the real car. Gaps between chassis plate and body after assembly - but this is typical for Tamiya curbside kits. Verdict: Overall, it is a very nice curbside kit, but not up to the modern standards. Some of the drawbacks are rather disappointing (such as window masks), and could have been easily avoided. There are few suspension parts that are included with the kit that are not intended for use with this model - make sure you use the right parts. Tamiya captured the shape of the GT3 nicely, and even built box-stock the model looks great. It is simple enough to be tackled even by the beginner, and is highly recommended for everybody. |
 |
 |
 |
|
 |
 |
 |
Buildup
|
|
Before diving into another super-detailed project, I wanted to build something really simple. GT3 from Tamiya looked like a great quick-builder kit. Little did I know that this "quick" build would sit in the box since 2005! Everything looked good in the beginning though... |
|
Finally, the body was thoroughly washed and carefully waxed with Last Detail Treatment model wax. It was looking definitely much better than the yellow at this point! |
|
|
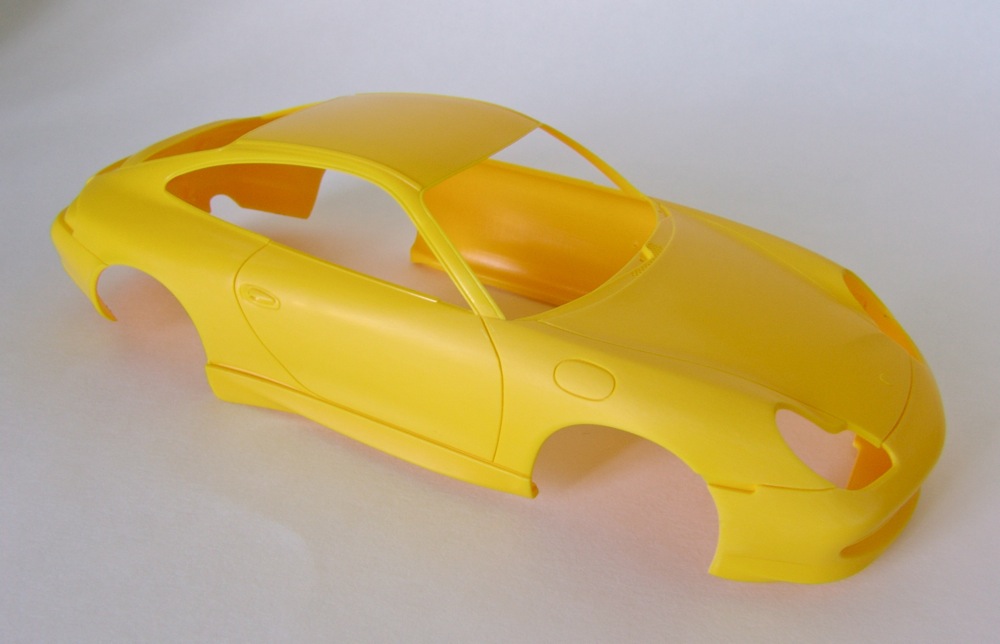
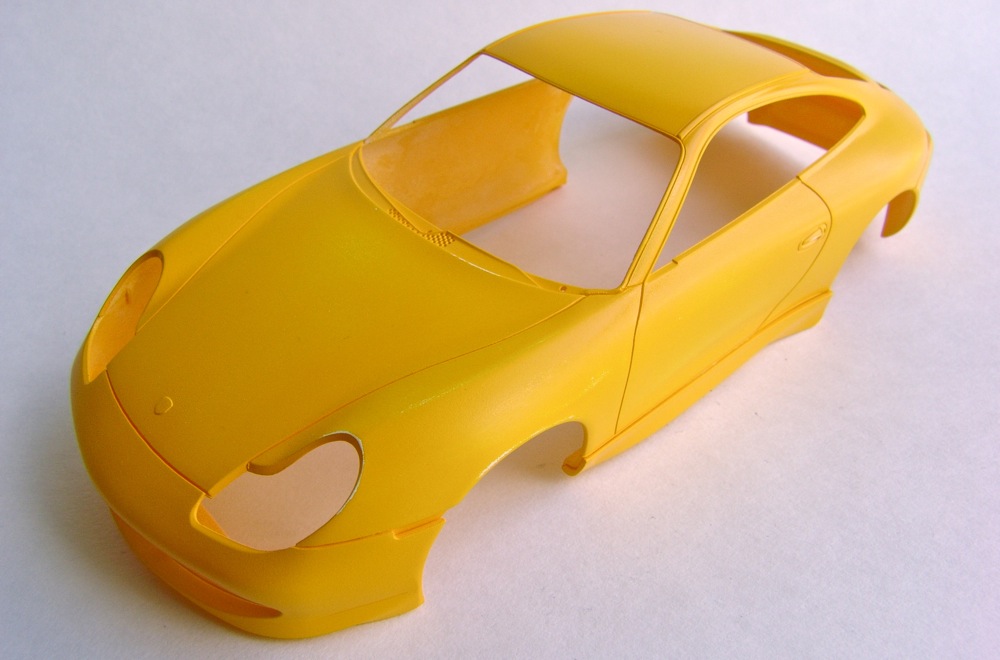
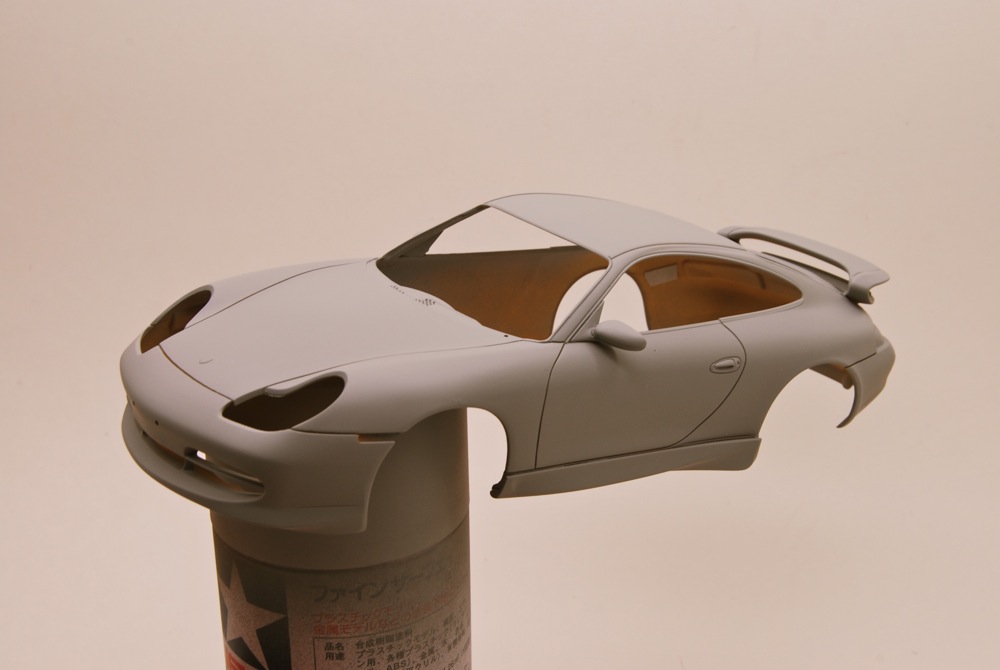
The body was assembled (bumpers and side skirts are separate parts) and panel lines re-scribed/deepened, lightly wetsanded and sprayed with 2 coats of Tamiya white primer (the plan was o paint the body yellow). |
|
Picking black color for the body certainly made my life easier when the time came to paint the chassis plate. Instead of masking black portions, I just sprayed the whole thing black and was done with it. |
|
|
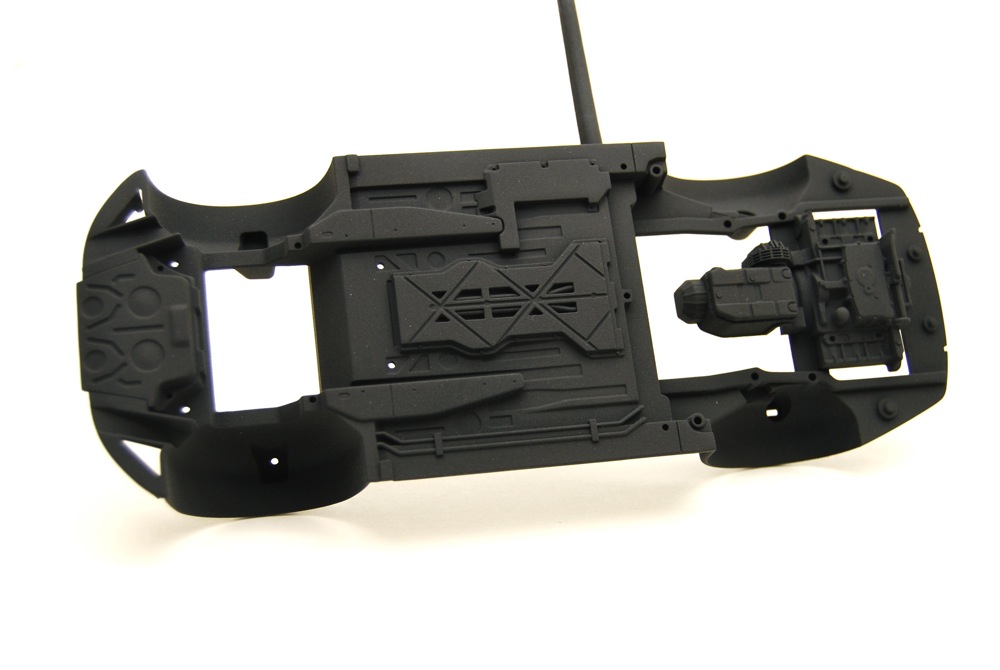
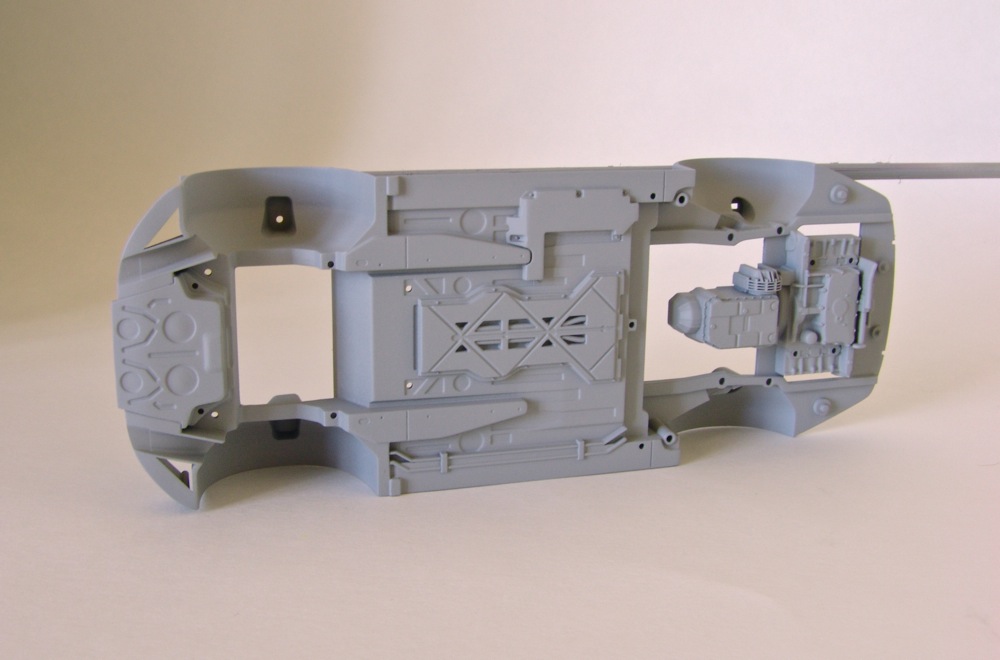
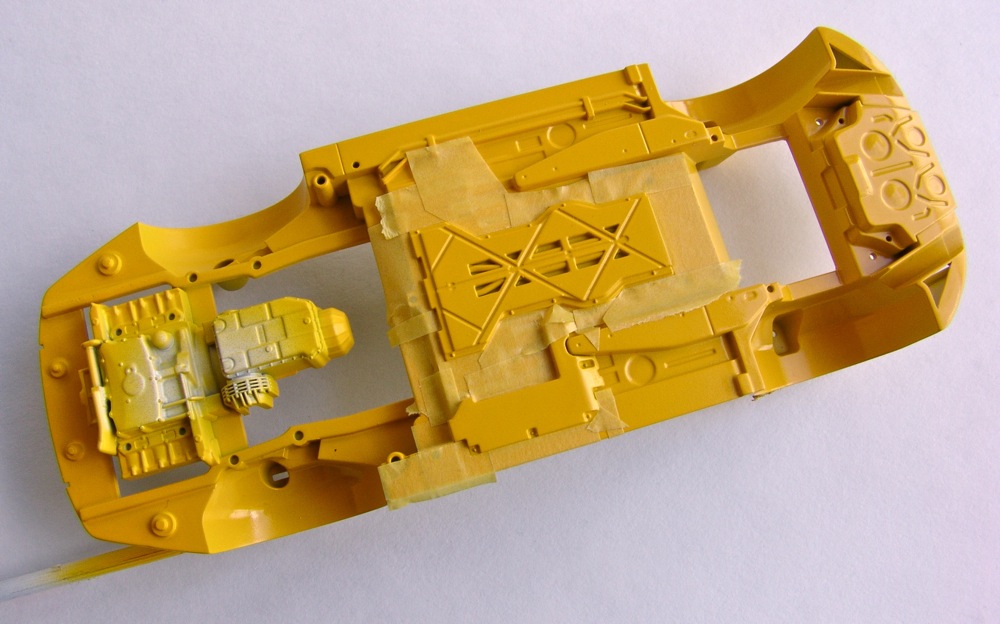
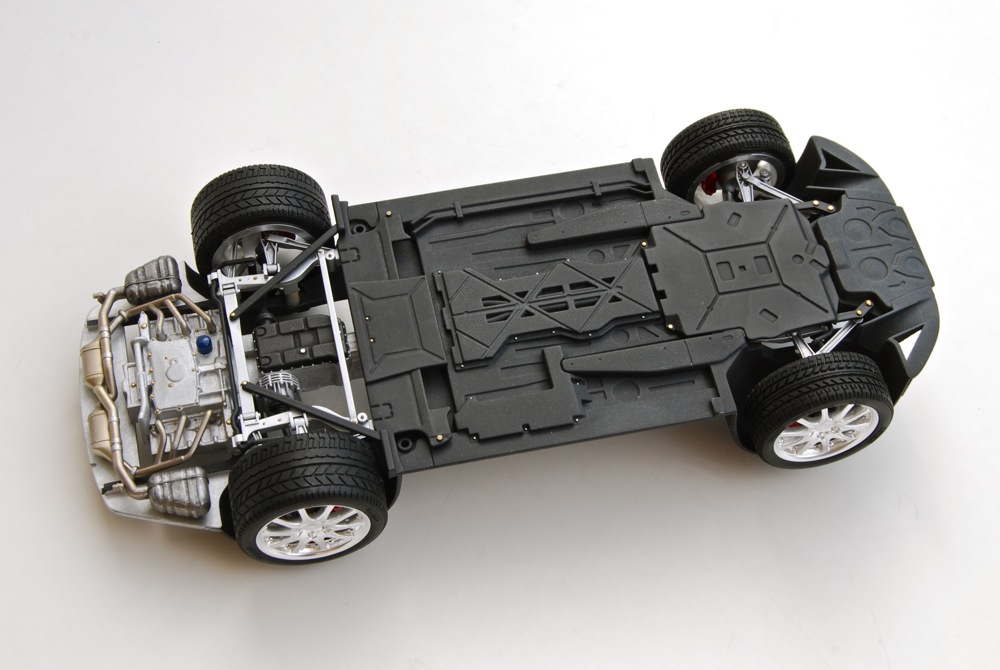
Chassis plate is a painter's nightmare - "all-in-one" design. It had few imperfections in it so it was cleaned up, lightly sanded and sprayed with gray primer. |
|
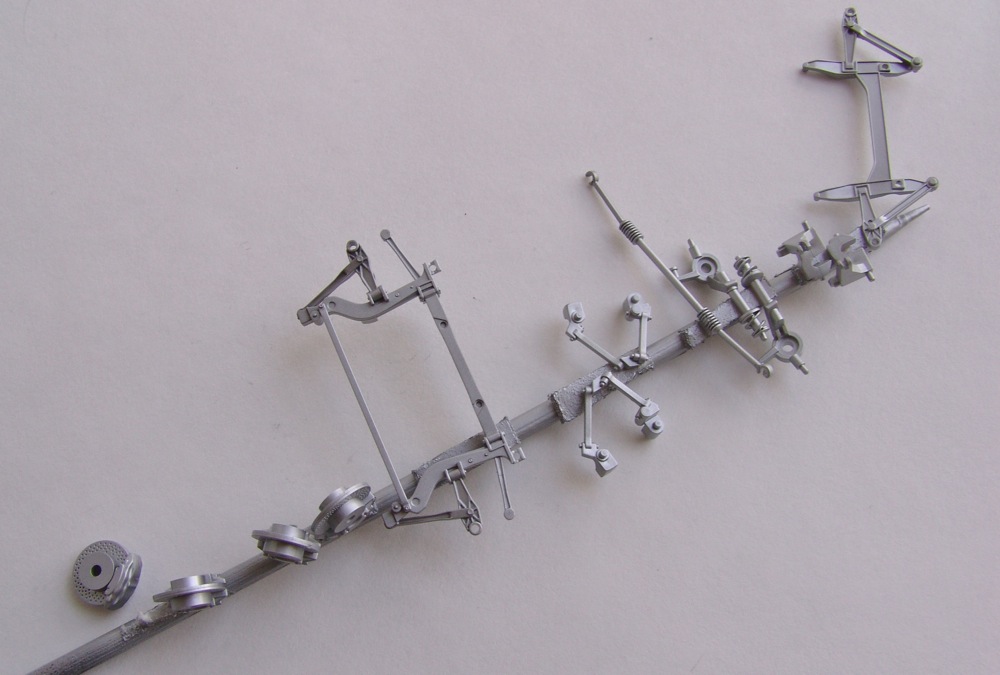
Engine part of the chassis plate was masked off and sprayed with Model Master aluminum metalizer, exhaust was painted and weathered with Alclad metalizers, and I also attached drive-shafts and upper a-arms. |
|
|
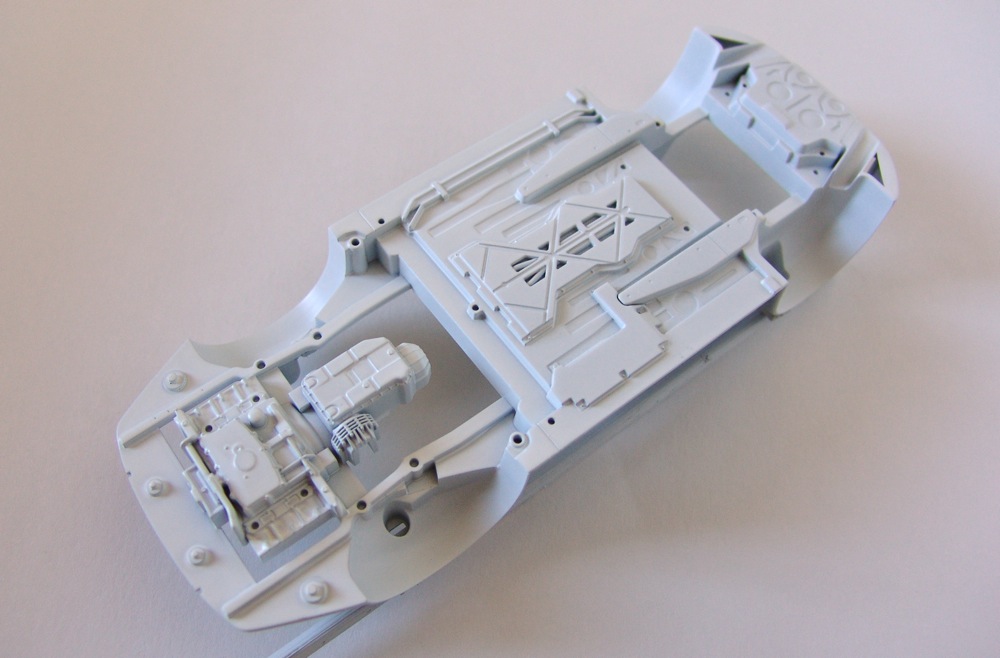
Since I wanted to paint the model yellow, I sprayed a coat of white primer. The problem with white primer and complex parts like this is that it is very hard to cover every crevice consistently. This resulted in rather thick primer coat and I started having doubts about my color choice.... |
|
Bolts and nuts were picked out with some paint, oil filter painted blue, and chassis was ready for front suspension and brake detail. |
|
|
Black parts were separated into batches, mounted and sprayed with various shades of black. |
|
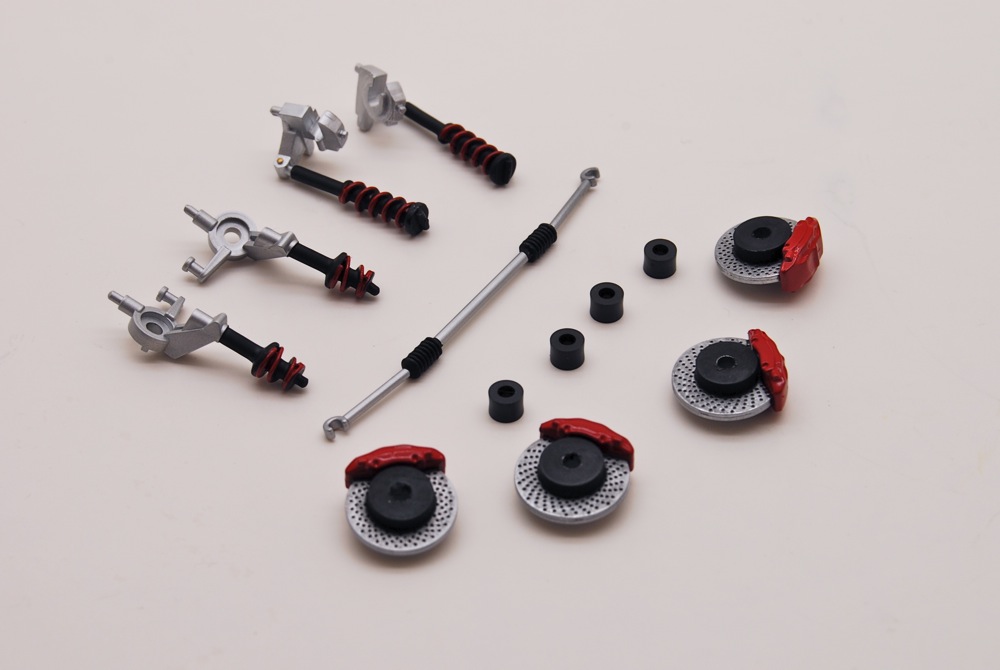
Since I set out to build the kit out of the box, I didn't do anything to shocks or brakes, but carefully painted them. Even with this simple detailing, they look really good. |
|
|
Similar technique was used to paint silver parts. I then re-mounted parts that needed additional (or different shade) paint and sprayed them again. |
|
Front and rear suspension parts were detail painted and given a light black wash. Ready for assembly. |
|
|
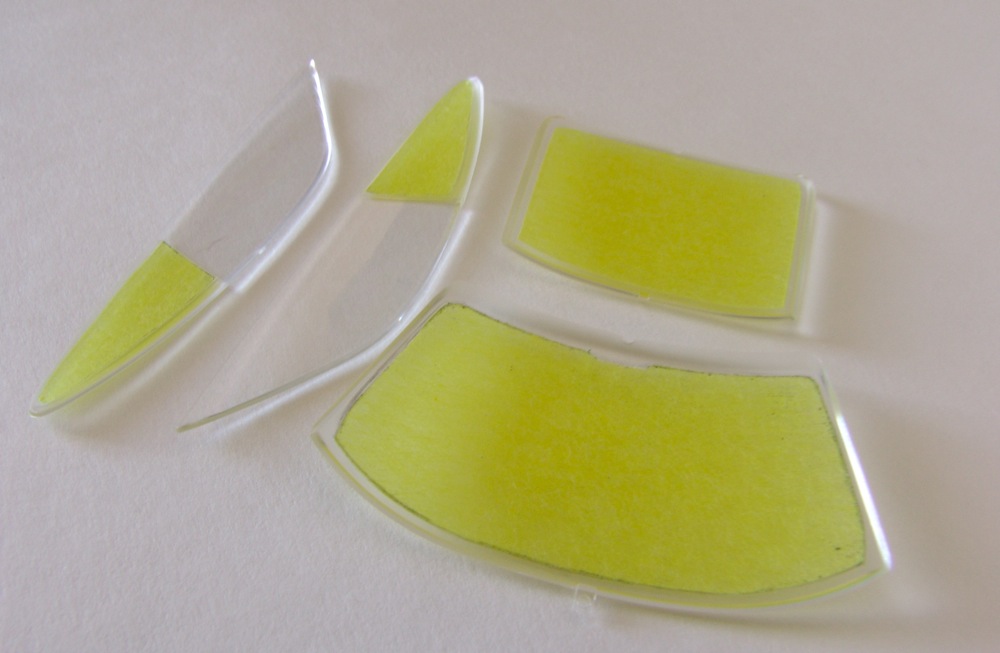
Since Tamiya does not supply any window masks with the kit, I made some masks from 40 mm Tamiya tape using the technique I describe in my "Window Masks" tutorial. |
|
Front suspension was put together and brakes attached. |
|
|
After a few coats of Tamiya Chrome Yellow (decanted and sprayed with an airbrush), I carefully sanded little imperfections only to burn through the paint in several places! |
|
Upper part of the rear suspension, brakes and stabilizer bars were assembled and detail painted. |
|
|
Then I painted the chassis and started masking it so I could spray black portions. It was then when I realized that 2 coats of primer, then yellow paint, and then black paint would be probably too much paint on one part....At this point the model was put in the box....until 2009! |
|
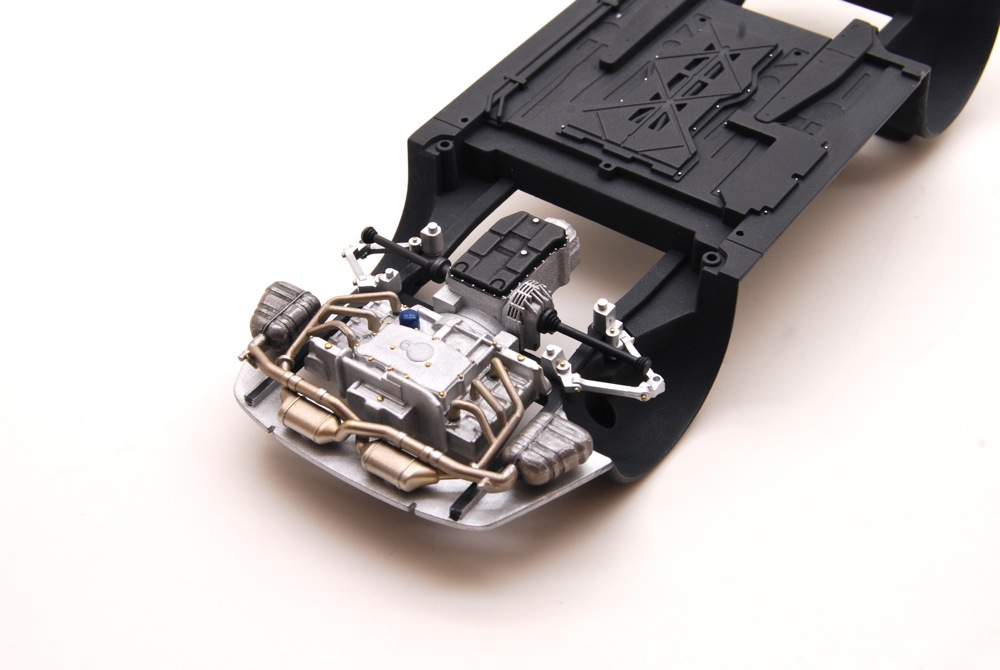
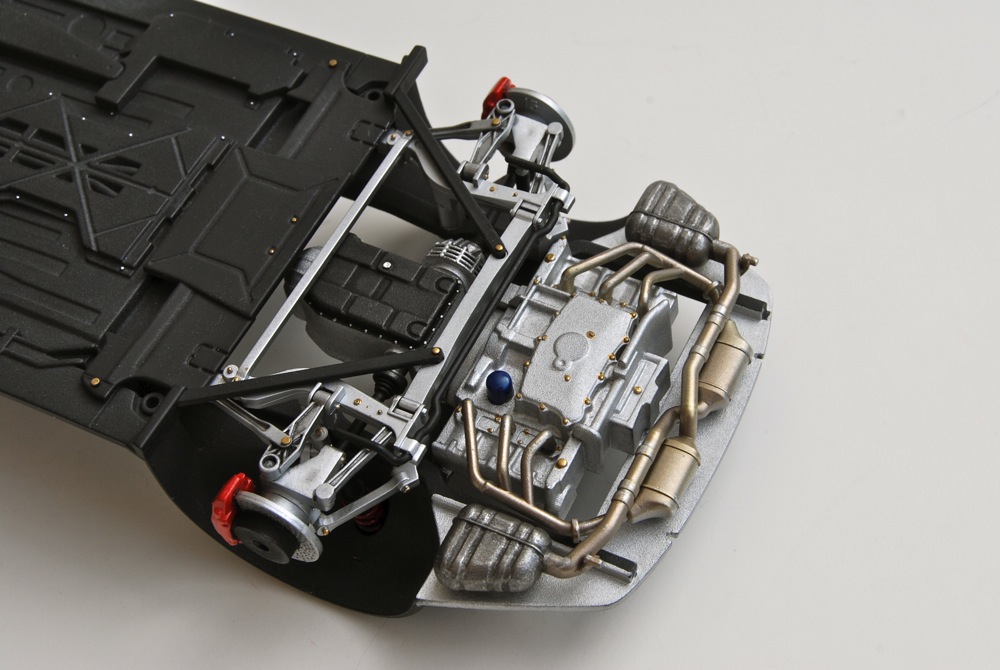
The chassis was complete. I lightly dry-brushed entire chassis plate with Model Master metalizers (burnt metal and steel) to give it some depth. |
|
|
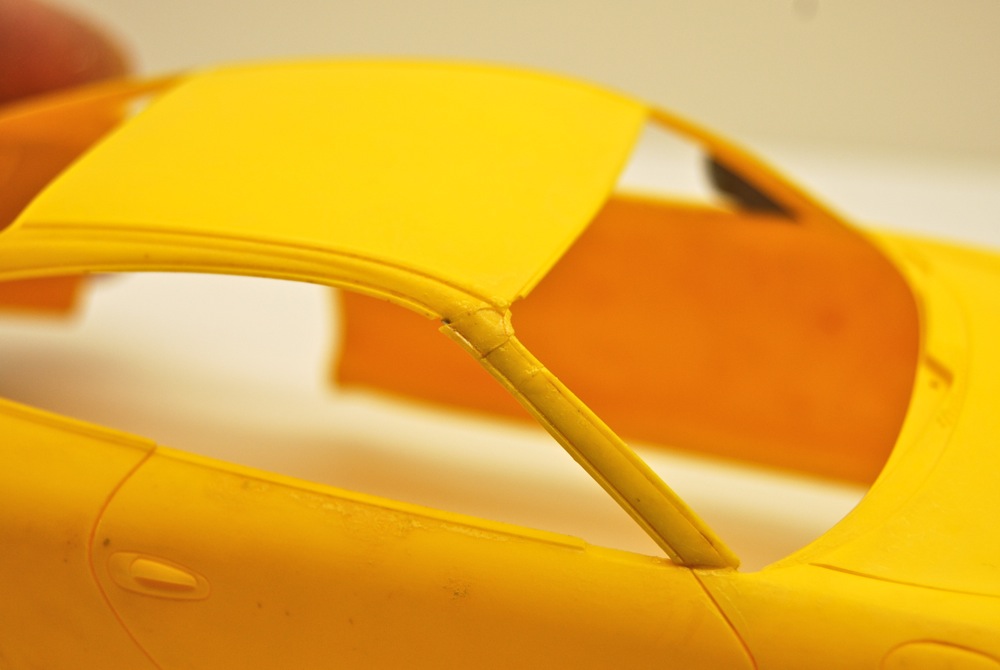
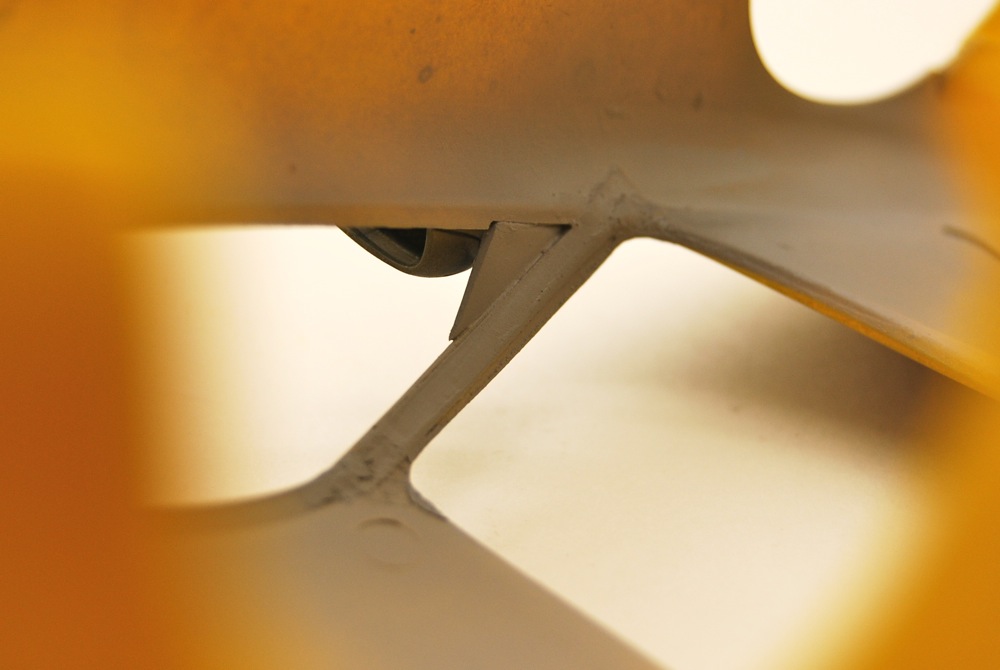
While sitting in the box, the model got damaged. Something heavy was put on it, and one of the A-pillars shattered, into 4 pieces no less. That was a sign - I decided to go with a different color. The pillar was put together to the best of my abilities with plastic weld... |
|
Another picture of completed chassis. |
|
|
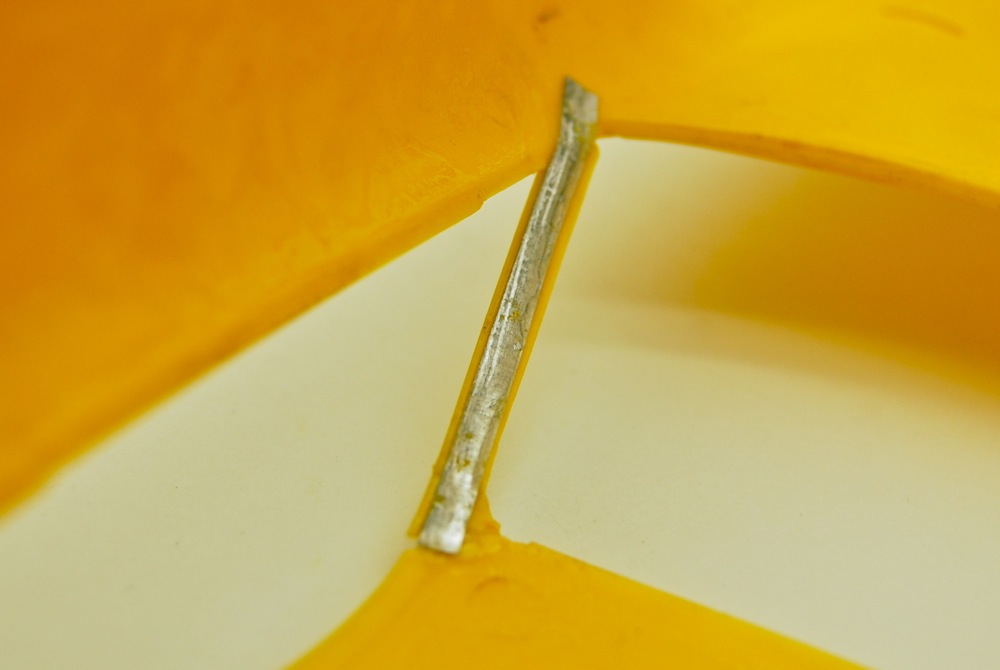
...then reinforced with thick metal foil strip on the inside. I still had to rebuild window trim, and fill all the cracks and make it smooth and nice again. |
|
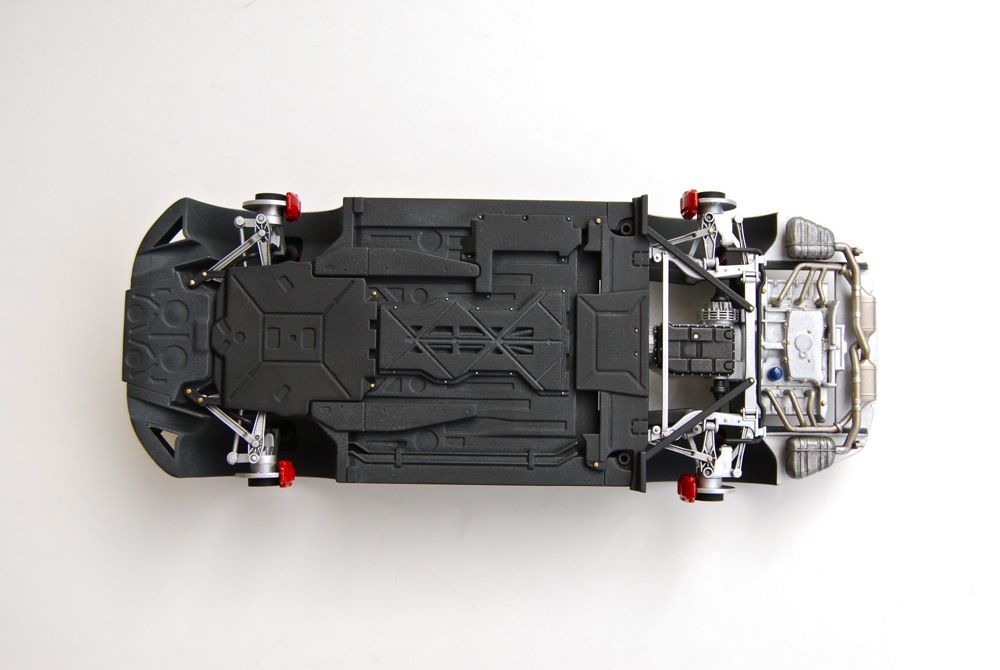
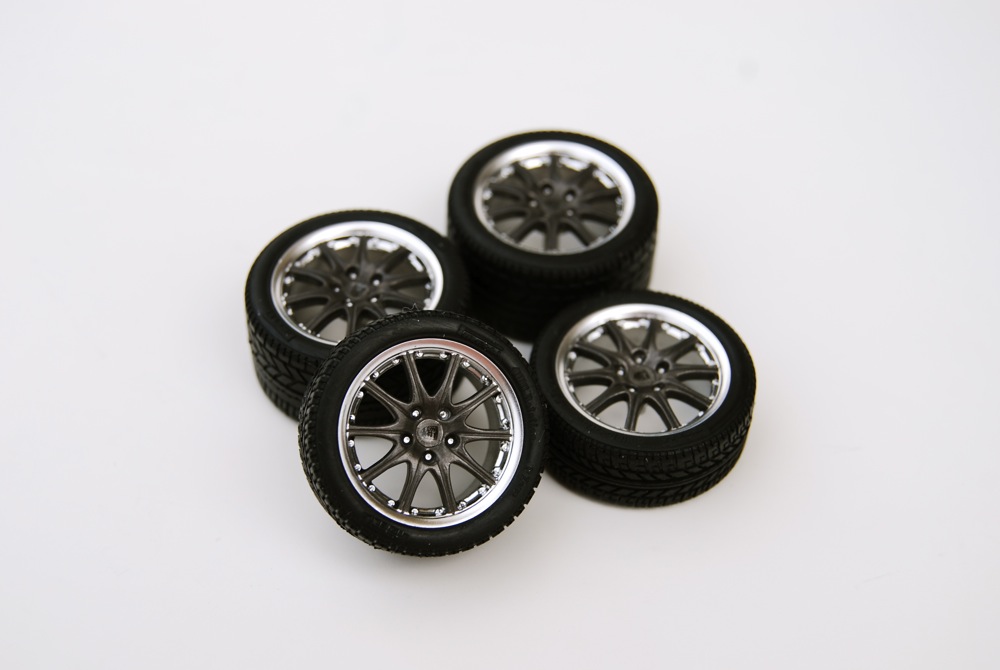
Wheels were put on the brakes. Kit has directional tires, so you have to make sure you put them on correctly. |
|
|
That proved to be a challenge because of the delicate and fragile area I had to work with. Using Tamiya putty, glue, and plastic strips, I was able to roughly rebuild the pillar. Here you can see it mid-way through the restoration. |
|
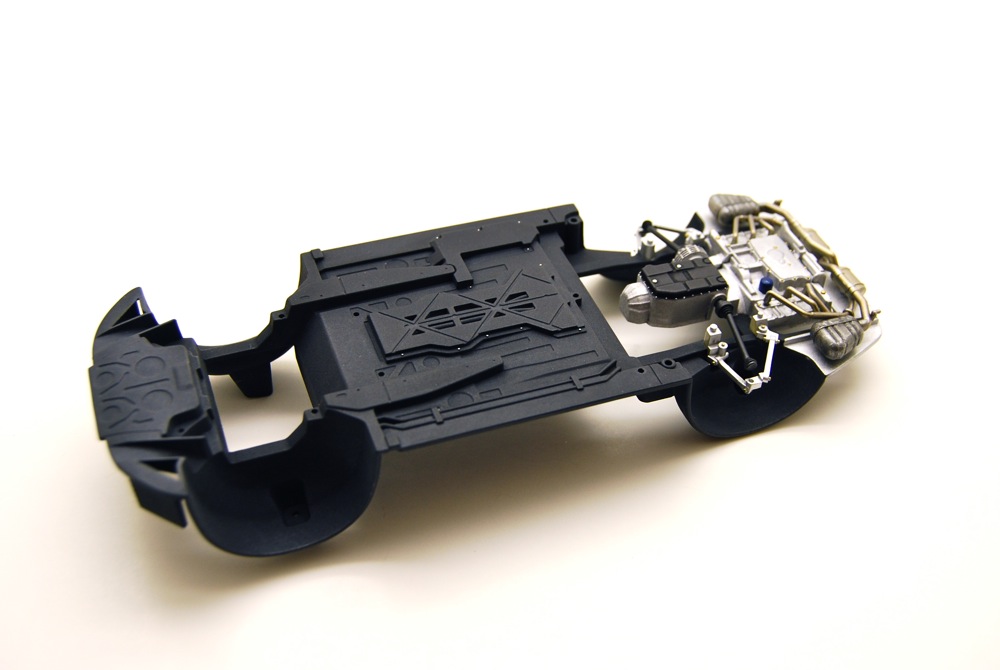
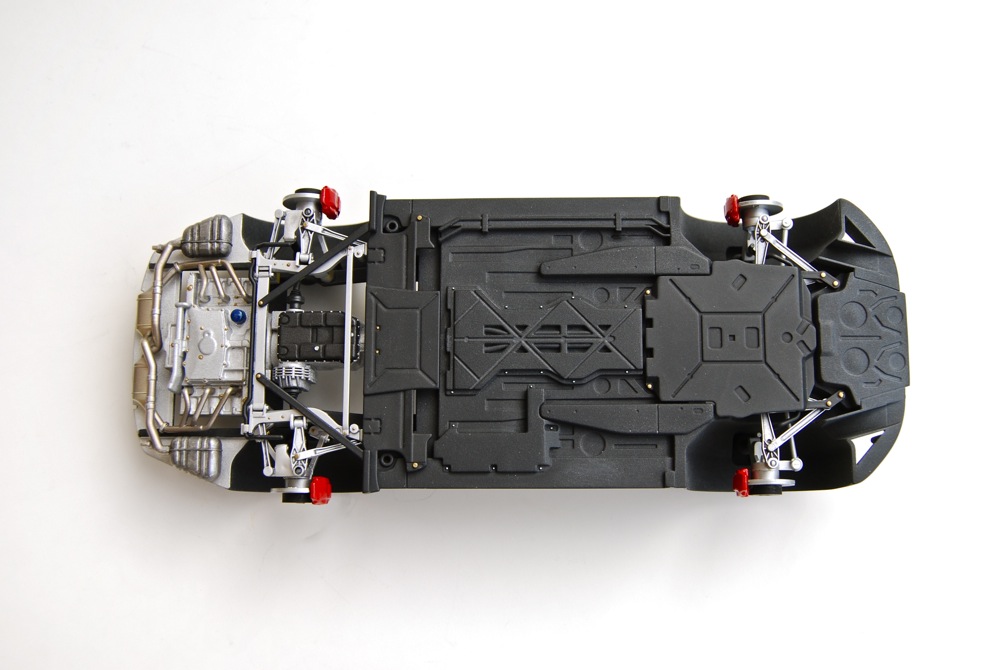
Another picture of the chassis with wheels on. |
|
|
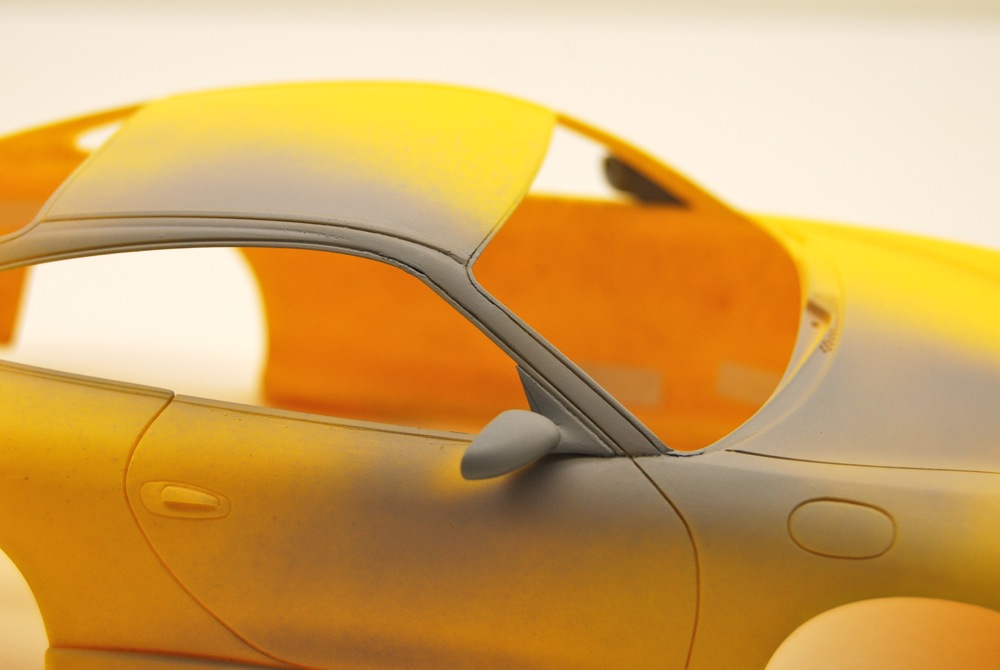
I also cleaned up the other side of the pillar to make sure that windshield and side windows would fit without any problems. |
|
When I test fitted completed chassis to the body, I noticed two problems. First, the stance, especially in the read was completely off. Second, I clearly hated overdone plating on the wheels. |
|
|
Once the pillar was fixed, I sprayed a light coat of Tamiya gray primer to check for flaws. The pillar looked good! |
|
Stance was corrected by adjusting the pins that attach the chassis to the body. I had to slightly adjust the interior piece to make sure that it will fit too. |
|
|
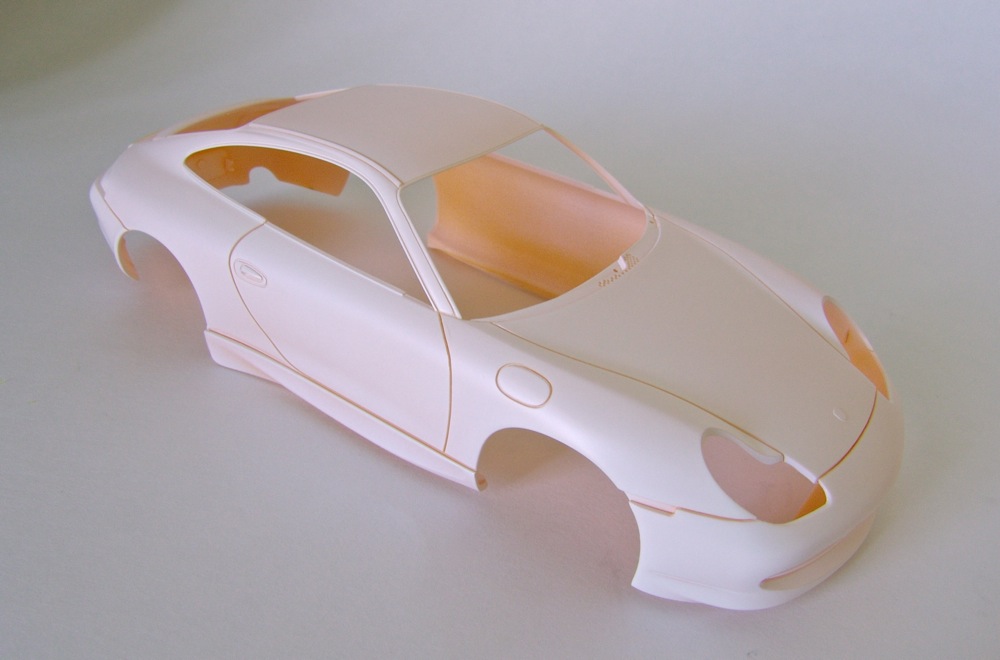
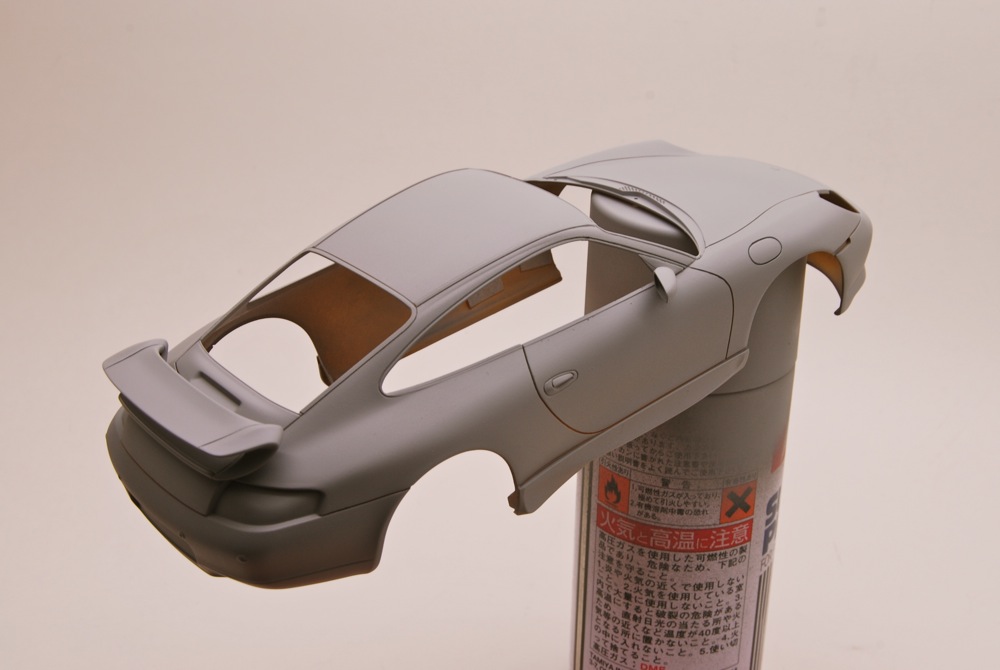
After light wet-sanding, final coat of primer was sprayed on the body and it was ready for paint. Now I only had to pick new color..... |
|
"Bling-bling" wheels were toned down with some Model Master metalizers - I simply brush painted the spokes with Burnt Metal and after it dried, slightly burnished them for a nice dark bronze color. They were looking instantly better. |
|
|
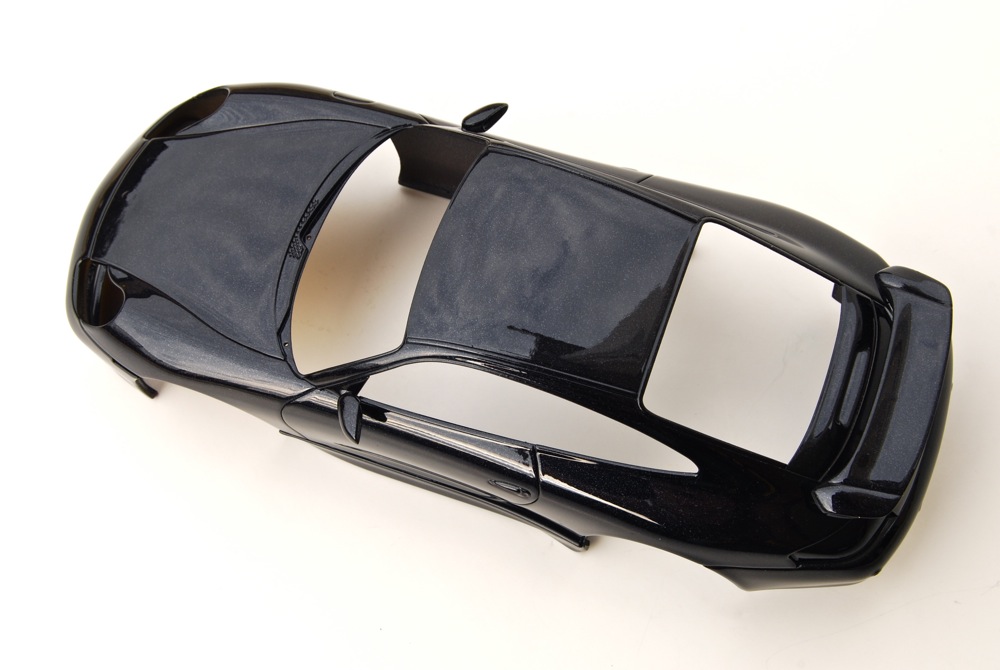
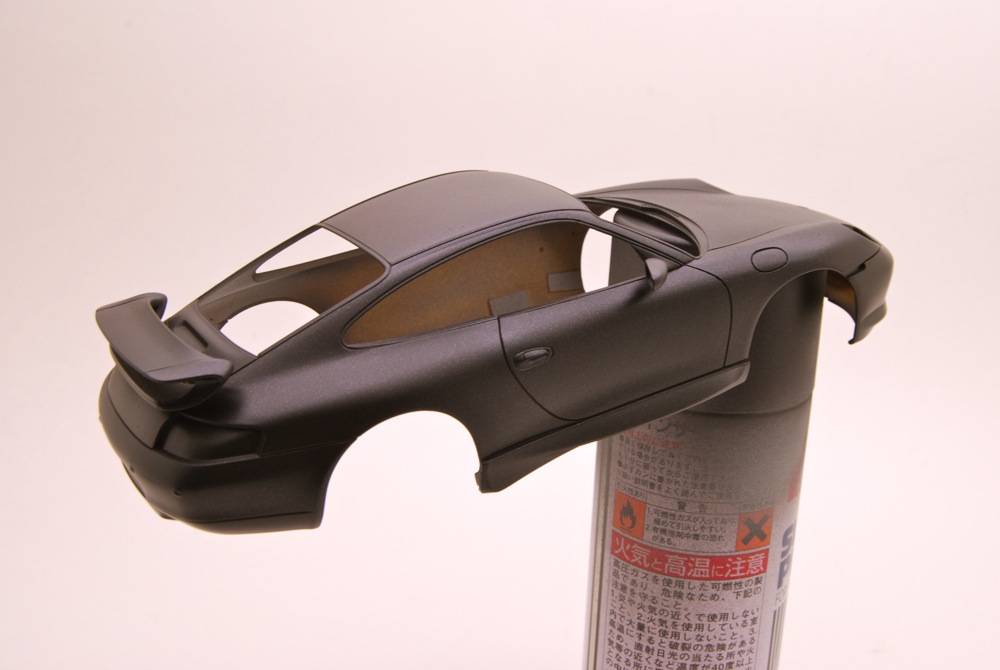
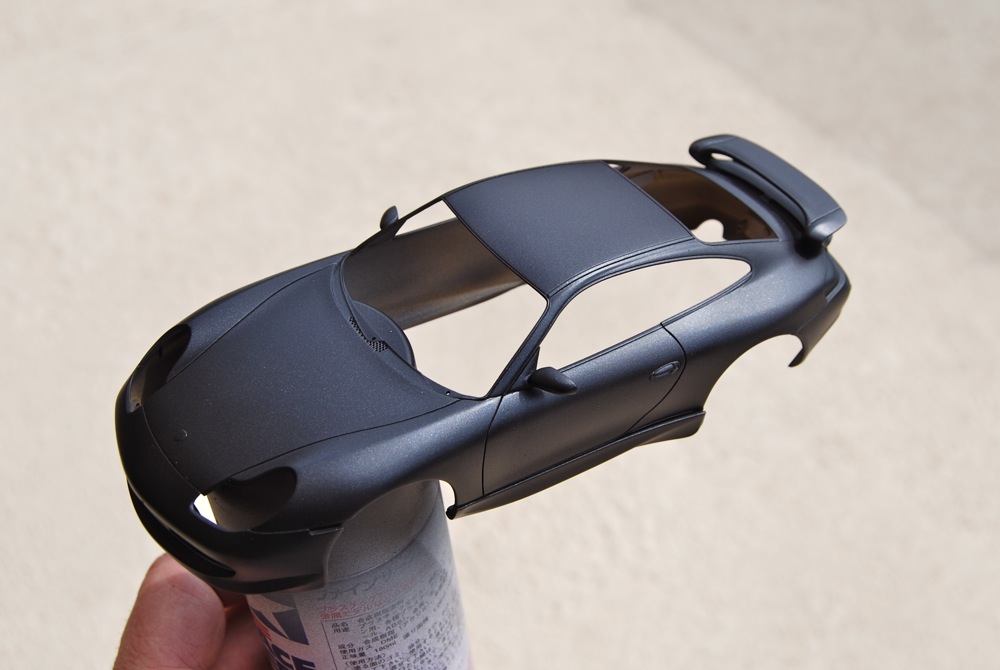
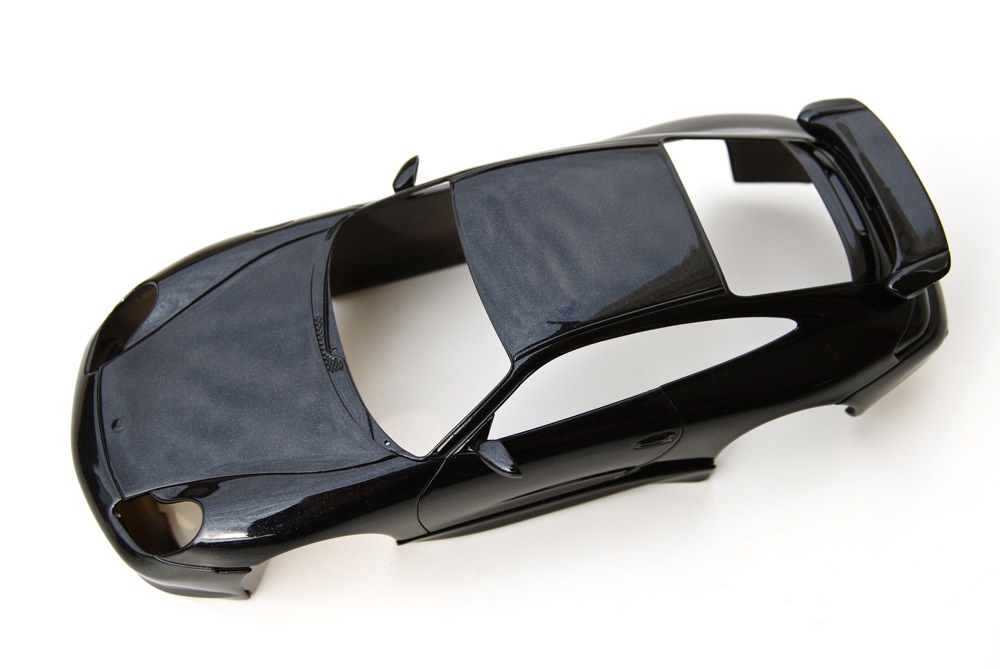
I was looking online for pictures of the GT3s and found a beautiful car for sale in Houston, TX. That was it - I wanted it to be black! I had some Ferrari black metallic from Hiroboy (Zero Paints) which I decided to use on this Porsche. the picture shows first coat before sanding. |
|
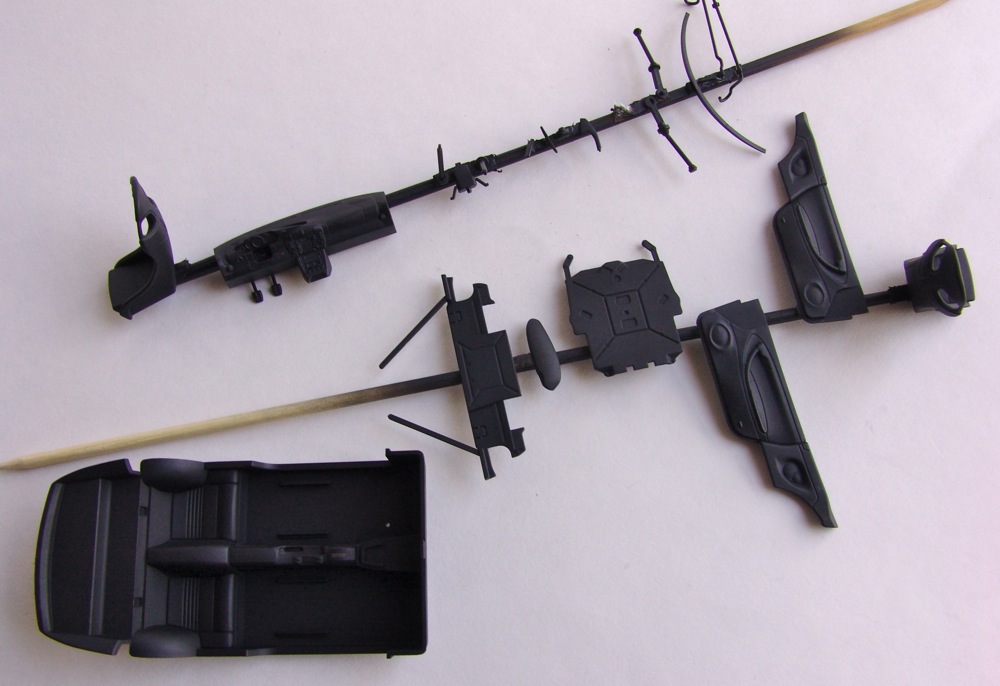
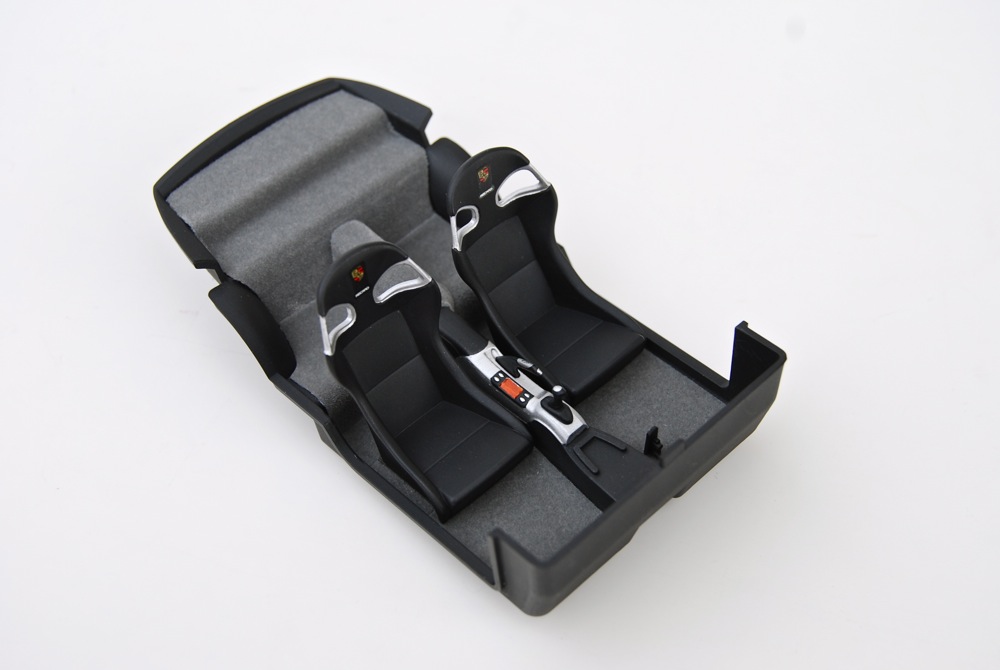
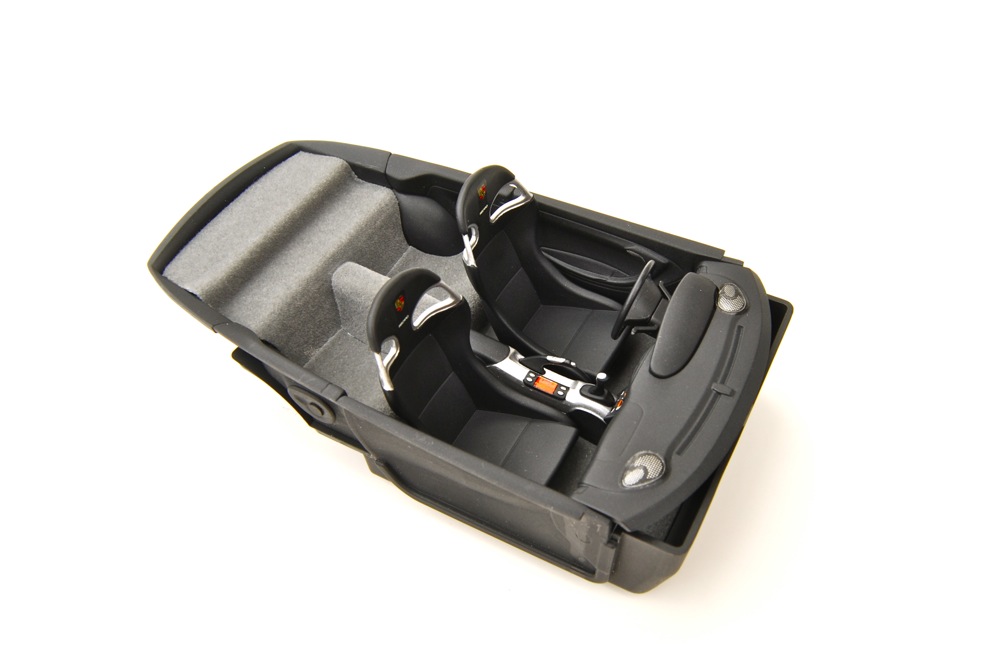
Interior was built completely out of the box; I even used the sticky fuzzy paper included in the kit. it was pretty straightforward application. The rest was painted various shades of black with silver accents, and kit decals. |
|
|
Zero Nero Nuovo is a bit transparent color, so I sprayed another coat just to make sure I have even coverage for all areas. |
|
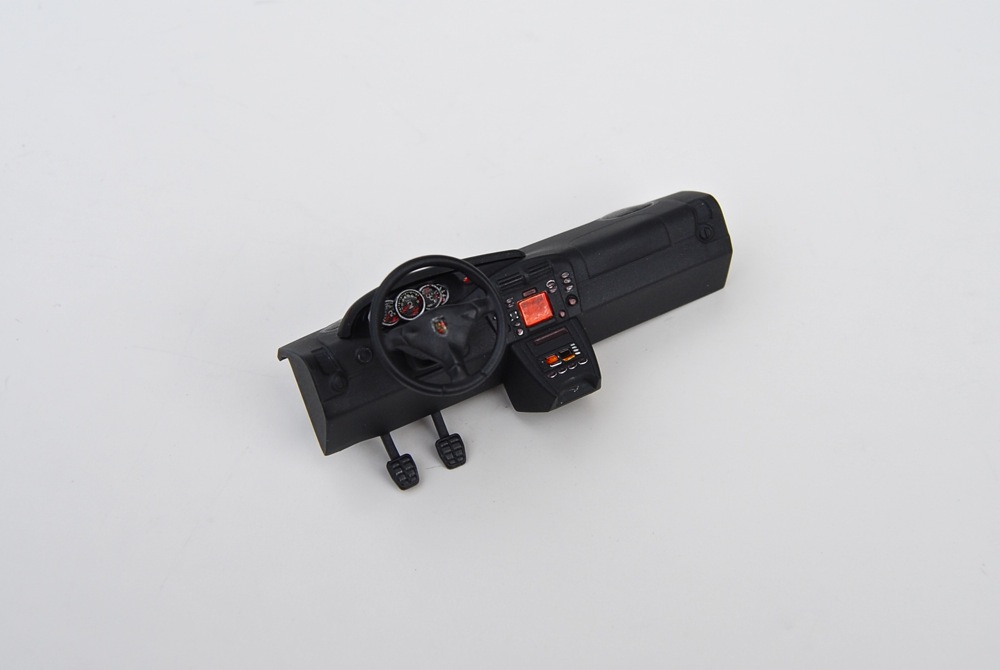
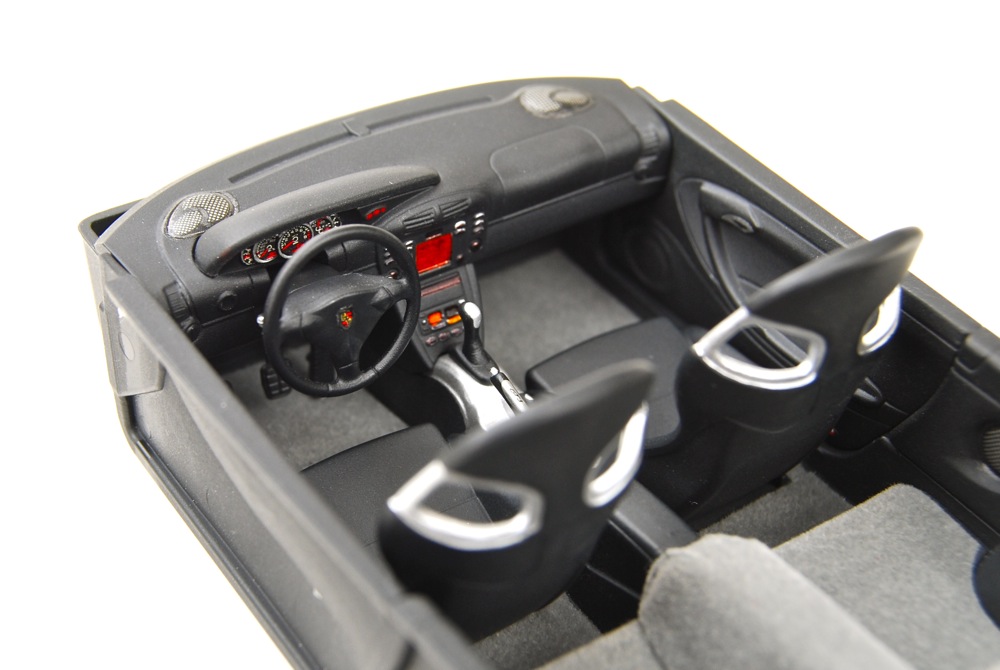
Dashboard was detail assembled (instrument cluster), detail-painted and decaled. |
|
|
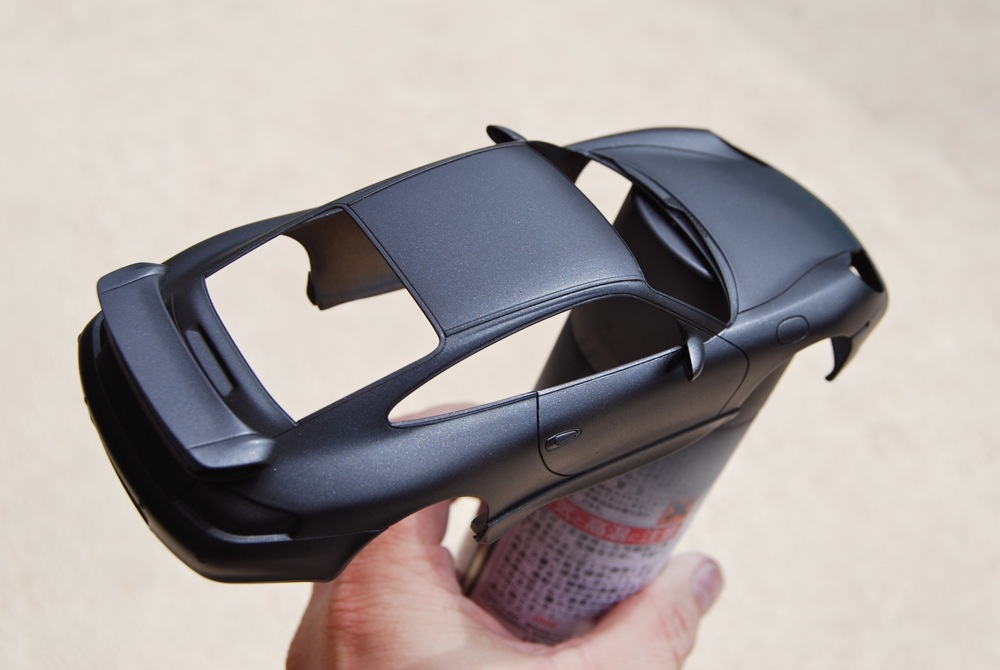
Paint turned out really rich, even without clearcoat. But it was completely matt, so it was time for some nice and shiny clearcoat for this Porsche! |
|
Speaker decals look a bit out of place, but since I wanted to build this one box-stock, I left it as is. |
|
|
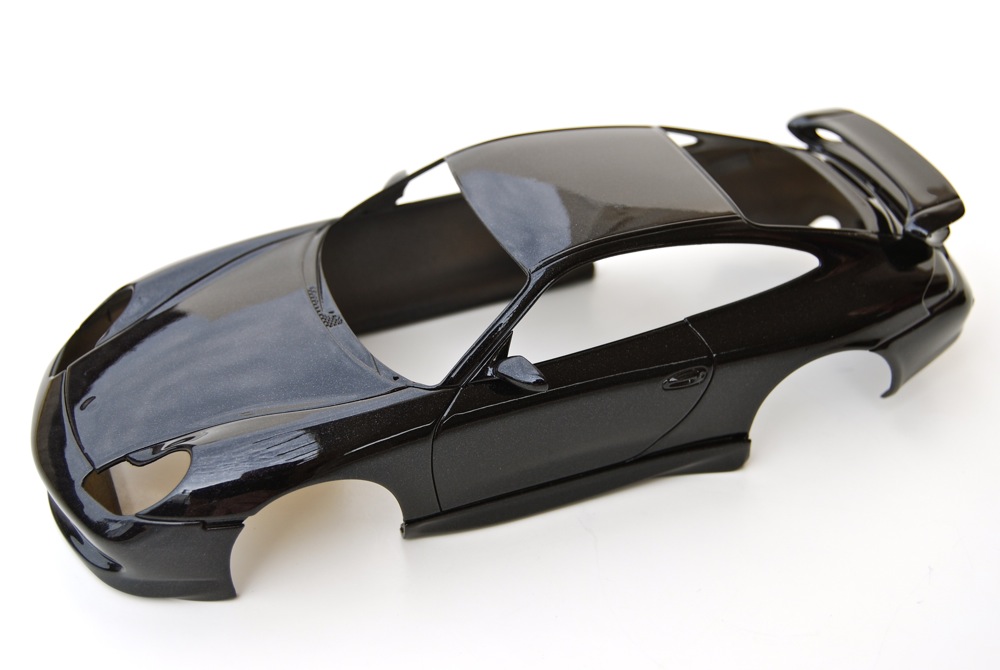
I used 2K Dupont clear sprayed it in two thin coats. I also reduced the clear rather heavily to make it flow better. I then let it dry for a couple days before polishing. |
|
Completed interior actually looks pretty good, even in "all-black" color scheme - testament to Tamiya's excellent engineering and molding quality. |
|
|
Here you could see the body polished with 3M polishing compound, followed by Tamiya Fine polishing compound. |
|
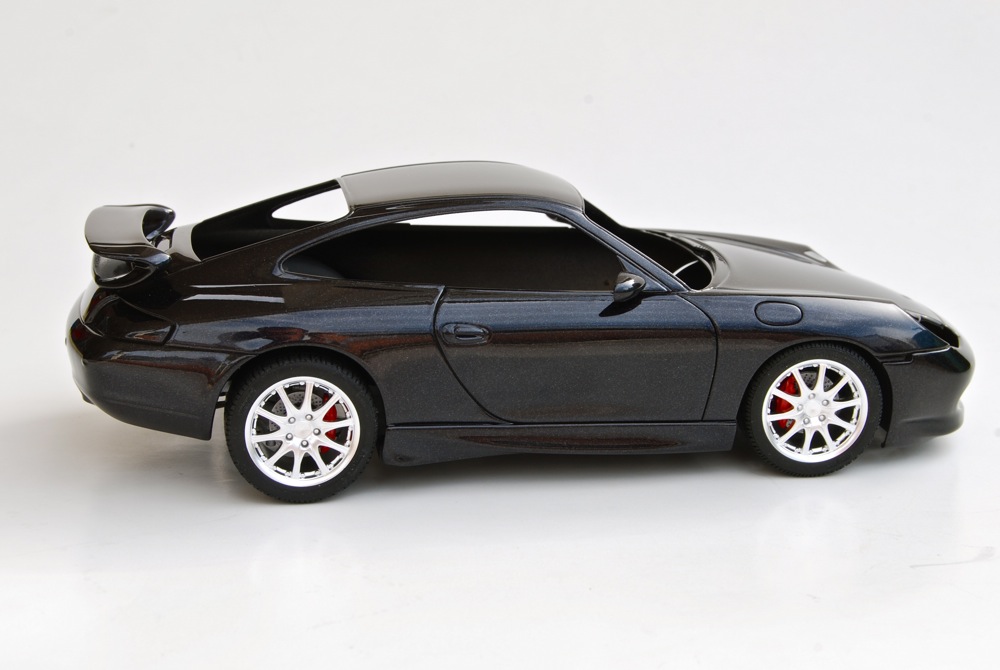
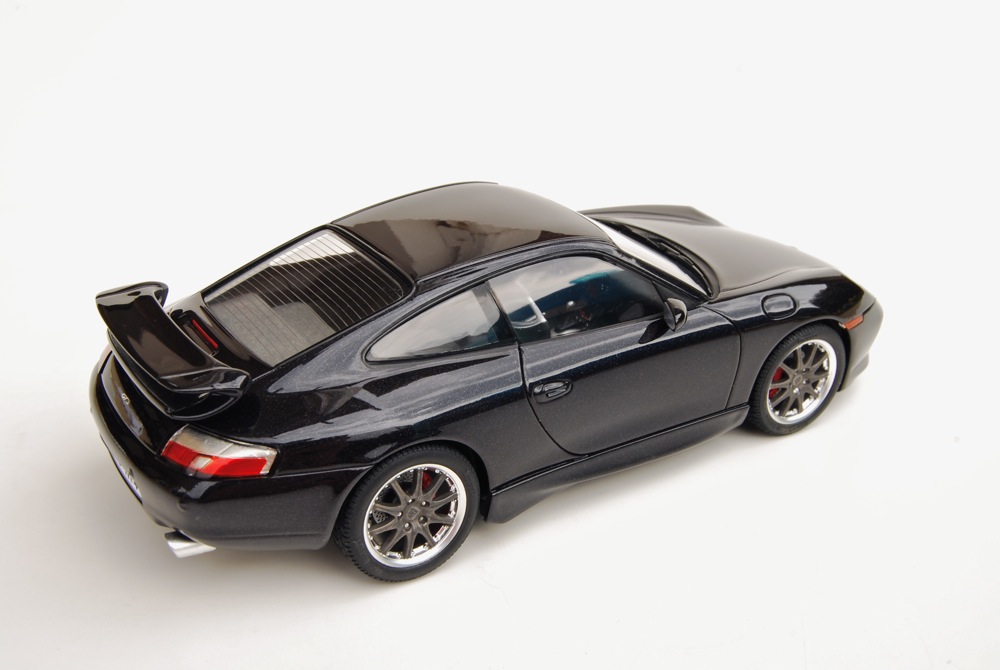
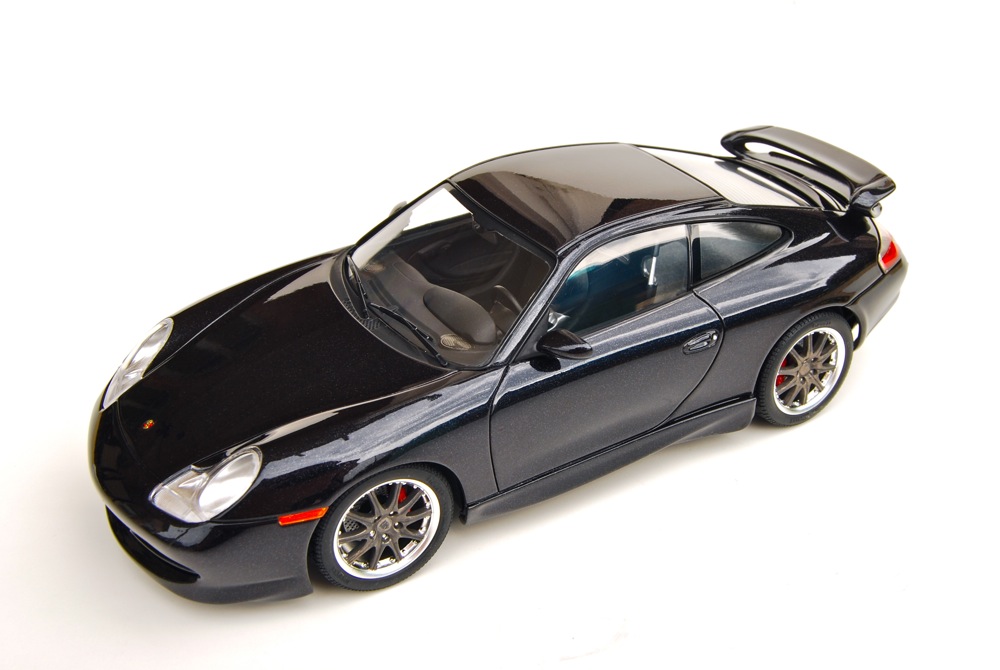
Windows, interior and chassis were all assembled together into the body. I added all little exterior details, and lights, and the model was completed. Pretty relaxing box-stock build of an excellent Tamiya kit. |
Copyright 2009 Alex Kustov. No copying or reproduction in any shape or form without written permission of the author.