Acura NSX Zanardi Edition
 |
 |
 |
Kit: 1/24 Tamiya Honda NSX, kit # 24100 Pros: Excellent proportions, good overall fit, great detail. Left and right hand steering provided (two dashboards) for a very nicely detailed interior. Complete engine detail (although somewhat simplified), excellent chassis and suspension detail. Great rubber-like tires, satin plated chrome tree. Crisp and nicely registered decals, clear instruction sheet with correct color guide for Honda NSX. Headlights can be assembled in raised position, if desired. Cons: Well made kit, though not up to Tamiya's own standard of latest kits. Kit was made in early 90's, and it shows. Few very noticeable mold lines run through the body and several smaller parts. Very brittle clear parts - the windshield was cracked when I opened new kit, and I also broke another clear part when removing it from the tree. Poor fit of the windshield and side windows, might be due to a very delicate A-pillars. Very tight fit of the chassis and body. Not so much a con, but there are no window masks, or metal transfers. Verdict: Its an excellent kit for a beginner modeler to get into building Tamiya kits. Many areas of the kit still can be improved and this makes it interesting for more seasoned modelers, or for modifications, like mine Zanardi conversion. Highly recommended, especially for NSX and Honda fans. |
 |
 |
 |
|
 |
 |
 |
Buildup
This buildup was also published in Scale Auto magazine, April 2005 Volume 26, Number 6, Awesome Acura
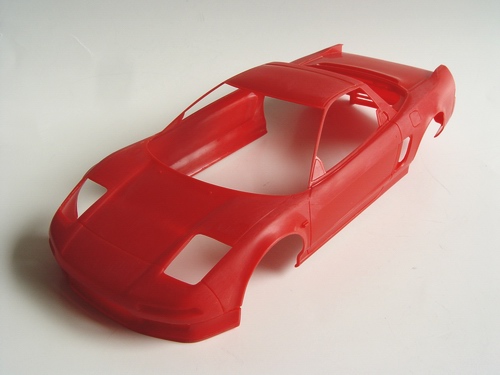 |
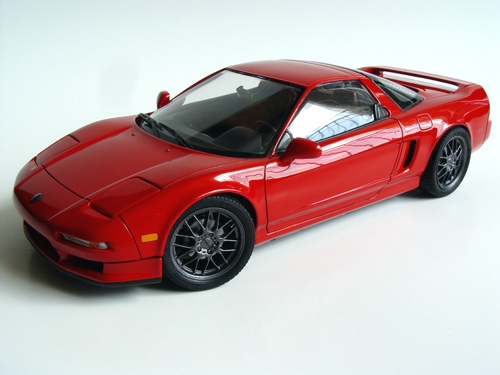
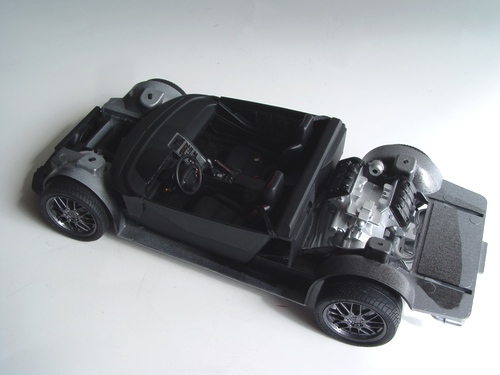
Conversion of Honda NSX to Alex Zanardi NSX is quite simple - there are few visual differences. Most changes were made to the car's mechanicals, although some, such as different blinker's location, new BBS wheels, lack of driving lights, and body colored roof are noticeable from the first sight. As usual I started with the body. |
 |
After wheels were installed, I assembled the chassis and the body together to check for wheel alignment and position. Rear wheels required some more grinding from the inside to fit into the rear arches, but otherwise everything looked just right, even the ride height was absolutely perfect! |
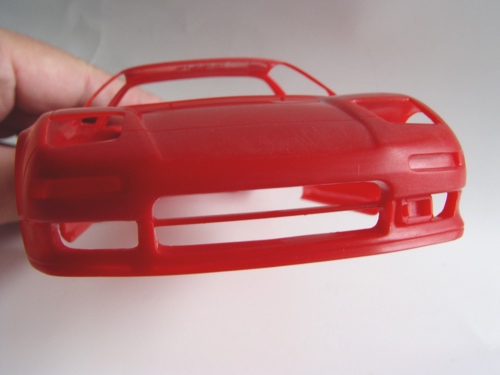 |
I removed all mold lines and lightly sanded it all over with 800 grit. Driving lights were cut out with jewelers saw, and openings sanded smooth with fine sanding stick. I also removed turn signals from the front fenders (Japanese version) - Zanardi edition had the same blinker's location as American version of NSX. |
 |
In most coupe kits Tamiya does not include seat backs - they are more or less hidden from the view. I decided to fill the holes with some sheet styrene. |
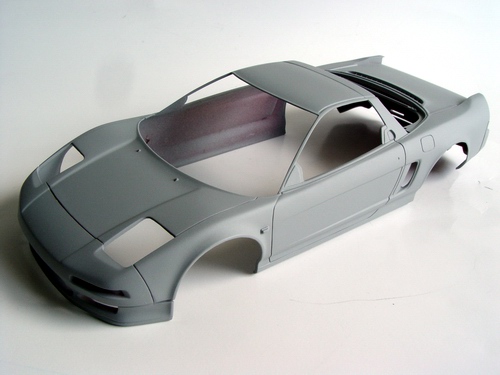 |
Body was washed, dried, and sprayed with a light coat of Tamiya gray sandable primer. Primer revealed some scratches that were fixed and re-primed. |
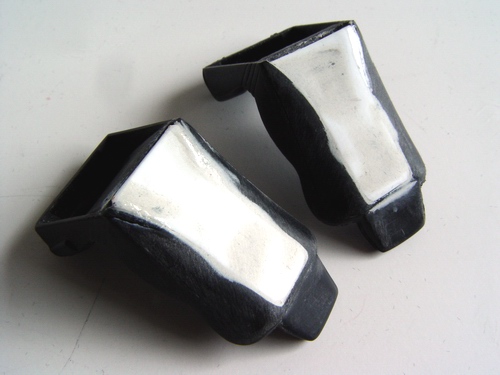 |
Basic shapes were cut from the plastic sheet, and glued to the seats. After smoothing rough plastic edges with a file, I filled the gaps with putty and CA glue. |
 |
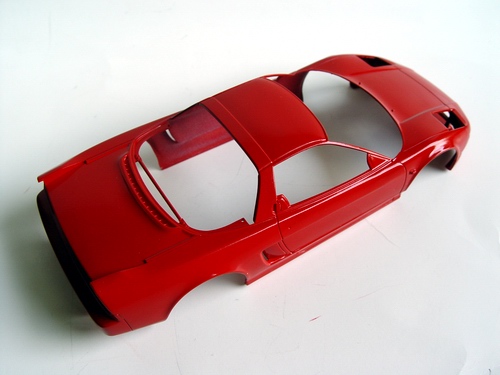
After gray primer dried completely, I sprayed a coat of Tamiya white primer. It will serve as an undercoat for Tamiya TS-8 Italian Red. |
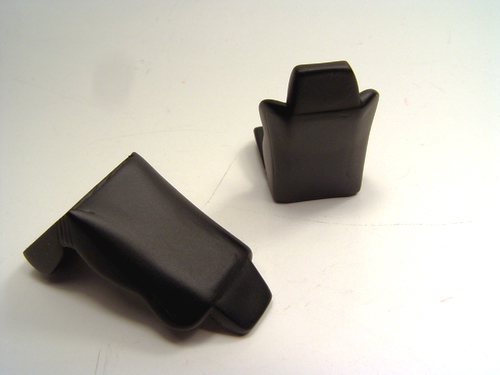 |
After putty and glue dried, I sanded backs smooth and sprayed a coat of primer to check for flaws. There were some minor gaps at the bottom, but since they will be completely hidden, I proceeded with satin black paint. |
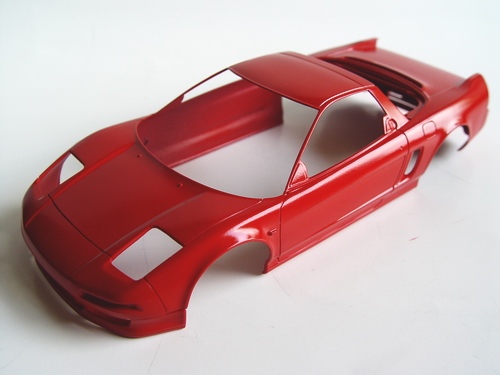 |
After white primer dried, I wet-sanded few small dust particles, and emptied a can of Italian red into my airbrush bottle. When paint gassed out, I sprayed 3 mist coats 20 minutes apart. Now body was completely covered with paint, but had few flat spots. |
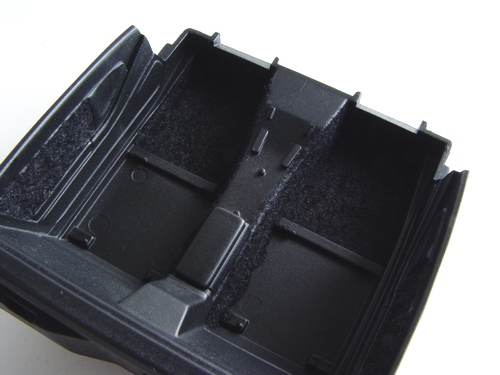 |
Interior tub was cleaned, primed, and painted satin black. When paint dried, I flocked all visible areas with Testors black flocking. Door panels were also partly flocked. |
 |
I wet-sanded the paint, and after the body was dry, I sprayed 1st wet-coat. 2nd wet coat was sprayed about 4 hours later, and then I left the body for a couple of days to dry. After paint completely cured, it became slightly textured, as seen on this picture. This is common for Tamiya lacquers, and can be easily polished out. |
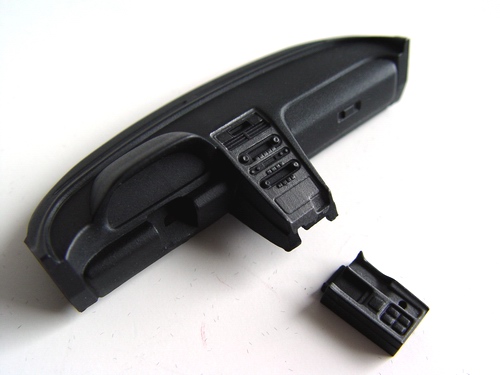 |
Dashboard and central console were also primed and painted satin black. Central panel's insert was then painted with Testors Titanium. |
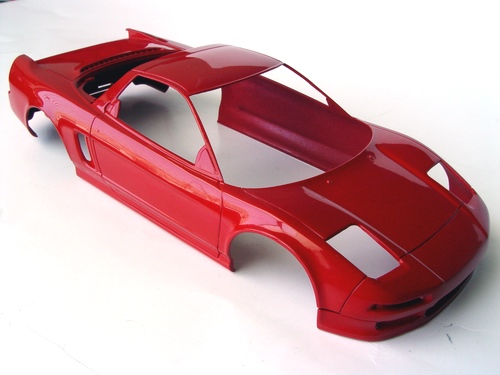 |
Paint was polished with 3M rubbing compound which removed all the texture. Then I followed with Tamiya Fine polishing compound, and then Treatment model wax. Now the paint looked smooth and shiny like a glass! |
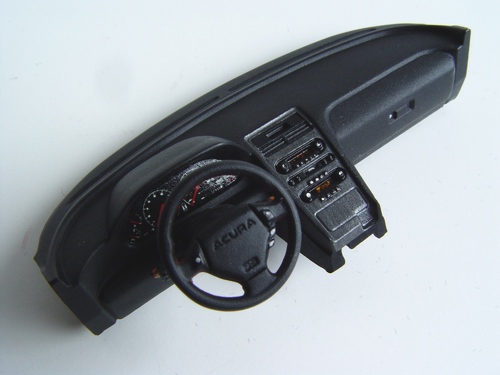 |
Dashboard was detailed, and steering column assembled and glued to the dash. Instrument's decal was also applied at this time. |
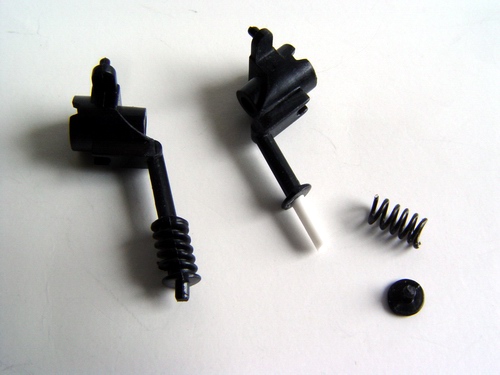 |
Plastic coils on shocks were cut off, and replaced with plastic rod (part of the shock absorber) and a spring made from Detail Master black wire wrapped around a q-tip handle. |
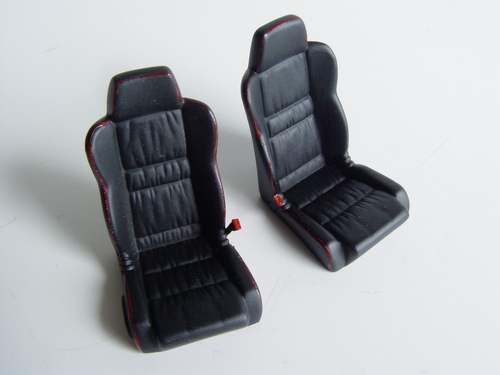 |
Red stitching (one of the features of the Zanardi edition) was done with fine brush, and I also scratchbuilt seatbelt catches, with release buttons painted red. |
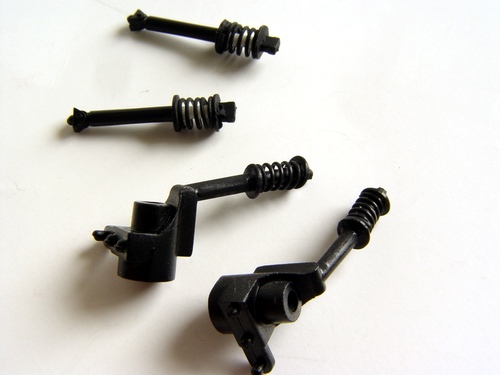 |
Same thing was done to the front shock absorbers, and on this picture you can see all four completed shocks. Tamiya parts have different configuration of locating pins on every part to ensure they are installed in correct places. I had to be very careful to glue parts that were cut off back in the same fashion. |
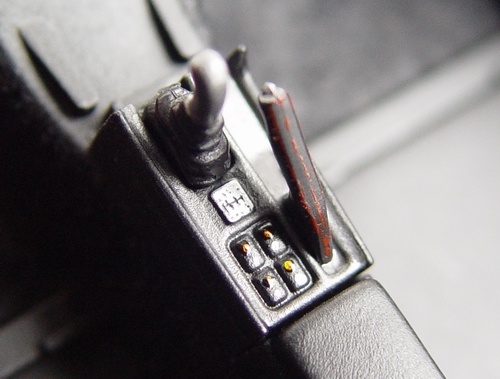 |
Central console was fitted with the shifter with titanium colored handle, and emergency brake handle, with painted-on red stitching. Note little silver plate with shift pattern scribed on with the point of Xacto knife. |
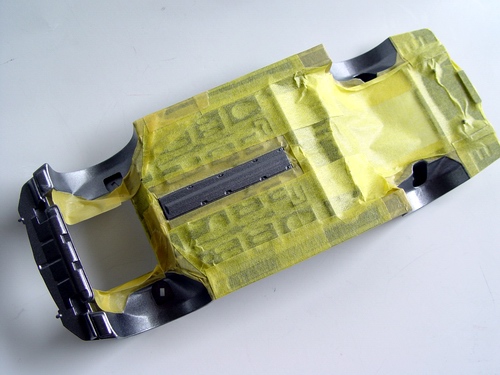 |
Chassis plate was cleaned, primed with gray Tamiya primer and then sprayed with a coat of Tamiya Aluminum. Then I masked the plate with Tamiya masking tape to paint semi-gloss black areas. |
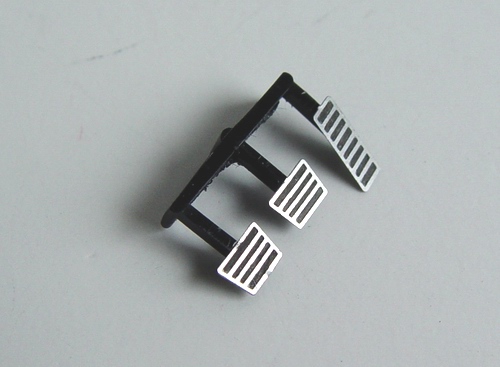 |
Kit pedals were removed and replaced with some Detail master photoetched pedals, painted with fine black permanent marker. |
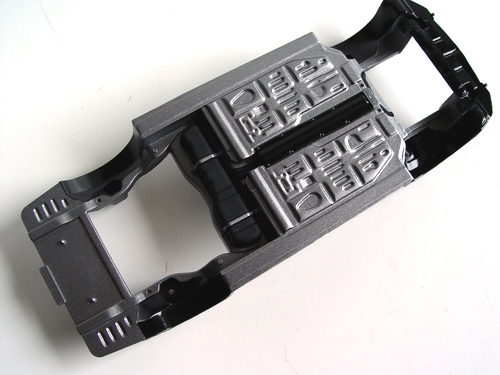 |
After masks were removed, I painted gas tank flat black by hand (it was hard to mask), and touched up little details, such as tank straps and few bolts and rivets with metallic paints. |
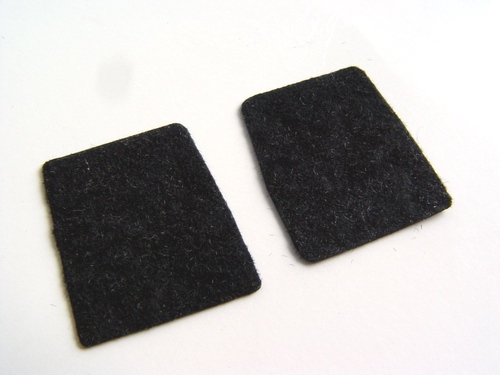 |
I also made two floor mats from the sheet styrene, painted them black and applied some Testors black flocking. |
 |
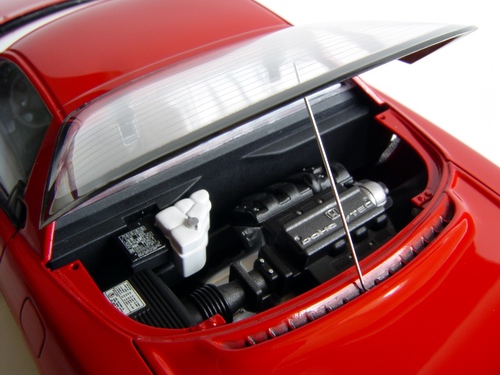
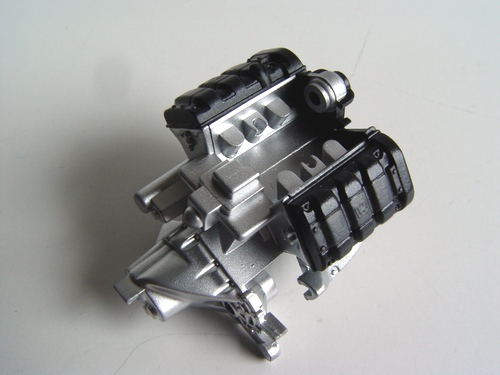
Engine block was glued together and painted with Testors Aluminum metalizer. Oil pan was painted flat black. I also fitted front cover with molded-in belt (painted flat black) and pulleys. |
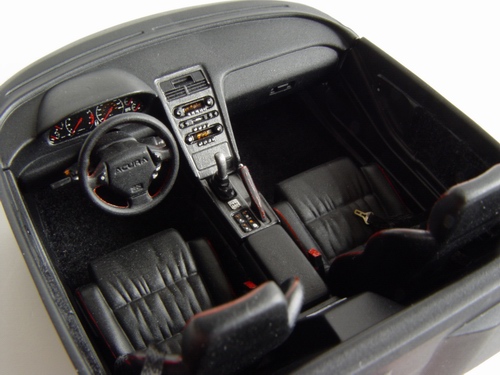 |
Everything was put together, mats glued to the floor, and few minor details added and painted on. |
 |
The engine was sealed with Testors metalizer sealer, and then I added cam covers painted semi-gloss black. EDIT: Later I discovered that cam covers and few other details on Zanardi edition were supposed to be painted red. It was too late to change because the engine was already installed, so I left it as is. |
 |
Finally I made seatbelts using thin black ribbon from craft store and photoetched buckles from Detail Master P/E seatbelt set. Special Edition Zanardi plate was scanned from original brochure and scaled down. I then made a decal that was placed between the seats (it was moved a bit higher later). |
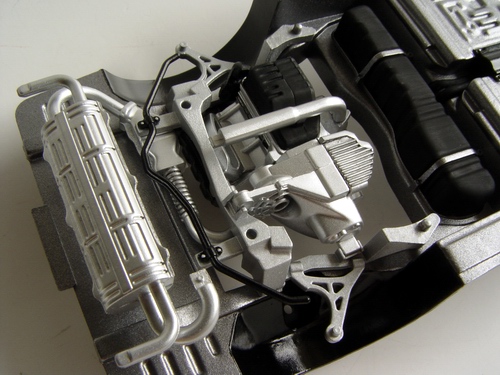 |
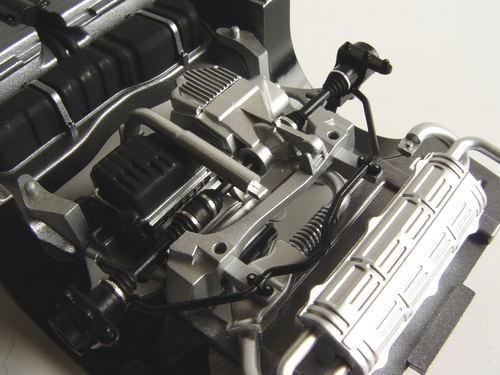
Muffler and parts of the exhaust system were painted Tamiya Chrome Silver, suspension parts in different metallic shades. Everything was glued to the chassis, and incomplete engine installed on the engine mounts. |
 |
Radiator was primed, and painted black. Then I masked it off and sprayed front area with aluminum metalizer. I didn't do any wiring since it will be completely invisible once the body is put on. |
 |
Then I added modified rear shocks and satin black half-shafts with boots painted flat black. Boot's clamps were made with tiny stripes of Chrome BMF. |
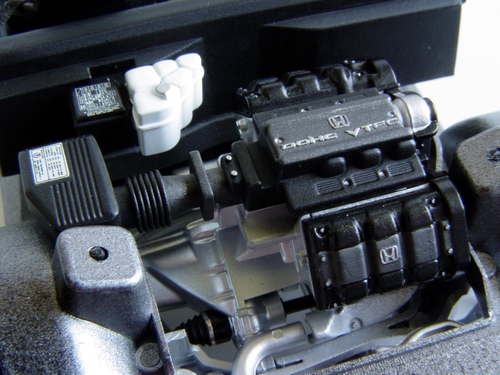 |
Engine cover and intake system with an airbox were painted, detailed, and letters and emblems on the cam covers drybrushed with silver paint. Then I added a water tank and some kit-supplied decals. |
 |
Brakes were cleaned and sprayed with Tamiya chrome silver, then sealed with sealer. Calipers were painted with Testors Titanium, then lightly buffed. I also added brake hoses made from Sakatsu wire to every caliper. They will connect to the brake lines. |
 |
Interior tub was glued to the chassis and test fitted with the body to ensure good fit. |
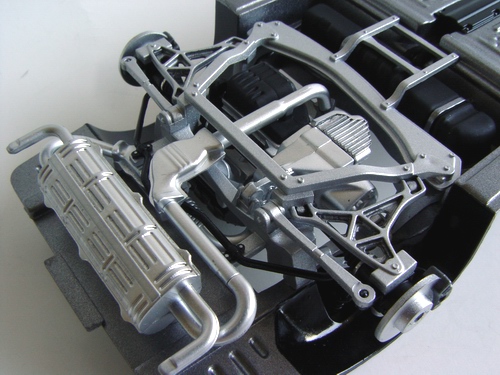 |
Remaining parts of the exhaust system were glued in place, together with lower rear suspension frame, roll bar, etc. Rear suspension was now complete, except for one small detail. |
 |
Wheels were detailed with home-made Acura decals, and fitted with valve stems made from thin black wire. Lug nuts were dry-brushed with silver paint. |
 |
Front upper suspension part (with some water hoses and other detail) was painted and glued to the chassis. |
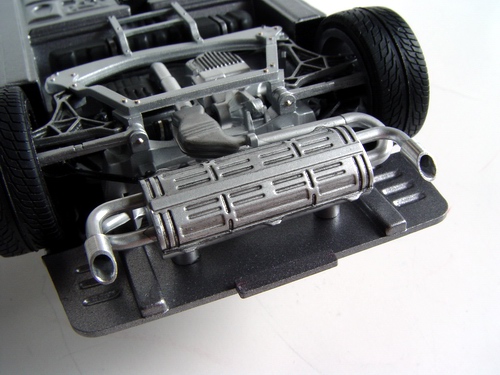 |
Zanardi exhaust tips are slightly different from regular NSX. I used thinned down polished aluminum tubing cut at the 45 degree angle to make two tips. After the glue dried, I painted insides with Exhaust Smoke metalizer. |
 |
Then I installed front shocks, lower frame, brake disks, steering rack, detail painted everything. I finally applied a thin black wash to all suspension parts to create a light tint in few areas, and heavier wash on all the joints. |
 |
Front driving lights and taillight panel were detailed with BMF from the inside. I also tinted rear-drive lights with Tamiya smoke to give them authentic Zanardi look. |
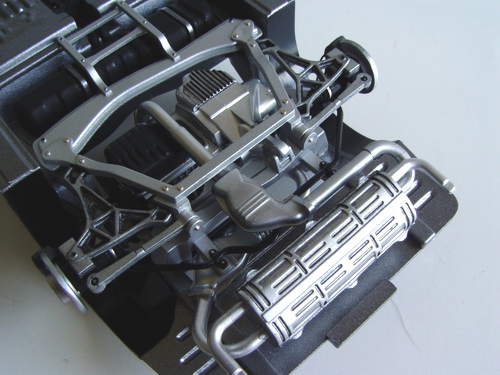 |
Last detail for the rear suspension was black wash on all suspension pieces and also on a muffler. I also picked up all bolts and nuts with metallic paints. |
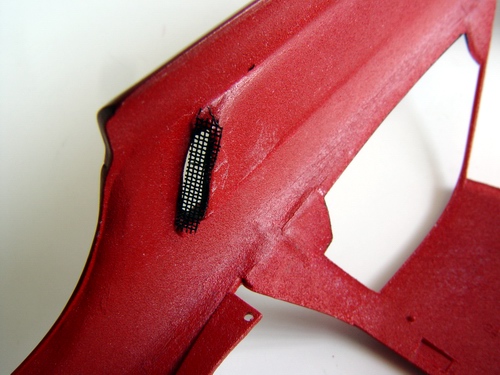 |
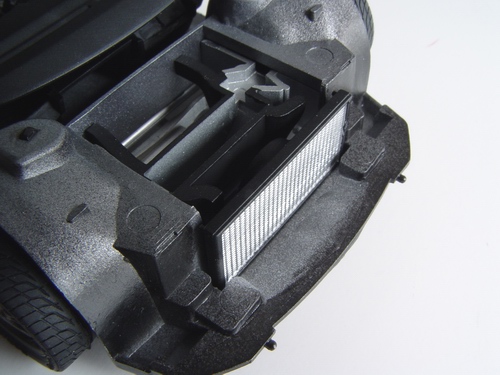
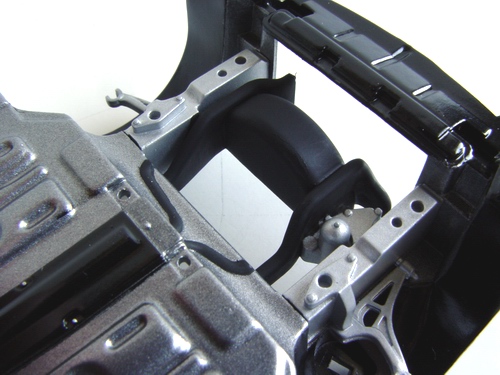
Rear engine cooling ducts received a plastic mesh protection (from Tamiya 360 Modena kit). This feature is also specific for Zanardi Edition car - regular NSX has slotted grills. |
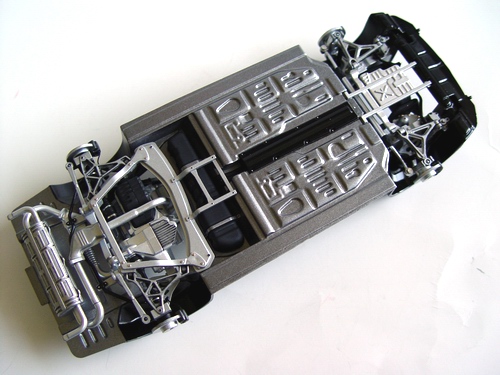 |
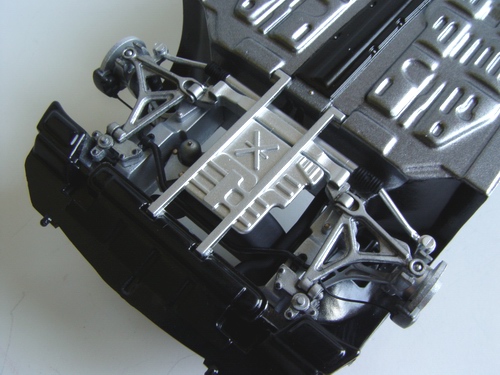
Here is the picture of completed chassis. Everything looks good and slightly "used". |
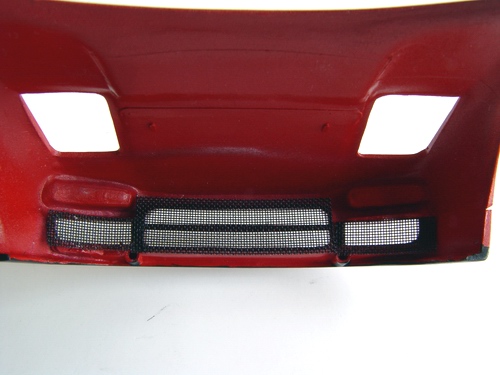 |
Front intakes and cooling ducts also received a similar treatment - plastic mesh was glued from the inside. |
 |
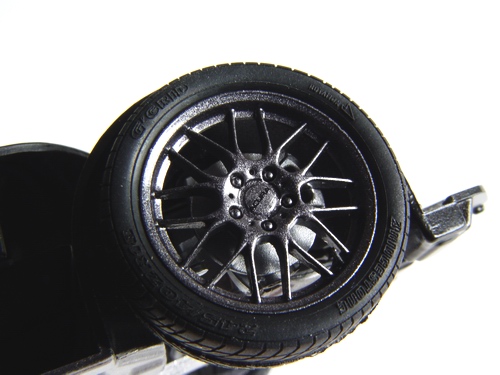
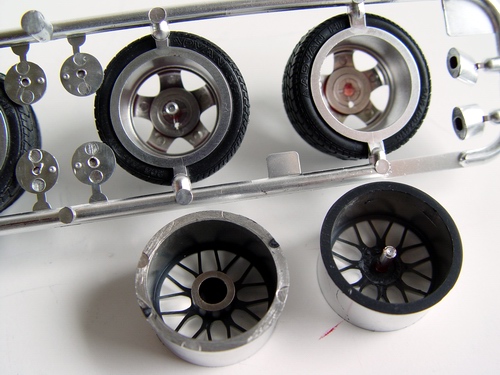
To replicate real Zanardi NSX wheels I used Aoshima's BBS DTM wheels and tires set, since it is a very close match to original Zanardi BBS wheels. Tamiya's way of attaching wheels to the model is completely different from Aoshima's, so the wheels had to be modified. |
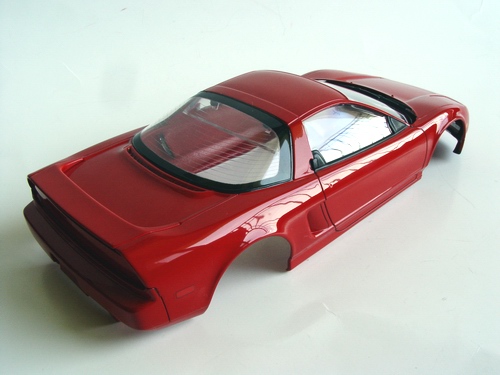 |
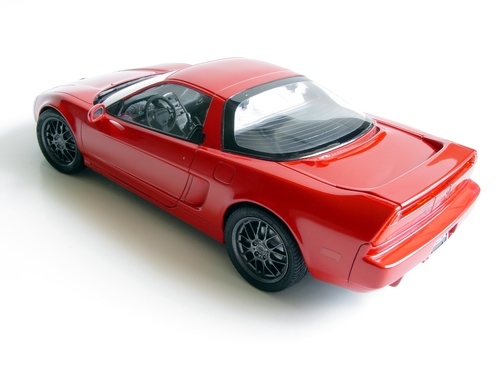
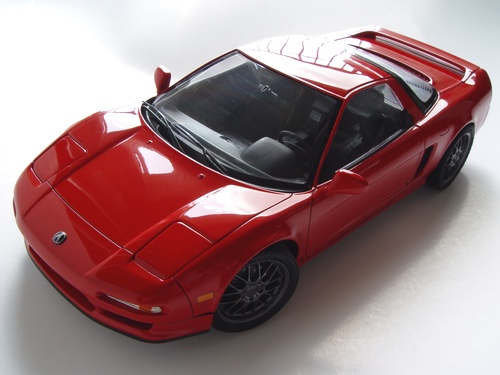
Panel lines were filled with wash (red + black mix), window trim painted black, rear spoiler glued to the body, taillights installed, windows painted and installed. American style blinker decals were put on. |
 |
Pins from original Tamiya rims were carefully cut off. With the help of rotary tool, I removed the hubs inside Aoshima wheels, then drilled holes of the same diameter as the pin. Then all four pins were glued to Aoshima rims, and carefully centered inside the wheel. |
 |
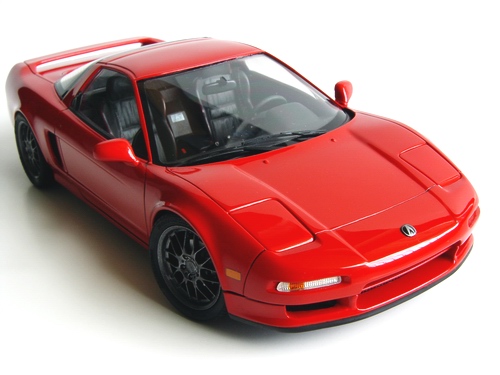
Finally I fitted the headlights, wipers, rearview mirror, and waxed the body and glass to remove all the fingerprints for the last time. |
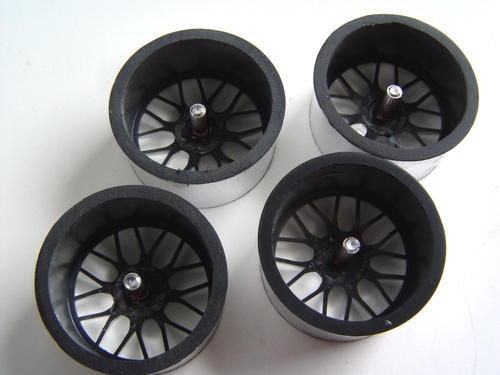 |
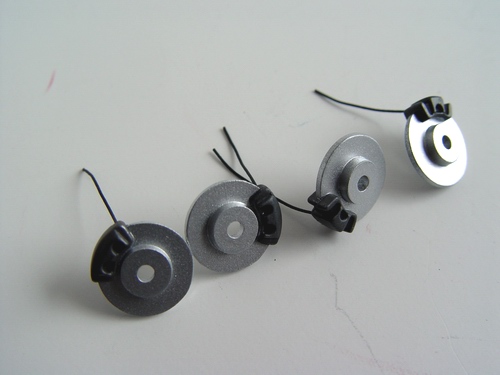
Here is the picture of all four completed wheels. I had to sand the rear lips off the wheels (they had some bad injection pin-marks), and then strip the chrome plating in Castrol Super Clean (CSC) degreaser. |
 |
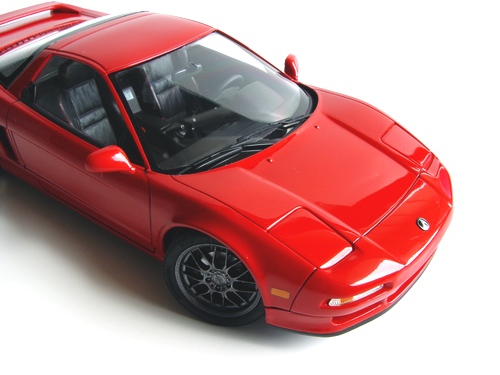
Acura NSX has a spherical emblem on the front bonnet. I used very thin plastic and a wide burnishing tool to make a spherical indent in the plastic, that was sliced off with sharp Xacto blade, shaped, painted, and topped with home-made Acura decal. |
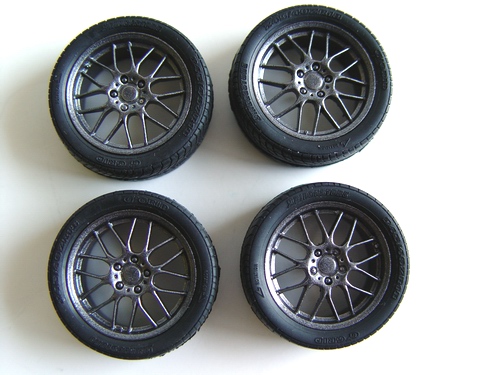 |
Wheels then were primed with Tamiya gray primer, painted with Testors Titanium metalizer, buffed, then sealed with a coat of Tamiya clear. I also applied some black wash on the lug nuts. |
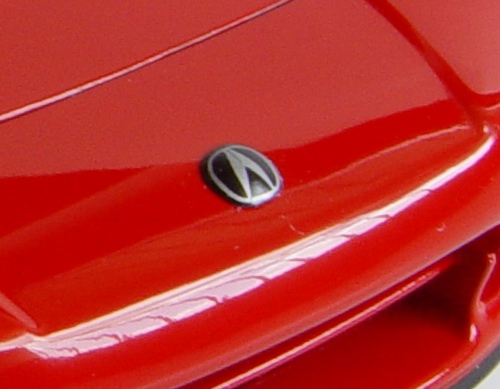 |
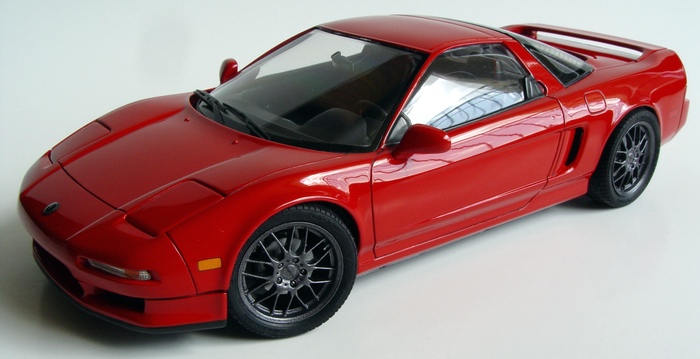
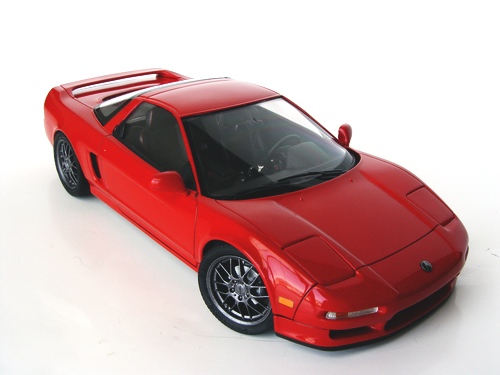
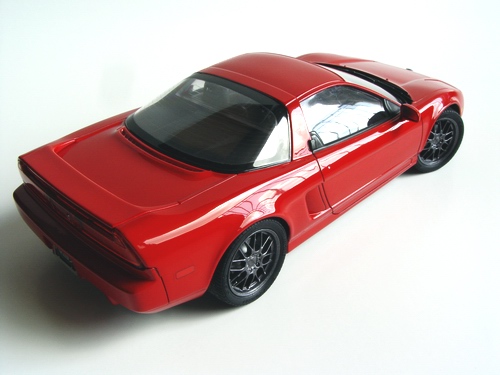
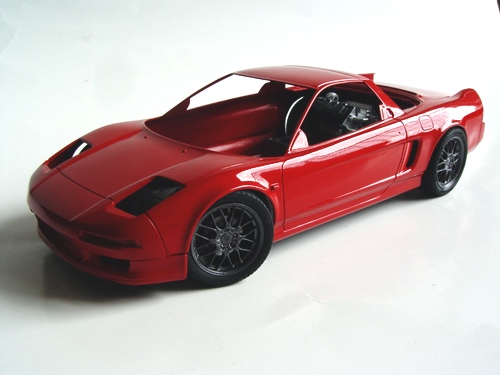
The I glued the emblem with Elmer's white glue and brushed some clear paint on it - looks very realistic! The model was assembled, dusted, photographed and sealed in a display case. It was a very simple and pleasant conversion which resulted in unusual and very good-looking model. |
Copyright 2004 Alex Kustov. No copying or reproduction in any shape or form without written permission of the author.