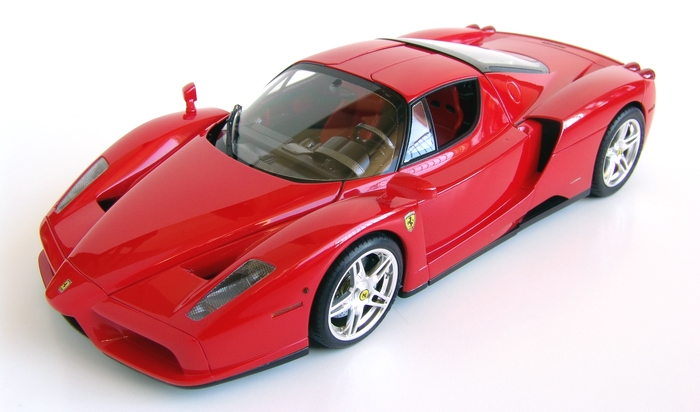
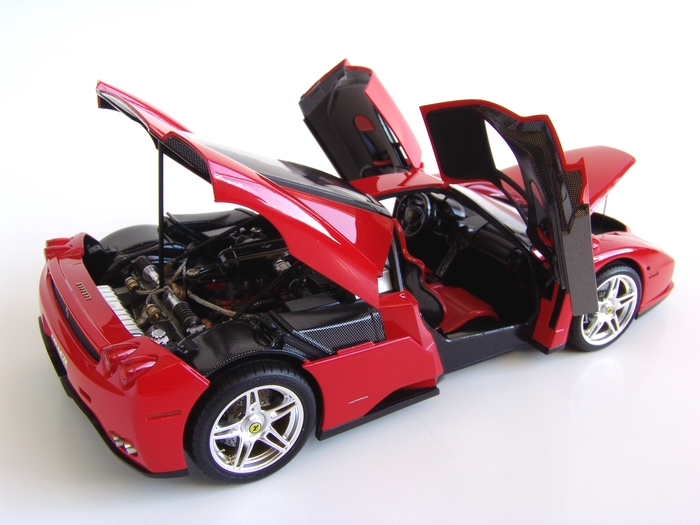
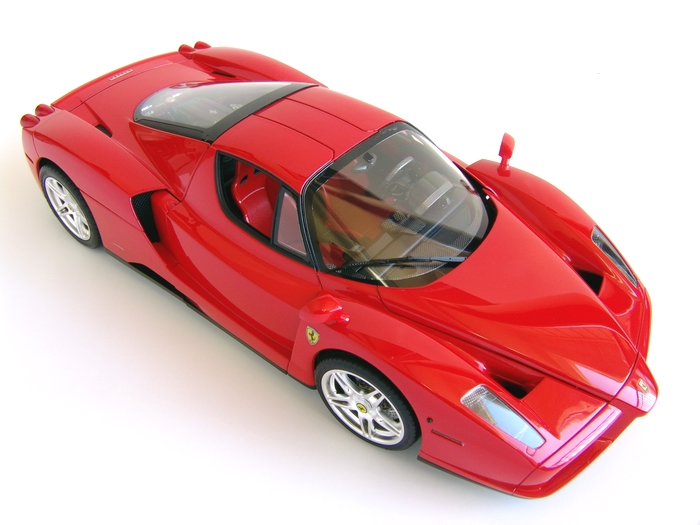
F e r r a r i Enzo Rosso Corsa
Super-detailed buildup of the Tamiya kit with addition of ScaleMotorSport detail kit, and Studio 27 and Sakatsu detail sets
 |
 |
 |
Kit: Tamiya 1/24 Ferrari Enzo, kit #24260 Pros: Incredible number of detail that allows to create an ultimate replica of the Ferrari's newest supercar - Enzo Ferrari. Highly detailed body, with opening doors and engine lid allows to view engine and interior after assembly. Excellent parts fit, good chrome plating, very nice tires, great looking metal transfers, traditional window masks, mesh, great and thin decals (compatible with Microsol), easy to follow instruction sheet. Cons: Incomplete painting instructions, somewhat-full painting guide given only for the red color. No word about what parts are made from carbon fiber, so you need a lot of reference pictures to figure out where to apply C/F decals (SMS CD comes to rescue). Most parts are molded in color, which is good for beginners, but creates unnecessary priming work for builders who want more professional results. Verdict: This is one amazing kit. Its quite complicated, and I would not recommend it for beginners, but experienced modelers will enjoy it immensely. Quality of Tamiya moldings and engineering is outstanding, and in my opinion, this is one of the best plastic kits issued over the last 10 years, beating even Tamiya's excellent 360 Modena kit by a mile! If you looking to buy this one - it will not disappoint. I also would like to add few words about SMS detail set that was reviewed by me before the buildup, as my opinion has slightly changed. Even though it is still the best detail set for this kit, few of the shortcomings that were discovered during the buildup process really disappoint. First of all, almost all C/F decal templates are way too big, and some are mirror images of what's needed! Instructions are really vague in some places, though picture CD does help quite a bit. Fit of some (very few though) P/E parts is bad, and requires trimming and lots of test-fitting. Still a very solid effort on SMS's part. Sakatsu mesh was superb. Studio 27 set was good, as usual,, though I used very few detail from the set. |
 |
 |
 |
|
 |
 |
 |
Buildup
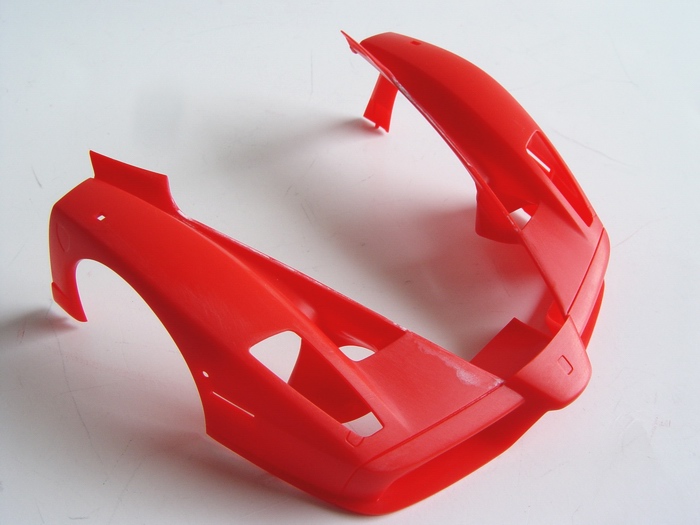 |
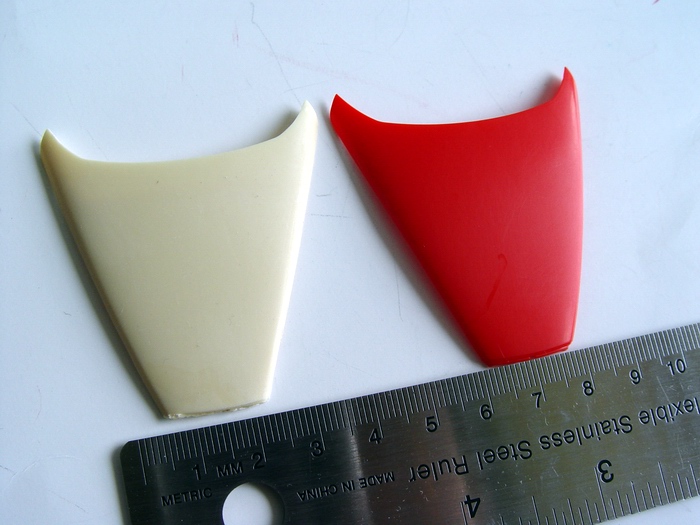
First thing I did with the kit is opened the trunk - SMS transkit provides a resin lid. I scribed plastic part with the back of my hobby knife, and cut it out. This resulted in the body part being broken in two pieces. So I glued them both to the nose piece, then smoothed the edges with sanding sticks. Finally, I puttied all the imperfections, and sanded everything smooth, removing faint mold lines in the process. |
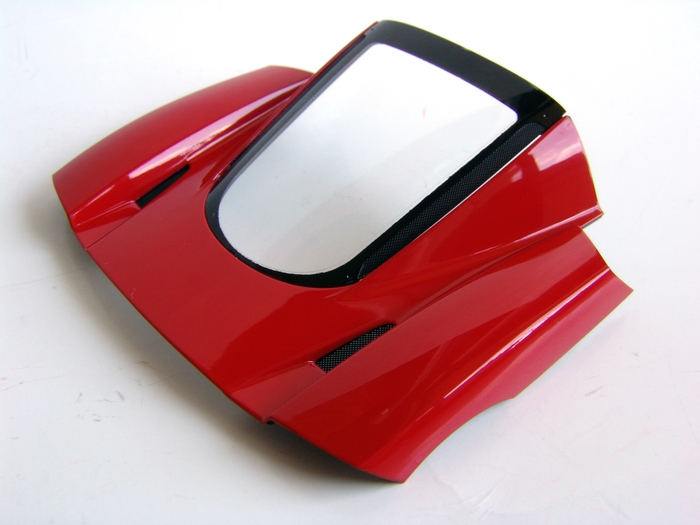 |
Engine cover was polished, waxed, and fitted with the glass. I was really tempted to cut out molded mesh and replace it with Sakatsu P/E mesh parts, but I was afraid to crack the glass, so I left it as is. |
|
|
But when I tried to test-fit resin hood into the opening, it became apparent that its slightly shorter than needed! Maybe I made mistake when removing the part, but the resin hood was unusable as is. So I had no choice but to use the plastic part that I just cut out. I cleaned it and it was fitting much better, even though there was a small gap. It will be eliminated by few layers of primer and paint on both parts. |
|
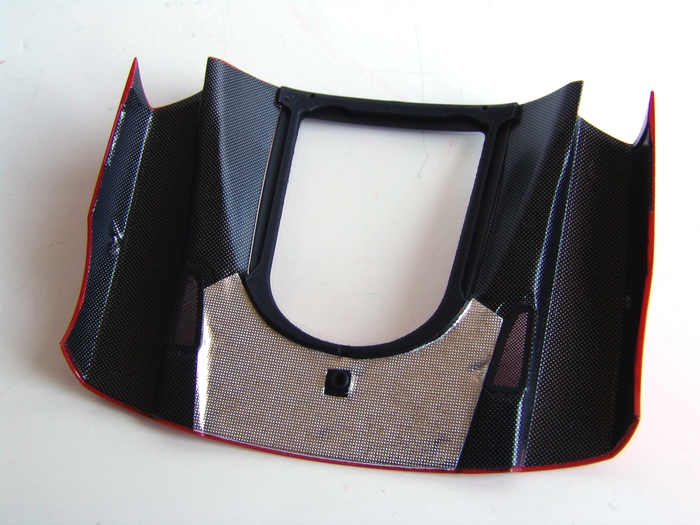
Underside of the cover was carefully decaled with carbon fiber using SMS templates, fitted with P/E mesh and another piece of cigarette foil as a heat shield. |
|
|
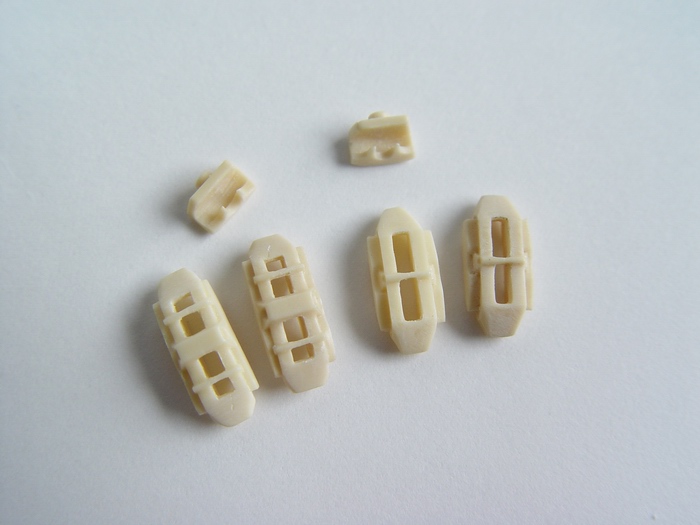
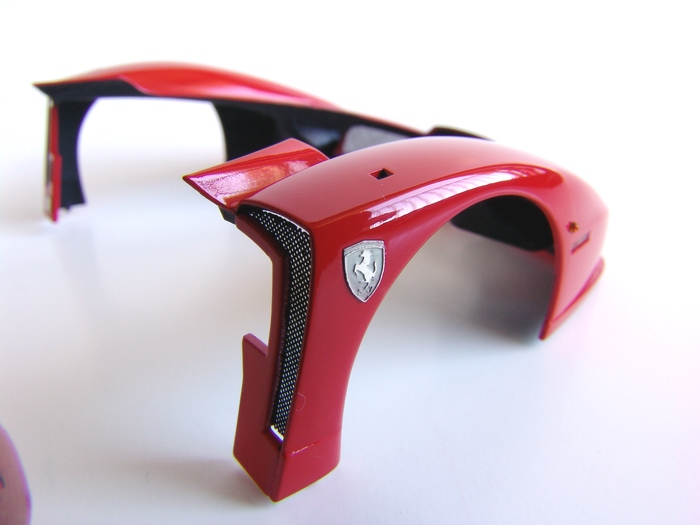
SMS transkit provides nice P/E clasp towers for the rear fenders, so molded-in clasp towers had to be removed before any painting. I also cut out molded-in mesh on the front vents, since it will be replaced by Sakatsu metal mesh. |
|
Inner door panels were completely covered with C/F. I used both SMS and my own templates for this task, since some of the SMS templates were way off. Again, hours of decaling! |
|
|
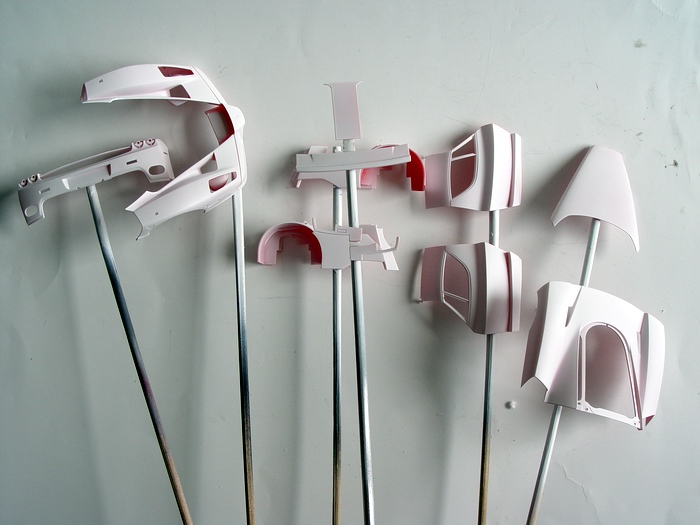
After all the body modifications and corrections were completed, I mounted all body parts on wooden dowels and sprayed a coat of Tamiya white primer. After careful inspection and correction of few small blemishes, I sprayed another, final coat of primer. |
|
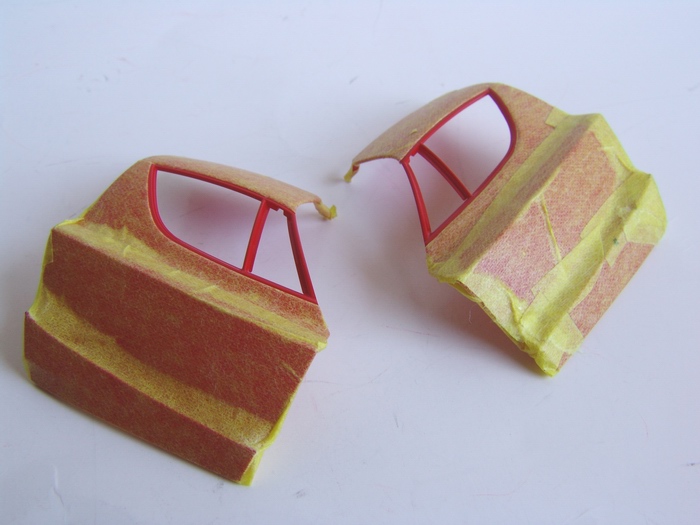
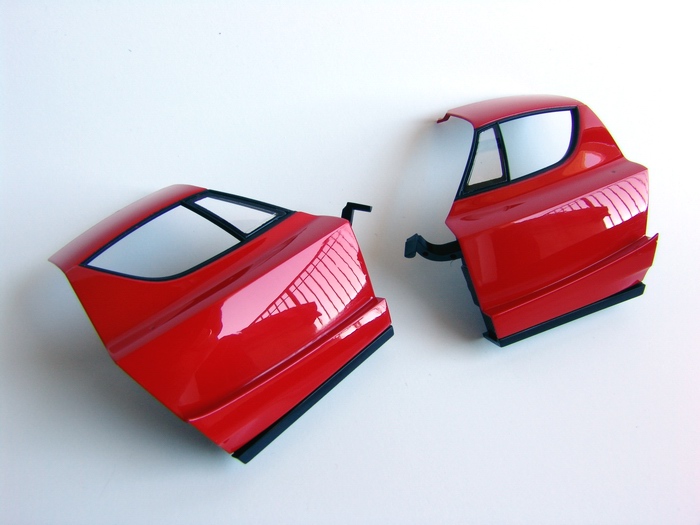
Doors were masked off to paint the window trim. 400mm Tamiya tape covers almost the whole door in one piece! |
|
|
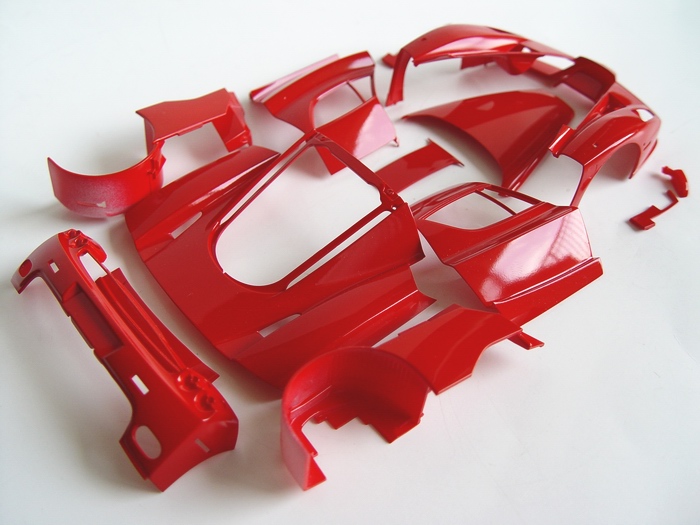
After 2 mist coats of Tamiya TS-8 Italian red, all parts were evenly covered with paint. I left them dry for a day, and then sprayed 2 wet coats 30 minutes apart. After paint has dried, it became slightly textured, as you can see on the picture. It was polished with 3M polishing compound and waxed with Last Detail's Treatment model wax to a beautiful shine. |
|
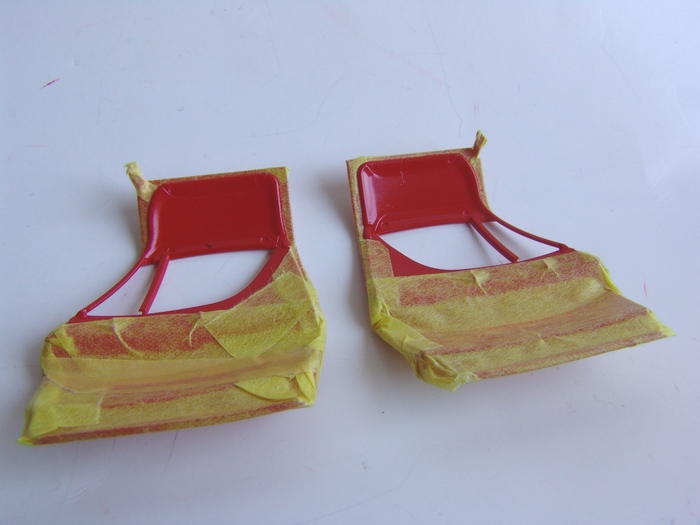
Insides were masked off too. I decided on red/black combination for my interior, so the roof panels had to be painted with satin black. |
|
|
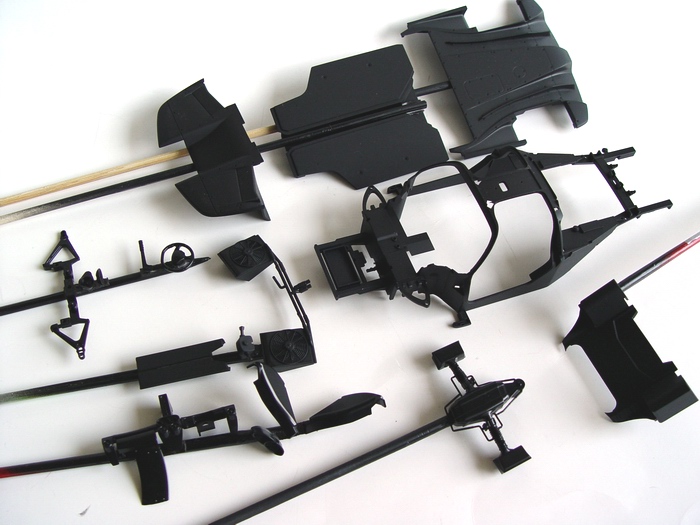
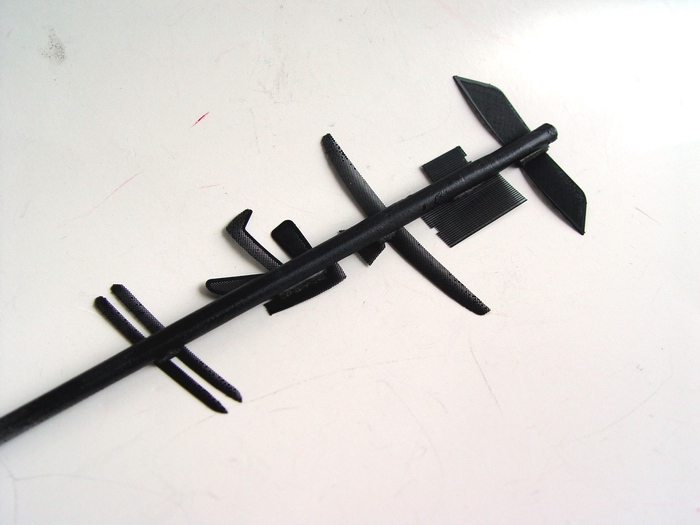
All black parts were cut off the trees, cleaned, sorted, mounted on dowels, and then sprayed in different shades of black - flat, semi-gloss, etc. |
|
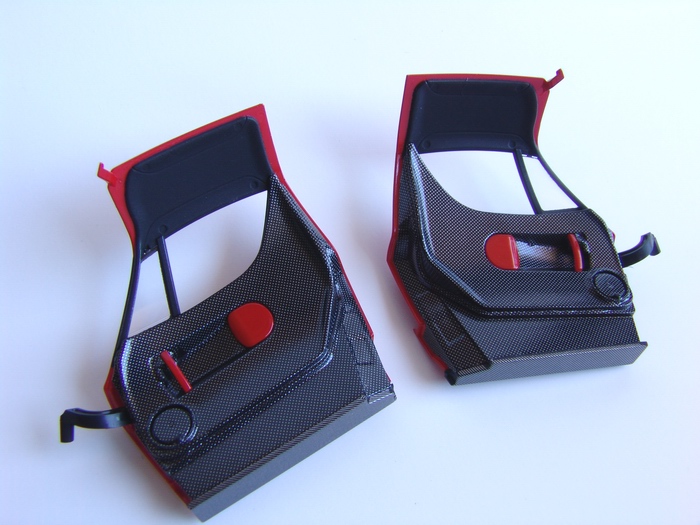
After all the trim and insides were painted, I fitted doors with the hinges, inner panels, and previously C/F decaled bottoms. |
|
|
Even though I will be using mostly Sakatsu mesh (it is already chemically blackened, but there are no mesh pieces for the radiators, etc) I removed all SMS mesh pieces, primed them with Tamiya metal primer, and painted them flat black from both sides. |
|
Inside panels also received all handles. This picture shows completed doors. |
|
|
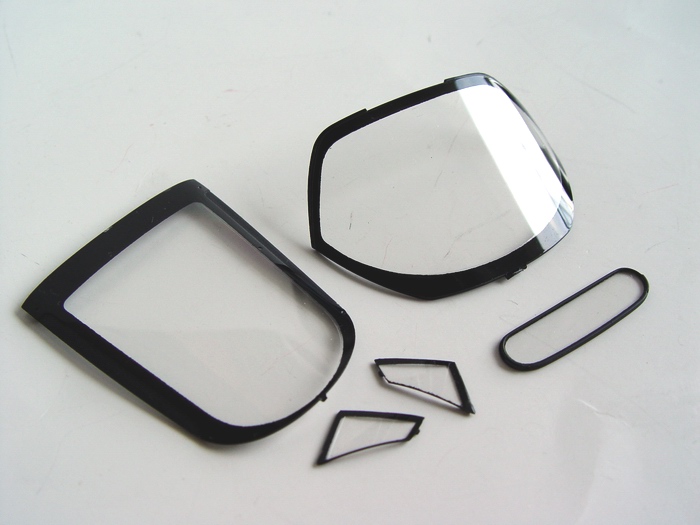
All glass pieces were cut from the trees, masked with enclosed window masks and Tamiya 40mm masking tape, and painted black from the inside. After paint has dried, I lightly waxed them to remove fingerprints and paint residue. |
|
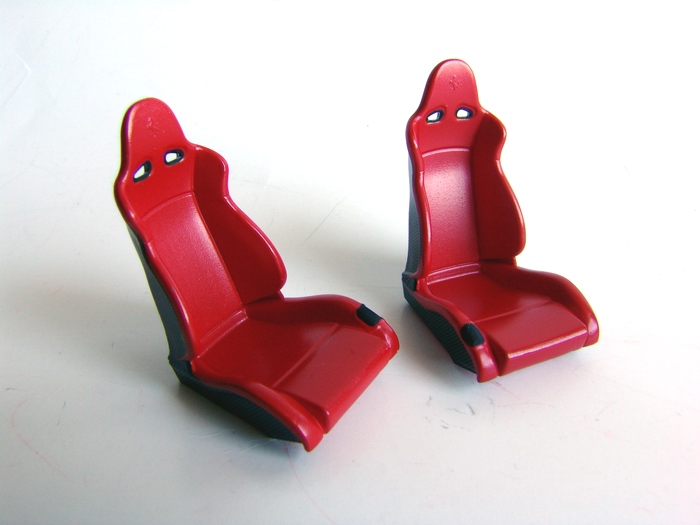
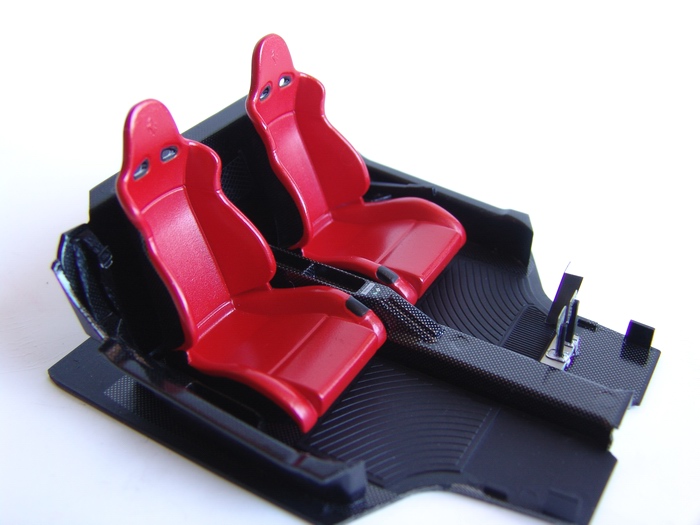
Seats were cleaned, primed with Tamiya white primer, and painted with a custom mix of Tamiya flat and gloss reds to simulate leather upholstery. |
|
|
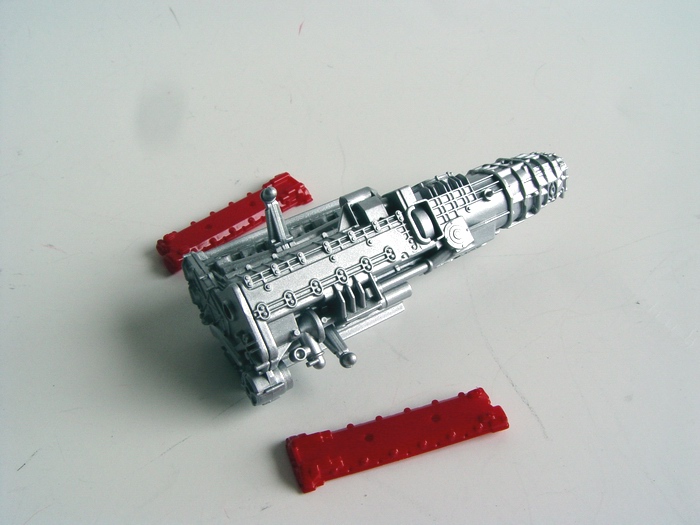
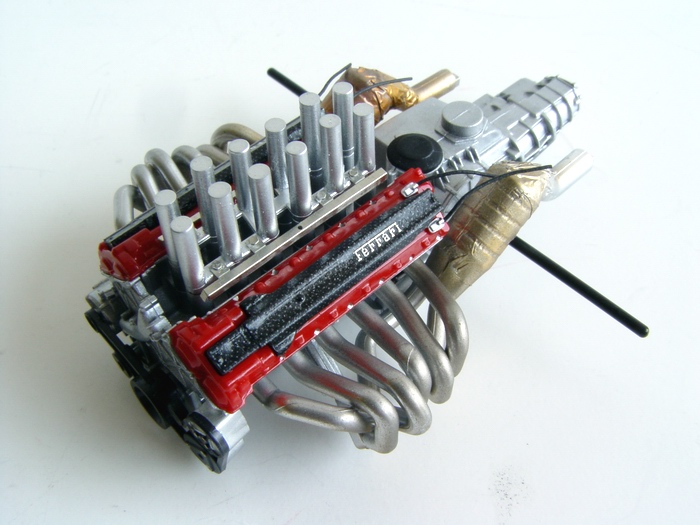
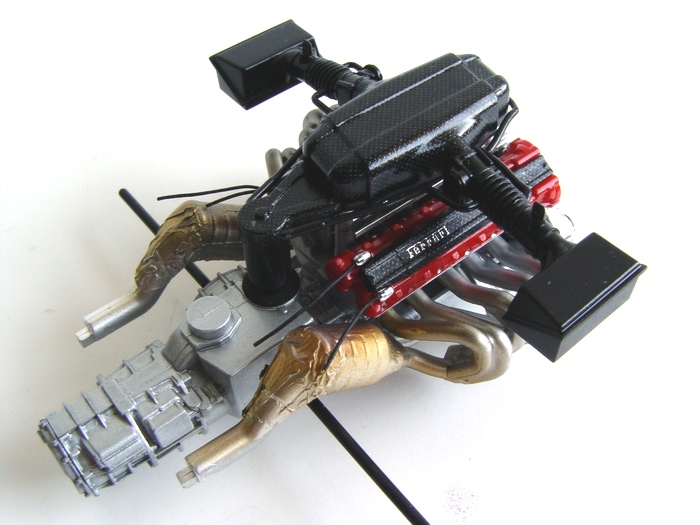
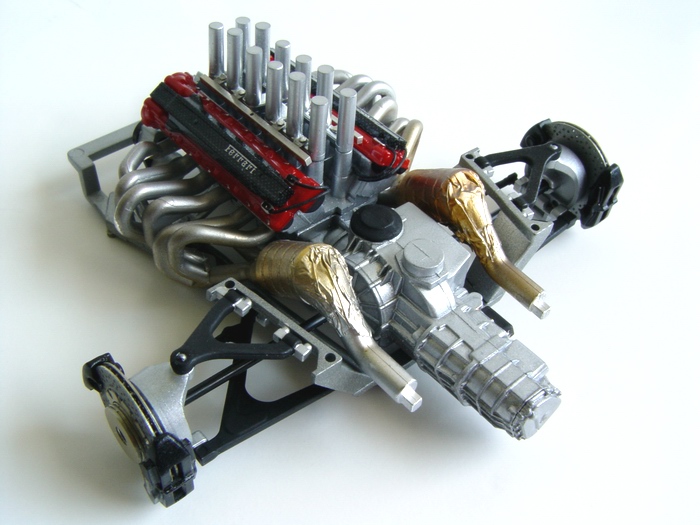
When all preliminary parts painting and preparation was finished, I moved the the heart of the supercar - the engine. Engine block was glued together and painted with Testors aluminum metalizer. Cam covers were painted Italian red (when I painted the body) and then toned down with a layer of flat clearcoat. |
|
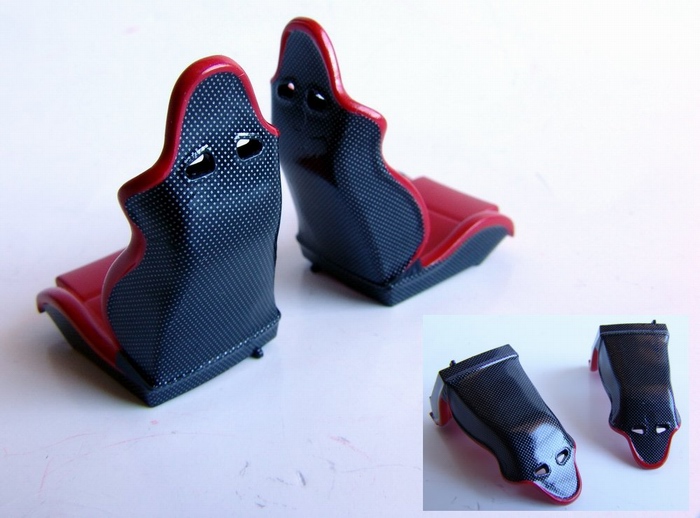
Seat backs were covered with C/F decals and clearcoated with Tamiya clear. Again, SMS templates were way to big and I had to make my own. |
|
|
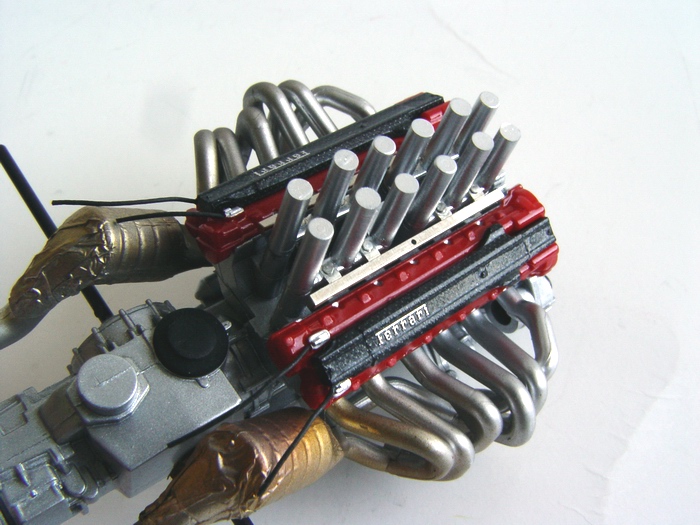
SMS transkit provides multiple P/E parts that substitute kit parts in one or another way. Plastic fuel rails were removed and substituted with SMS photoetched rails. SMS rails had to be formed from flat P/E part and look quite good. |
|
Since I was building a road car, I made a set of road seatbelts for it. I used thin cloth ribbon from a craft store, and Studio 27 photoetched buckles and brackets. |
|
|
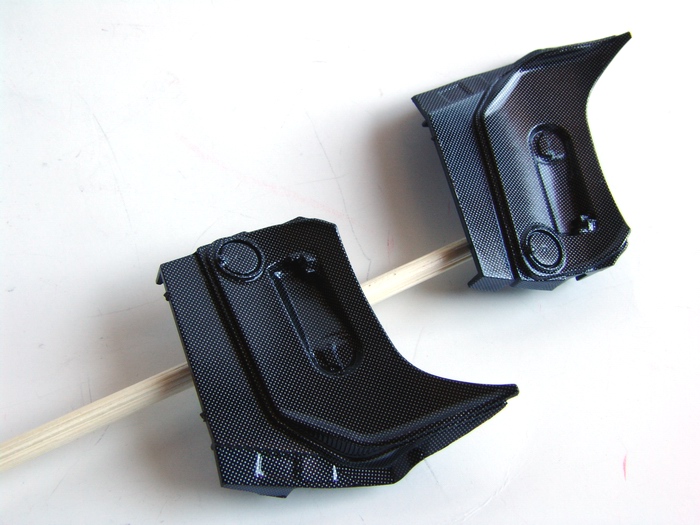
Ignition packs covers were detailed with C/F decals, topped off with "Ferrari" metal transfers, and glued to the cam covers. Cam covers in their turn were glued to the block, together with velocity stacks/fuel rails assembly, front engine cover and belts/pulley assembly. I also installed exhaust manifolds and drive shafts at this time. |
|
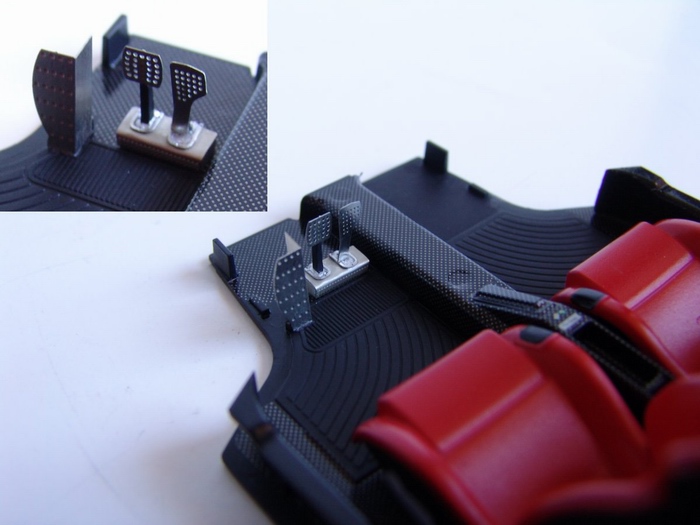
Tamiya pedal cluster was heavily modified with P/E parts from SMS transkit. I glued a new photoetched skin on the pedestal, new trim, and replaced plastic pedals and the footrest with P/E parts. |
|
|
Exhaust manifolds were glued together, painted with Alclad II Chrome, then toned down with highly diluted flat black paint sprayed at low pressure. Then I wrapped silencers with small pieces of cooking foil (to replicate wrinkled surface of the real car) and sprayed them with Testors Burnt Metal metalizer, and then a light coat of Tamiya clear orange paint. |
|
Floor panels were C/F decaled inside and out (literally) together with the rear bulkhead and central tunnel. Then I glued the seats, pedals, and few small things like hand brake and Enzo Ferrari signature plate. |
|
|
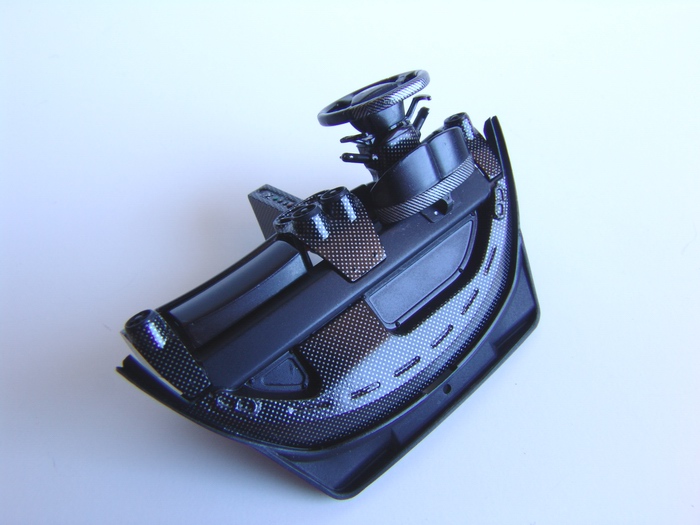
Air intake tower was C/F decaled, masked, and clear coated. I tested the fit of the tower just to see how good it looks on top of this monster engine! |
|
Insides of the central tunnel were covered with heat shielding (cigarette foil again). Then I installed water lines. All this will be completely covered and nobody will ever see it, but I just couldn't leave it unfinished. |
|
|
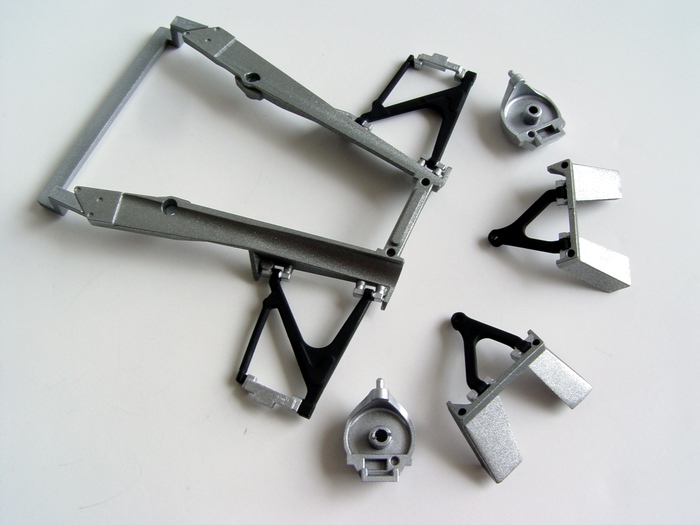
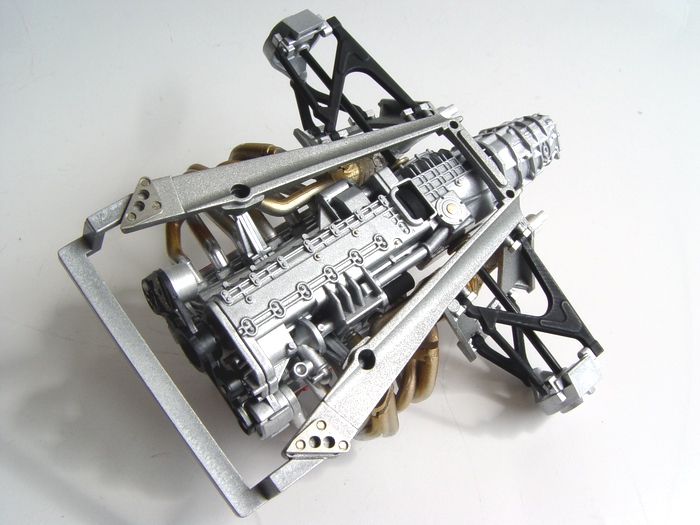
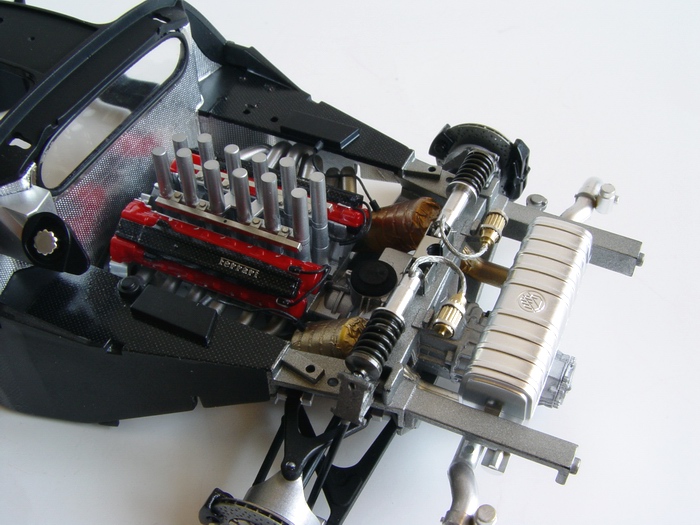
With most of the work on the powerplant completed, I moved to the engine frame. It was painted grey metallic according to instructions (exact color match I might add), and detailed with black and silver. I also painted upper suspension A-arms and rear wheel hubs. |
|
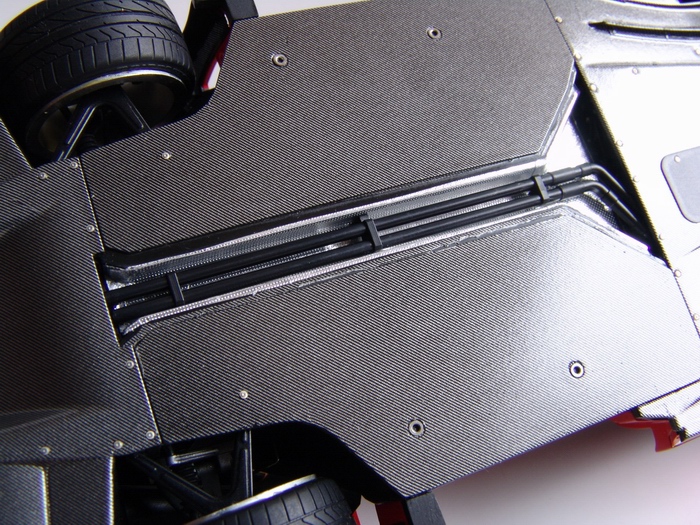
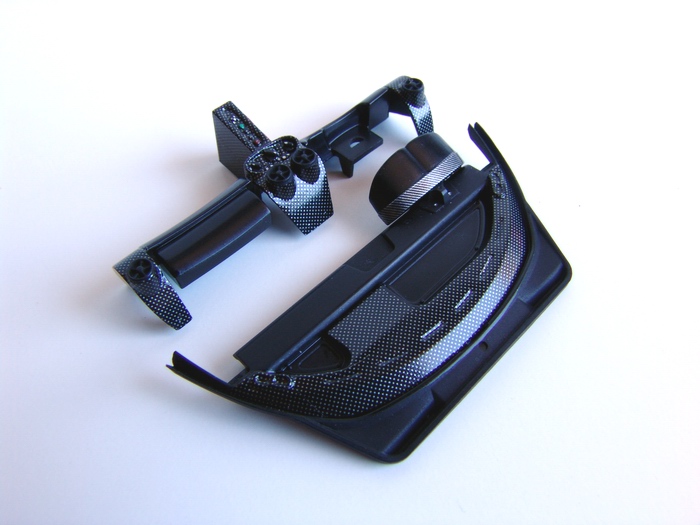
Finally, water lines were covered with the lid that was previously C/F decaled and detailed with photoetched rivets. I also added small C/F wing at the front. |
|
|
SMS set includes little photoetched bits and pieces that you can add here and there to make your model more realistic. These little plates won't even be visible when the model is finished, but I enjoyed adding them nevertheless. |
|
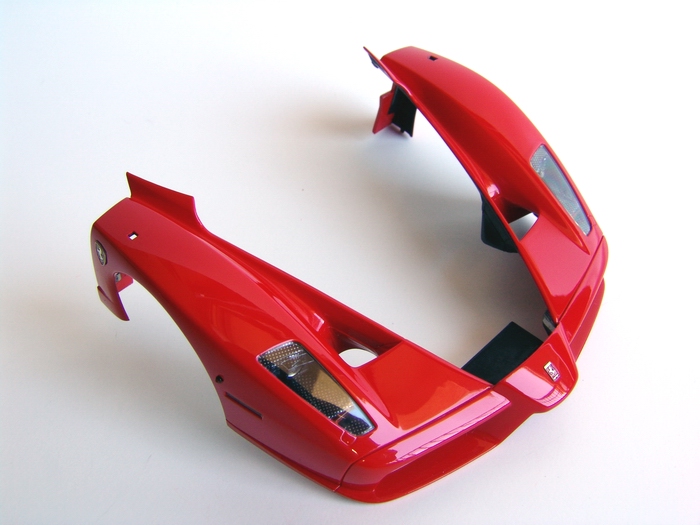
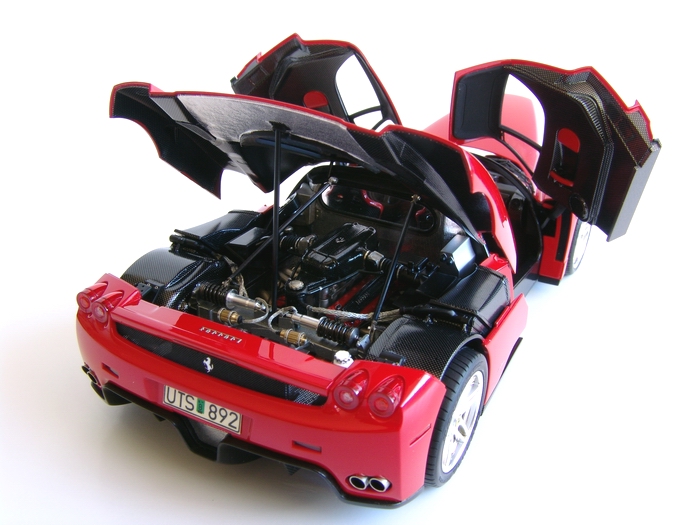
Rear end was polished, waxed, fitted with taillights, blinkers, Sakatsu vent mesh, Cavallino emblem, wing, third stoplight decal, license plate and attached to the frame and lower chassis panel. As a final touch, I added SMS turned steel exhaust tips and photoetched Ferrari script. |
|
|
Finally, engine was glue to the frame, together with A-arms, etc. Everything fits perfectly and can be assembled with tiny amounts of glue. |
|
Headlight bezels were carefully covered with C/F decals (what a pain!), fitted with lenses, and glued to their places. Blinkers and reflectors were also installed at this time. |
|
|
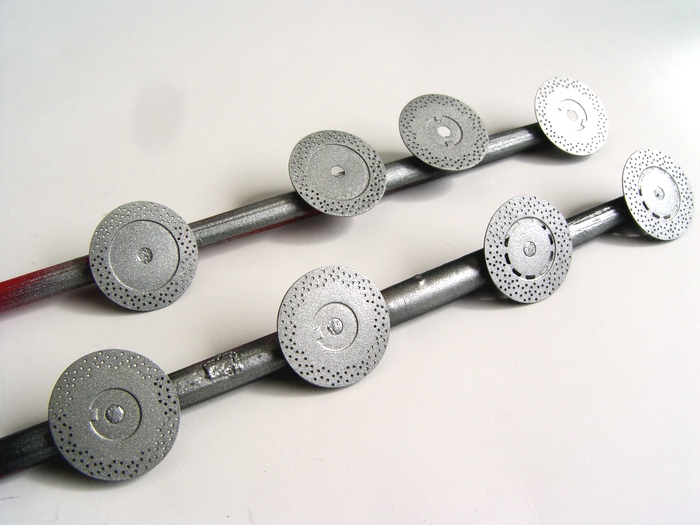
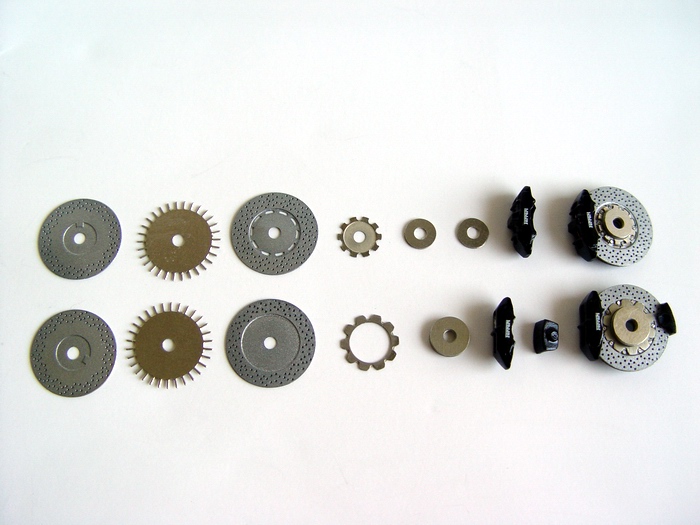
All brake parts were carefully removed from the frets, cleaned, and mounted on the dowels. Then I primed them with Tamiya metal primer, and painted with custom mix of gray metallic and flat black to simulate carbon disks. |
|
Then I glued in the headlight covers with Elmer's white glue, and applied some BMF to the lenses so they would reflect more light. |
|
|
Resin calipers were carefully cleaned off flash and washed with dish detergent to remove mold release residue. The calipers are extremely nice and fit brake disks perfectly. |
|
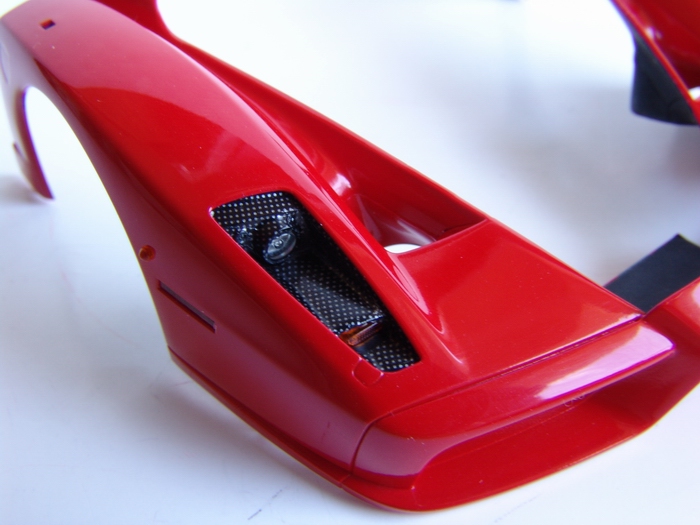
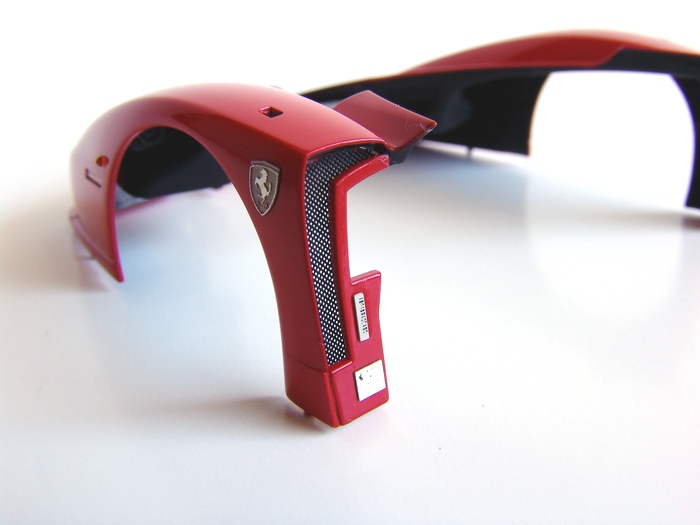
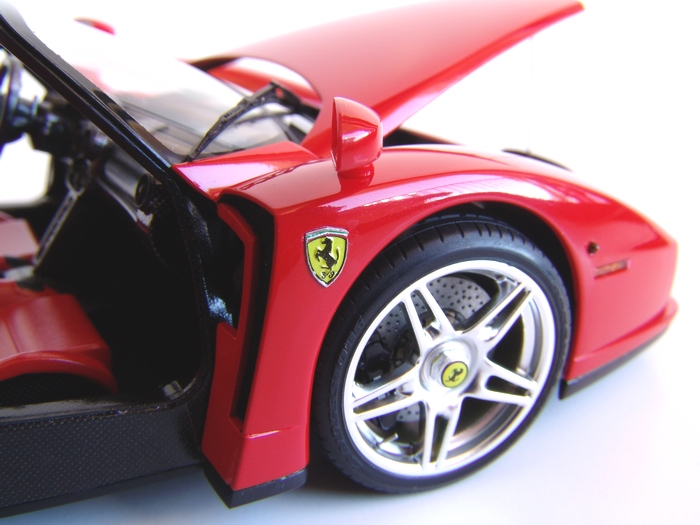
Modified vent parts were glue to the body, and detailed with P/E mesh from Sakatsu set, and small scripts and badges from SMS set. I also added SMS Scuderia shields to both sides. |
|
|
Each brake disk was assembled from 8-10 separate parts and topped with Ferrari decal to become a small work of art. I used a toothpick to keep all the parts centered and properly aligned. |
|
Body panels were carefully hand-painted flat black from the inside with wide brush (too much masking to airbrush something that will be hidden almost completely!) |
|
|
Finally I added 10 tiny photoetched bolt heads to each disk and small brake pads made from sheet styrene. These brakes look amazing and will add tremendously to the realism of the model. |
|
Finally, I added photoetched SMS Ferrari emblem to the nose, and carefully polished and waxed entire front end. |
|
|
Finally, brakes were added to the rear wheel hubs, as well as front hubs. It took some elbow grease to get poly-caps to fit properly (I had to trim them slightly), and align the brakes properly, but it all worked out just fine in the end. |
|
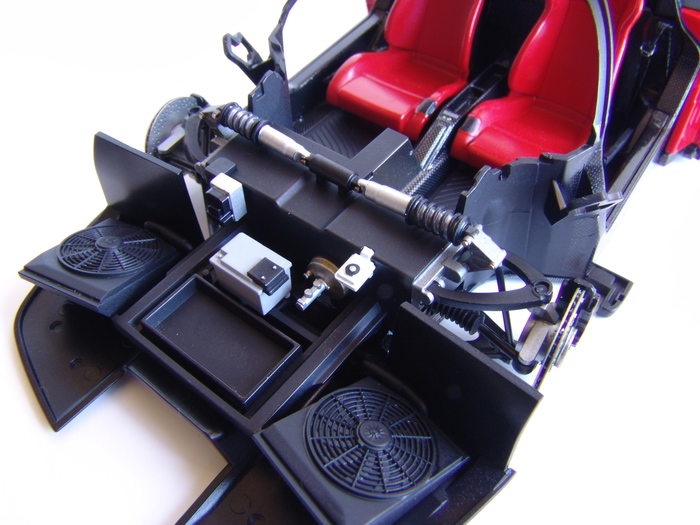
Radiators were put together and glued to the floor. I also painted and installed front shock absorbers, battery, all the relays and fluid bottles, and painted the master cylinder. Front suspension was assembled and glued to the chassis. |
|
|
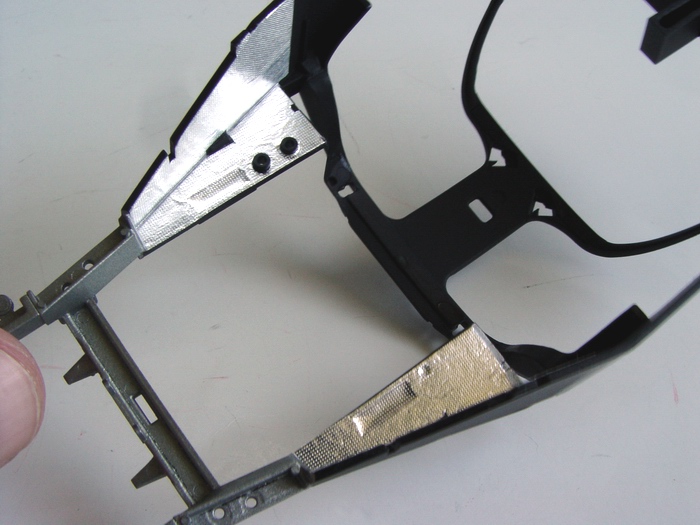
All visible surfaces of the monocoque were covered with C/F decals. Funny thing, on 5 templated decal sheets, SMS provided total of zero decals for the monocoque. I was really surprised by that, and had no choice but to make my own templates! |
|
Dashboard parts were carefully decaled with twill weave carbon fiber using SMS templates. I also installed instrument cluster and detail painted all the knobs and dials. |
|
|
Aluminum heat shielding was simulated with finely perforated foil from cigarette pack. It has perfect scale texture for this material. I used Elmer's white glue as an adhesive, and made my own templates for all shields too. |
|
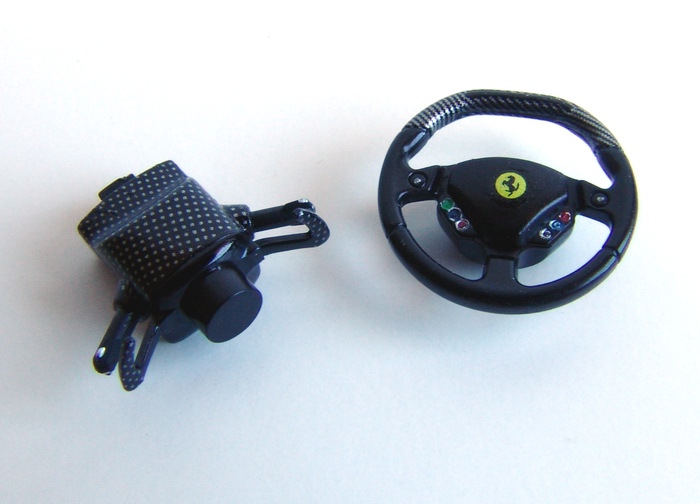
Steering column and steering wheel were C/F decaled and detail painted. I also added Ferrari emblem decal to the wheel. |
|
|
Firewall was also covered with cigarette pack foil, and fitted with rear window and photoetched trim piece from SMS set. Finally I added a gas receptacle with it funneled top. |
|
Everything was assembled together, vents were painted flat black, and knee cushion was added. |
|
|
After the monocoque was completely dry (I clearcoated all C/F decals) I glued in the firewall, exhaust, engine assembly, and rear shock absorbers. |
|
C/F covered dashboard looks really good, and adds special F1 feeling to the real car, and the model too! Different shades and weaves of the Carbon Fiber add a lot of realism to the whole assembly. |
|
|
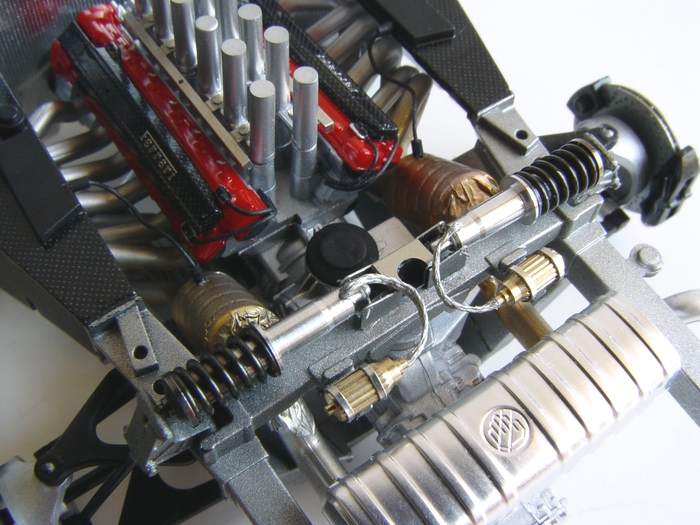
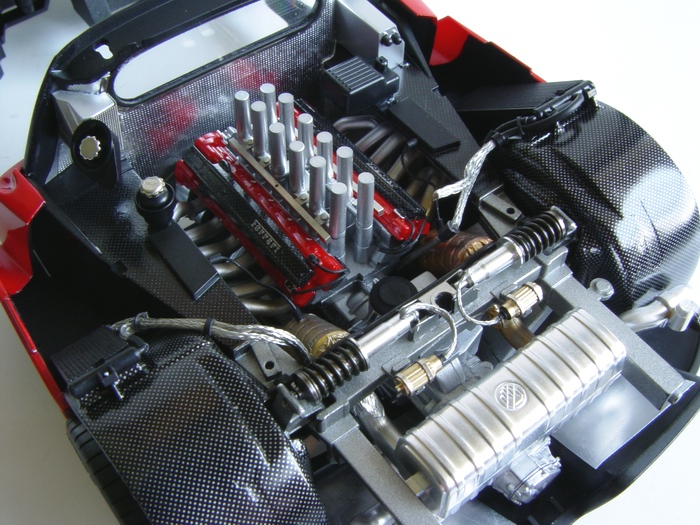
Shock absorbers were assembled from beautiful SMS turned steel pieces and chemically blackened metal coils. They were slightly bigger than required and I had to trim plastic parts to fit them in, but only slightly. I also added machined brass fluid reservoirs wrapped in P/E brackets, and connected everything with supplied braided lines. Shocks look really good! |
|
I test-fitted the dashboard and it was fitting perfectly. Then I put the wheels on, and... they were sitting way to wide! I had to trim poly-caps again and re-glue front brakes for them to sit right. |
|
|
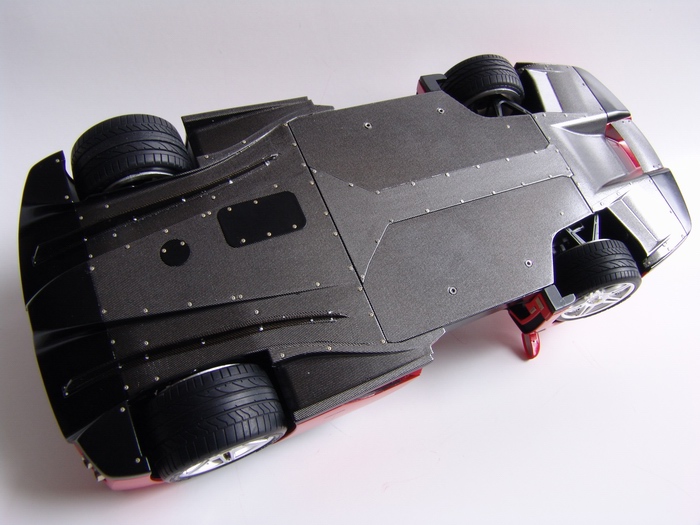
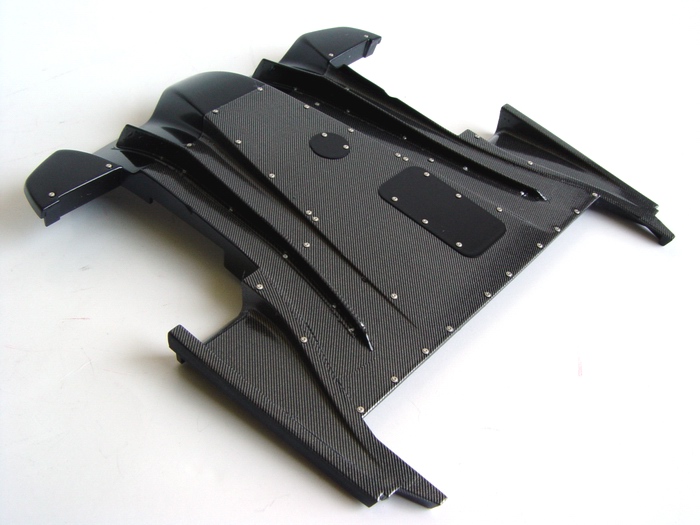
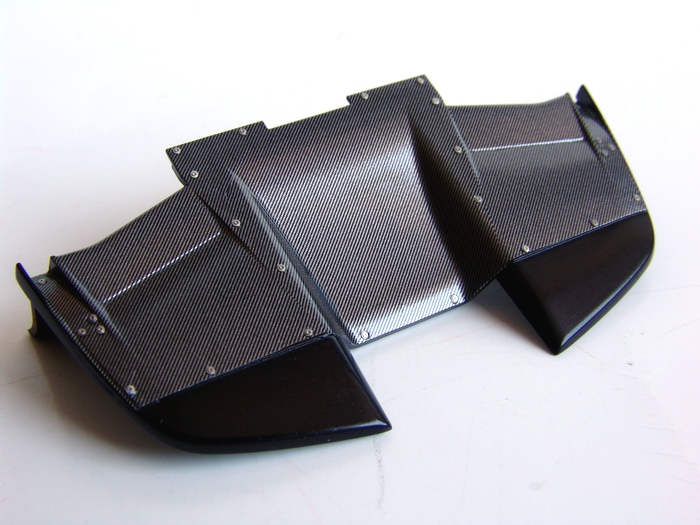
After finishing with the engine bay, I moved to the underside. It is made almost completely from Carbon Fiber on the real car, and I used SMS templates to cover it with decals. This is got to be the most challenging part of the build! Applying these decals takes literally hours, and lots of patience! I used Microsol decal setting solution and a hairdryer to help the process. |
|
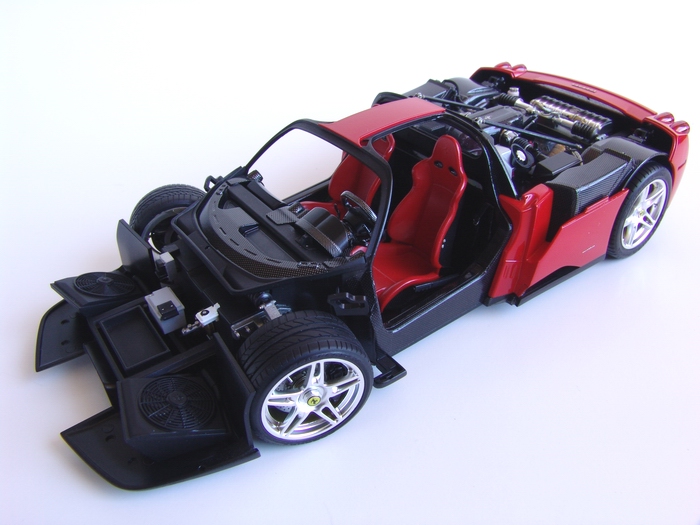
This is the picture of the completed chassis with all the flaws corrected, dashboard and floors installed, and ready for the glass, doors, and body panels. |
|
|
After all decals were applied and completely dry, I sealed them with few light coats of Tamiya clearcoat. Then all parts were detailed with tiny photoetched rivets from SMS detail set. |
|
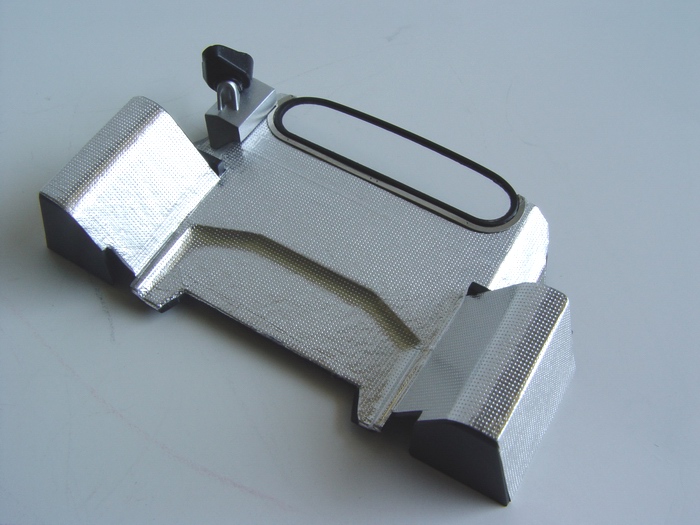
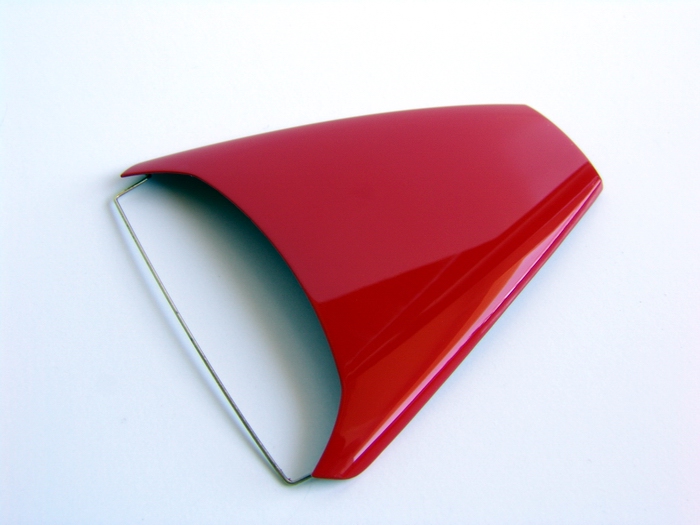
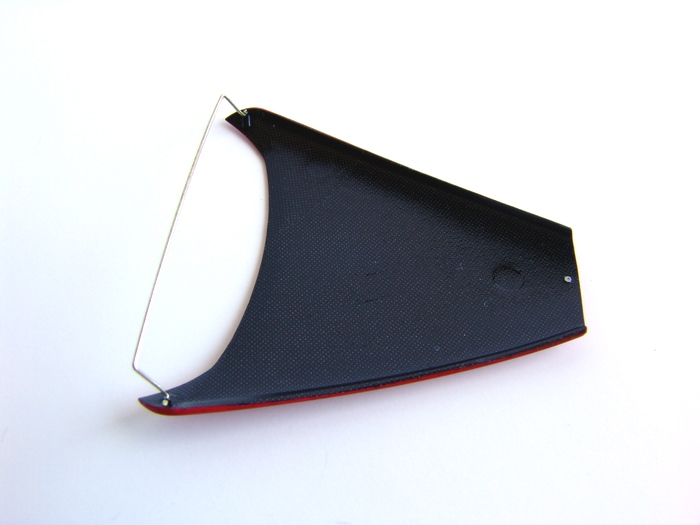
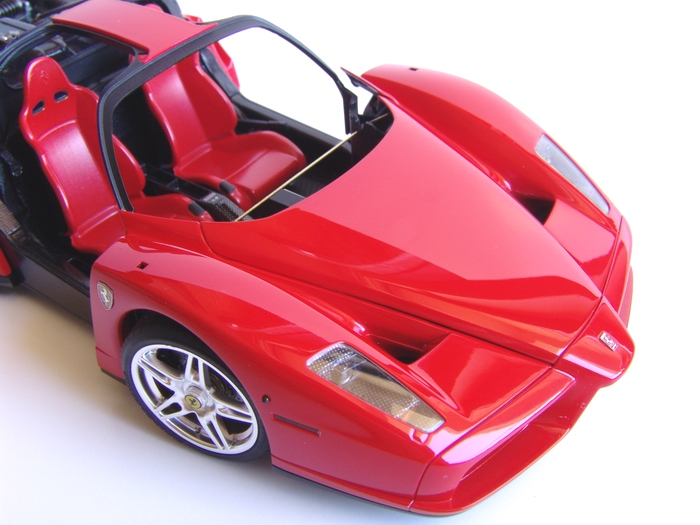
Trunk lid was polished and waxed. I also made a simple hinge following SMS instructions. It was more of a trial and error type thing, but I finally figured out how to make it work. |
|
|
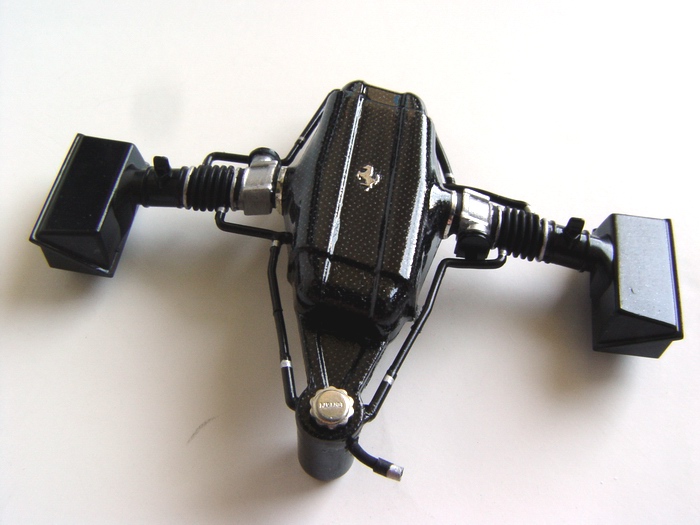
Then I further detailed the engine air intake - I detail painted it, added thin BMF clamps to all hoses, tiny "Ferrari" engraved cap from SMS transkit, and topped it off with Cavallino metal transfer. I also added a small tube to the reservoir - water cooling line from one of the radiators will connect to it later. |
|
Underside of the trunk lid was covered with C/F decals. On this picture you can also see the hinge - it was made from brass wire and two photoetched brackets. Took some time to get it right. |
|
|
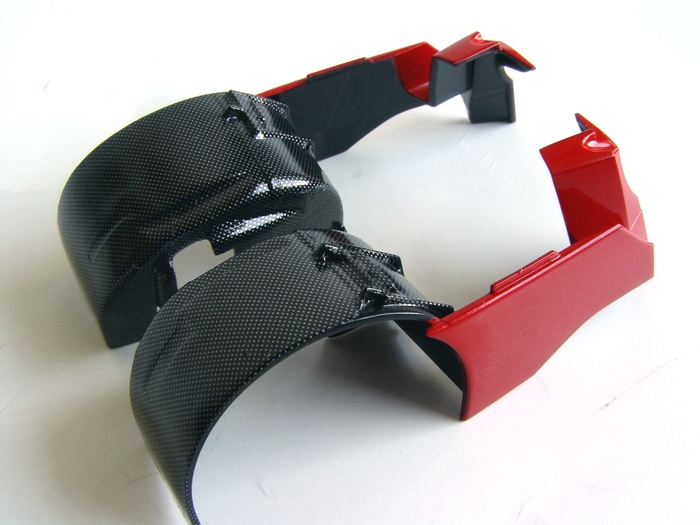
Rear fenders were also carefully decaled with C/F and painted flat black inside. It took a lot of time and Microsol to make decals to conform to all the curves. |
|
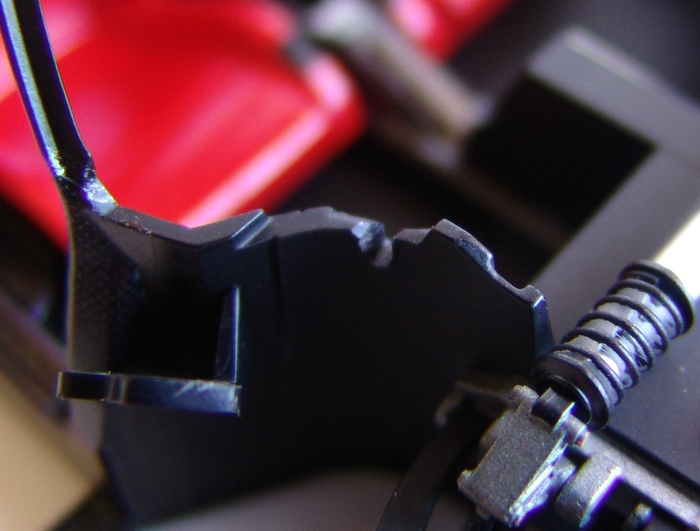
The hinge is sandwiched between the monocoque and the dashboard. For the hinge to work, I had to make two groves in the monocoque, because dashboard wouldn't fit otherwise. |
|
|
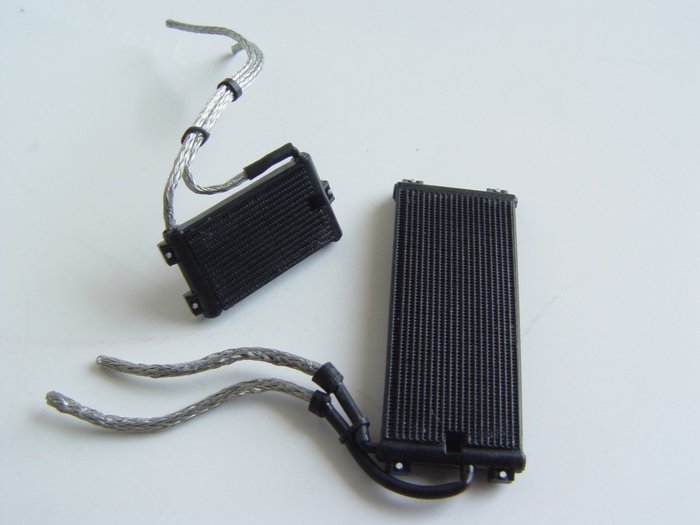
Radiators were fitted with fine P/E mesh, and then drilled for the water lines. I used braided lines supplied with SMS set, and some Detail Master hoses too. Clamps were made from bigger diameter hoses. |
|
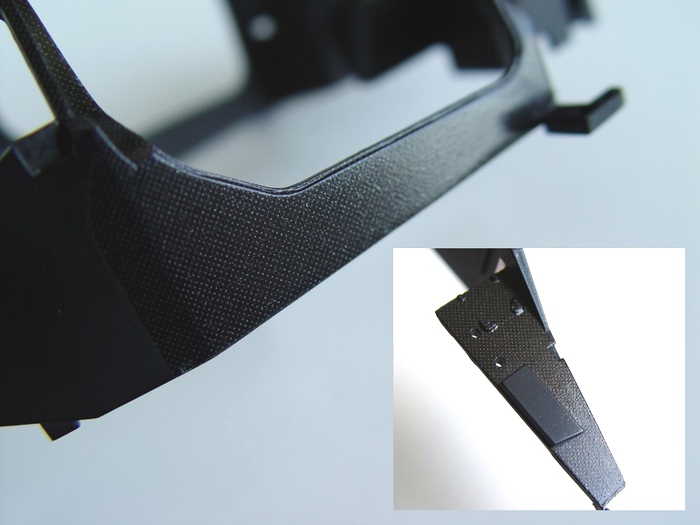
Here is a better view of the hinge mechanism. From this angle you can also see photoetched passenger foot well vents and driver's side kick panel protection pieces. |
|
|
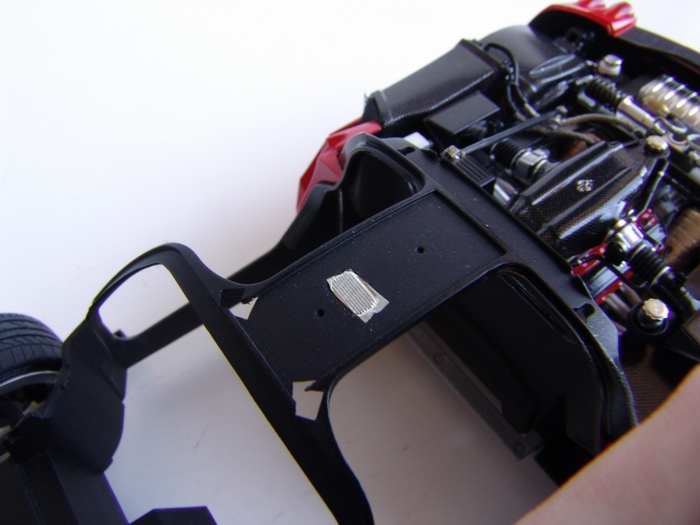
Before attaching engine part of the chassis to the frame, I foiled it with the BMF to simulate the heat shielding (barely visible in this picture). Then I installed both fenders, glued in and plumbed the radiators, and accessorized engine bay with fluid bottles, caps, etc. |
|
In closed position, the hinge just rests on the monocoque. The only problem of this construction is that sometimes the lid tends to shift from side to side a little bit. |
|
|
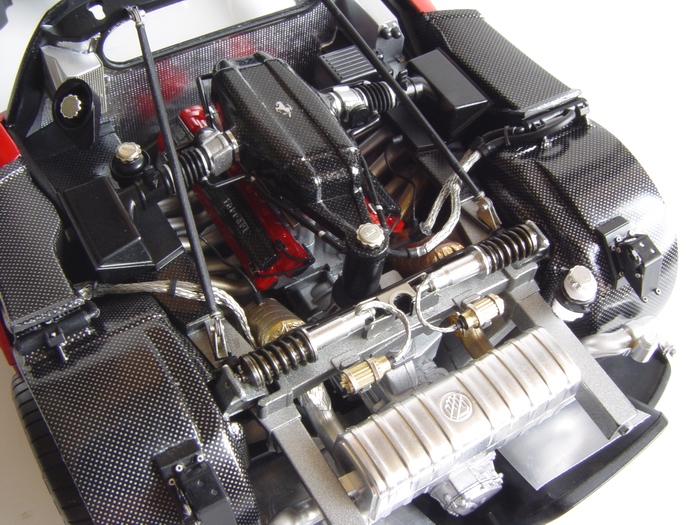
Another view of the (almost) completed engine bay. All that is left are new clasp towers and engine struts. Every single part in this kit fits so well, and the results are really amazing. |
|
As you can see, primer and paint layers almost completely eliminated panel line gap between the body and trunk lid. |
|
|
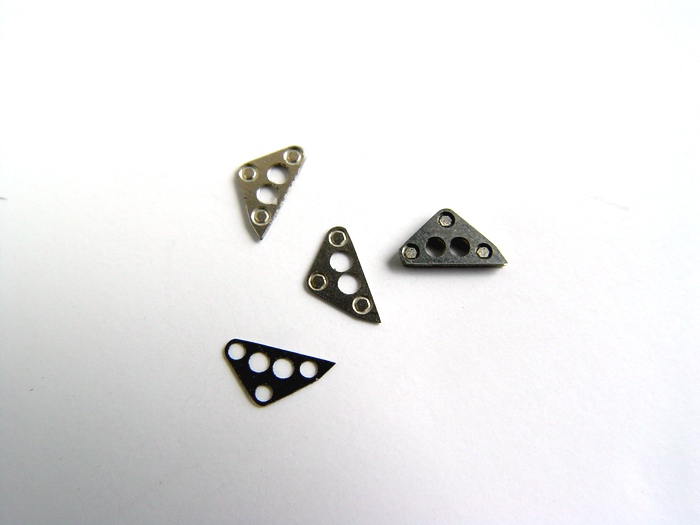
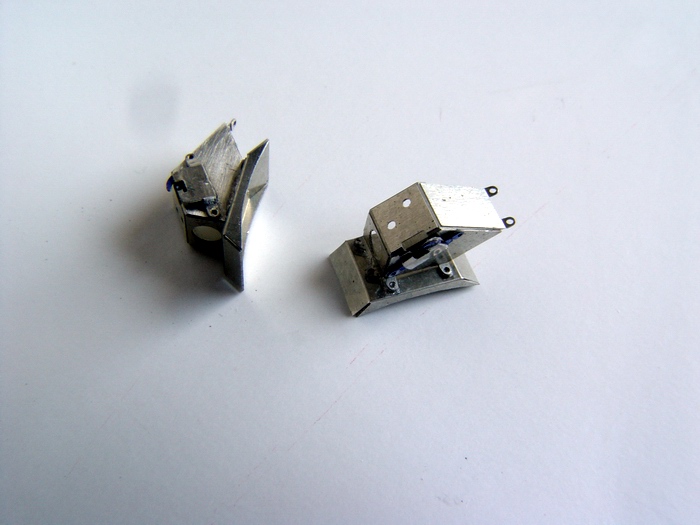
Photoetched clasp towers were made from SMS templates, and they look really good! I also glued locking mechanisms before priming and painting. |
|
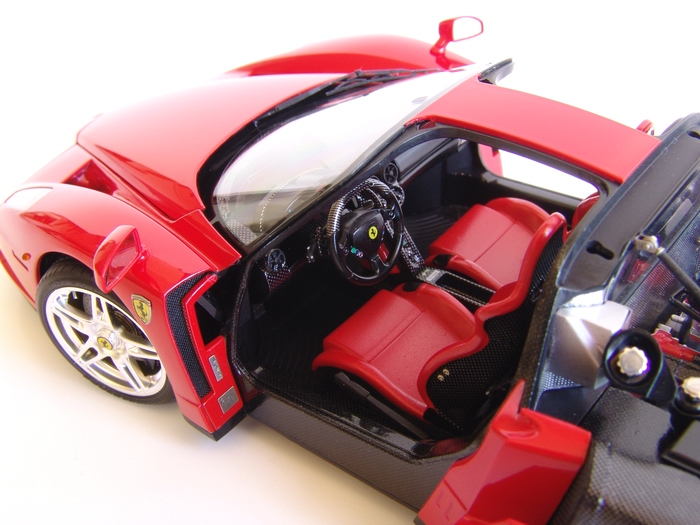
Finally, after few minutes of adjusting the hinge I glued in the dashboard, windshield, and side view mirrors with SMS photoetched faces. |
|
|
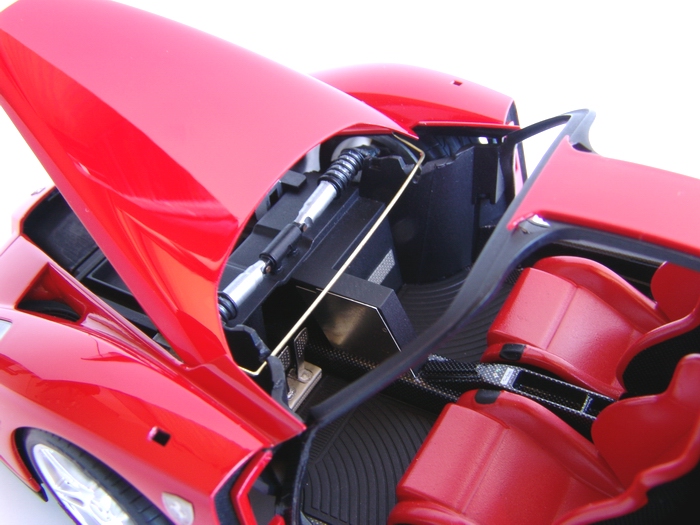
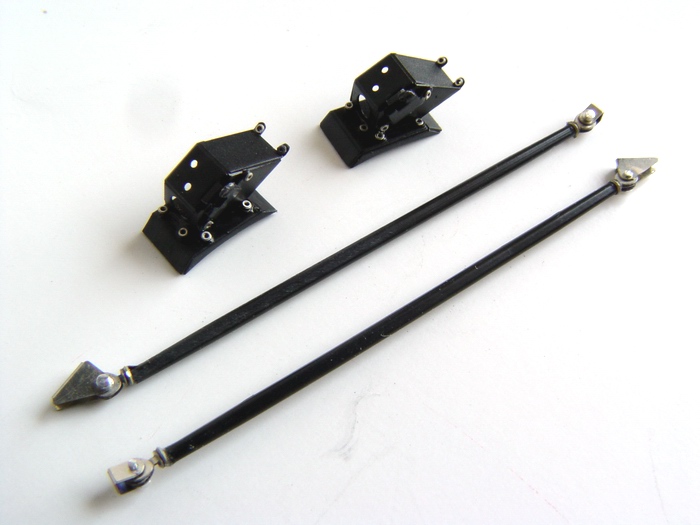
Tamiya struts were modified and fitted with multi-piece photoetched hyme joints from SMS set. Clasp towers were painted and flat black and detailed with tiny photoetched rivets. |
|
I made a prop rod from a piece of wire so I could open the cover and look at the insides. |
|
|
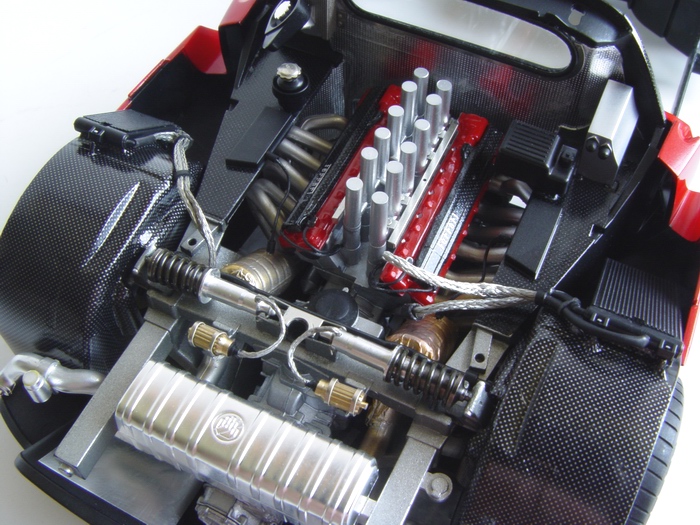
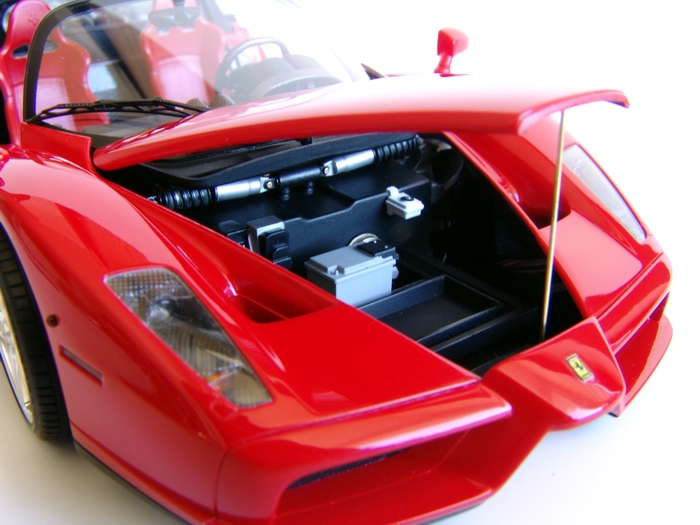
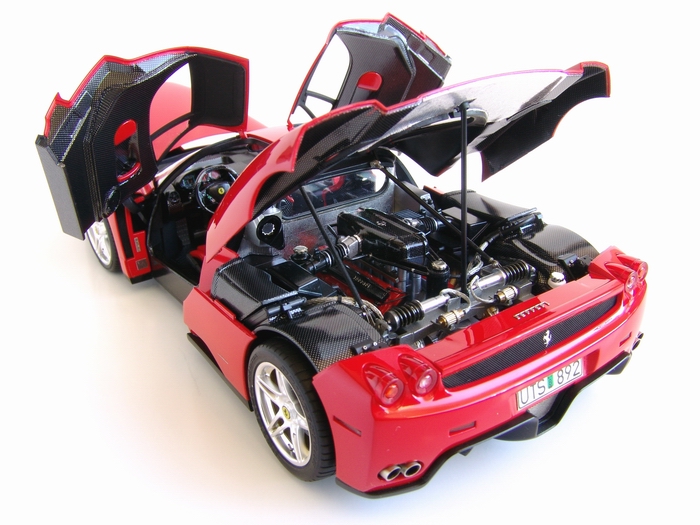
Finally, air intake was glued to the velocity stacks, and all remaining water lines connected. Radiator's cooling ducts were decaled with C/F and attached to the radiators. Struts were mounted in the engine bay, clasp towers glued to the fenders, all small bits and pieces added. The engine bay was officially completed. |
|
Cast-metal windshield wiper from SMS set was finally added. It is an extremely well made part, and its chemically blackened for a nice, satin-black finish. |
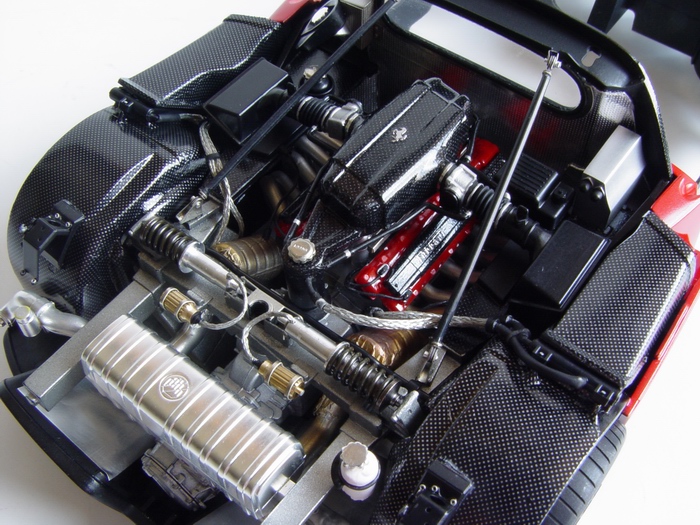 |
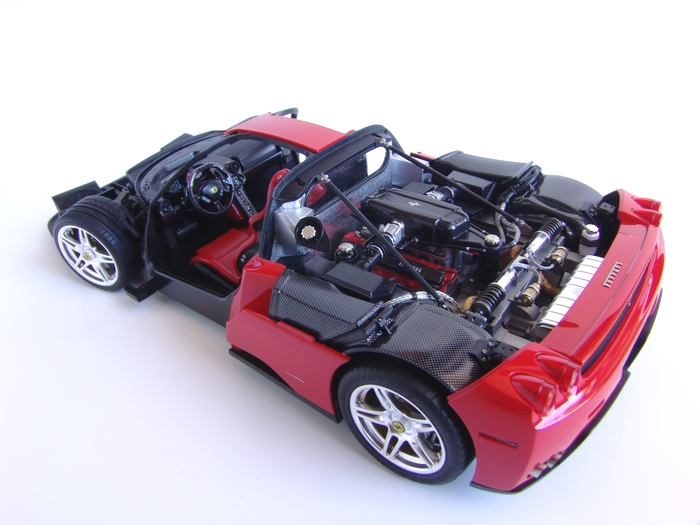
Another view of finished engine bay from different angle. It is a shame you won't be able to clearly see all this beauty once the model is finished. Even with the engine lid up, it still hard to see all this detail. |
 |
As a final touch, I added decals on top of all photoetched badges (like the Scuderia shield you see on this picture) and then soaked them in Microsol to make them to conform to the P/E piece. |
 |
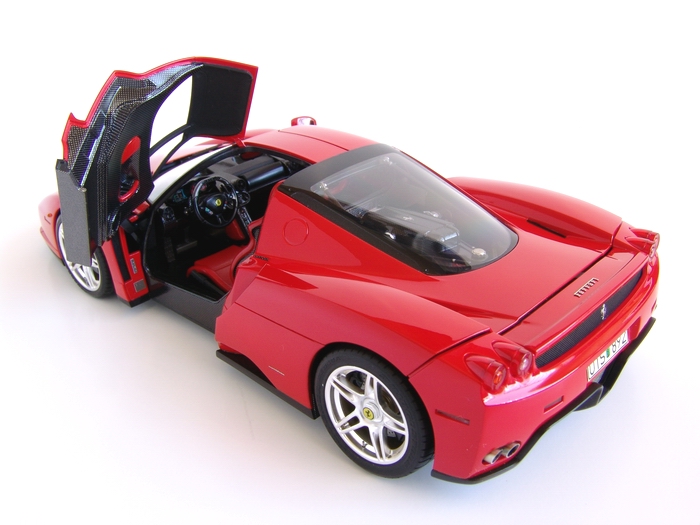
With the most important part of the car completed, I started working on the interior and rest of the body. Ceiling light was glued in and backed with a small piece of BMF to make it more reflective. |
 |
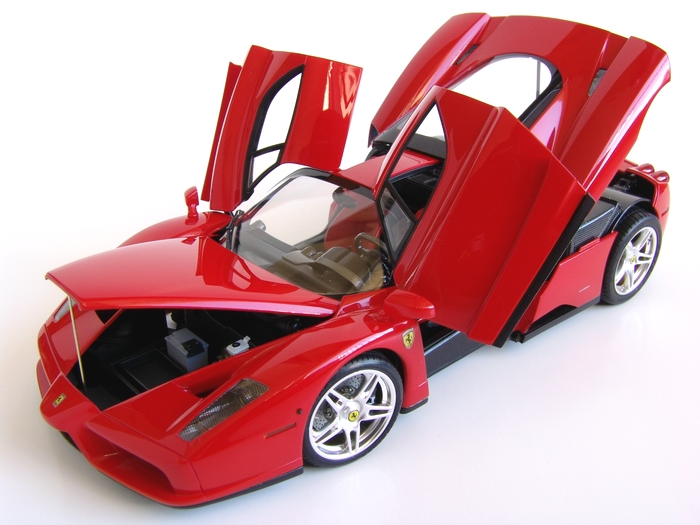
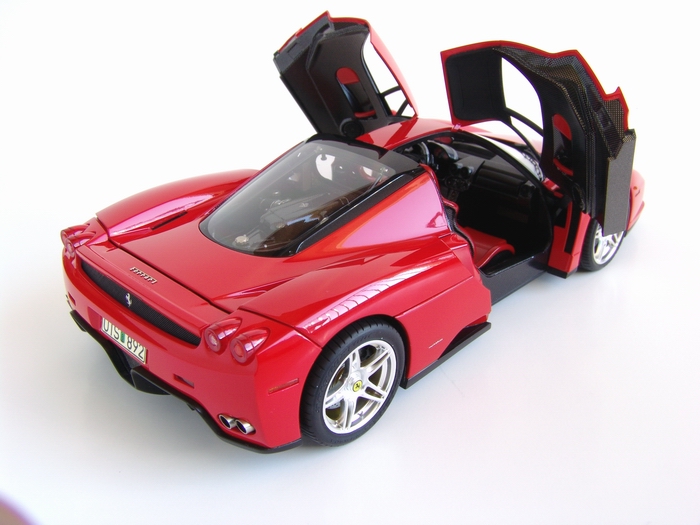
The final result looks great, in my opinion. All emblems were later clearcoated too. I also added central wheel nuts and valve stems to the wheels. Finally, I installed the doors and engine lid. The supercar is completed! |
Copyright 2005 Alex Kustov. No copying or reproduction in any shape or form without written permission of the author.