How to Use Metal Foil to Enhance Window Trim
Materials and Tools Needed
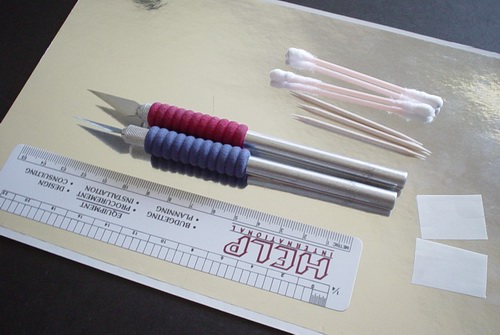
You will need flexible ruler, two hobby knives (one with fresh blade to trim the foil, and one to cut the foil while it is still on paper), chisel-shaped and pointed toothpicks, q-tips, two paper "handles" made from non sticky paper (I use foil backing paper), and foil. I prefer to use Bare Metal Foil, but many other model foils will do the trick, although some foils are thinner than BMF, and will require more caution during application and trimming.

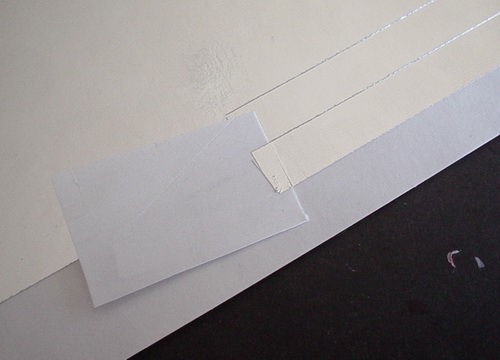
Paint your model and let it dry completely. Polish and wax the paint if you want to, then wipe wax and paint residue from the window trim to ensure proper foil adhesion. Using a ruler, measure the length of the trim you need to cover with foil.
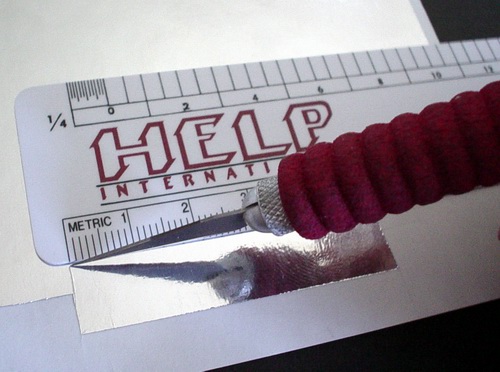
Then measure the strip of foil you need to cut...
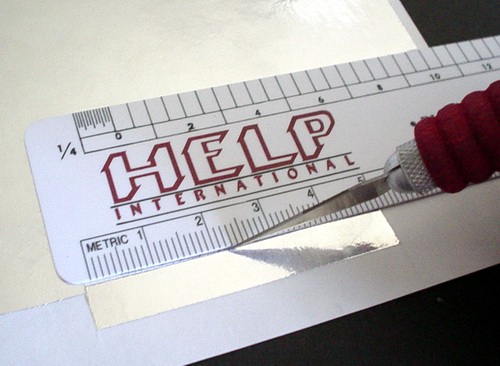
...and using ruler as a guide cut the strip of foil with your regular knife (do not cut through the backing paper) much wider than the area you want to cover. Do not use your new blade for cutting foil now, foil dulls the blade really quickly, and you will need very sharp blade for trimming the foil on the model.

Lift about 5mm of foil from its backing from one end with the knife blade (or toothpick).
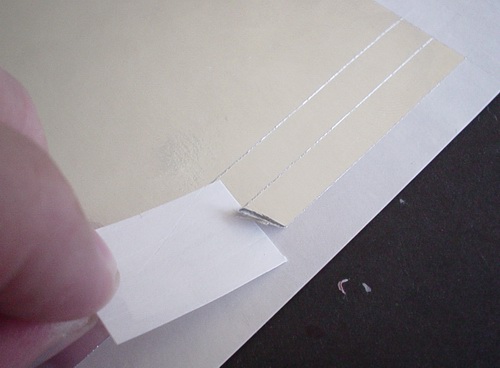
Then take one of your paper "handles" and slide it underneath the foil.
Then press the foil down firmly. Make sure the foil stuck to the handle - you will use this handle to pull the foil off the backing paper.
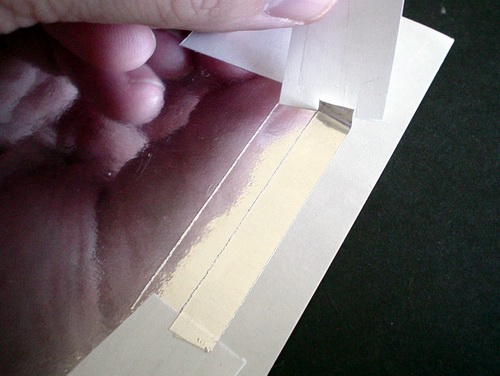
Repeat the procedure from the other end. This step could be avoided if the stripe of foil is relatively short, but anything longer than 2 inches (5cm) will start to curl when separated from the paper, and could stick to itself.
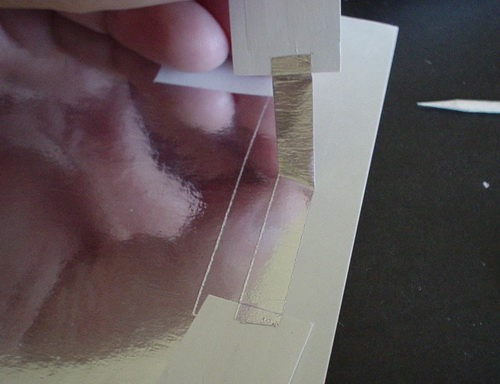
Then remove the foil stripe from its backing by pulling one of the handles. Be careful not to tear the stripe now.
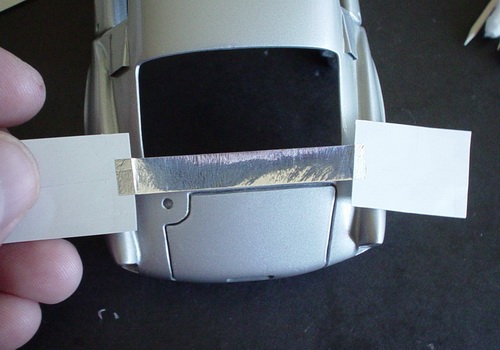
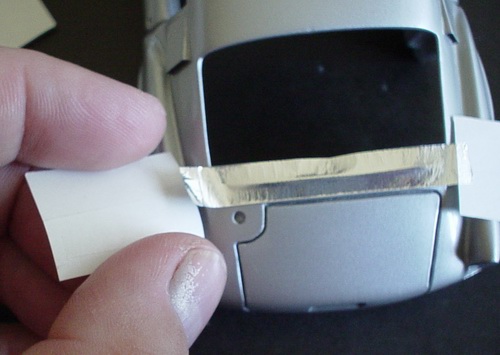
Holding the stripe by the handles transfer it to the model, try to position the stripe before you stick it to the model.

Now take a q-tip, and lightly (!) rub the foil down to the model at the edge (do not press the entire stripe, only the edge). Start from the center and move to the sides to prevent foil wrinkling and tearing.
Now when the foil stuck to the model, very gently pull down the handles to remove them.
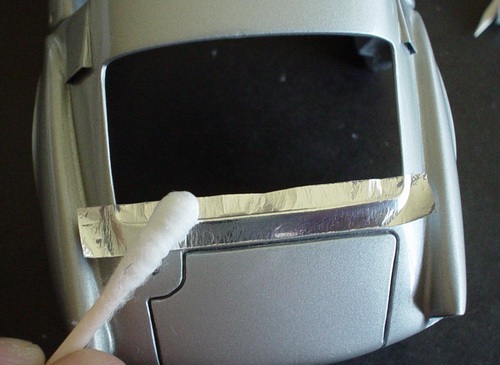
Then continue pressing the foil with the q-tip (again - only at the edge).
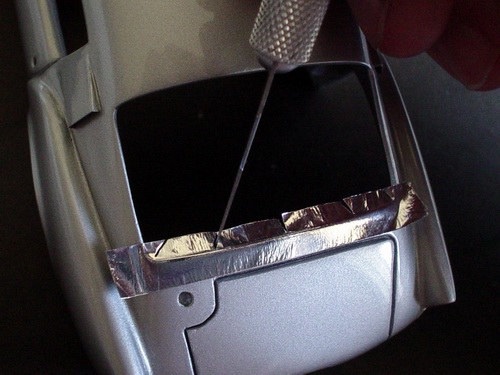
Then take your new blade and make several cuts from inside. This will prevent foil wrinkling when you wrap it around the window.
Now gently fold the foil inside the body. Press edges firmly while checking that foil is not wrinkling.
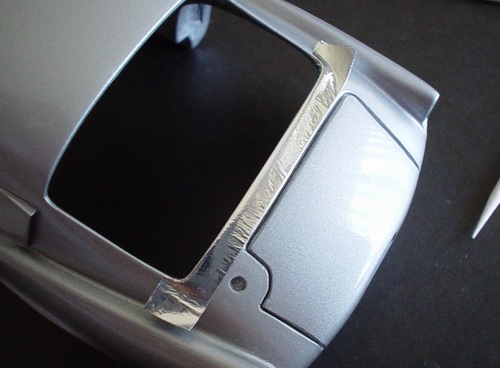
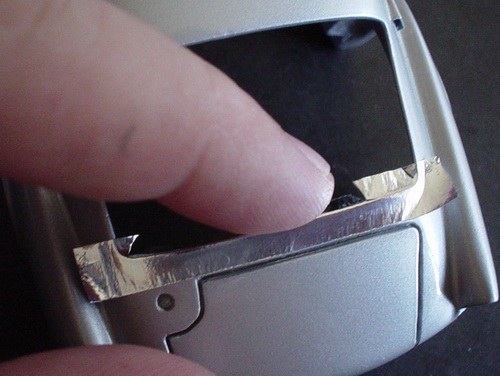
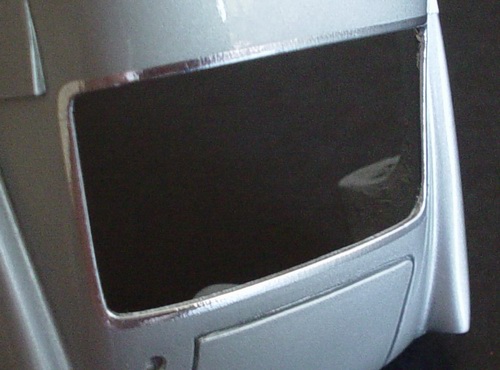
This is how trim should look like after this step. Note that the rest of the foil is not burnished to the body. It will make it easier to remove the foil excess after trimming.
Burnish foil from the inside. Run a q-tip to firmly press it down.
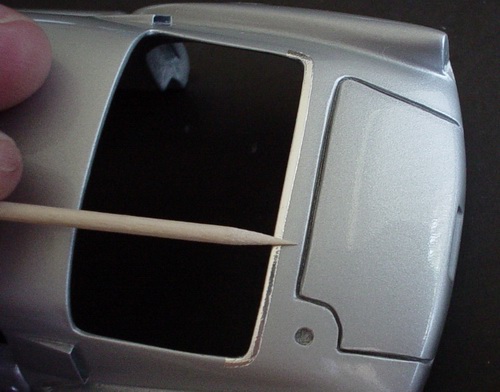
Then burnish the foil from the outside with a round toothpick. Do not press hard because you may tear the foil.

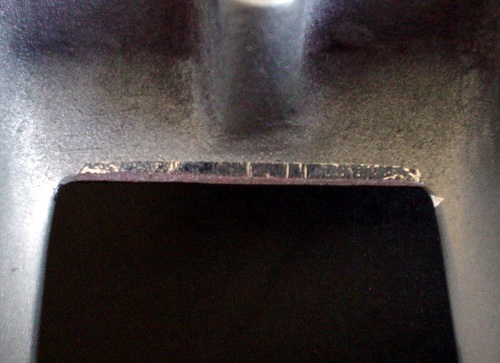
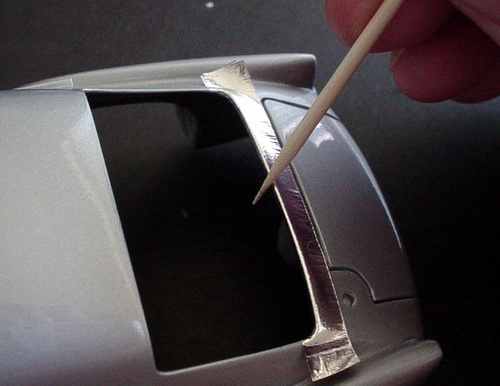
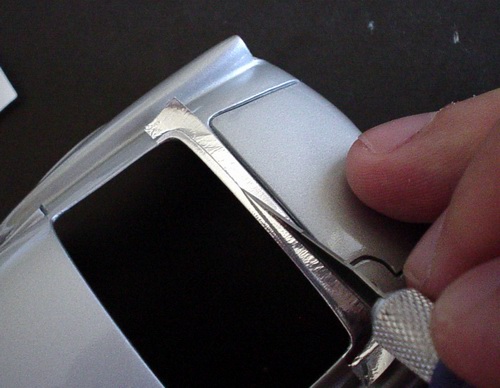
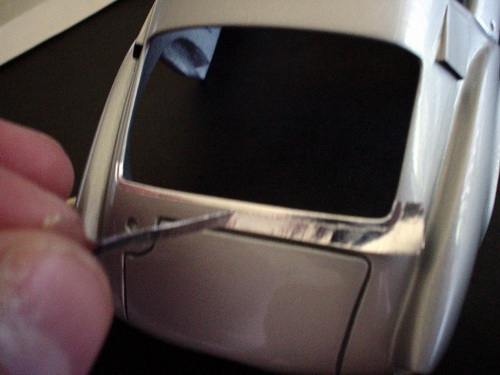
Then take you new blade and trim the foil. Do not press the blade too hard against the paint (this is why you need a new blade) since it may chip. If the blade is sharp, it will cut the foil easily.
Most of the kits have a grove for window trim, and you won't have to do it freehand, like on this picture. But if you working on the kit that has no groves - this is the only way to do this. Be patient and work slowly.
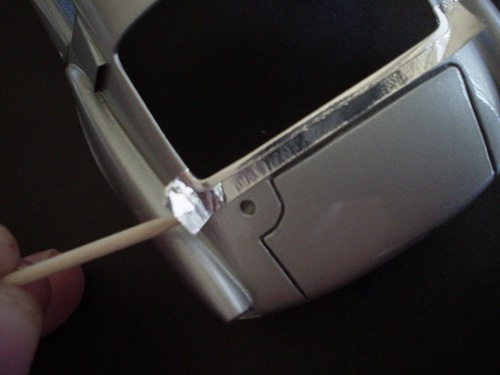
After all trimming is done, take a chisel-shaped toothpick and lift the foil at the edge. If foil was not burnished to the paint well, it will come right off.
Then take the foil with your fingers and gently pull it off. You could use the "handle" if you prefer.
Burnish the foil with pointed toothpick or other burnishing tool. Be careful not to tear the foil.
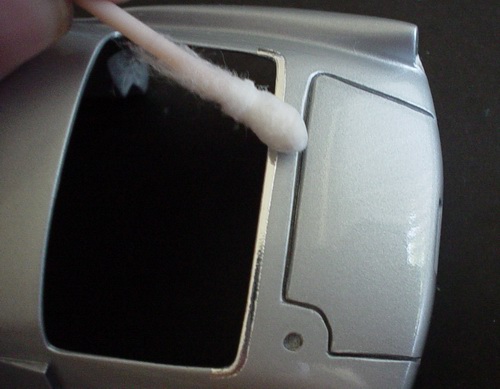
To remove adhesive residue and bring the shine to the trim, rub it down with clean q-tip.
Repeat all the steps for the rest of the window. Now we have realistic looking chrome window trim without messy painting. Using foil on window trim really enhances the appearance of the model.
Copyright 2003 Alex Kustov. No copying or reproduction in any shape or form without written permission of the author.