How to Build Realistic Vented Rotors
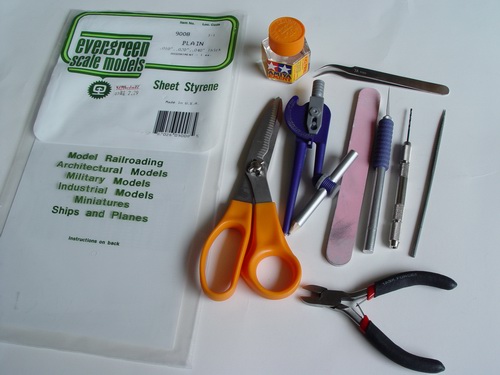
Materials and Tools Needed
Many modern race and street cars these days have vented brake rotors, but most kits include only plain rotors, since vented rotors are much more difficult and more expensive to mold. To create realistic-looking vented brakes from scratch, you will need a pack of Evergreen (or any other brand) sheet styrene, .020" and .040" thick, plastic cement, scissors, small drafting compass, tweezers, file or sanding stick (you may also use sandpaper wrapped around the block), hobby knife, pin vise, small round file, and small cutters. You will also need a ruler and a pencil.
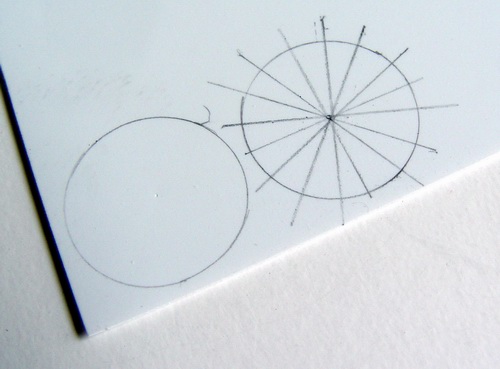
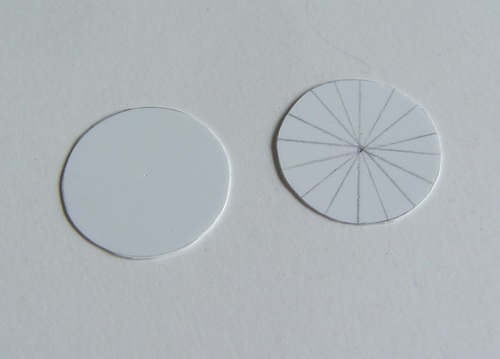
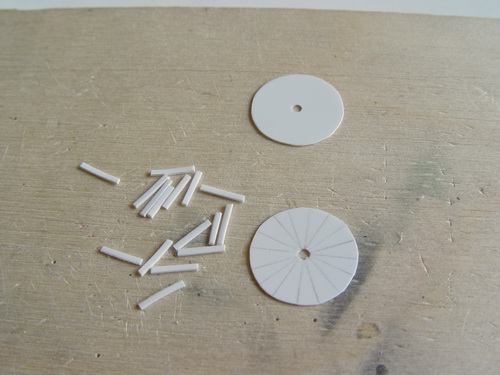
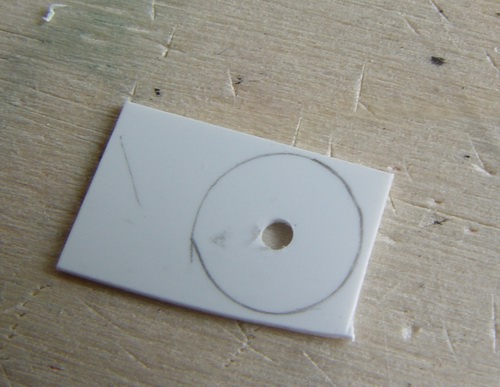
Using your compass, draw two circles the size you want your rotor to be on a sheet of .010" styrene. Make sure the circles are same size (at least very close).
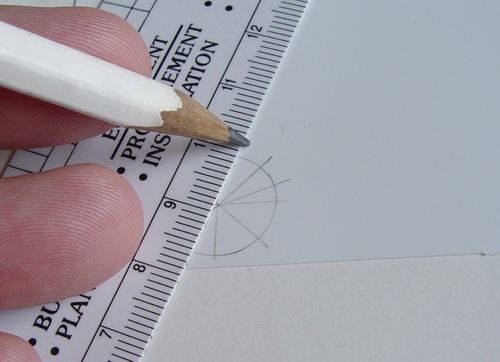
Using your ruler, divide one of the circles into equal pieces, just like a pie. Make as many slices as a number of ribs you want in your vented rotor (Usually 15-25)
When you done, your pattern should look similar to the one on the picture below.
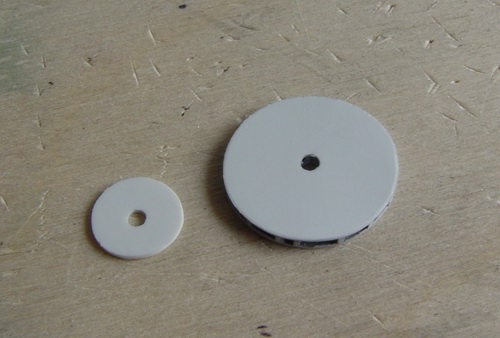
Now cut both circles carefully using your scissors. .010" plastic is really thin and cuts easily with scissors, just like regular paper.
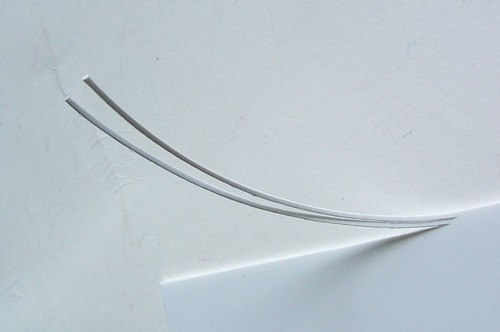
Then cut several 0.8 mm (or thicker if you want your rotors thicker) stripes for .020" styrene. You may also use square styrene rods already available from Evergreen and other styrene manufacturers. It will be a little bit more expensive, but will save you some time.
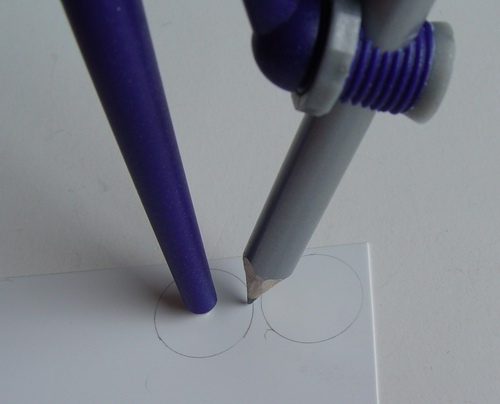
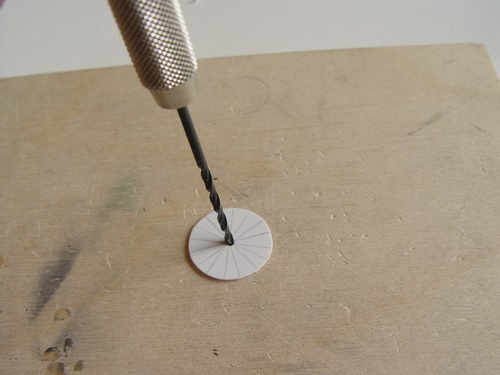
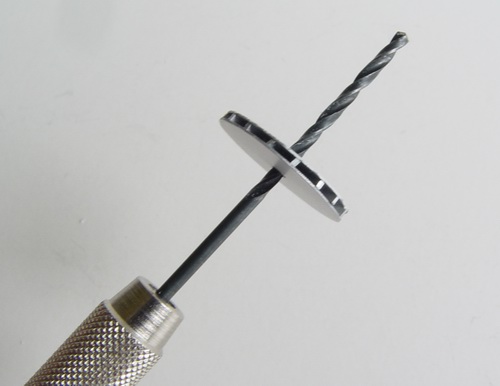
Using your pin vise with small drill bit, drill holes in the middle of both circles.
Then using your hobby knife or cutters, cut styrene stripes into pieces the length of the rotor.
Cut enough pieces for every rib of the rotor. This should look similar to the picture below.
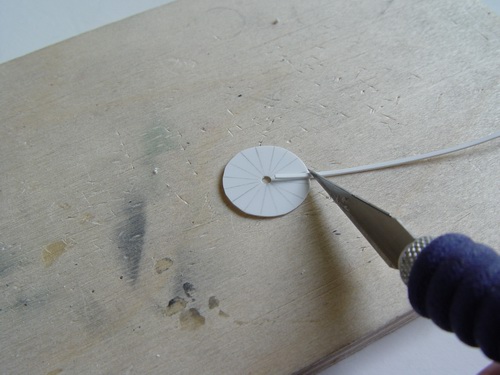
Then using your tweezers, glue each styrene strip with plastic cement in the middle of each slice (or along the lines, it doesn't really matter). Make sure the gaps between the stripes are identical, or at least close enough.
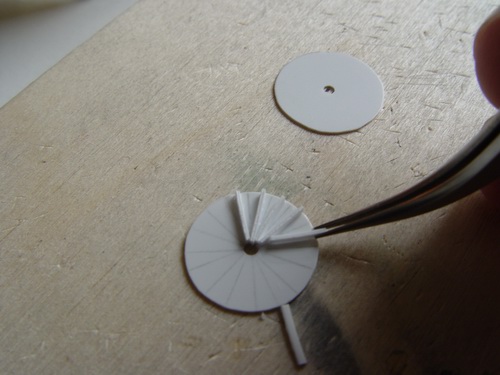
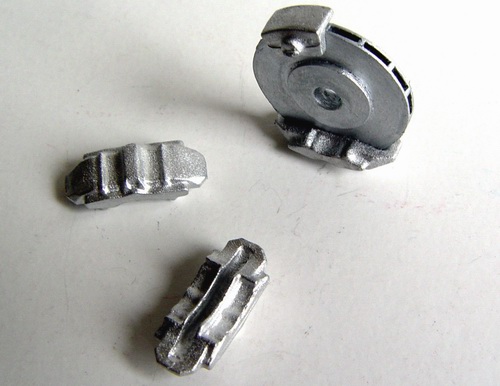
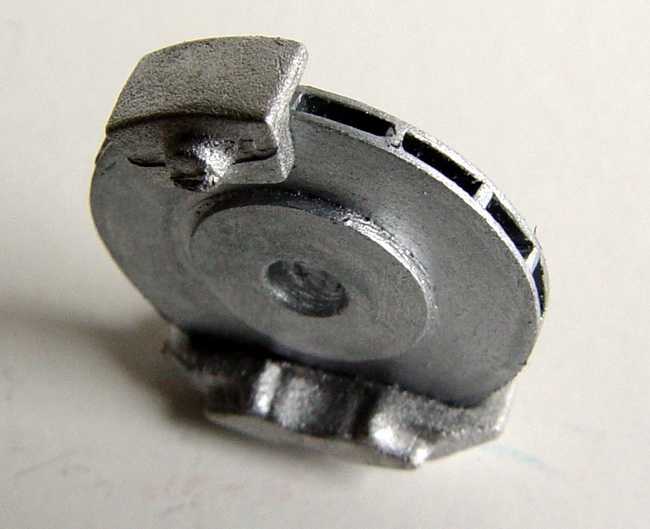
After you glued every single stripe, you should have a two rotor pieces, similar to the picture below. This one has 15 ribs, you may increase the number of ribs depending on the rotor.

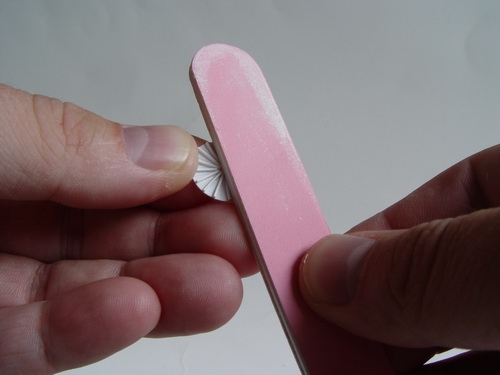
If you used self-cut styrene stripes for the ribs, sand them with sanding stick in order to make the rib surface smooth and flat. Make sure the glue is completely dry before sanding or ribs will break off easily.
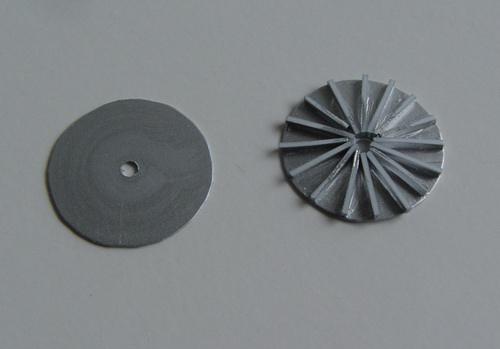
Then paint the rotor parts from inside with your favorite metallic paint (I used Testors Steel metalizer), and sand off the paint from the ribs with sanding stick to enhance adhesion when you glue two halves together.
When gluing two parts together, use drill bit or a suitable diameter wire, or a toothpick, as a guide to align two pieces.
After the glue is completely dry, sand the edge of the rotor using your sanding stick. Make sure the rotor stays round!
Now you have very nice looking vented rotor!
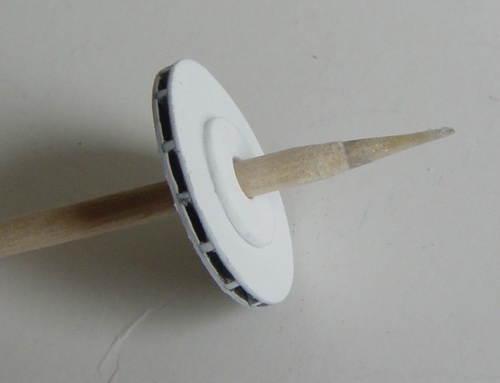
But do not paint your rotor just yet. Cut one more circle of much smaller diameter (depends on the size of the rotor) for .040" styrene and drill a hole in the center the same size as for the rotor itself.
The picture below shows proportions of the small circle. Sand the surface of both small circle and rotor smooth and glue small circle in the middle of the rotor.
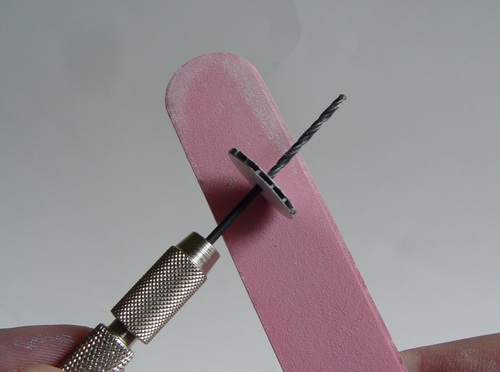
When glue dries, enlarge the rotor center hole using small round file to fit the axle of your model and the wheel. Make sure the hole stays in the center!
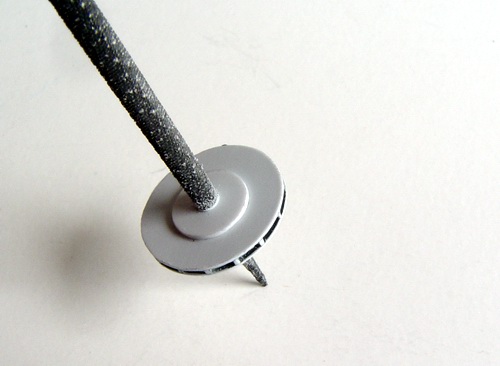
There you have it! Good looking vented rotor. Make sure you smooth all the edges of the rotor before painting. Wait till glue is completely dry.
Finally, to add some more realism, before painting scratch the rotor surface with coarser side of your sanding stick to imitate brake pad's marks on the rotor. Just mount the rotor on a piece of plastic tree (or something similar, I used q-tip handle), and rotate it while pressing against the sanding stick.

Then paint the rotor, fit it with one or more of your favorite calipers - and you are ready to go! (or brake?)
Picture below is a close-up of the completed rotor. Note that I didn't smoothed the surface and edges of the rotor good enough, since I built this one as an example for this tutorial. If you take your time, work carefully, and remove all unnecessary sand marks, etc, your rotor will look terrific, as well as your models!
Keep on modeling!
Alex
Copyright 2003 Alex Kustov. No copying or reproduction in any shape or form without written permission of the author.