Detailing Headliners in Road and Race Cars
Every real street-legal car has a headliner of
sorts. Be it simple cloth attached to the roof, fancy alcantara, suede, or
leather in a luxury car, or a plastic/vinyl cover – most cars have them. Even
though race cars don’t have headliners, you can still replicate the surface in
scale, to give your model a little bit more realism.
The idea for this tutorial was born on one of the model car shows I attended
long time ago – there were several absolutely beautifully detailed models on
display, but they all missed this important interior detail. So I decided to
compile this little tutorial to give you just few ideas for your future model
projects.
Before you attempt making a headliner in your model, look closely at the real
thing, or photos of the real car, to see what kind of headliner the real thing
has. Is it cloth? Leather? Plastic? Try to find the material that will match the
real thing closely. I will show you how to make headliners for three different
types of vehicles – road car, sports car, and race car.
Street/Road Car Headliner.
Most headliners in road cars are made from some sort of cloth. It can be formed over a plastic or cardboard lining, or just simply attached to the roof, it could be one big piece, or several smaller pieces – this will depend on your original subject. One great headliner material that I found in local pharmacy was self-adhesive bandage tape – it looked just like headliner material in cars made in 60s and 70s. Let’s begin.
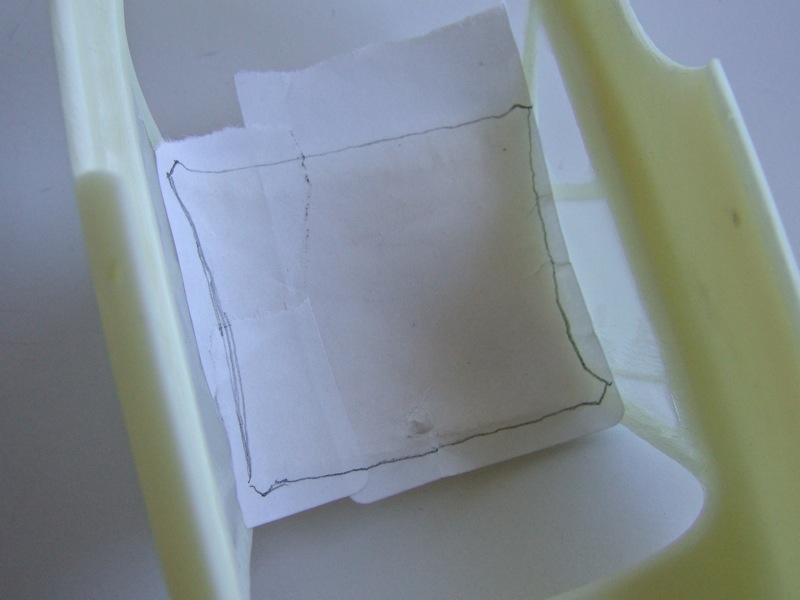
Using paper or masking tape make a template of the headliner. It doesn’t have to be precise, you can adjust the shape with scissors later.
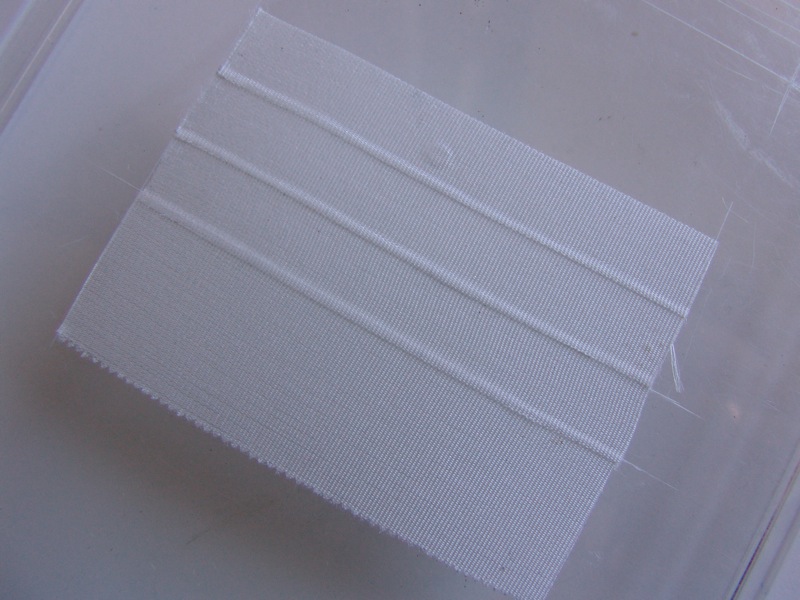
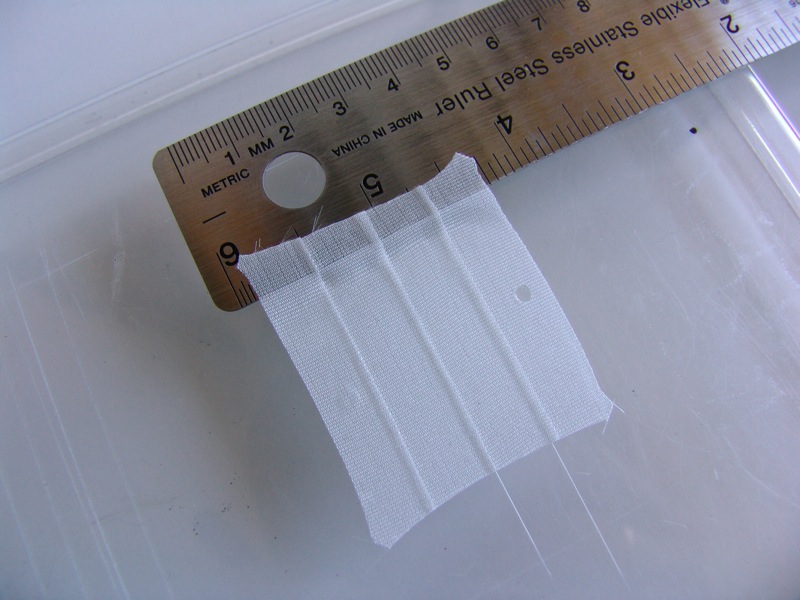
Take the tape of your preference (they come in several widths and textures)…

…and stick it to a smooth surface, such as glass, or piece of sturdy smooth plastic. You should be able to remove the tape without problem – glass is ideal for this. Some headliners are smooth, some have ribs, some made from several smaller pieces – use different pieces of tape to reflect that.
Take your paper template, and stick it to the tape. Make sure it is sitting straight.
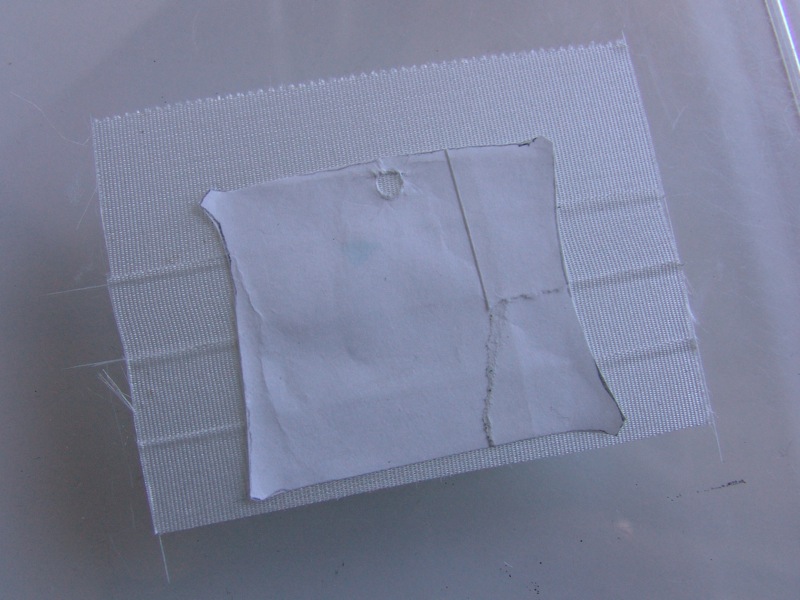
Then cut it along the template with sharp knife. Remove the leftover tape.
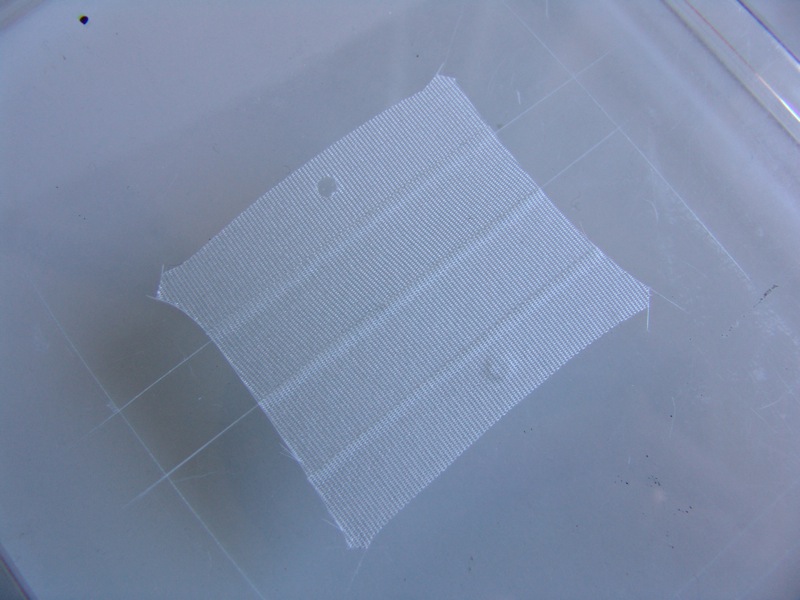
Then using a knife, or a metal ruler, pull the edge of the tape and remove it from its backing. There you have it – a headliner ready to be applied to the model.
Once you stick it to the model, you can carefully trim the edges, or even make additional trim from the same tape, or other material. Don’t forget rearview mirror and sunvisors too!
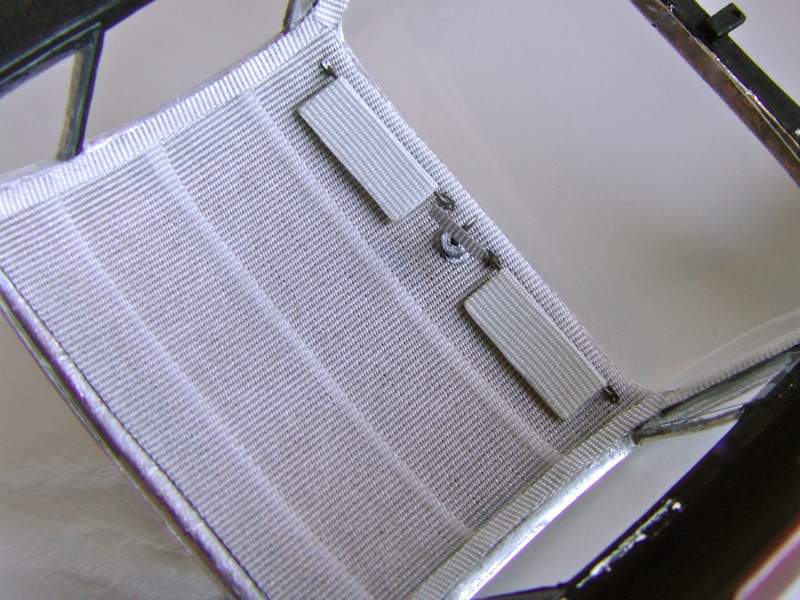
You can make headliners that fit around roof consoles…
…or just plain headliners with some vinyl trim on the sides (made from black electric tape or real leather). The possibilities are endless.

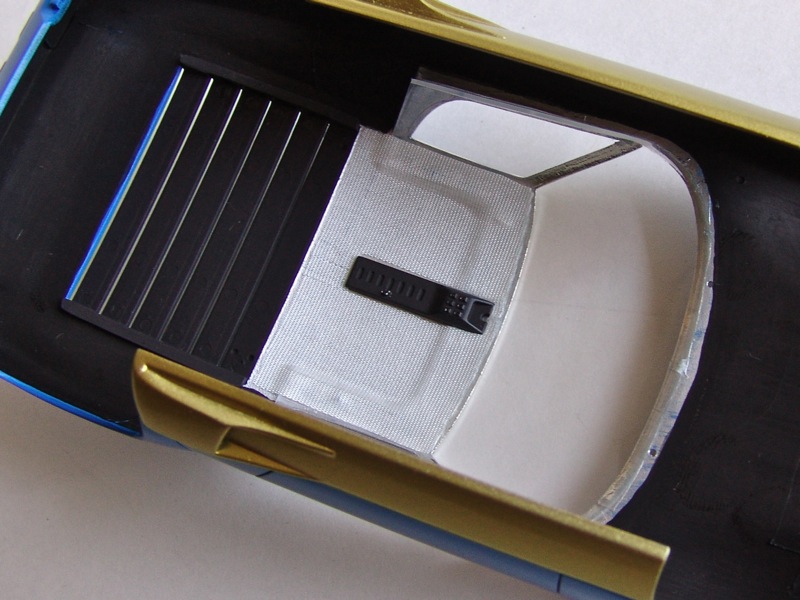
Headliners on Sports Cars.
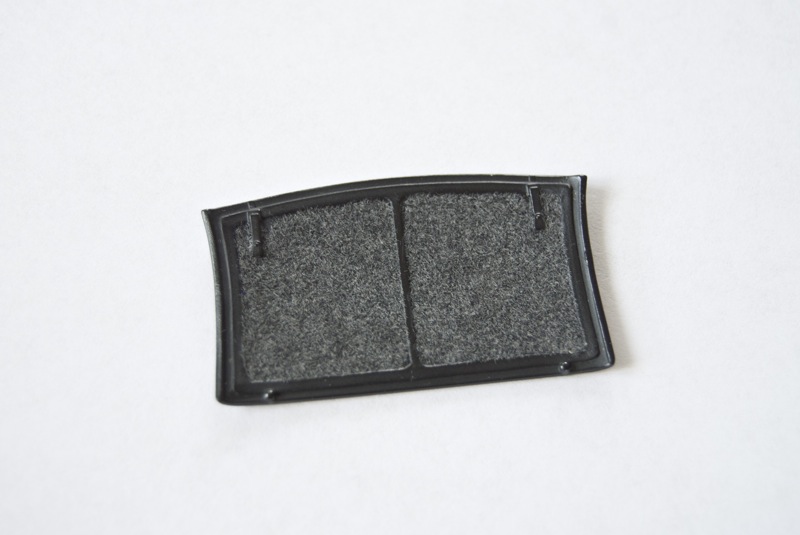
Model Factory Hiro recently released a line of self-adhesive papers that look like carpet, upholstery and leather to use in various model projects. These are perfect for making alcantara or leather headliners in modern sports cars. For alcantara or suede, you can also use fuzzy paper.
Using the same technique described above, you can make a headliner that looks line this:
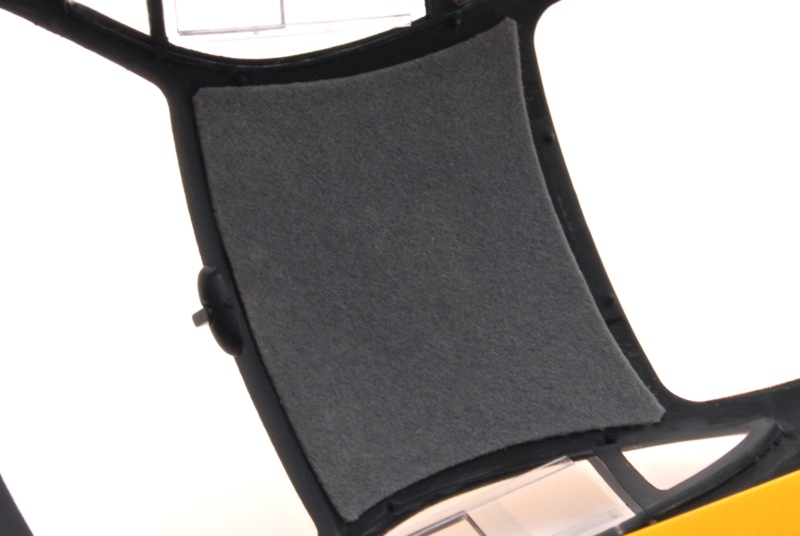
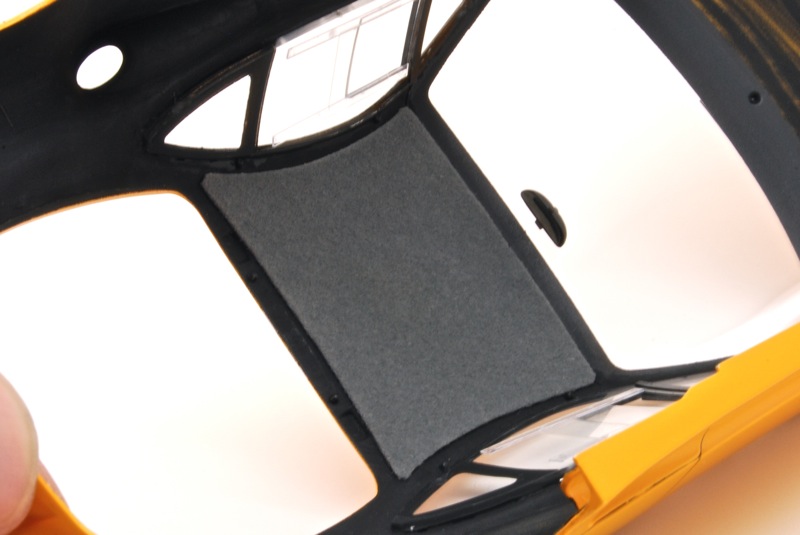
Or, for targa tops or more plush headliners, you can always use good old flocking applied over paint or white glue.
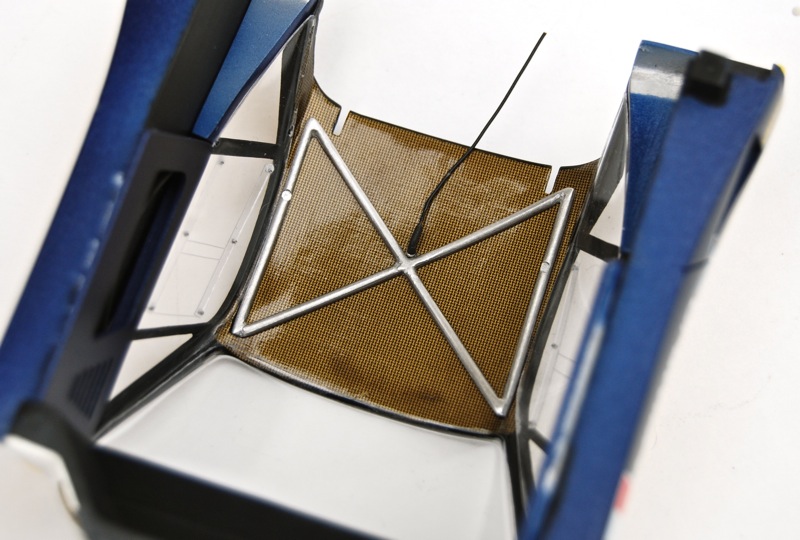
Race Cars Headliners.
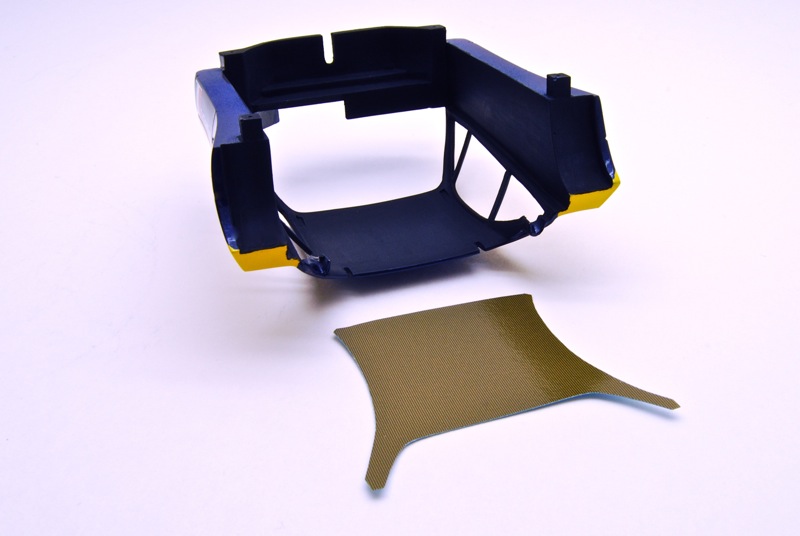
Most vintage racers didn’t have any headliners – so replication them is easy – just paint the roof and you are done. Modern race cars however have bodies and roof panels that were made from some sort of composite material – carbon fiber, kevlar, etc. To replicate such headliner you will need some composite decals – companies such as KA Models, ScaleMotorSport, Crazy Modeler, Renaissance and many others offer such decals for a very affordable prices.
Using technique similar to the one described above, make a template for the roof panel and transfer it to the decal sheet. Cut the decal leaving some decal on the sides for trimming later.
Test fit the decal, and carefully trim it to fit perfectly with fine scissors of sharp blade. You won’t have an opportunity to do it after the decals applied, as they can’t be easily trimmed when dry (or wet for that matter).

Using decal setting solutions such as Microsol, or Solvacet, apply decal to the roof panel, let it dry, and depending on the composite material, clearcoat and polish it if needed.
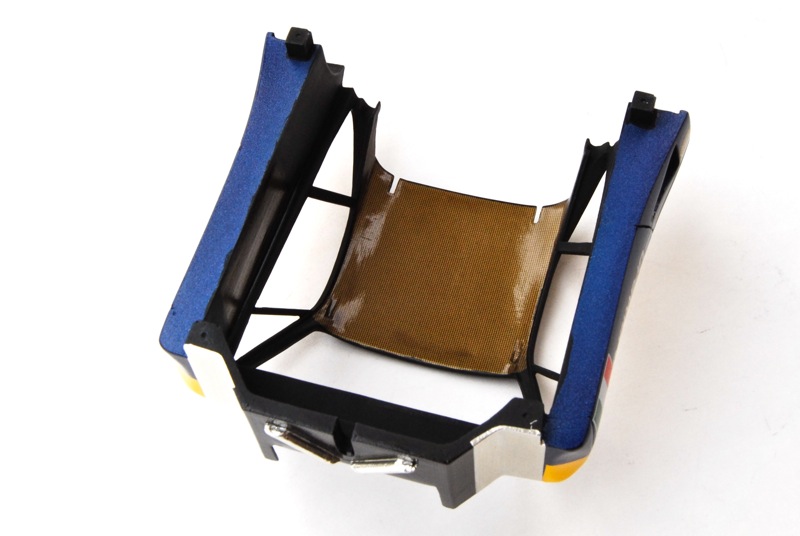
You can keep adding more detail to the roof like wiring or roll cages, but your headliner will always look terrific because if that composite decal under it.
These are just several examples of how you can spice up your model interior with simple headliner detail. You can use various materials – paper, vinyl, masking tape – anything that looks like headliner in real vehicle – just use your imagination.
Copyright 2010 Alex Kustov. No copying or reproduction in any shape or form without written permission of the author.