Detailing Models with Photoetched Parts: Basic Guide
After building plastic models “out of the box” for a while, almost every builder starts to think about adding extra details to make models more real, more life-like. Many household items can be used for this purpose, but eventually, most builders turn for help to aftermarket industry. Today, there are many different companies that produce detail parts for model builders – everything from decals, special paints, and metal parts, to wires, flocking, and conversion kits. One of the most common improvements available for plastic models is so-called Photo-Etched Detail sets (or Grade-Up parts, as many Japanese makers call them). In fact, they became so popular that even big companies like Tamiya and Fujimi are starting to include these parts into their kits.
In this little tutorial, I’ll try to share my knowledge about working with photo-etched parts (P/E) and different ways to make your models more realistic with the help of P/E parts.
What is P/E? Types of Photoetched Parts.
Photoetched parts are tiny metal parts made (etched) by photochemical process from a sheet of thin metal. The process allows etching the metal all the way through, or only on the surface with high precision to get very small and accurate flat parts of almost any shape and form. It is possible to make photo-etched parts at home with some special tools, but nowadays, it is cheaper just to buy the parts you need. All P/E parts are different – they are made from different materials – steel, nickel, brass, and are different in thickness too. They can be shiny, and look almost chrome plated, or they can be flat and dull – it all depends on the metal and the process used. Finally, P/E parts can be attached to the frame – a fret, or rubber-backed – attached to a thin rubber-like base sheet. Parts that are attached to the frame are easier to make, and usually, less expensive, but they are harder to work with. Rubber-backed parts are much easier to remove and use on the model, but they are usually much more expensive, and rare. As a rule, most manufacturers make regular P/E, and only few top-rate makers produce rubber-backed photoetch.
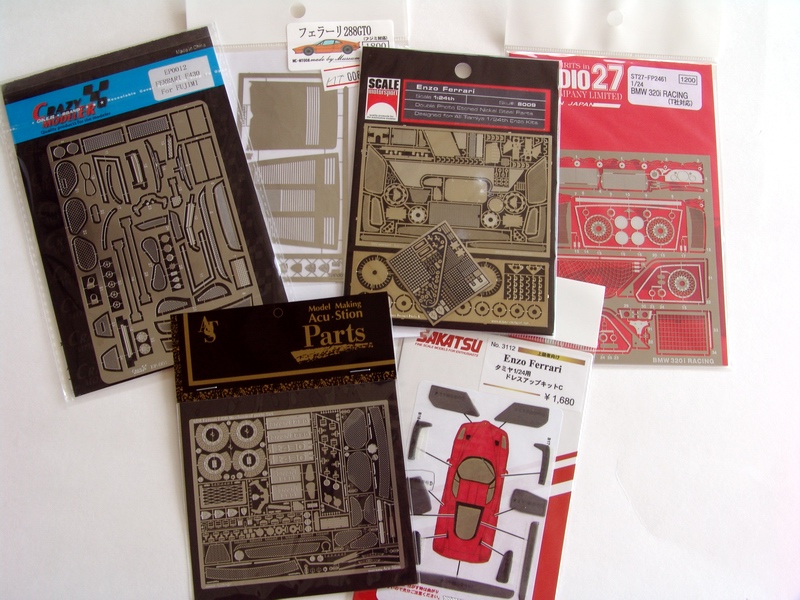
Assortment of different photoetched sets - Crazy Modeler, Museum Collection, Scale MotorSport, Studio 27, Acu-Stion, Sakatsu

Rubber-backed photoetch - Model Factory Hiro and Replicas & Miniatures Company of Maryland
Cleaning the Parts.
Before parts can be used on the model, they should be cleaned, just like any other part of the model. P/E parts that are attached to the frame can be cleaned with lacquer thinner. It is essential to remove the residue left on parts from the etching process, and to help paint and glue to adhere to the parts. Rubber-backed parts are harder to clean, since lacquer thinner will usually dissolve the backing. These parts must be cleaned after they are removed from the backing (usually the process or removing and cleaning rubber-backed parts is combined, see below).

Cleaning photoetched fret with lacquer thinner: any lacquer thinner will be fine for this purpose (Kleen Strip in this picture)
After parts were cleaned, make sure they are dry before painting or attaching them to the model. You also need to remove all attachment tabs (if any) and bend the parts to shape before painting and mounting. But let’s start with removing the parts from the fret.
Removing Parts, Tools.
There are no special tools required to remove the parts. Most rubber-backed parts can be simply peeled from the backing, or accurately scraped with the knife blade. Some stubborn pieces are hard to remove, and this is where you could combine removing the part and cleaning it at the same time – just cut the part together with the backing, and dip it in lacquer thinner. Thinner will dissolve the glue (or the backing), and clean the part at the same time!
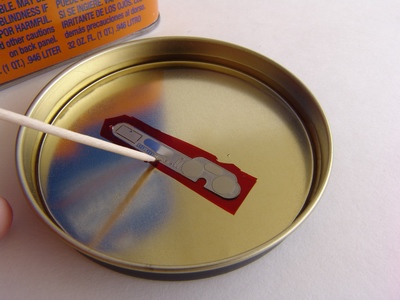
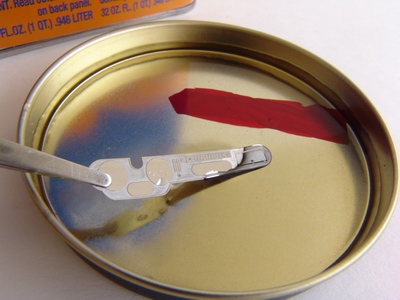
Cleaning and removing part from a rubber backing
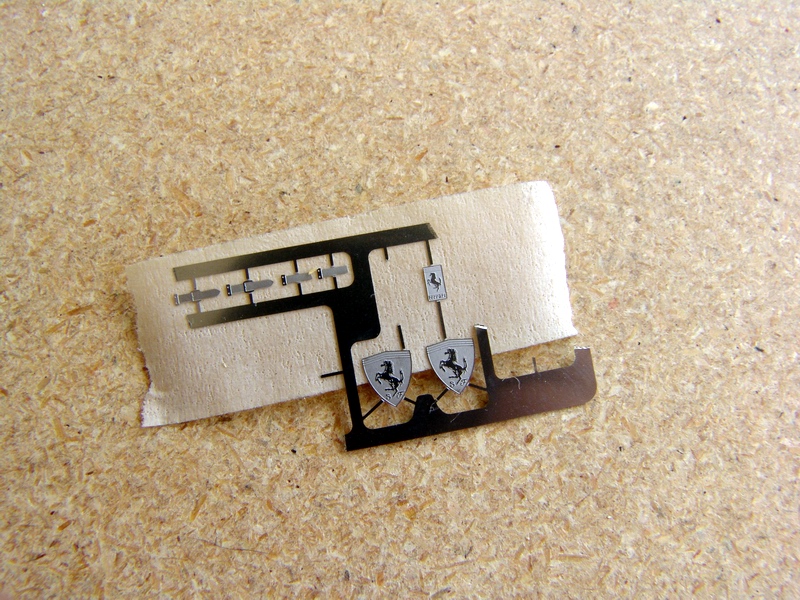
Part that attached to the frame can be cut off with the hobby knife. Just lay the fret flat on the cutting board, carefully hold the part, and cut the tabs. Try to cut as close to the part as possible to minimize cleanup. If the part is really small, there is a possibility it can fly away when you cut all tabs that hold it and believe me - I lost a lot of parts this way! The trick is to put the fret on a piece of masking tape – part will stick to the tape and won’t fly away! It is still a good idea to hold the part while cutting.
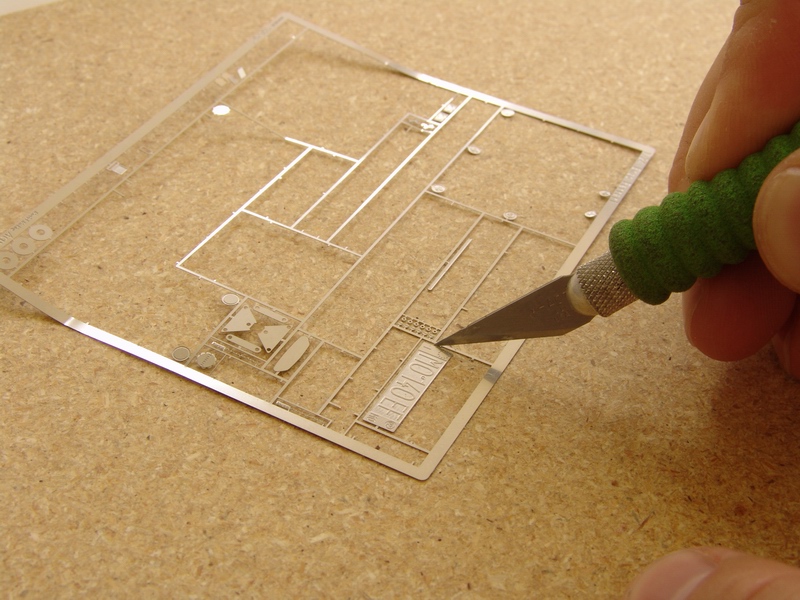
Cutting large part from the fret
Small P/E part is placed on a piece of masking tape to prevent flying off while cutting
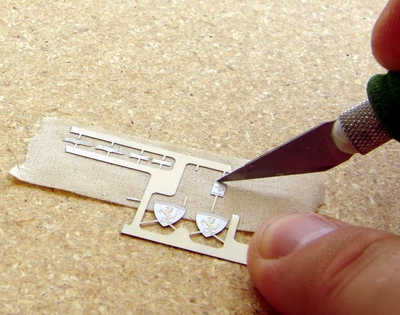
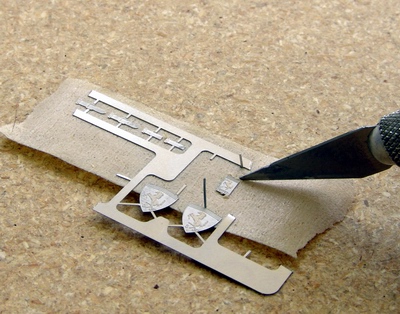
Cutting small part off - part stays on the tape after tabs cut
One last thing – do not cut all the parts at once – cut only the parts you need for immediate assembly. Majority of the P/E parts are so small, it’s easy to lose them if you not going to use them right away (and even then its easy to lose them). Good example is racing harness hardware – do not cut all the buckles at once. Cut one; attach it to the belt, then cut another.
Cleanup/De-burr.
The advantage of rubber-backed P/E part is that after you peeled them from the backing they are pretty much ready to use. Not so easy with conventional photoetch. The tabs need to be removed (filed off) for the parts to look accurate and clean. It is not very hard to do – but be patient – do not rush.
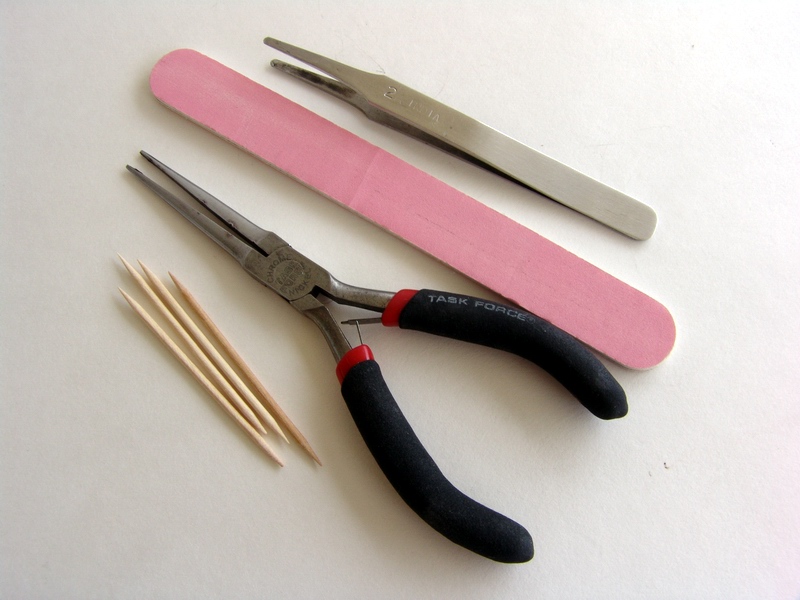
Tools required for cleanup/deburr and bending
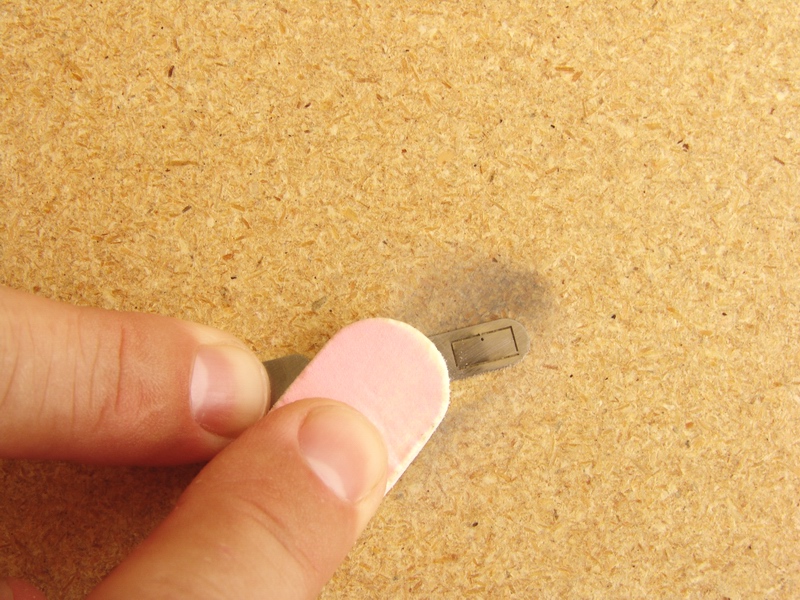
You will need a flat sanding stick or a file, flat-nosed tweezers, and maybe few toothpicks for this operation. If the part is relatively big, you can grab it with the tweezers and carefully file the tab with the sanding stick. Do not squeeze the part too hard while holding – it may fly out of your tweezers and be forever lost. If the part has a hole, it might be a good idea to stick it on a toothpick – and file the tab while holding the part with your finger.
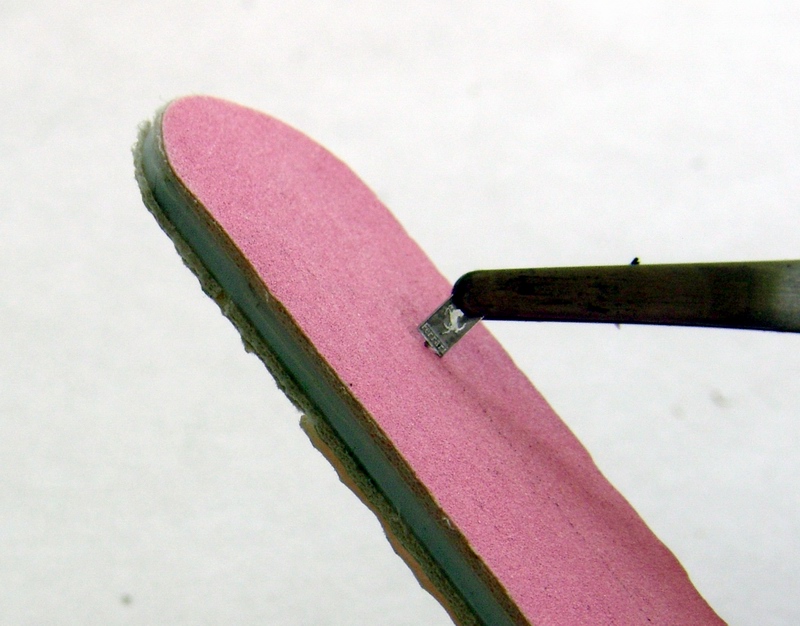
Sanding off the tab

Sanding off tabs using toothpick as a handle
After the part was cleaned you can bend it to shape (if required), then paint or mount on the model. If you assemble several P/E parts together, it is always good to make the assembly inside big transparent plastic bag – if you accidentally drop the part - it will be inside the bag, not on the carpet.
Painting.
Most P/E parts are made from steel or brass, so naturally they are silver or brass in color. If you need the part to be painted – it is very easy to do. If the part is relatively big – scuff it with fine sanding stick – primer will stick a lot better to the part. If the part is small – no scuffing is necessary.
Scuffing photoetched part to prepare for painting
Bend the parts before painting – if you’ll attempt to bend painted P/E part – the paint will likely chip and fall off. Careful painting will produce incredible results, especially when painting photoetched emblems or badges. Be careful when painting P/E mesh – it is very easy to fill the holes with paint (if you want your mesh to be black – you can always make it black with the help of Blacken-It – a chemical metal blackener). Always prime bigger parts with metal (etching) primer – it will help the paint to adhere to metal parts. Finally, since P/E parts are metal, it is very easy to create various effects by scraping paint from certain areas of the part.
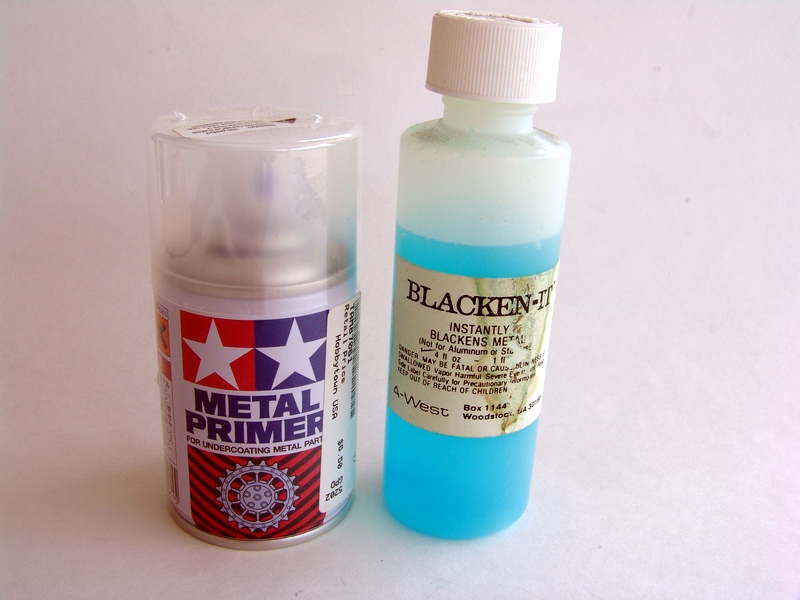
Tamiya metal primer, and Blacken-It, a chemical metal blackener
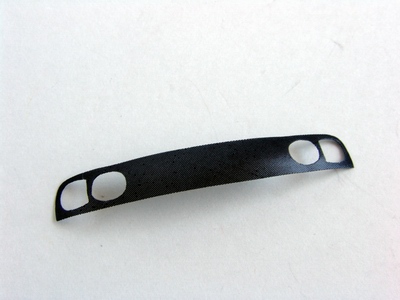

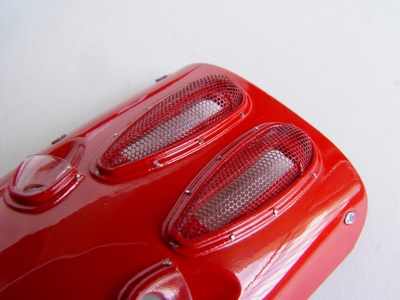
Top: Mesh blackened with Blacken-It. Bottom: Painted mesh installed on a radiator and vents.
Bending Photoetched Parts.
Sometimes instructions tell you to bend of fold P/E parts at a certain angle to make a part fit properly on the model. On car models this usually involves windshield wipers, screens, engine parts, etc. Depending on the softness of the metal, sometimes it is very hard to bend the part, especially if you need a sharp angle. There are few special photoetch bending tools on the market, and if you plan to work a lot with photoetched parts – this tool is a lifesaver. If you only use P/E occasionally, then you might use metal ruler and a hobby knife to bend parts. Another alternative is to use flat, long-nosed pliers or tweezers and a hobby knife.
Ways to Attach P/E to Model. Adhesives.
Since photoetched parts are metal, regular plastic glues won’t work on them. There are several different adhesives modelers use to attach P/E parts to their models. CA glue (superglue) is widely used since it glues almost anything. I use CA glue for many tasks, including gluing P/E parts. The problem with CA Glue is that it may fog painted parts and it is not recommended for installation of P/E badges and emblems, or other parts on painted surfaces. For gluing parts to painted surfaces you can use clear epoxy – it will not adversely affect paint. Another advantage of using epoxy is that it sets up longer than most CA glues, and will leave enough time to re-position P/E part once on the model. 5-minute clear epoxy is excellent for attaching photoetched parts.
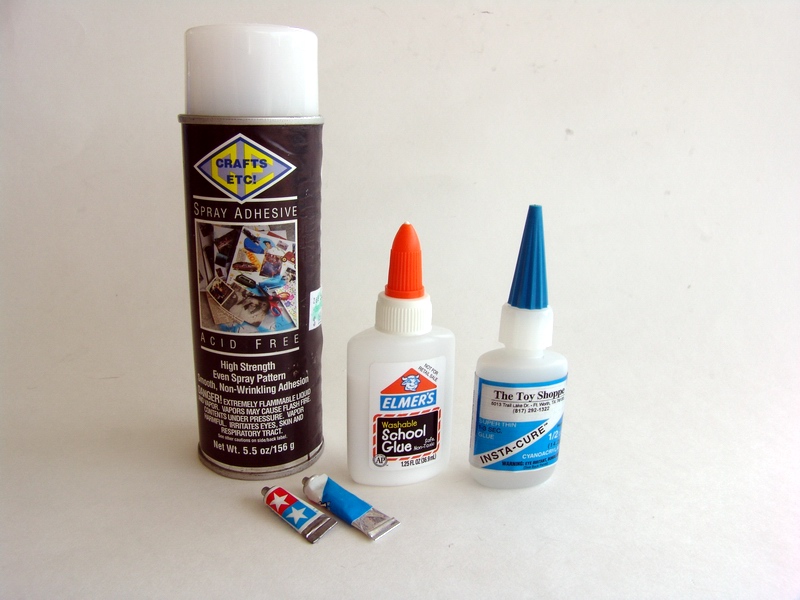
Assortment of glues used to attach photoetched parts on a model
Another excellent alternative to attach small P/E parts to painted surface is clear paint. Acrylic paint is better than any other type, since it is water based, and can be washed off if you make a mistake. If your part is not big (like a badge, or a rivet) paint will hold the part securely. I prefer Tamiya X-22 acrylic clear, it has good consistency for this type of work. Finally, if you are attaching P/E parts to glass (clear parts) you can use Elmer’s White glue, or Testors Krystal Klear – both dry clear and very easy to use. You can even apply them with fine brush, and then wash the brush in warm water.
Use tweezers to hold your part, and apply very small amount of glue with the toothpick/brush. Again, do not squeeze the part with tweezers, it might slip out and fly away. Carefully place the part on its place, and quickly (re) position the part with the other end of the toothpick.
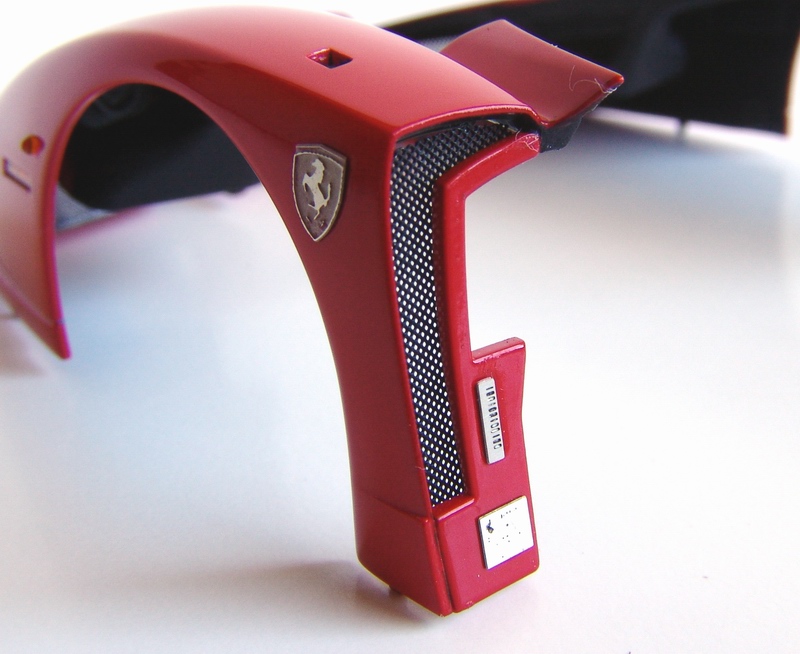
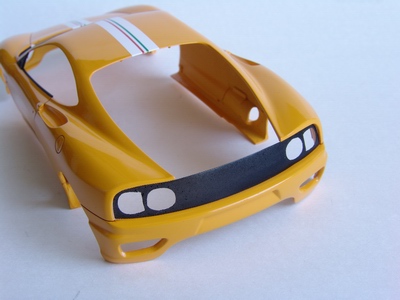
Photoetched emblems and mesh installed on a fender of Tamiya Ferrari Enzo
Conclusion.
Photoetched parts are an excellent way to add more detail to your models. Companies that produce photoetched sets for models are releasing hundreds of new products every month, and the selection is truly impressive. Most sets are not very expensive, but add a great deal of realism to the model. You can find sets for tanks, planes, cars, boats, and even space ships! Anything from racing harnesses and brakes to engine parts and mesh. If you have never tried a photoetched set – I highly recommend it. My favorite photoetch manufacturers for model cars are Studio 27, ScaleMotorSport, Acu-Stion, and Model Factory Hiro, but there are many others. I hope this tutorial have given you enough confidence to try some photoetch on your next project.
Copyright 2006 Alex Kustov. No copying or reproduction in any shape or form without written permission of the author.