Leather Upholstery for Model Interiors 101
What can be more realistic than recreating leather interior of the car in real leather on the model? With proper application technique - nothing! In this tutorial, I will cover some basics of working with leather, and some techniques to create realistic leather panels for model interiors.
Before we start all the work, you need to find suitable piece of leather. You don't need much for typical 1/24 scale model interior. Depending on the amount of upholstery (plus some inevitable mistakes during the process), you will need about 4x6 inches piece of leather. Color of the leather is very important - light leathers tend to get darker during application, softer leather will require more work than hard leather, etc.
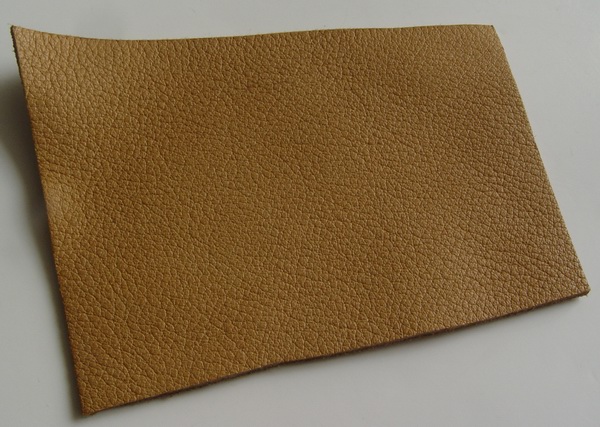
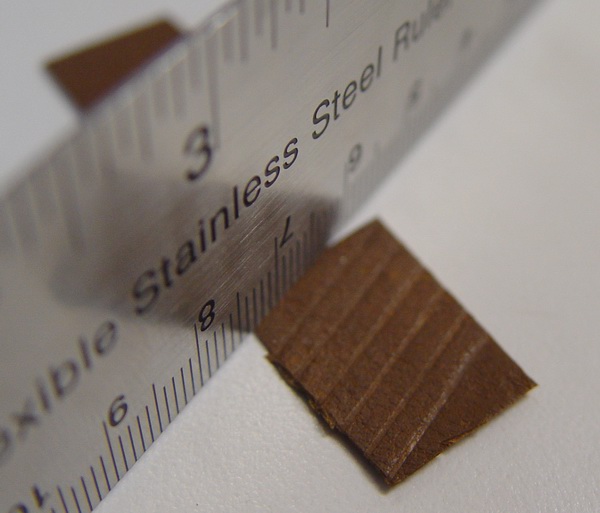
Virtually any leather can be used for interior upholstering. I spent hours looking for very thin leather (pigskins, used to make fine ladies gloves), until I learned about the technique to make almost any leather paper thin. And that is exactly what we will do first, cause the thinner the leather, the easier it is to work with it in 1/24th scale! First picture shows the piece of leather I will be using to make interior for my new Ferrari model. Color is very close to the Ferrari tan leather.
As you can see on the picture below, the leather is quite thick. Of course it will be impossible to use it for our purpose as is - we need to make it really thin. It is quite easy.
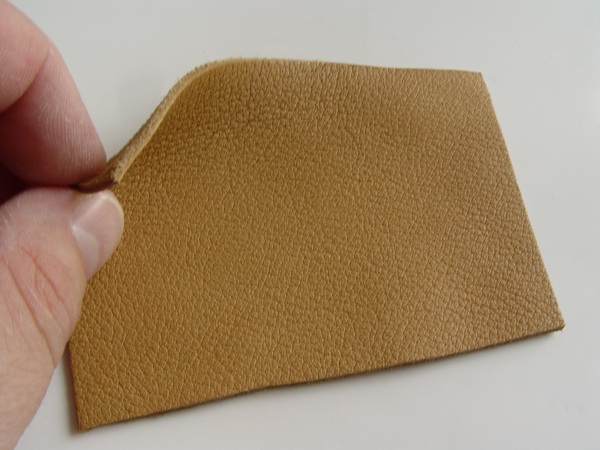
First, cut the piece of the leather that you will need to cover the panel in question. Make it a bit larger from each side than the panel just in case. IMPORTANT: Use only fresh blade, dull blade will tear the leather and ruin it. Replace blades often. When you feel the blade is getting dull, replace it or you risk tearing the leather. From my experience new blade will become dull after skiving slightly more than 1 square inch of the leather.
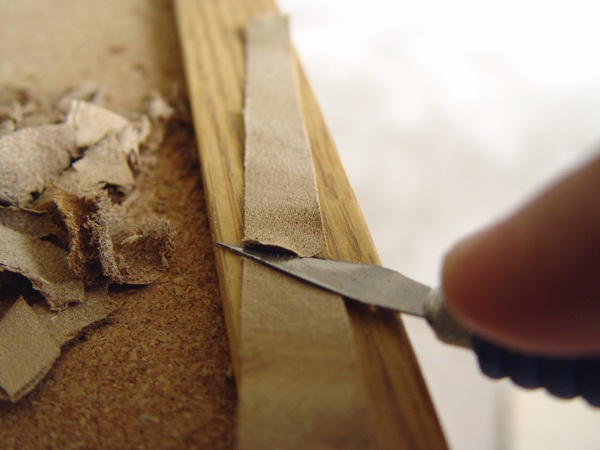
Find a hard surface (I used corner of my workbench) and start skiving. Layer by layer, it is really easy! When the leather will be thin enough, skive very carefully, slow down and check the thickness often. It is easier to skive small pieces than big ones, but it is still can be done.
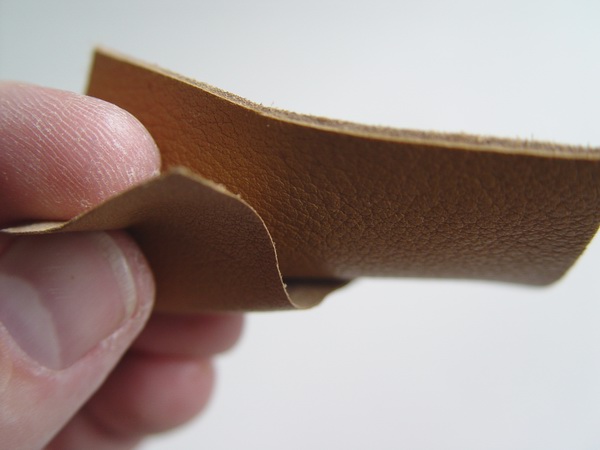
Now compare the thickness - its the same leather after and before skiving - quite a difference. Its possible to make it even thinner, but I was afraid to cut through.
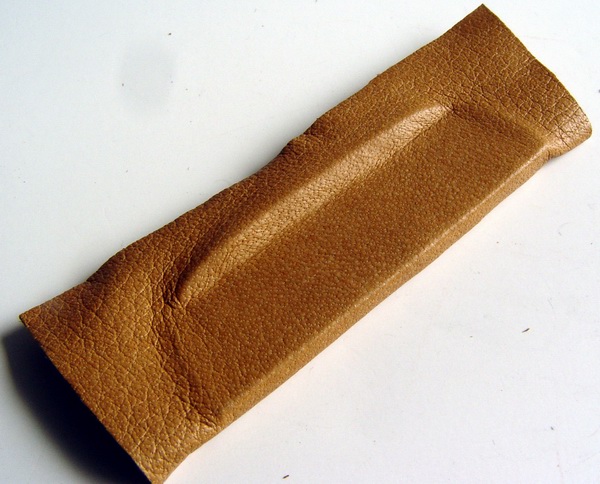
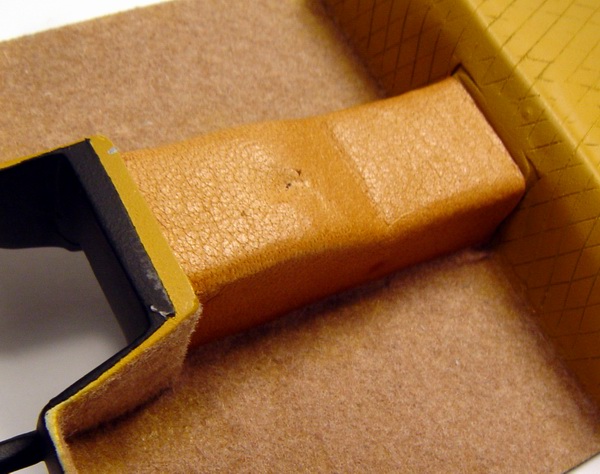
Now when we have a very thin leather we can wrap almost any part in it like in wrapping paper. To attach leather to parts I used Elmer's white glue. You can also use superglue (only thick consistency), but be very careful, leather is porous, and there is a possibility that glue will soak through it. On the pictures below, I'm wrapping package shelf for my Ferrari. Before gluing down the leather, plan ahead how you will fold the leather.
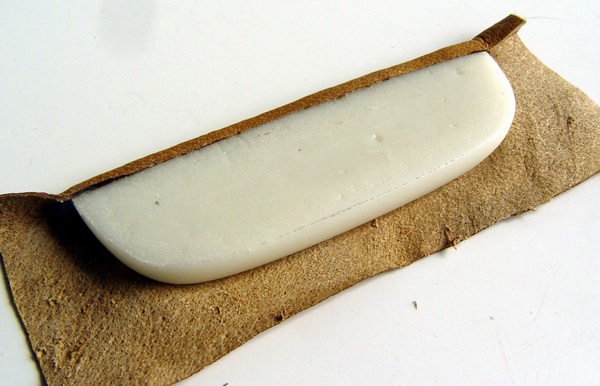
Make sure you put glue in every crease, or leather will bubble. Also, stretch the leather as much as possible to eliminate out of scale grain, and make it more uniform. Try to cover part in one big piece, rather than in several small pieces of leather.
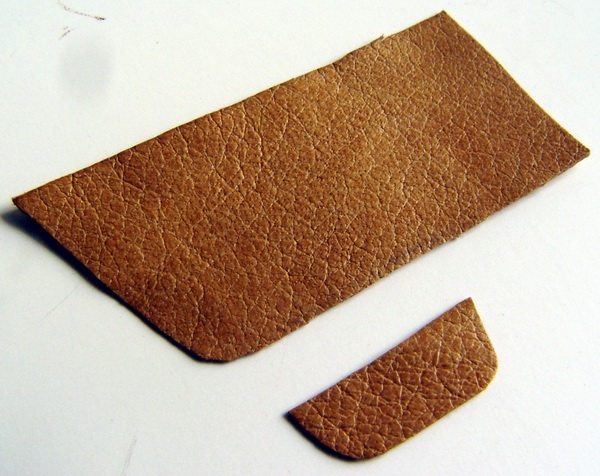
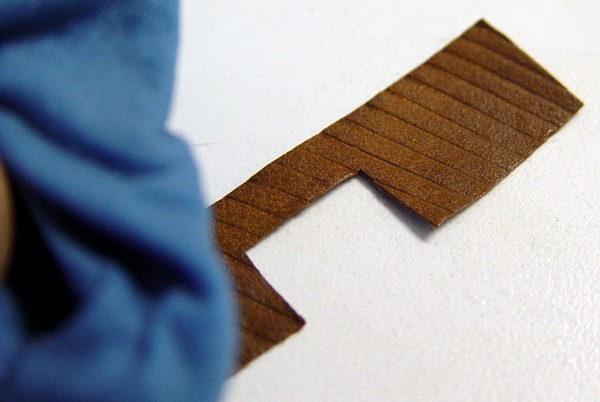
It is much easier to work with flat parts, such as door panels, and seat backs for example. Basic seat upholstery can also be done in leather, but it gets more complicated if the seat has really curvy surface (like quilted pattern). On the picture below you can see two templates, one for the door panel, and one for the door pocket.
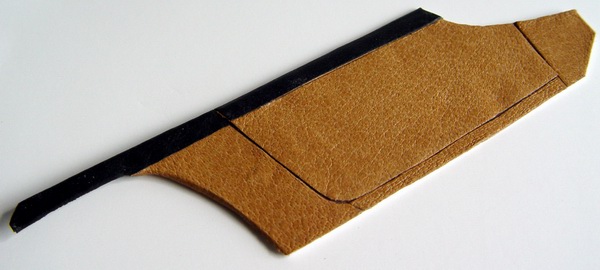
And here is what the door panel upholstered in leather might look like in your next kit. Simple, yet with additional details it will look way better than painted plastic! Upper black trim also made from leather.
Now that you know how to work with plain leather, lets look at the technique that will allow you to emboss the leather to create an illusion of different patterns. Very often, leather interiors (especially on older cars) have quilted (diamond) pattern, or tuck and roll pattern, and with the following technique I will show how to replicate these patterns.
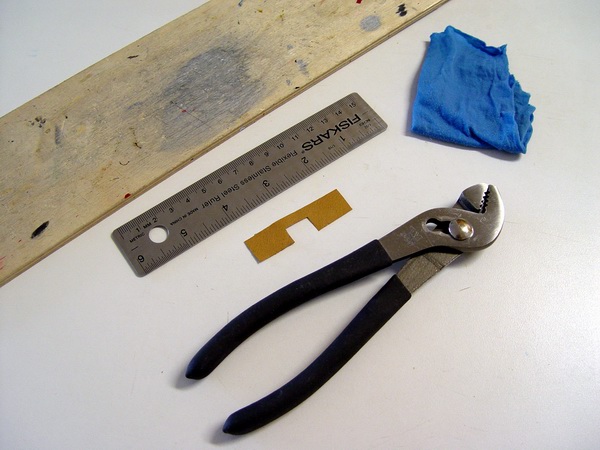
You will need some basic tools: wet cloth (old t-shirt works just fine), small metal ruler, cutting board (or something very hard), and a small hammer. I couldn't find my hammer when I was taking pictures, so I used my pliers instead!
Now let's make a diamond pattern on the leather. Cut the leather to the shape you need, and start wetting it with the cloth.
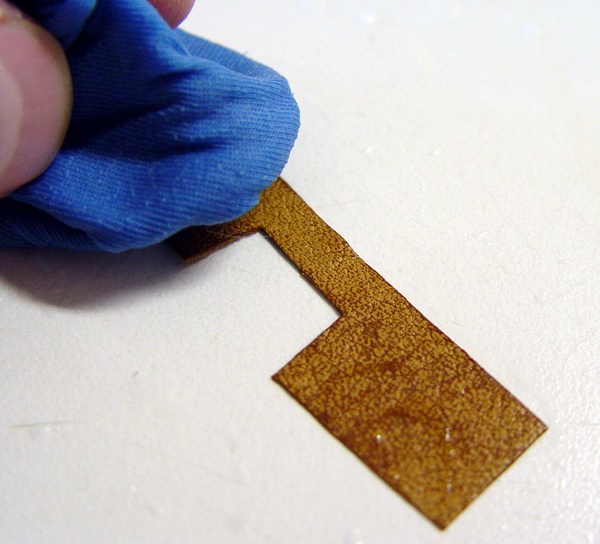
Continue wetting the leather until it is almost soaked through in water, but not completely wet.
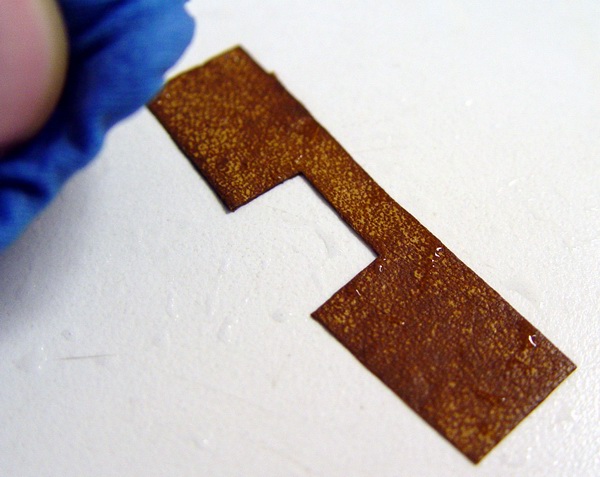
After it is almost all wet, turn the leather and wet it lightly from the other side as well. It wont really help the embossing process, but will help leather piece to stay put during embossing (it will kind of stick to the surface).
Now, take the metal ruler and place it over the leather, then hit it lightly with the hammer two-three times. Do not hit hard, you can easily split the leather in two parts, especially if it is paper-thin! Ruler should leave very thin grove in the leather. Continue in the same fashion until entire piece is embossed. If you would like to make thinner lines, you can use something other than metal ruler, like thin sheet metal, but make sure to check how it works on some scrap pieces.
After you are done with the entire piece, wet it some more with the wet cloth. It will keep it from drying while you emboss the rest of the pattern.
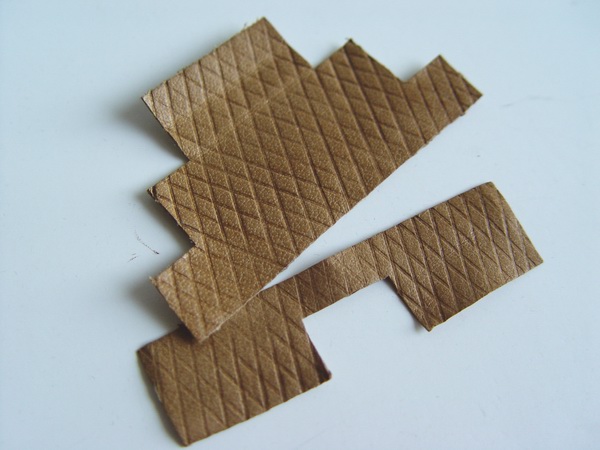
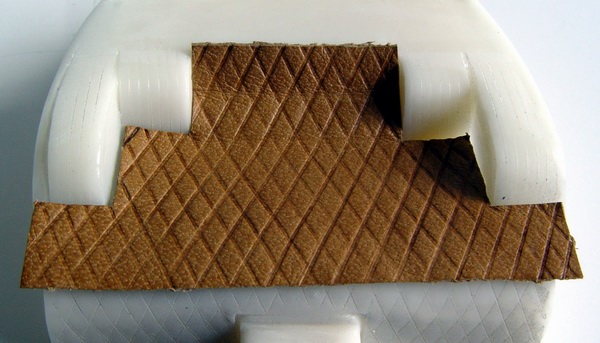
In the same fashion, emboss the rest of the pattern on the leather piece. Make sure all the lines are parallel and evenly spaced. Also, make sure your hit every single line same number of times to ensure consistent embossing.
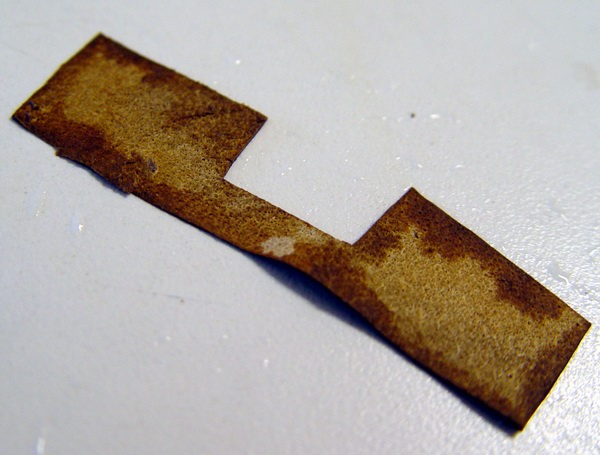
After all is done, dry the leather (you can use hair dryer to speed up the process). Leather should dry back to its normal color, but embossed lines will be a little darker. You you embossed everything with the same strength, the pattern will be very even and nice looking.
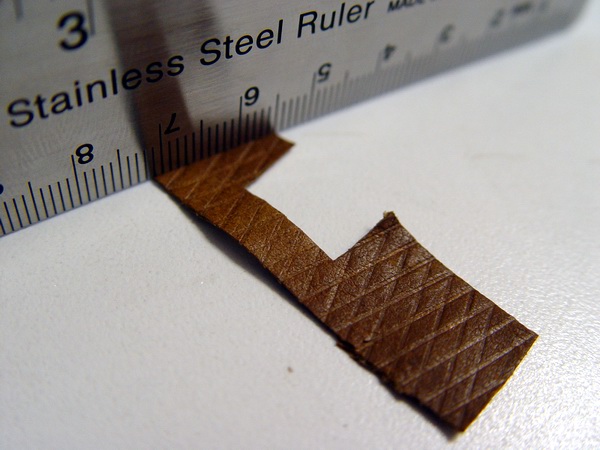
Using the ruler you can do simple patterns, like diamond pattern above, or simple lines like on the picture below. With special tools, or other hard objects, it will be possible to emboss almost anything on a piece of leather using the same technique.

Several more tips about working with leather. Before you start gluing your leather panels to the model, make sure they fit very tight. Check the fit of ever panel several times, maybe even dry-fit several panels to ensure good and tight fit. Nothing looks worse than gaps in the leather interior!
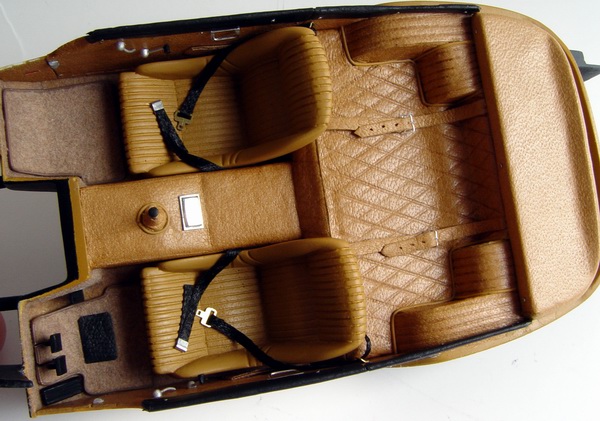
Find, or mix the color that is closely matches your leather and paint entire interior with it. On the picture below it doesn't look exactly right due to lighting, but in reality it is very close to the leather I was using for this project.
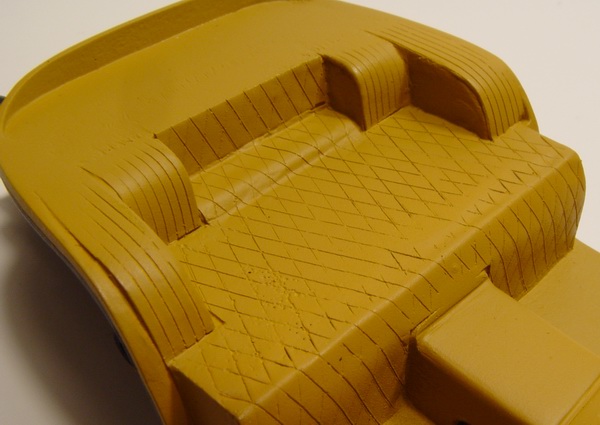
During the application, make sure your start from the bottom and move up, meaning you need to cover lower panels first and upper panels last. This will help to cover some of the gaps, because you will be looking at the interior from the top. On this picture, central tunnel was covered first, then flocking applied to cover the seams between the leather and the floor. The panel that will go on the rear bulkhead, will cover the central tunnel rear seam.
After all panels are installed, burnish all the seams with fine burnishing tool, or very smooth (rounded) toothpick. You may also run some piping made from thin wire over the seams if the real car has them. The more leather detail you will add, the better your interior will look.
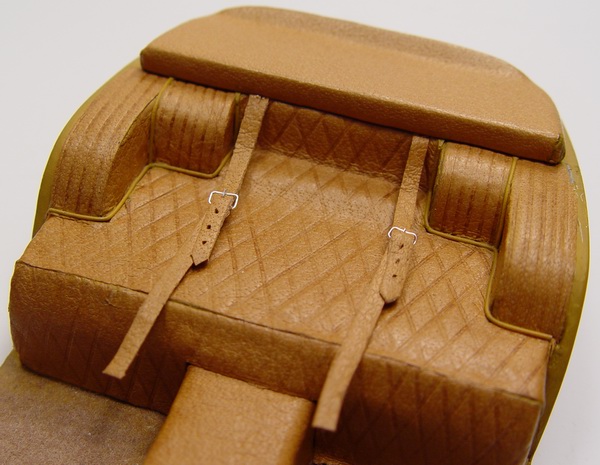
After everything is installed, you will be ready to sink in those leather seats - too bad it is just a model! Using real leather in model interior not only enhances the look of your completed kits, it also smells like leather! Happy modeling.
I would like to thank BMC member mgator13 (Mike) for giving me an idea and detailed explanation of the diamond pattern technique, and also all members of BriansModelCars for inspiration I needed for this project. I could never do it without you believing it can be done!
Copyright 2004 Alex Kustov. No copying or reproduction in any shape or form without written permission of the author.